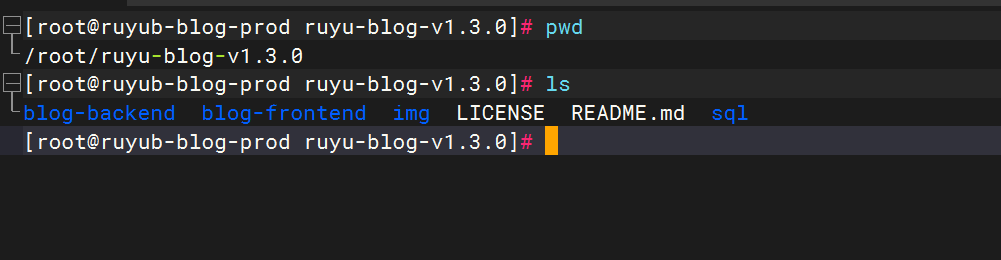
2、使用方法
使用方法
目录
[toc]
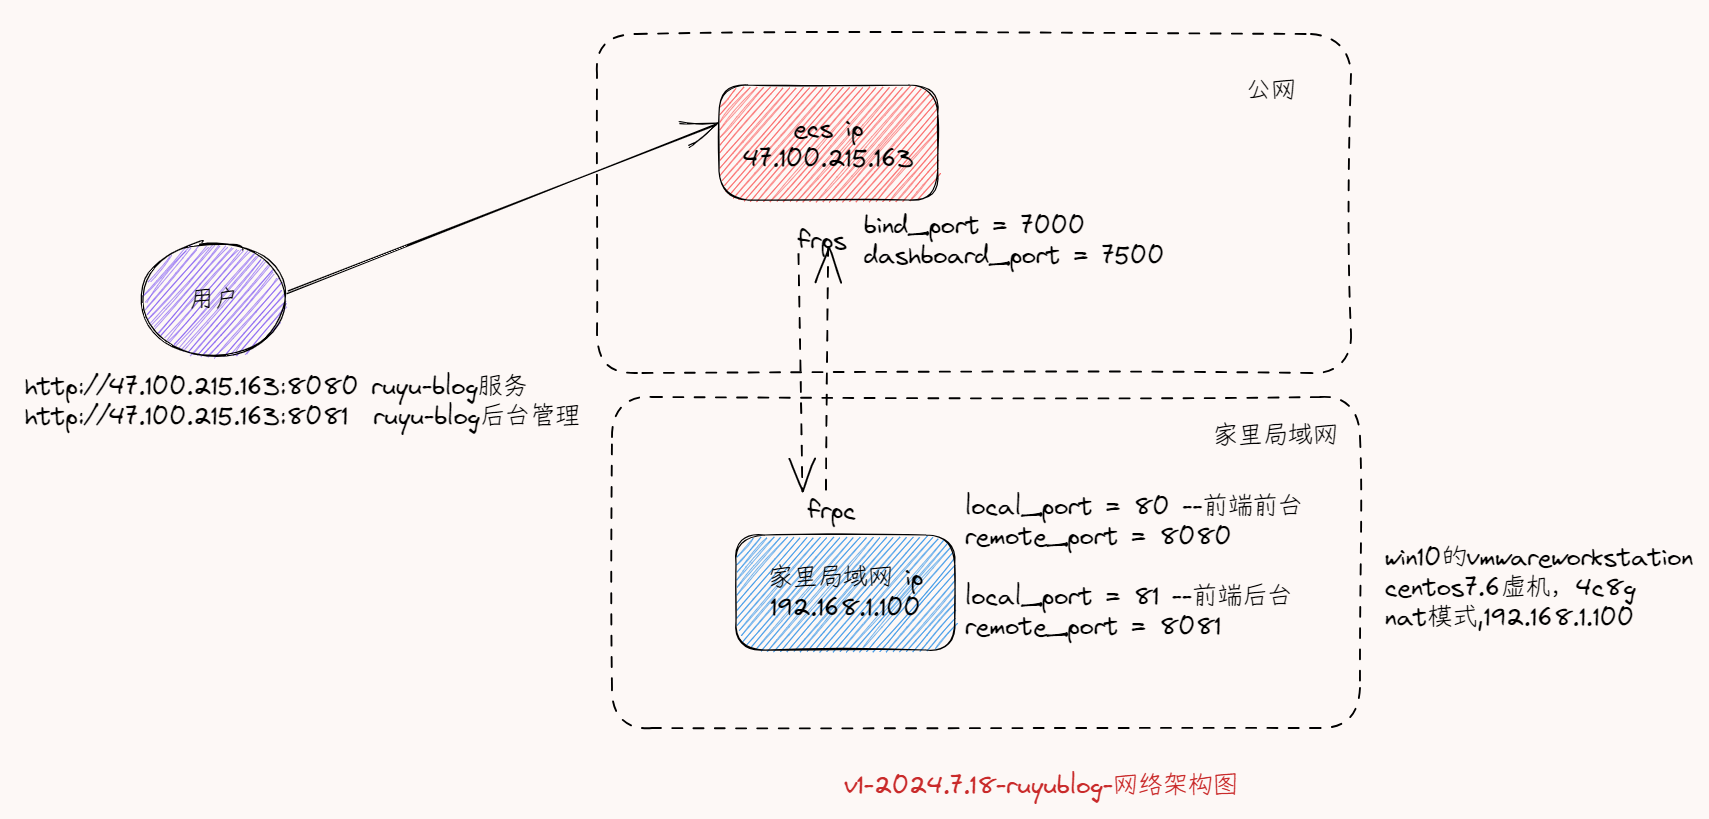
案例:将小主机frp出去方法(可选)
==本人组网环境==
为什么要用这种方式呢?
因为穷哇啊啊啊,哈哈。😂(云服务器贼贵)
我目前只有1台2c2g的云服务器,已经部署了docusaurus,但是不能正常部署次ruyu-blog博客。刚好我有1台nuc(小体积电脑),于是我经nuc frp出去,经测试网络是能正常使用的哦,完美。😘
关于frp如何搭建,请看如下手把手教程:
https://onedayxyy.cn/docusaurus/docs/docker-install-frp 《实战:docker式部署frp内网穿透-2024.7.13(测试成功)》

- 本次涉及frp配置
##在公网服务器上执行。
cat >>/root/frps.ini <<EOF
[common]
# 监听端口
bind_port = 7000
# 面板端口
dashboard_port = 7500
# 登录面板账号设置
dashboard_user = admin
# 登录面板的密码
dashboard_pwd = "输入你的密码!!!"

# 身份验证,这里需要修改为自己的token
token = "输入你的密码!!!" #这里务必要和下面frpc的token保持一致
EOF

docker run --restart=always --network host -d -v /root/frps.ini:/etc/frp/frps.ini --name frps registry.cn-shenzhen.aliyuncs.com/mogublog_business/frps


##在本地nuc上陪追
cat > /root/frpc.ini << EOF
[common]
# server_addr为云服务器IP地址
server_addr = http://47.97.48.237:8080/
# server_port为服务端监听端口,bind_port
server_port = 7000
# 服务端设置的token,身份验证,这里需要修改为自己的token
token = "输入你的密码!!!" #这里务必要和上面的frps的token保持一致

[ruyu-blog]
type = tcp
local_ip = 127.0.0.1
local_port = 80
remote_port = 8080

[ruyu-blog-admin]
type = tcp
local_ip = 127.0.0.1
local_port = 81
remote_port = 8081
EOF

[ssh]
type = tcp
local_ip = 127.0.0.1
local_port = 22
remote_port = 8022
EOF


docker run --restart=always --network host -d -v /root/frpc.ini:/etc/frp/frpc.ini --name frpc registry.cn-shenzhen.aliyuncs.com/mogublog_business/frpc
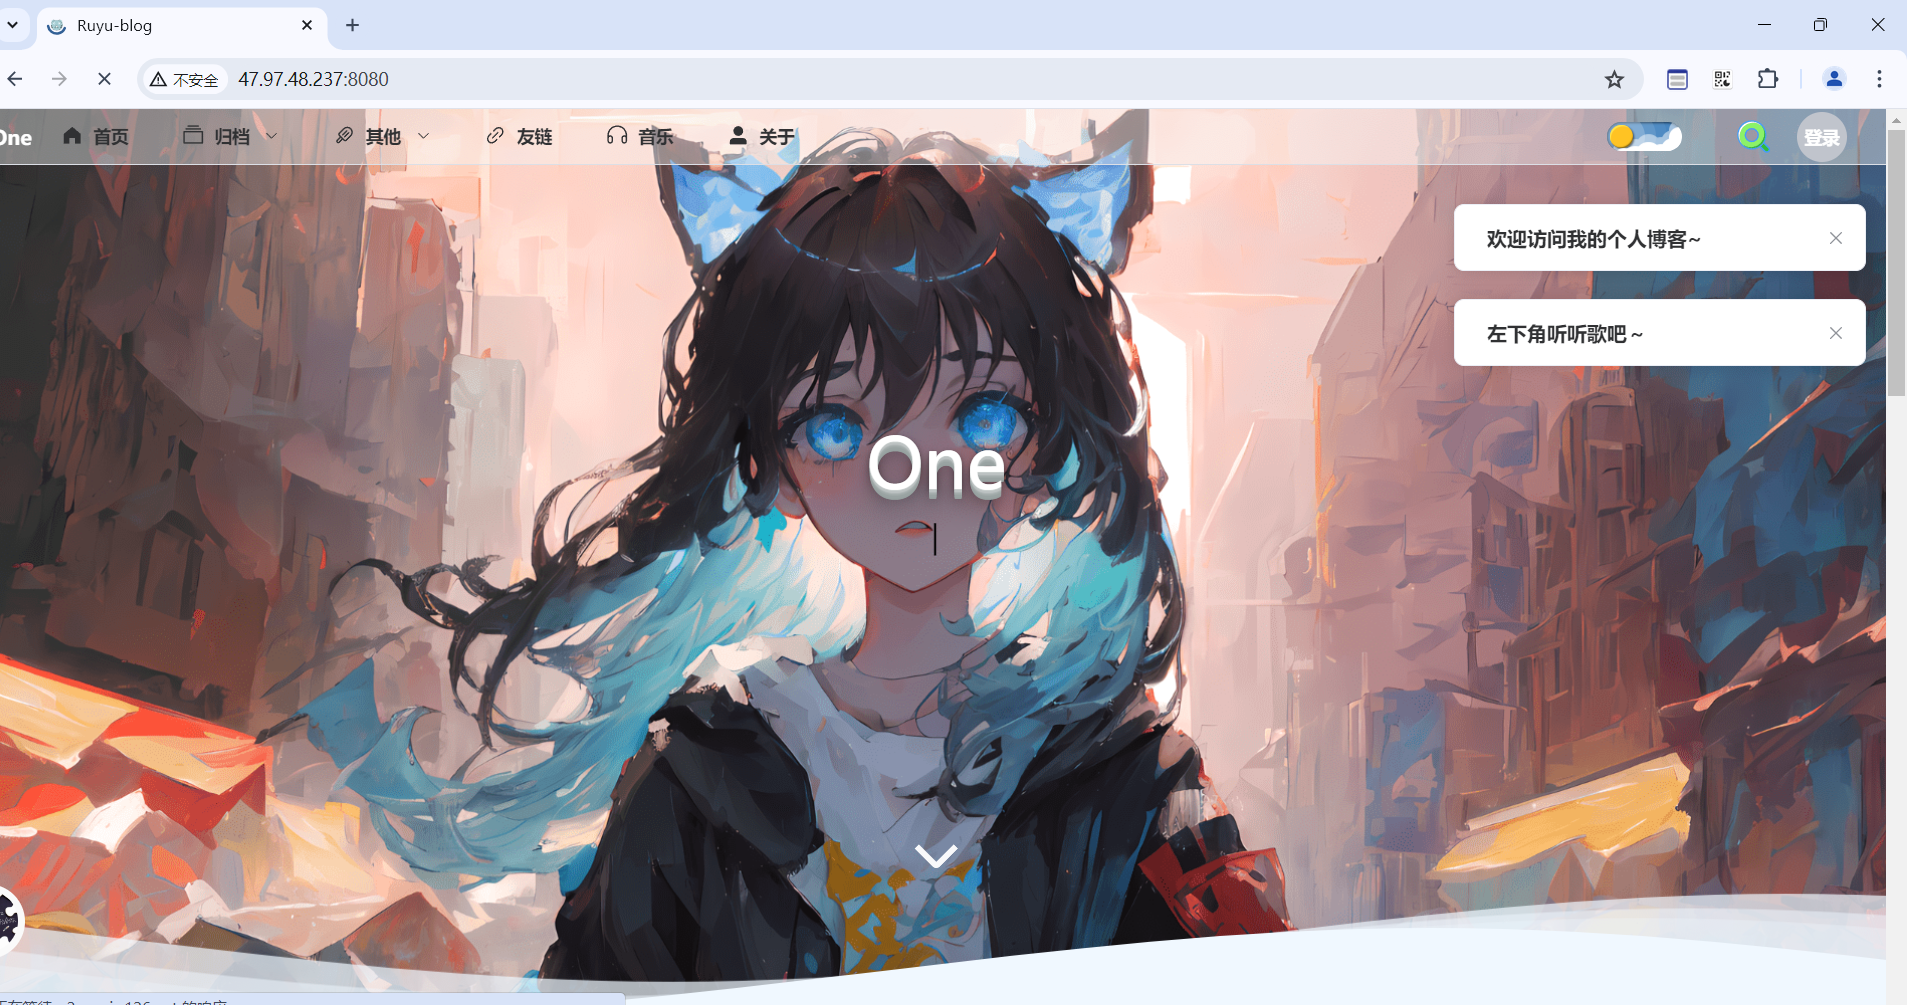
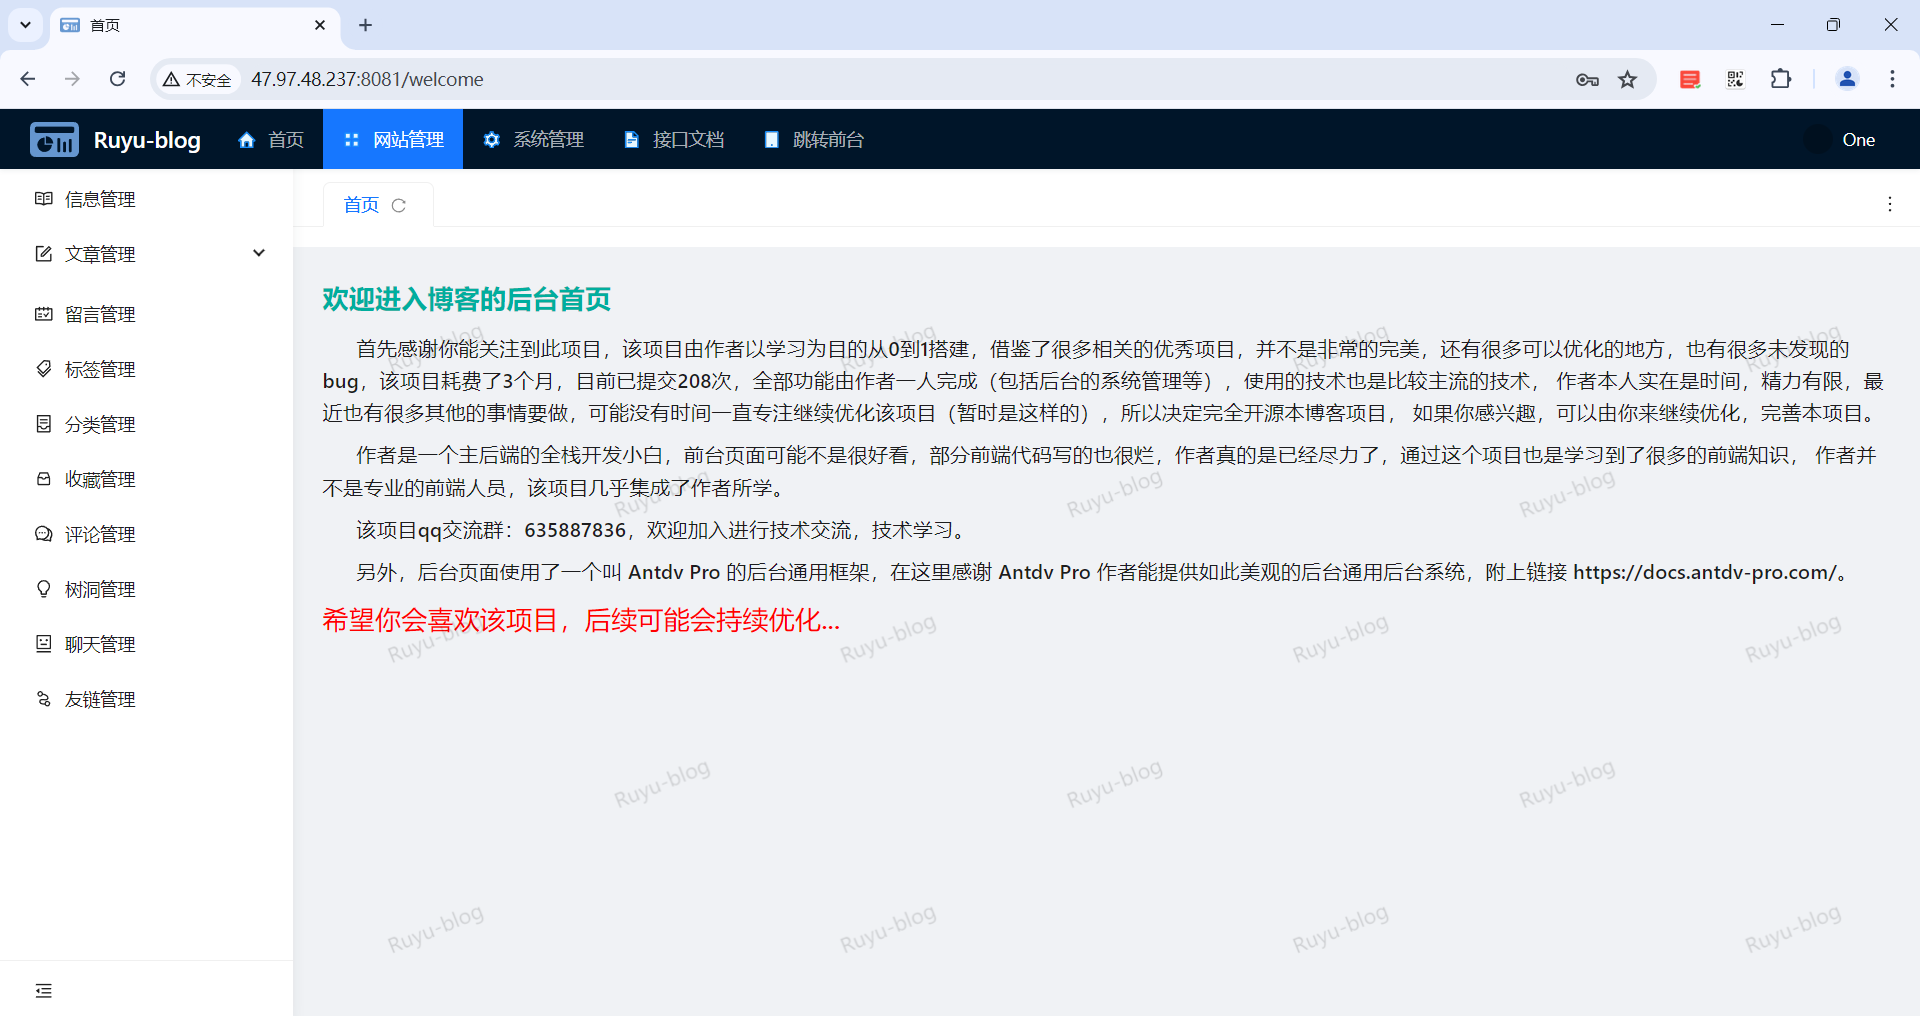
- 访问:
案例:ruyu-blog启动/关闭服务(已解决)
- 配置脚本
#一键启动涉及ruyu-blog所有容器:
cat > /root/upRuyuBlog.sh <<EOF
#!/bin/bash
cd /data/mysql
docker-compose up -d

cd /data/redis
docker-compose up -d

docker start rabbit

cd /data/minio
docker-compose up -d

docker start  netease_cloud_music_api ruyu-blog-hd blog-qt blog-ht frpc
docker ps
EOF


#一键关闭涉及ruyu-blog所有容器:
cat > /root/downRuyuBlog.sh <<EOF
#!/bin/bash
cd /data/mysql
docker-compose down

cd /data/redis
docker-compose down

docker stop rabbit

cd /data/minio
docker-compose down
docker stop disable netease_cloud_music_api  ruyu-blog-hd blog-qt blog-ht frpc
docker ps
EOF
- 配置开机自启
chmod +x /root/upRuyuBlog.sh
chmod +x /root/downRuyuBlog.sh
chmod +x /etc/rc.d/rc.local

echo "/root/upRuyuBlog.sh" >> /etc/rc.d/rc.local

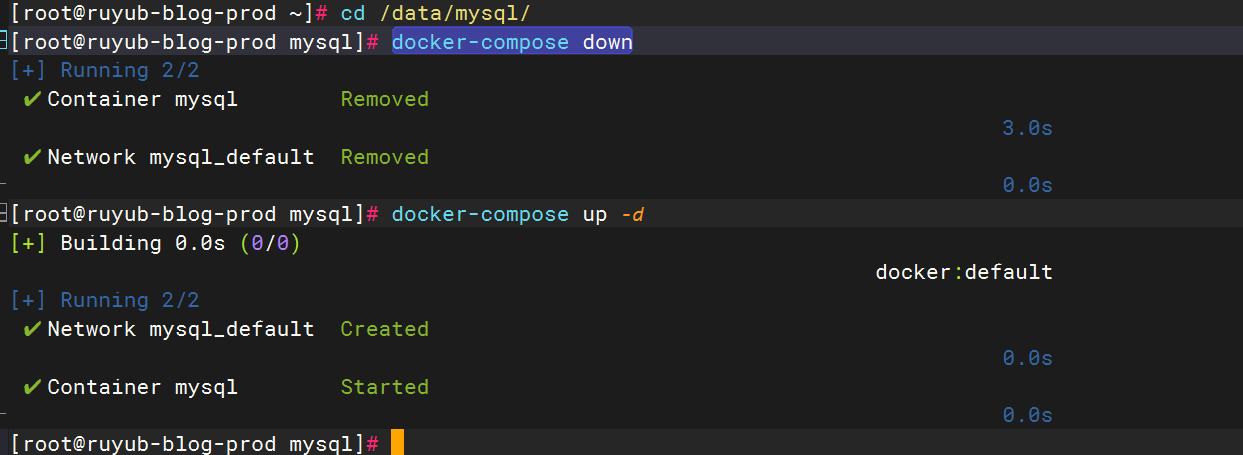
- 测试
查看配置:
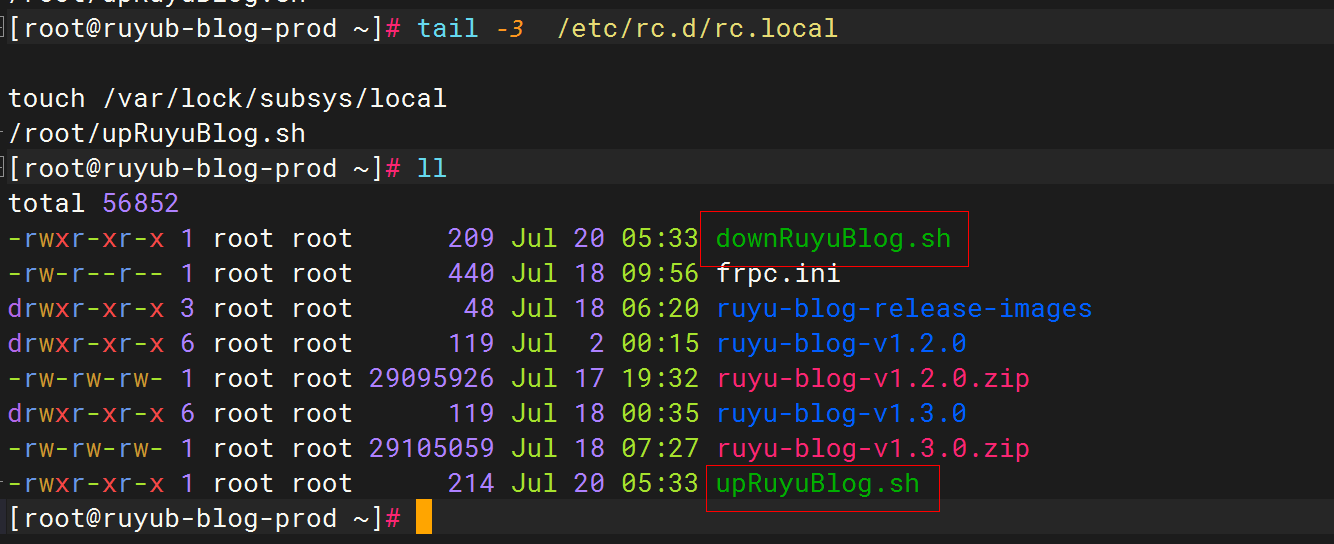
当前是无docke容器的:

重启机器:
reboot
验证:(符合预期)

- 如何使用(测试成功)
#启动ruyu-blog服务
sh /root/upRuyuBlog.sh

#关闭ruyu-blog服务
sh /root/downBlog.sh
案例:修改网站名称(已解决)
案例:修改mysql root密码(已解决)
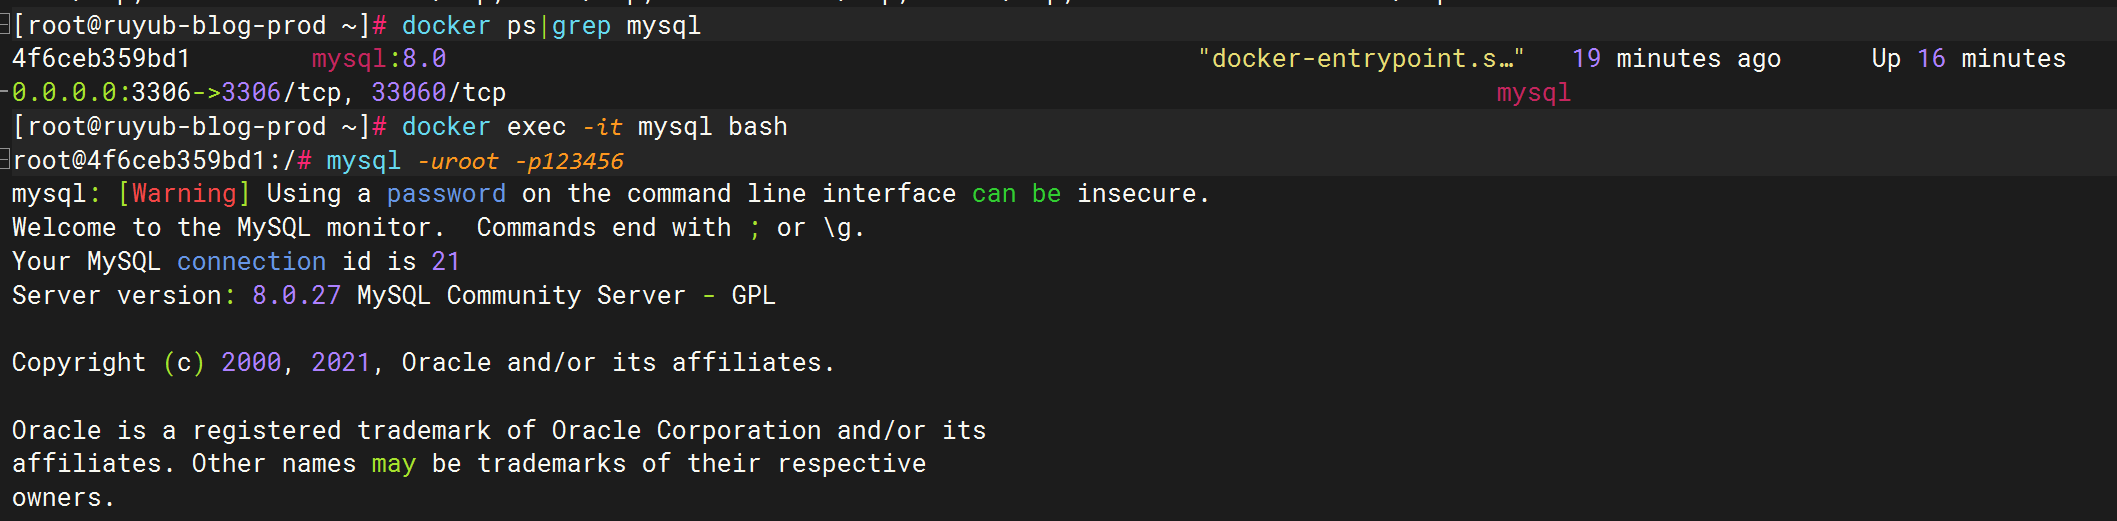
docker ps|grep mysql
docker exec -it mysql bash
mysql -uroot -p123456
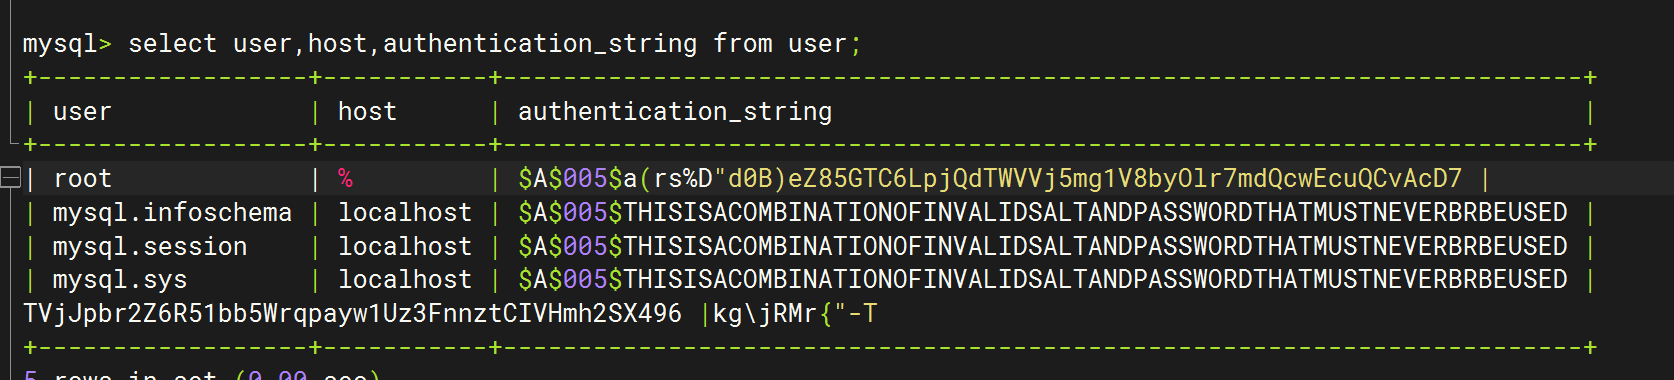
use mysql;
mysql -u root -p
USE mysql;
ALTER USER 'root'@'%' IDENTIFIED WITH mysql_native_password BY '新密码';

修改完后记得测试下:
奇怪,修改了,怎么没生效?

再修改一次:
mysql -u root -p
USE mysql;

ALTER USER 'root'@'localhost' IDENTIFIED WITH mysql_native_password BY '新密码';
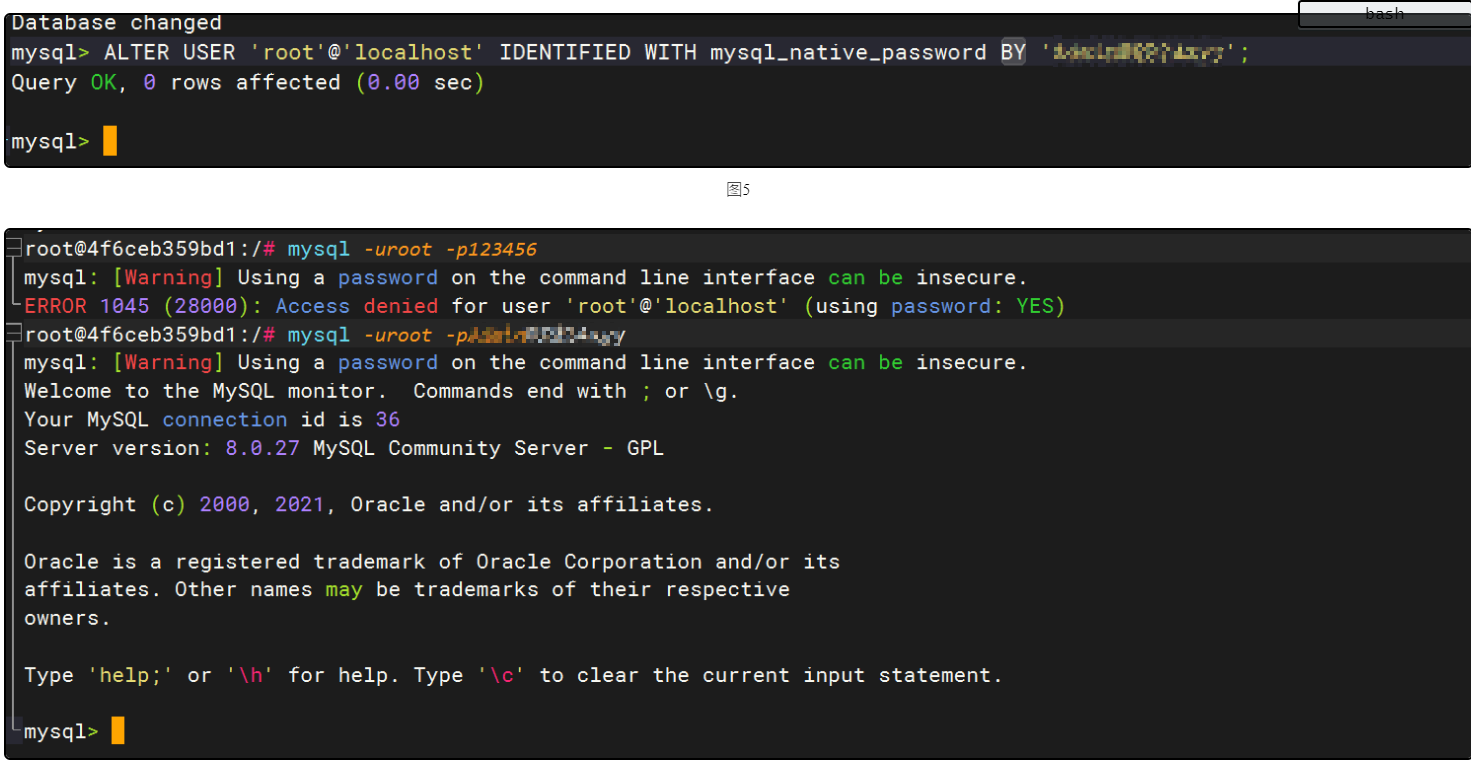
符合预期。
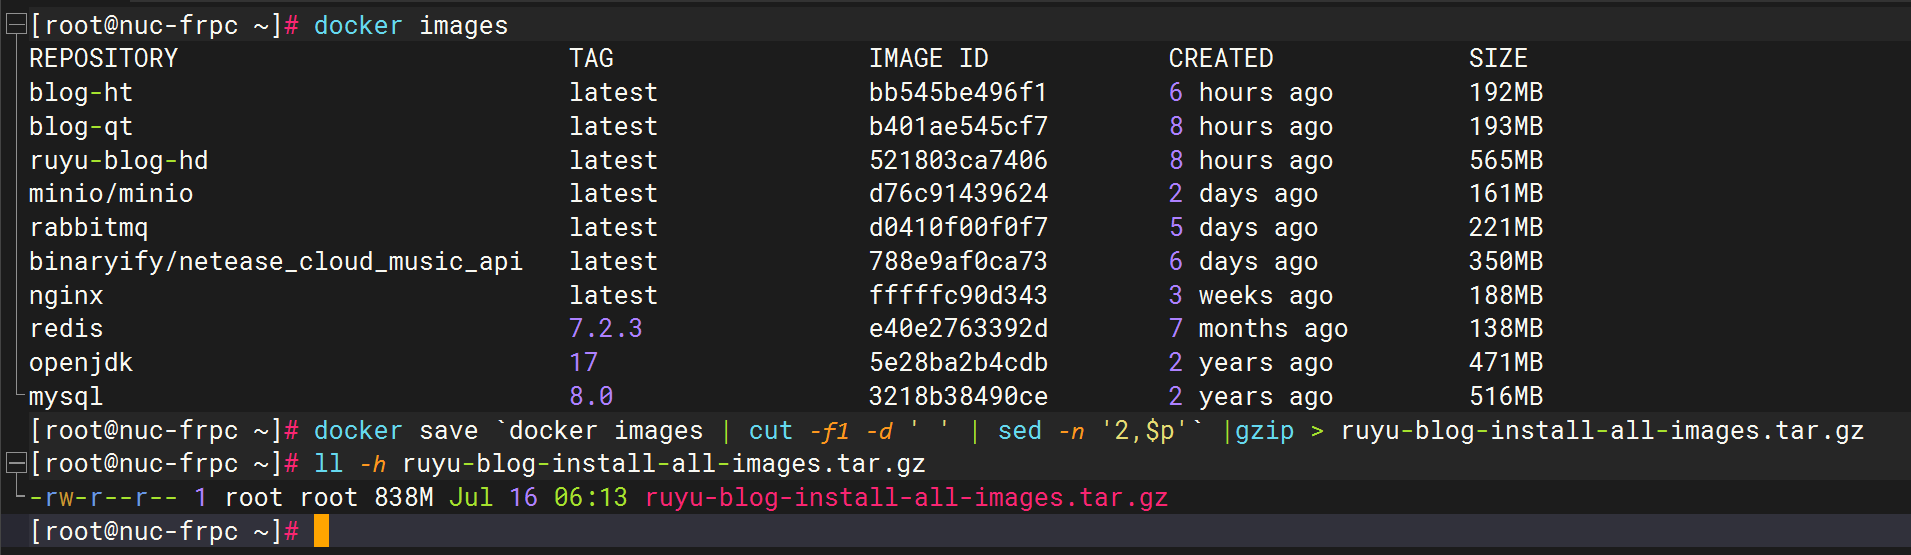
案例:导出本地所有镜像(已解决)
docker save `docker images | cut -f1 -d ' ' | sed -n '2,$p'` |gzip > ruyu-blog-install-all-images.tar.gz
范例:一键删除部署资源(已解决)
cd /data/mysql
docker-compose down

cd /data/redis
docker-compose down

cd /data/minio
docker-compose down

docker stop rabbit
docker stop netease_cloud_music_api
docker stop ruyu-blog-hd blog-qt blog-ht


##销毁数据
docker rm -f rabbit netease_cloud_music_api ruyu-blog-hd blog-qt blog-ht
docker rmi -f ruyu-blog-hd blog-qt blog-ht
rm -rf /data/mysql /data/redis /data/minio
rm -rf /root/ruyu-blog-v1.2.0
cd ~
##
范例:3个核心配置文件(已解决)
xxx
范例:重新打包命令😘(已解决)
#给ruyu-blog-release里的ruyu-blog-v1.3.0做ln
cd /root
mkdir /root/ruyu-blog
mkdir /root/ruyu-blog-release
ln -s /root/ruyu-blog-release/ruyu-blog-v1.3.0 /root/ruyu-blog

cd /root/ruyu-blog
容器名一直不回变的,变的是镜像名称。
1.重新打包ruyu-blog-hd
#重新构建jar包
cd /root/ruyu-blog/blog-backend
mvn clean
mvn clean package

#删除老容器和老镜像
docker rm -f ruyu-blog-hd
#docker rmi -f ruyu-blog-hd

#构建新镜像和启动新容器
docker build . -t ruyu-blog-hd
docker run --name ruyu-blog-hd -d -p 8088:8088 ruyu-blog-hd
docker ps
##
2.重新打包blog-qt
#重新构建dist
cd /root/ruyu-blog/blog-frontend/kuailemao-blog/
rm -rf dist
pnpm install
pnpm build

#删除老容器和老镜像
docker rm -f blog-qt
#docker rmi -f blog-qt

#构建新镜像和启动新容器
docker build . -t blog-qt
docker run --name blog-qt -d -p 80:80 blog-qt
docker ps
##
3.重新打包blog-ht
#重新构建dist
cd /root/ruyu-blog/blog-frontend/kuailemao-admin/
rm -rf dist
pnpm install
pnpm uninstall husky
pnpm install husky
pnpm build

#删除老容器和老镜像
docker rm -f blog-ht
#docker rmi -f blog-ht

#构建新镜像和启动新容器
docker build . -t blog-ht
docker run --name blog-ht -d -p 81:81 blog-ht
docker ps
##
范例:项目更新方法(已解决)
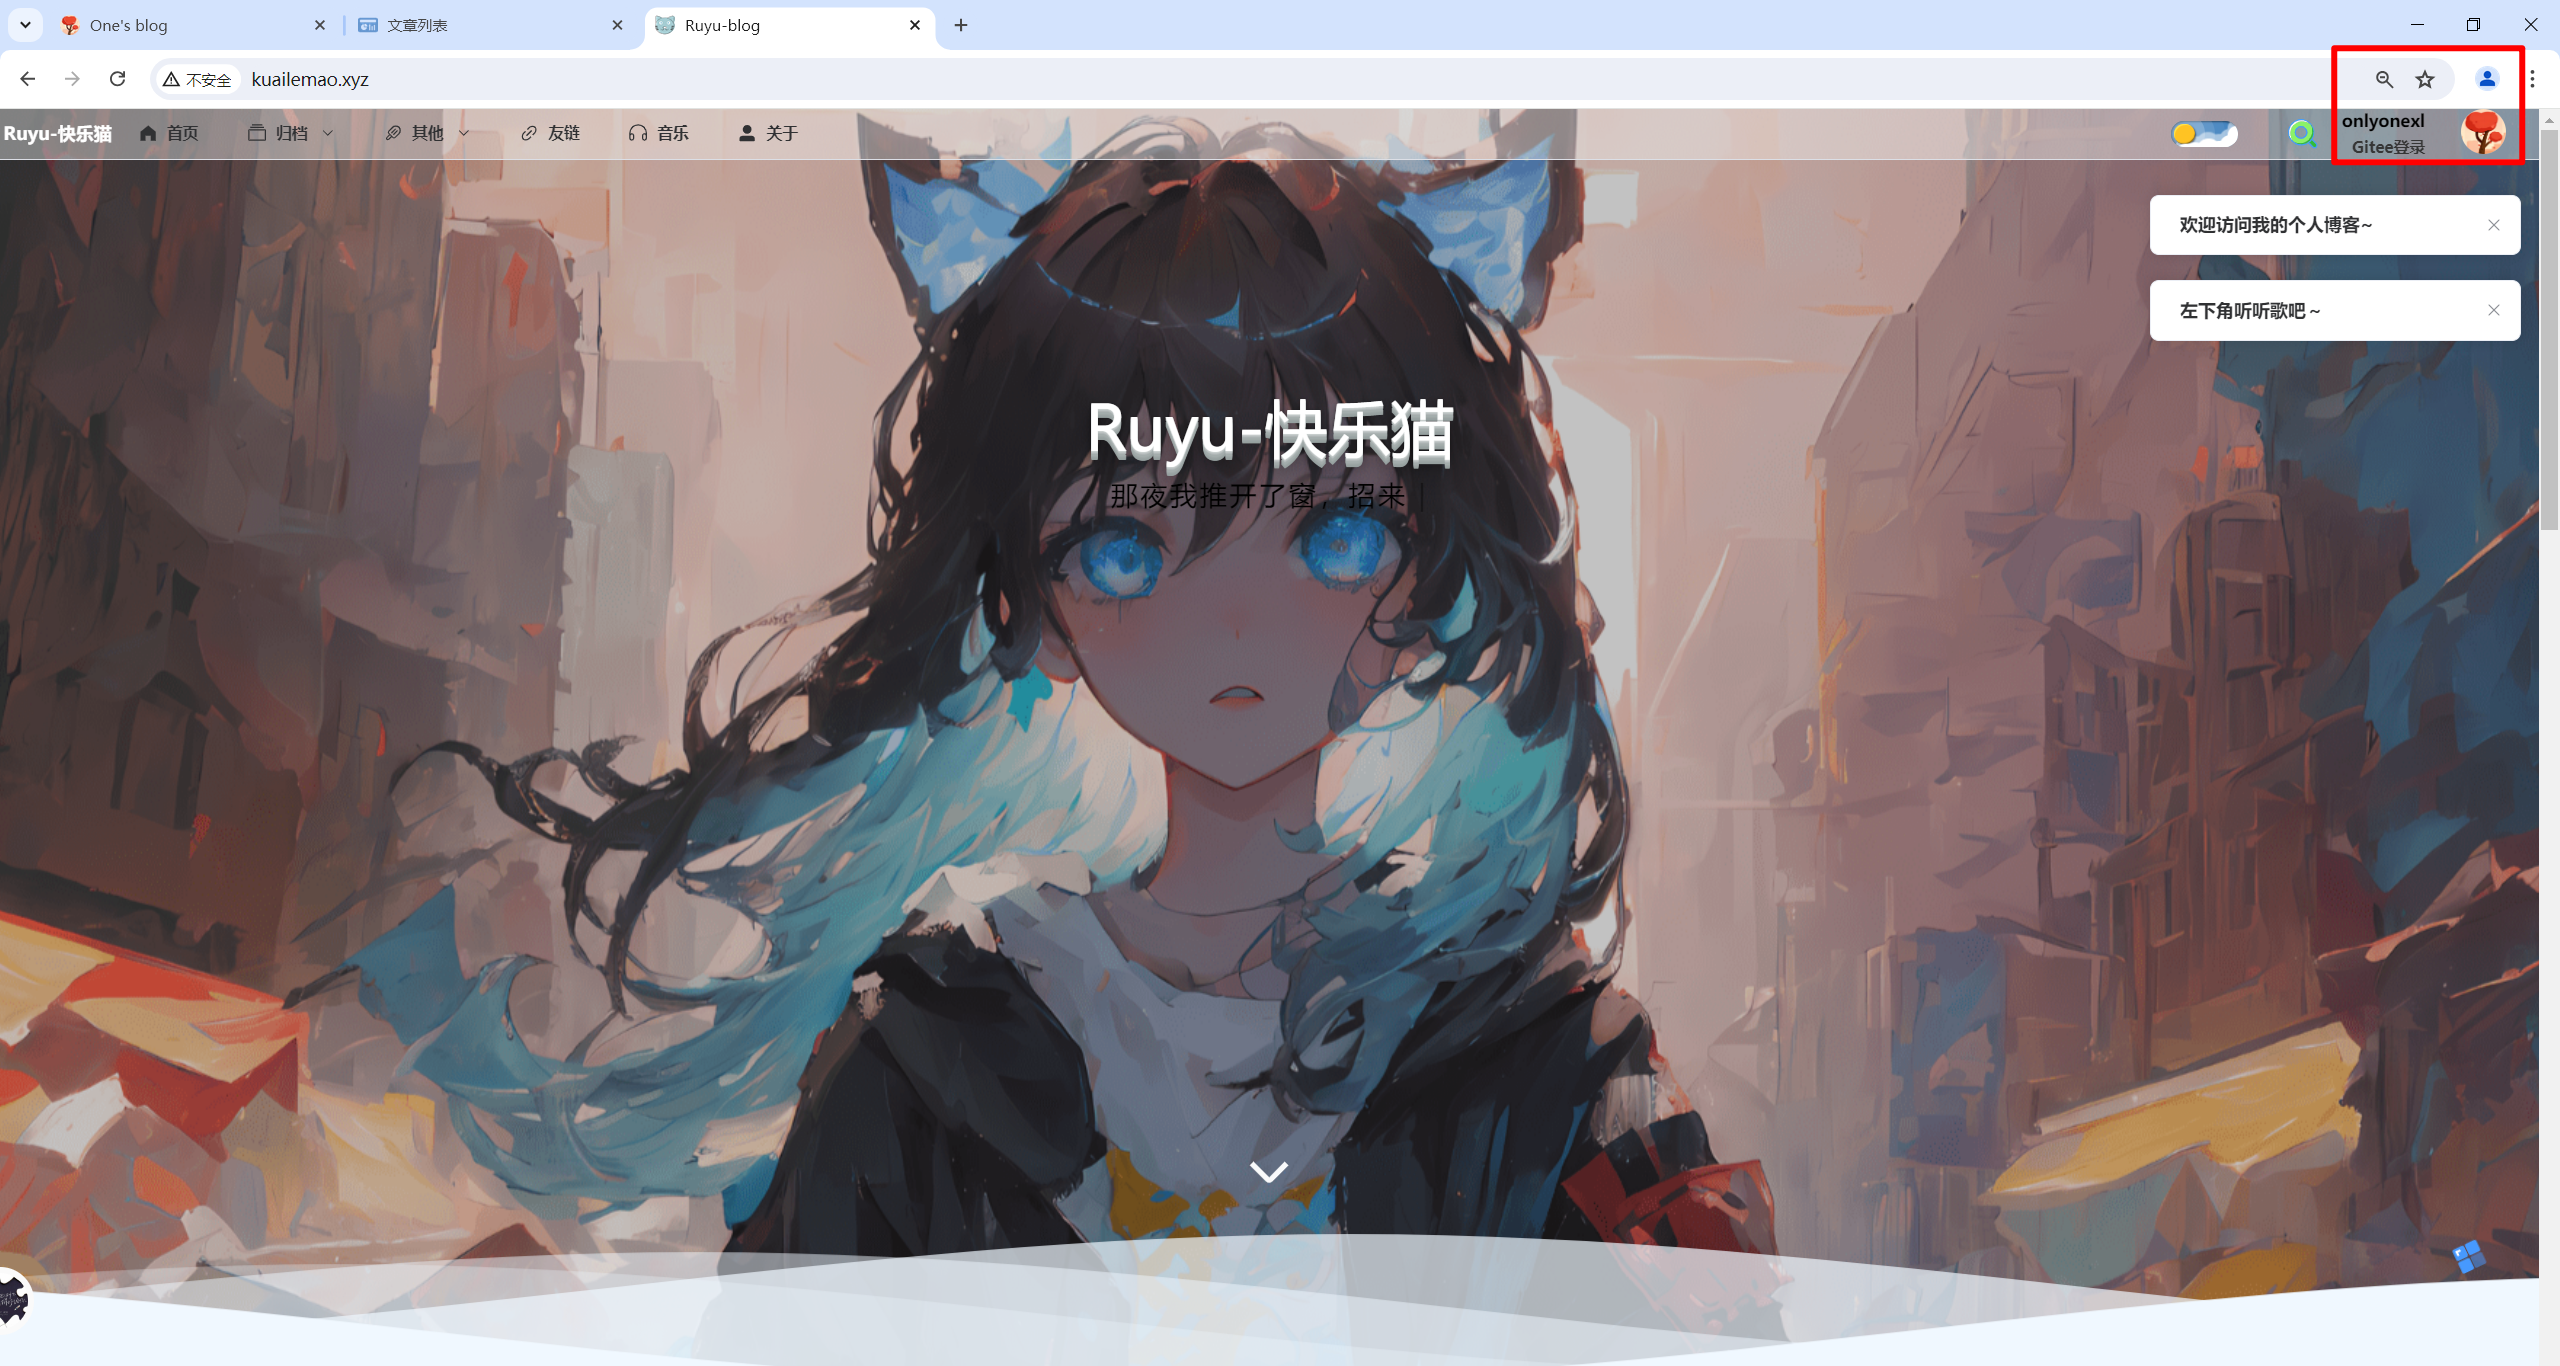
后端项目
我在别人上登录用的是gitee登录:
开始更新,自己之前是做了vm快照�的,这里直接更新:
- 更新方式
开始更新:
最新代码:
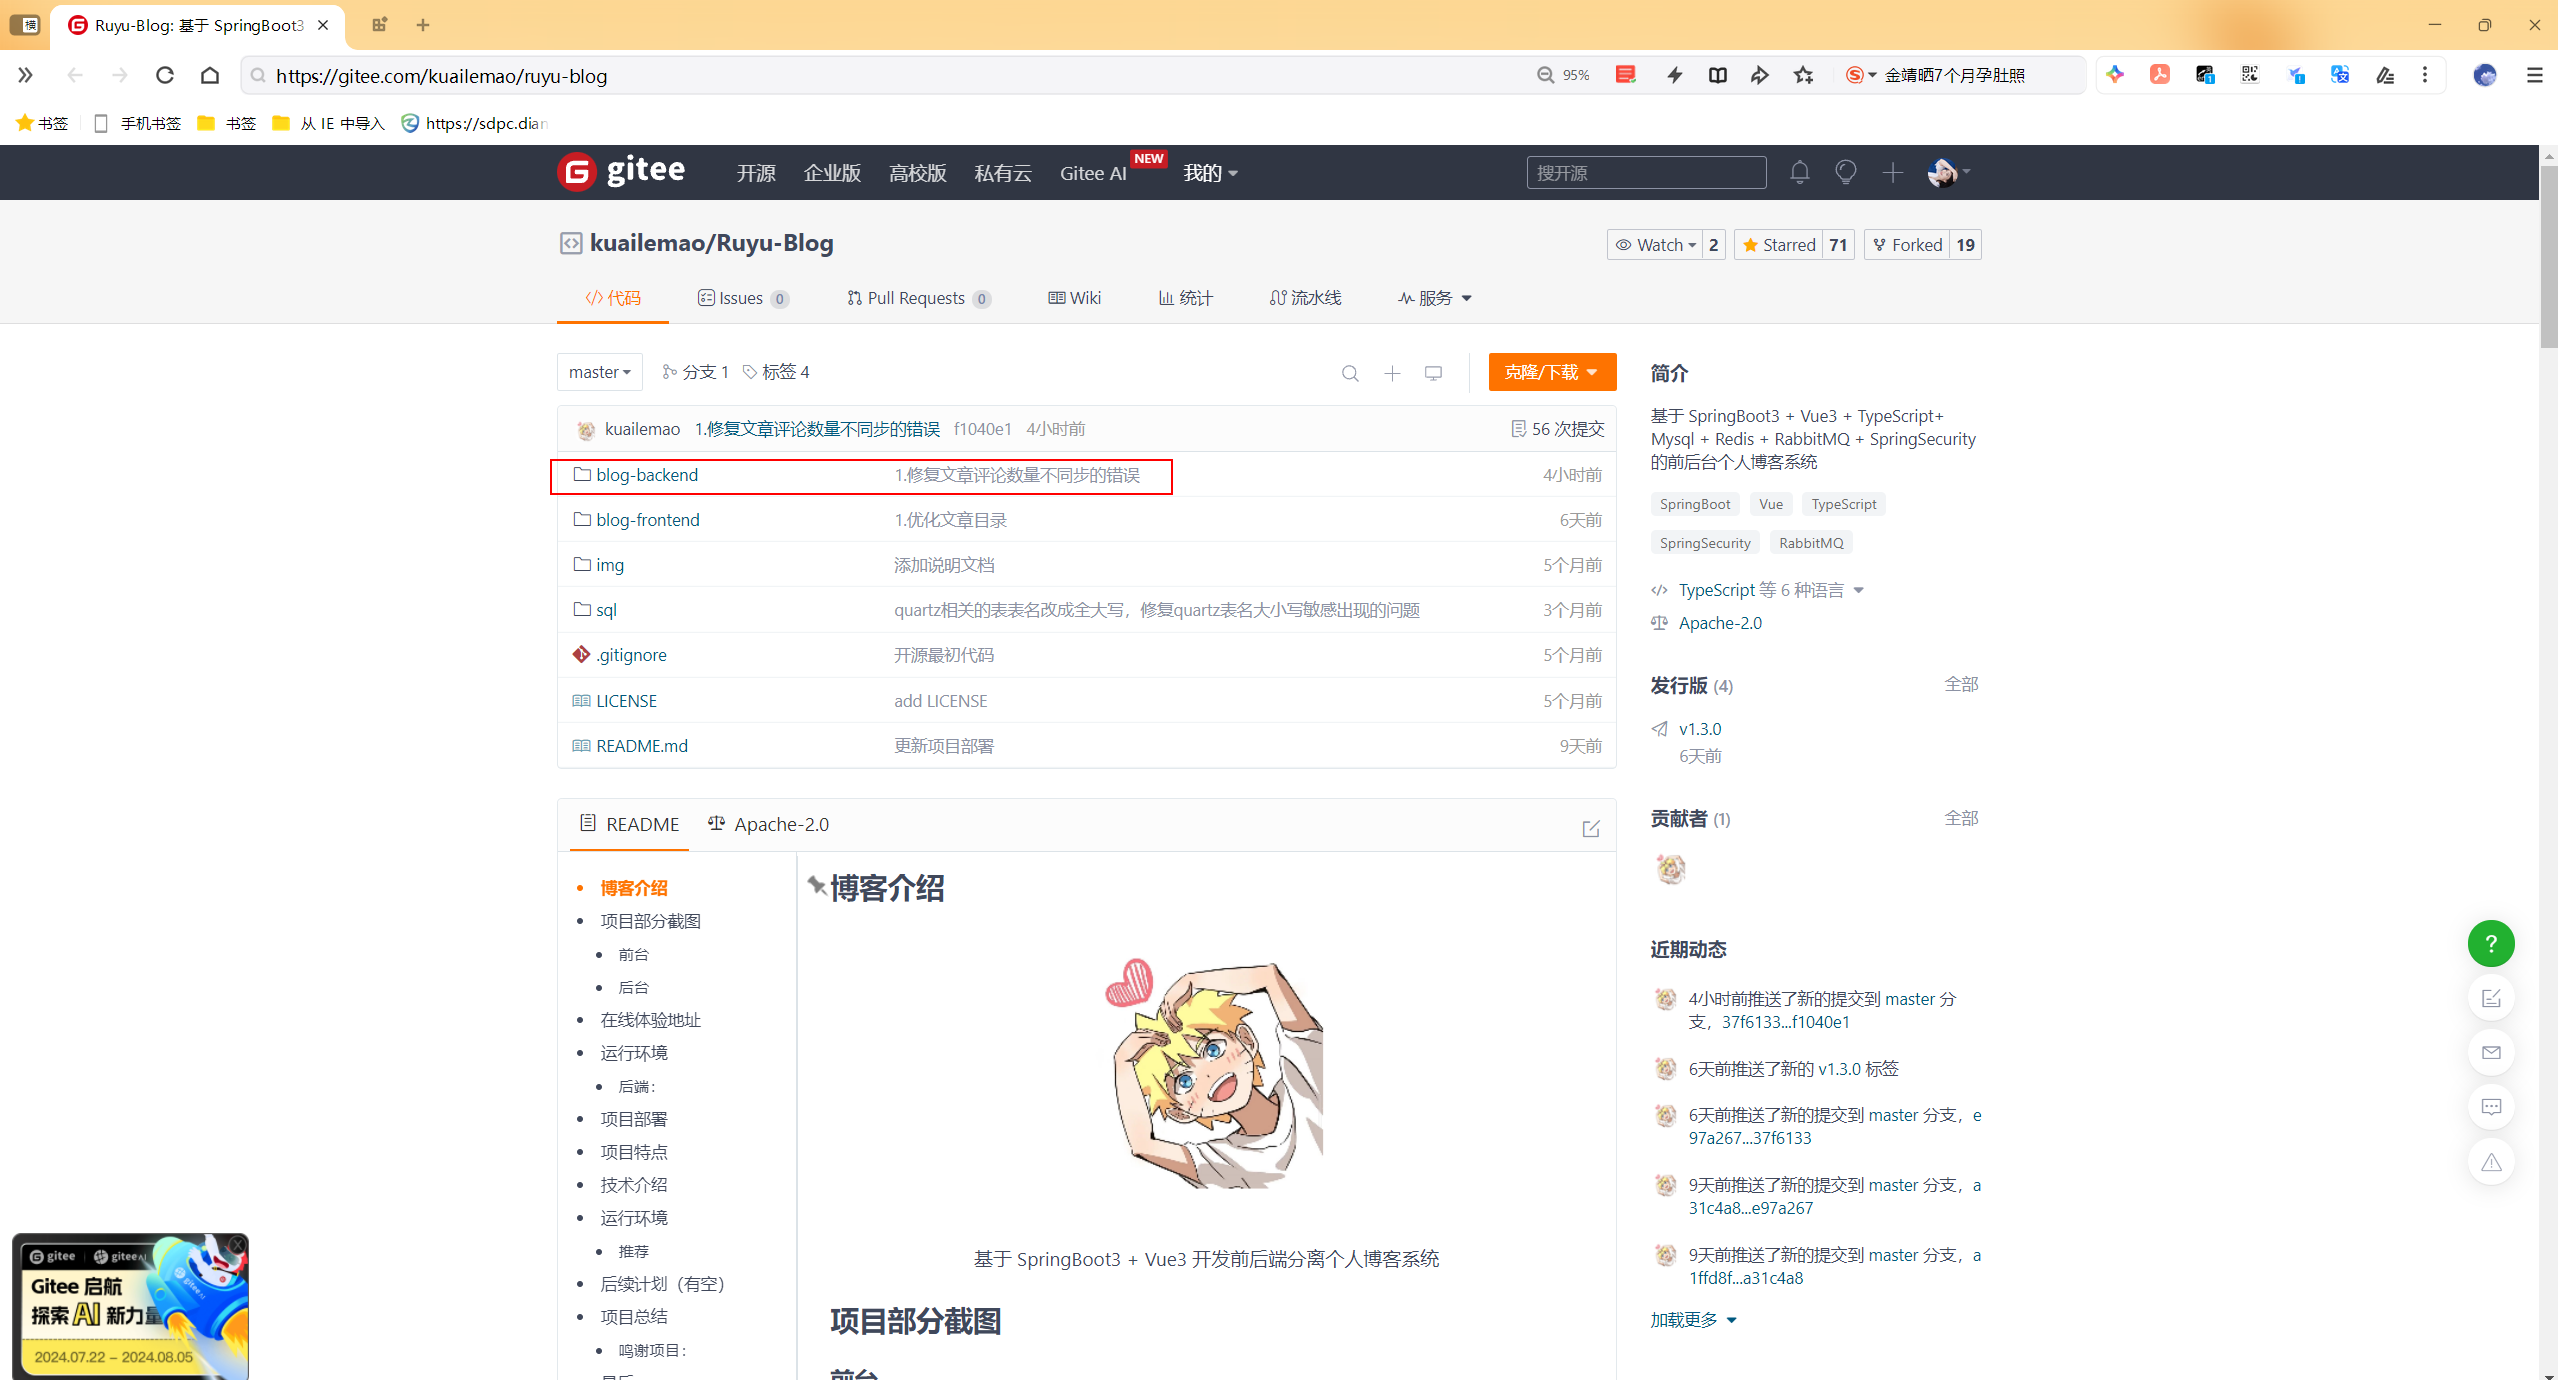
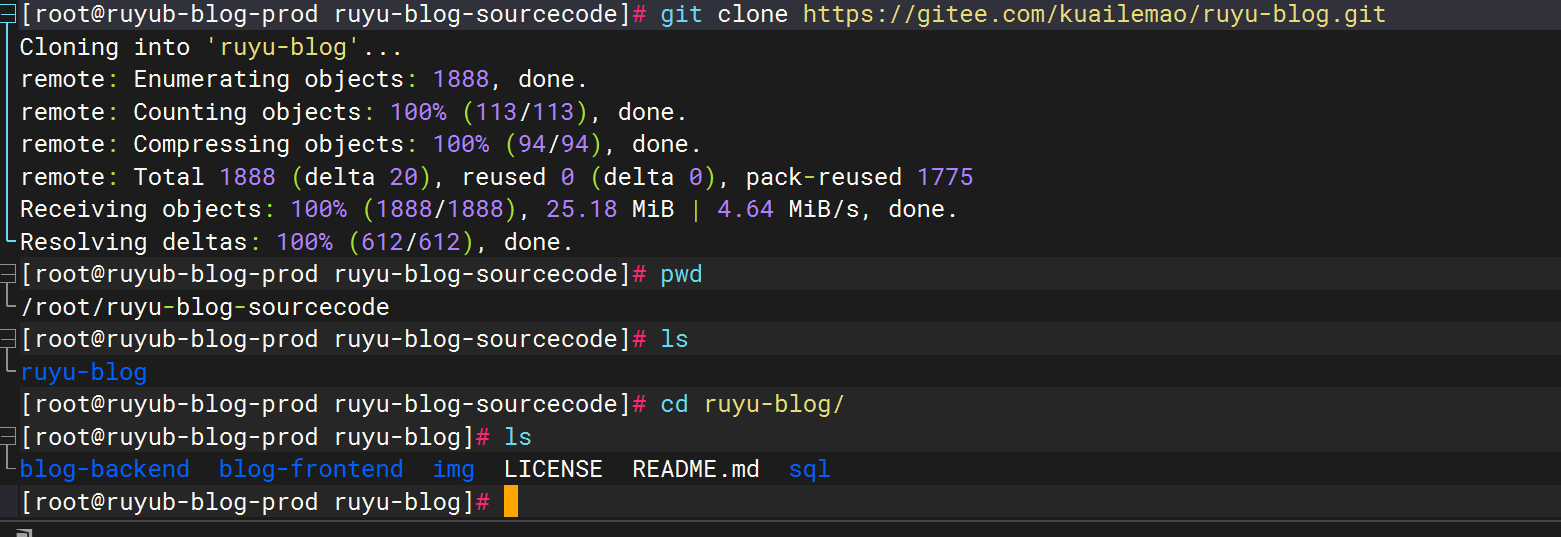
拉取最新代码:
mkdir ruyu-blog-sourcecode
cd ruyu-blog-sourcecode/
git clone https://gitee.com/kuailemao/ruyu-blog.git
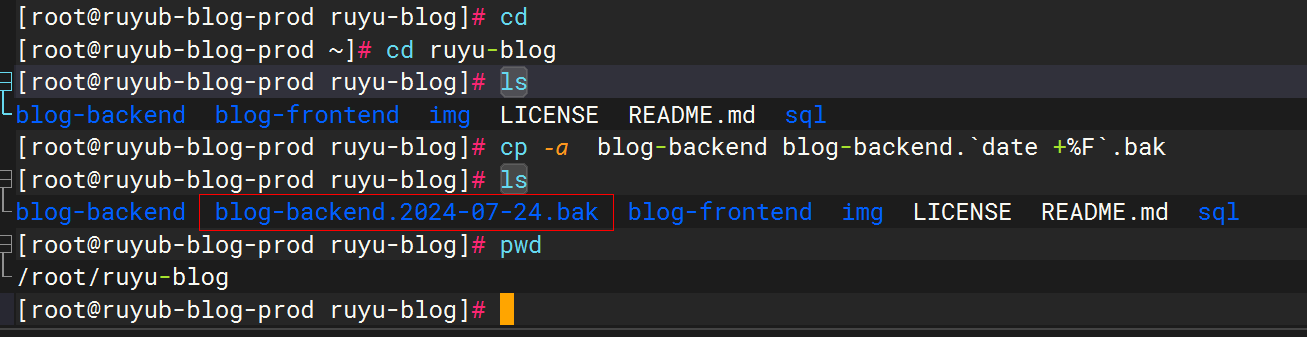
- 备份当前后端老代码:
/root/ruyu-blog
cp -a  blog-backend blog-backend.`date +%F`.bak

#/root/ruyu-blog/blog-backend.2024-07-24.bak
- 拷贝新代码到原来目录
rm -rf /root/ruyu-blog/blog-backend
cp -a /root/ruyu-blog-sourcecode/ruyu-blog/blog-backend /root/ruyu-blog/

- 拷贝旧版本核心application文件到项目运行目录
rm -rf /root/ruyu-blog/blog-backend/src/main/resources/application.yml
cp /root/ruyu-blog/blog-backend.2024-07-24.bak/src/main/resources/application.yml /root/ruyu-blog/blog-backend/src/main/resources/

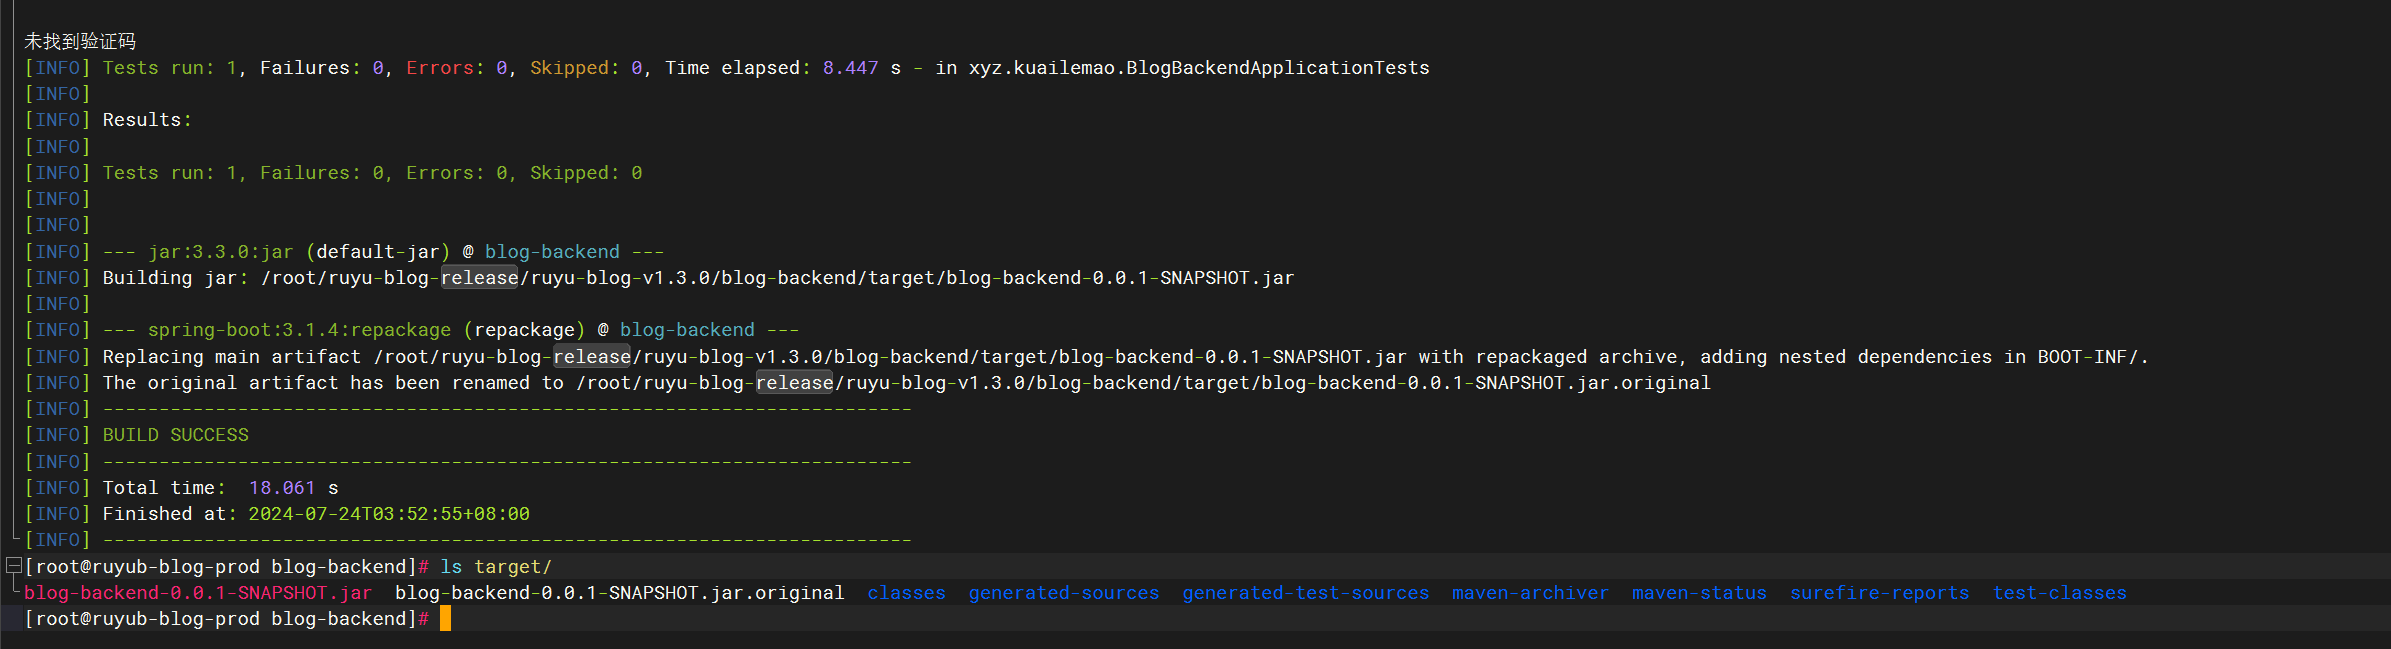
- 重新打包构建部署
# 复制项目的jar文件到容器中
#COPY target/blog-backend-0.0.1-SNAPSHOT.jar /app/app.jar
#重新构建jar包
cd /root/ruyu-blog/blog-backend
mvn clean
mvn clean package
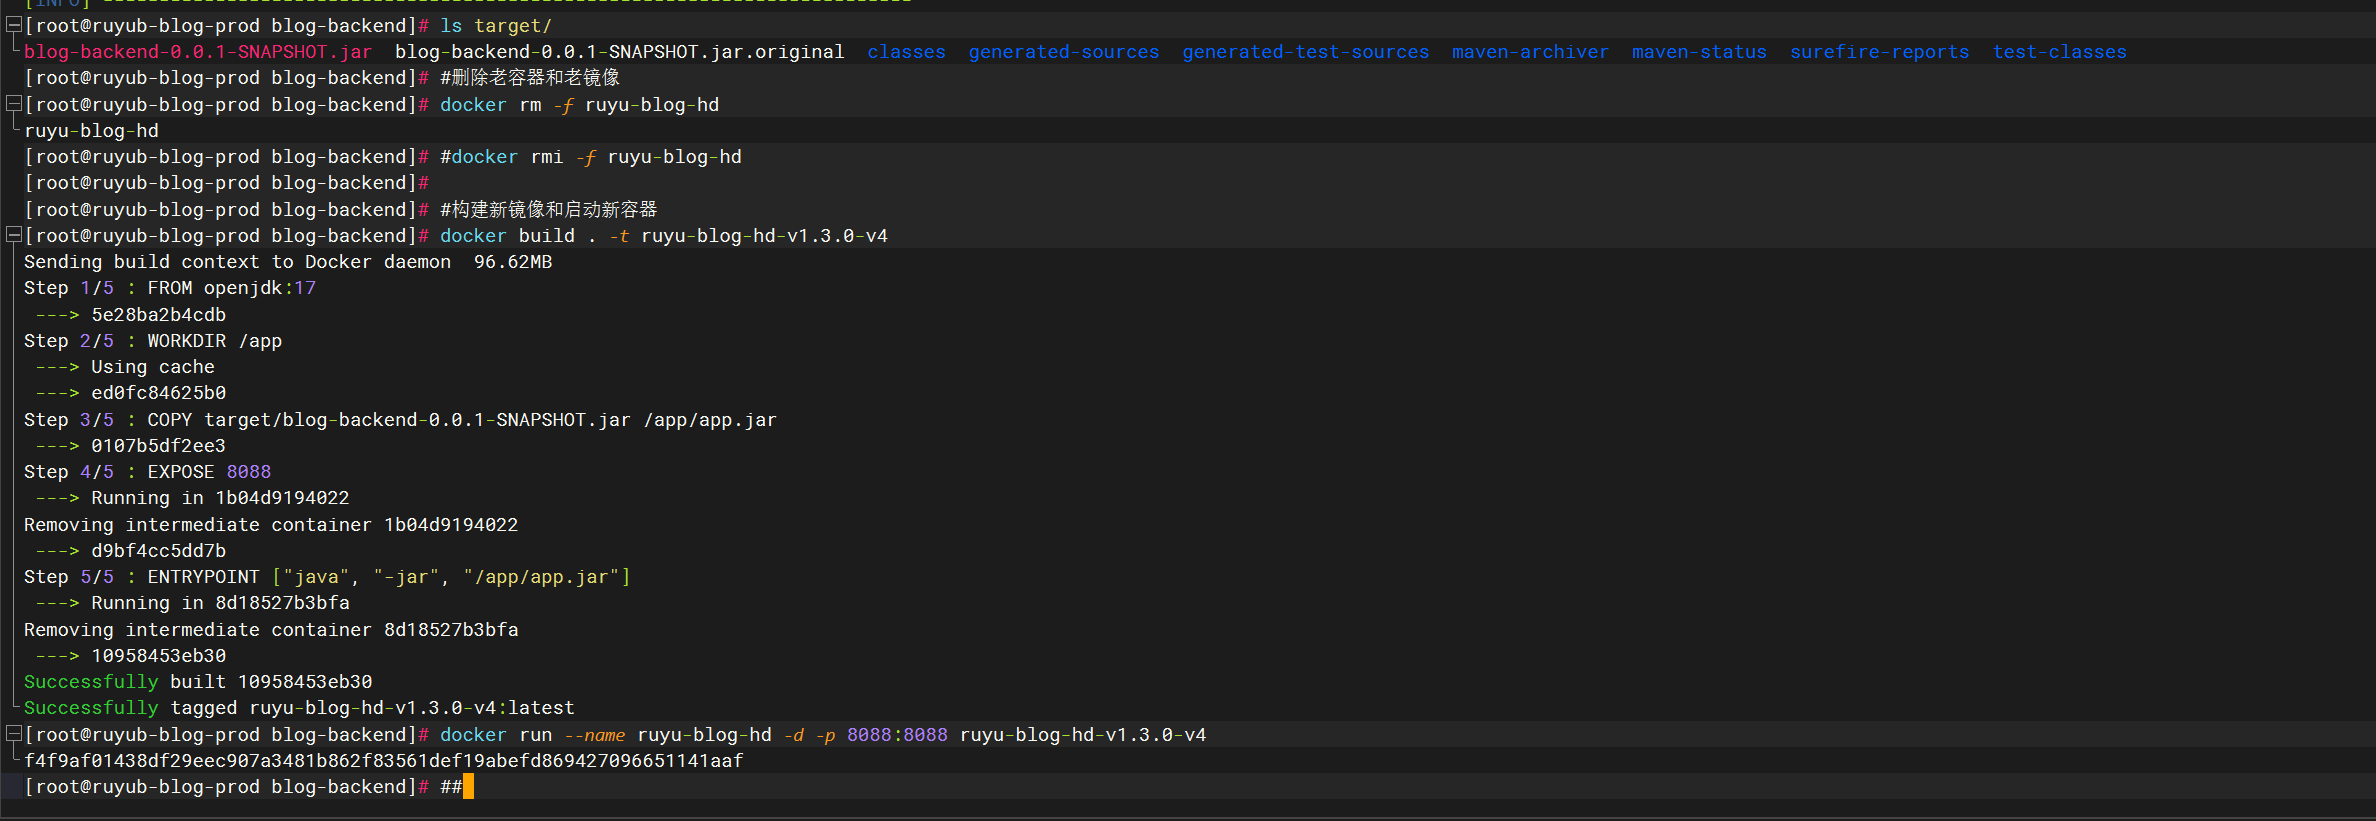
#删除老容器和老镜像
docker rm -f ruyu-blog-hd
#docker rmi -f ruyu-blog-hd
#构建新镜像和启动新容器
docker build . -t ruyu-blog-hd-v1.3.0-v4
docker run --name ruyu-blog-hd -d -p 8088:8088 ruyu-blog-hd-v1.3.0-v4
##
##ruyu-blog-hd-v1.3.0-v3

- 验证:OK

自己可测试下效果,是没问题的。
前端项目
release版本覆盖更新
##第1步:下载最新release代码并做好软连接ln##############################################################################
cd ~
cd ruyu-blog-release

#手动拉取代码,gitee需要手动下载,wget下载会失败的
#上传最新代码
# wget https://gitee.com/kuailemao/ruyu-blog/archive/refs/tags/v1.4.1.tar.gz
tar xf ruyu-blog-v1.4.1.tar.gz

cd ~
ln -sfn /root/ruyu-blog-release/ruyu-blog-v1.4.3 ruyu-blog
ll -t


##第2步:覆盖3个核心配置文件#################################################################################################
rm -rf /root/ruyu-blog/blog-backend/src/main/resources/application.yml
cp /root/ruyu-blog-release/ruyu-blog-v1.4.2/blog-backend/src/main/resources/application.yml /root/ruyu-blog/blog-backend/src/main/resources/

rm -rf /root/ruyu-blog/blog-frontend/kuailemao-blog/default.conf
cp /root/ruyu-blog-release/ruyu-blog-v1.4.2/blog-frontend/kuailemao-blog/default.conf  /root/ruyu-blog/blog-frontend/kuailemao-blog


rm -rf /root/ruyu-blog/blog-frontend/kuailemao-admin/default.conf
cp /root/ruyu-blog-release/ruyu-blog-v1.4.2/blog-frontend/kuailemao-admin/default.conf  /root/ruyu-blog/blog-frontend/kuailemao-admin

#vim /root/ruyu-blog/blog-backend/src/main/resources/application.yml
#.env
#检查下对不对

rm -rf /root/ruyu-blog/blog-frontend/kuailemao-blog/.env.development
rm -rf /root/ruyu-blog/blog-frontend/kuailemao-blog/.env.production
cp  /root/ruyu-blog-release/ruyu-blog-v1.4.2/blog-frontend/kuailemao-blog/.env.development /root/ruyu-blog/blog-frontend/kuailemao-blog
cp /root/ruyu-blog-release/ruyu-blog-v1.4.2/blog-frontend/kuailemao-blog/.env.production  /root/ruyu-blog/blog-frontend/kuailemao-blog


rm -rf /root/ruyu-blog/blog-frontend/kuailemao-admin/.env.development
rm -rf /root/ruyu-blog/blog-frontend/kuailemao-admin/.env.production
cp  /root/ruyu-blog-release/ruyu-blog-v1.4.2/blog-frontend/kuailemao-admin/.env.development /root/ruyu-blog/blog-frontend/kuailemao-admin
cp /root/ruyu-blog-release/ruyu-blog-v1.4.2/blog-frontend/kuailemao-admin/.env.production  /root/ruyu-blog/blog-frontend/kuailemao-admin


##第3步:构建镜像#######################################################################################################
#重新构建jar包
cd /root/ruyu-blog/blog-backend
mvn clean
mvn clean package -DskipTests

#删除老容器和老镜像
docker rm -f ruyu-blog-hd
#docker rmi -f ruyu-blog-hd

#构建新镜像和启动新容器
##这里记得做好原作者Dockerfile里target/的补充
docker build . -t ruyu-blog-hd-v1.4.3-v1-2024.8.19
docker run --name ruyu-blog-hd -d -p 8088:8088 ruyu-blog-hd-v1.4.3-v1-2024.8.19
docker ps
##


#重新构建dist
cd /root/ruyu-blog/blog-frontend/kuailemao-blog/
rm -rf dist
pnpm install
pnpm build

#删除老容器和老镜像
docker rm -f blog-qt
#docker rmi -f blog-qt

#构建新镜像和启动新容器
docker build . -t blog-qt-v1.4.3-v1-2024.8.19
docker run --name blog-qt -d -p 80:80 blog-qt-v1.4.3-v1-2024.8.19
docker ps
##


#重新构建dist
cd /root/ruyu-blog/blog-frontend/kuailemao-admin/
rm -rf dist
pnpm install
pnpm uninstall husky
pnpm install husky
pnpm build

#删除老容器和老镜像
docker rm -f blog-ht
#docker rmi -f blog-ht

#构建新镜像和启动新容器
docker build . -t blog-ht-v1.4.3-v1-2024.8.19
docker run --name blog-ht -d -p 81:81  blog-ht-v1.4.3-v1-2024.8.19
docker ps
##
latest版本更新
##拉取最新代码
cd /root/ruyu-blog-latest-code/ruyu-blog
git pull


##拷贝最新代码
cd /root
mkdir -p /root/ruyu-blog-latest/
rm -rf /root/ruyu-blog-latest/*
cp -a /root/ruyu-blog-latest-code/ruyu-blog /root/ruyu-blog-latest/
cd /root/ruyu-blog-latest/ruyu-blog/

##最新是 /root/ruyu-blog-release/ruyu-blog-v1.4.3
cd ~
ln -sfn /root/ruyu-blog-latest/ruyu-blog ruyu-blog
ll -t


##第2步:覆盖3个核心配置文件#################################################################################################
rm -rf /root/ruyu-blog/blog-backend/src/main/resources/application.yml
cp /root/ruyu-blog-release/ruyu-blog-v1.4.3/blog-backend/src/main/resources/application.yml /root/ruyu-blog/blog-backend/src/main/resources/

rm -rf /root/ruyu-blog/blog-frontend/kuailemao-blog/default.conf
cp /root/ruyu-blog-release/ruyu-blog-v1.4.3/blog-frontend/kuailemao-blog/default.conf  /root/ruyu-blog/blog-frontend/kuailemao-blog


rm -rf /root/ruyu-blog/blog-frontend/kuailemao-admin/default.conf
cp /root/ruyu-blog-release/ruyu-blog-v1.4.3/blog-frontend/kuailemao-admin/default.conf  /root/ruyu-blog/blog-frontend/kuailemao-admin

#vim /root/ruyu-blog/blog-backend/src/main/resources/application.yml
#.env
#检查下对不对

rm -rf /root/ruyu-blog/blog-frontend/kuailemao-blog/.env.development
rm -rf /root/ruyu-blog/blog-frontend/kuailemao-blog/.env.production
cp  /root/ruyu-blog-release/ruyu-blog-v1.4.3/blog-frontend/kuailemao-blog/.env.development /root/ruyu-blog/blog-frontend/kuailemao-blog
cp /root/ruyu-blog-release/ruyu-blog-v1.4.3/blog-frontend/kuailemao-blog/.env.production  /root/ruyu-blog/blog-frontend/kuailemao-blog


rm -rf /root/ruyu-blog/blog-frontend/kuailemao-admin/.env.development
rm -rf /root/ruyu-blog/blog-frontend/kuailemao-admin/.env.production
cp  /root/ruyu-blog-release/ruyu-blog-v1.4.3/blog-frontend/kuailemao-admin/.env.development /root/ruyu-blog/blog-frontend/kuailemao-admin
cp /root/ruyu-blog-release/ruyu-blog-v1.4.3/blog-frontend/kuailemao-admin/.env.production  /root/ruyu-blog/blog-frontend/kuailemao-admin


##第3步:构建镜像#######################################################################################################
#重新构建jar包
cd /root/ruyu-blog/blog-backend
mvn clean
mvn clean package

#删除老容器和老镜像
docker rm -f ruyu-blog-hd
#docker rmi -f ruyu-blog-hd

#构建新镜像和启动新容器
##这里记得做好原作者Dockerfile里target/的补充
docker build . -t ruyu-blog-hd-latest-v1-2024.8.24
docker run --name ruyu-blog-hd -d -p 8088:8088 ruyu-blog-hd-latest-v1-2024.8.24
docker ps
##


#重新构建dist
cd /root/ruyu-blog/blog-frontend/kuailemao-blog/
rm -rf dist
pnpm install
pnpm build

#删除老容器和老镜像
docker rm -f blog-qt
#docker rmi -f blog-qt

#构建新镜像和启动新容器
docker build . -t blog-qt-latest-v1-2024.8.24
docker run --name blog-qt -d -p 80:80 blog-qt-latest-v1-2024.8.24
docker ps
##


#重新构建dist
cd /root/ruyu-blog/blog-frontend/kuailemao-admin/
rm -rf dist
pnpm install
pnpm uninstall husky
pnpm install husky
pnpm build

#删除老容器和老镜像
docker rm -f blog-ht
#docker rmi -f blog-ht

#构建新镜像和启动新容器
docker build . -t blog-ht-latest-v1-2024.8.24
docker run --name blog-ht -d -p 81:81  blog-ht-latest-v1-2024.8.24
docker ps
##
案例:备份核心数据(重要)🤦♂️
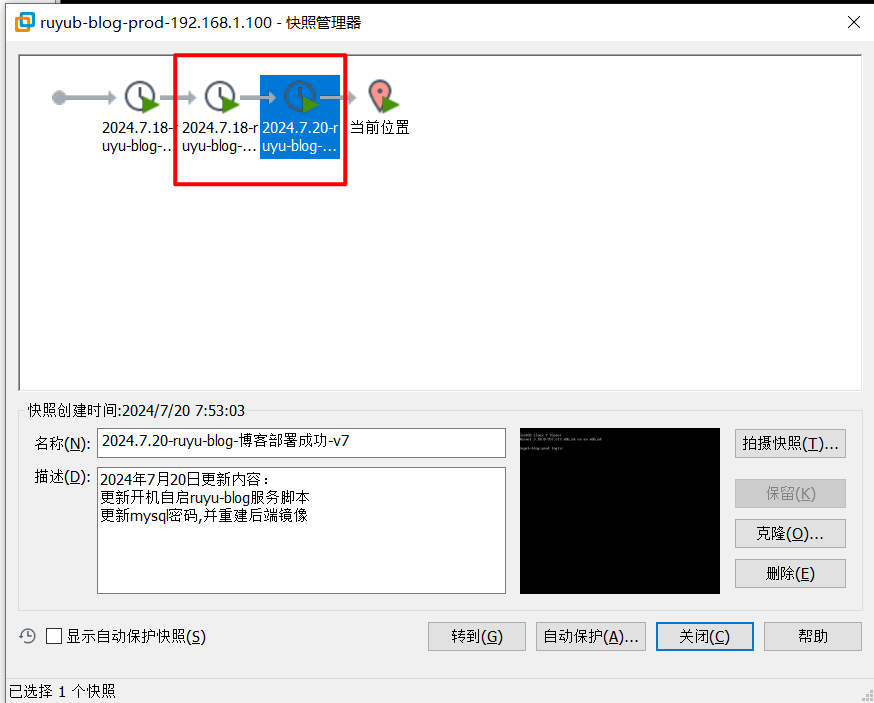
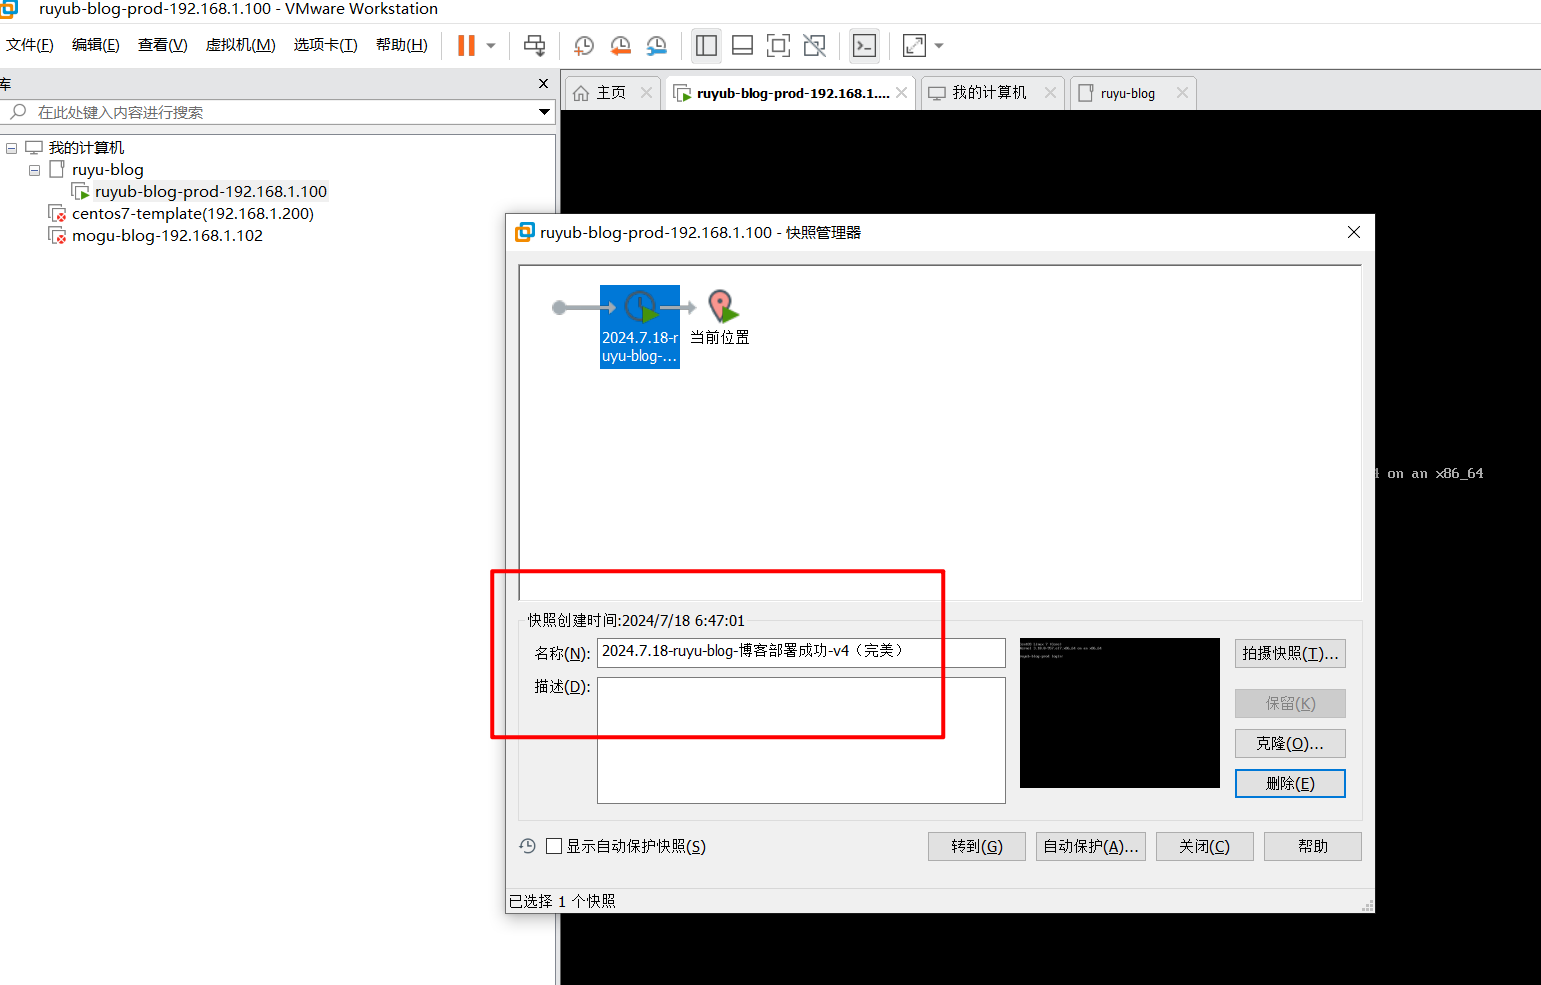
0、vm全备
每做一次更新,就对vm做一次快照。(一般保留最近的2个快照就好)
1、备份核心配置文件
sz /root/ruyu-blog-v1.2.0/blog-backend/src/main/resources/application.yml

cp /root/ruyu-blog-v1.2.0/blog-frontend/kuailemao-blog/default.conf /root/default-blog-qt.conf
sz /root/default-blog-qt.conf

cp /root/ruyu-blog-v1.2.0/blog-frontend/kuailemao-admin/default.conf /root/default-blog-ht.conf
sz /root/default-blog-ht.conf

rm -rf /root/default-blog-qt.conf
rm -rf /root/default-blog-ht.conf
##使用时,记得修改回deafult.conf
前端前台的配置文件有变动

①网页标签logo图片
②网页标签名称
③背景壁纸、及其配置文件
汇总备份脚本:
cd ~
mkdir blog-qt-bak
cd blog-qt-bak


##备份
cp /root/ruyu-blog/blog-frontend/kuailemao-blog/index.html /root/blog-qt-bak
cp /root/ruyu-blog/blog-frontend/kuailemao-blog/public/xyy-icon.svg  /root/blog-qt-bak

cp /root/ruyu-blog/blog-frontend/kuailemao-blog/index.html /root/blog-qt-bak
cp /root/ruyu-blog/blog-frontend/kuailemao-blog/public/xyy-icon.svg  /root/blog-qt-bak

cp /root/ruyu-blog/blog-frontend/kuailemao-blog/src/views/Home/Images/index.vue /root/blog-qt-bak


##下次新代码时拷贝文件
sed -i s/旧的/新的/g /root/ruyu-blog/blog-frontend/kuailemao-blog/index.html
#输入yes
cp /root/blog-qt-bak/xyy-icon.svg /root/ruyu-blog/blog-frontend/kuailemao-blog/public
#输入yes
2、备份release镜像
##2、备份release镜像
cd /root/ruyu-blog-release-images
#mkdir ruyu-blog-release-images
#cd ruyu-blog-release-images
mkdir v5-2024.7.17-install-docker-images
cd v5-2024.7.17-install-docker-images

docker save ruyu-blog-hd |gzip > ruyu-blog-hd.tar.gz
docker save blog-qt |gzip > blog-qt.tar.gz
docker save blog-ht |gzip > blog-ht.tar.gz

cp /root/ruyu-blog-v1.2.0/blog-backend/src/main/resources/application.yml /root/ruyu-blog-release-images/v5-2024.7.17-install-docker-images
cp /root/ruyu-blog-v1.2.0/blog-frontend/kuailemao-blog/default.conf /root/ruyu-blog-release-images/v5-2024.7.17-install-docker-images/default-blog-qt.conf
cp /root/ruyu-blog-v1.2.0/blog-frontend/kuailemao-admin/default.conf /root/ruyu-blog-release-images/v5-2024.7.17-install-docker-images/default-blog-ht.conf
#
3、备份源码(已解决)
- 自己生产业务源码(私密)
v1版本:(丢弃)
本地备份:(压缩自己生产源码到百度云盘(私有))
cd ~
tar cf ruyu-blog-`date +%F`-bak.tar.gz /root/ruyu-blog-release/ruyu-blog-v1.3.0
sz ruyu-blog-`date +%F`-bak.tar.gz
eee。。。没必要这样打包的,会有问题的,那些依赖要删除的。
更新版本:
==v2版本:==(推荐)
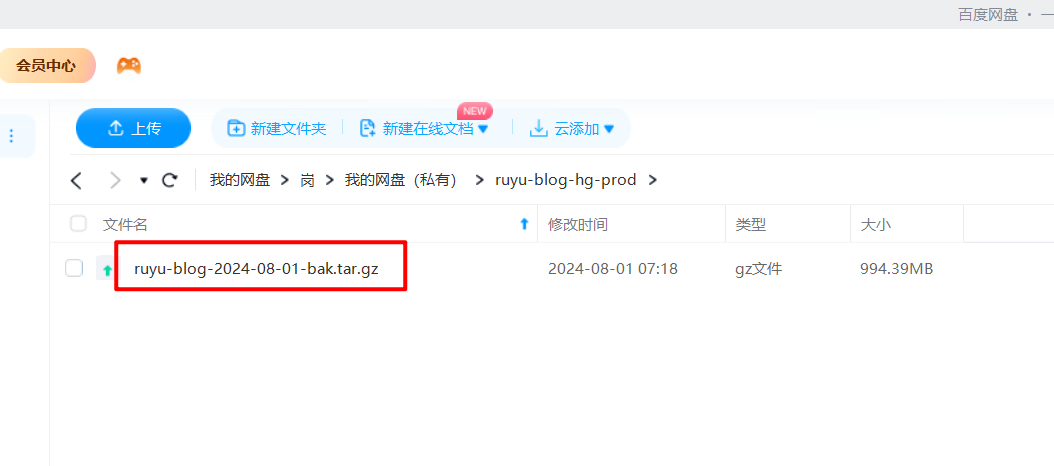
2024年8月3日17:14:50更新
#rm -rf /root/ruyu-blog-hg-prod-sourceCode-bak/*
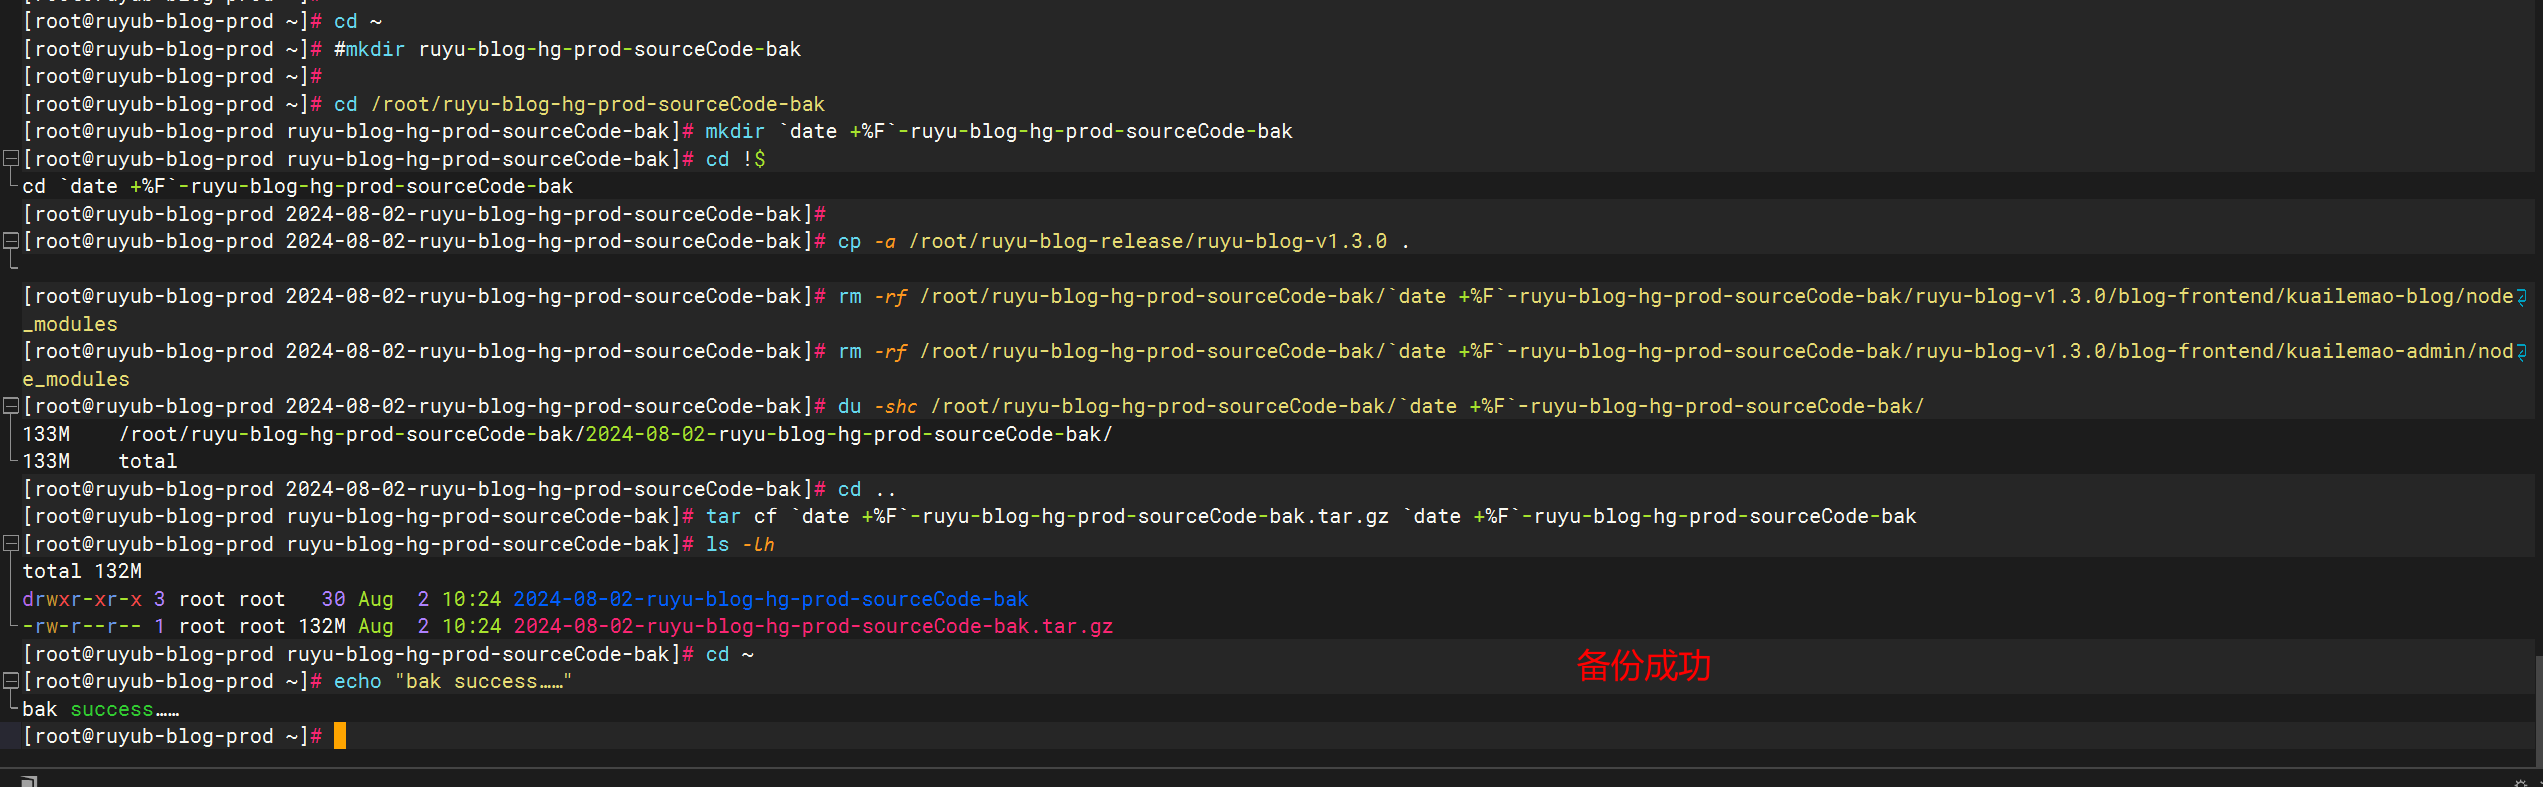
cd ~
#mkdir ruyu-blog-hg-prod-sourceCode-bak
cd /root/ruyu-blog-hg-prod-sourceCode-bak
mkdir `date +%F`-ruyu-blog-hg-prod-sourceCode-bak
cd !$
cp -a /root/ruyu-blog-release/ruyu-blog-v1.3.0 .
rm -rf /root/ruyu-blog-hg-prod-sourceCode-bak/`date +%F`-ruyu-blog-hg-prod-sourceCode-bak/ruyu-blog-v1.3.0/blog-frontend/kuailemao-blog/node_modules
rm -rf /root/ruyu-blog-hg-prod-sourceCode-bak/`date +%F`-ruyu-blog-hg-prod-sourceCode-bak/ruyu-blog-v1.3.0/blog-frontend/kuailemao-admin/node_modules
du -shc /root/ruyu-blog-hg-prod-sourceCode-bak/`date +%F`-ruyu-blog-hg-prod-sourceCode-bak/
cd ..
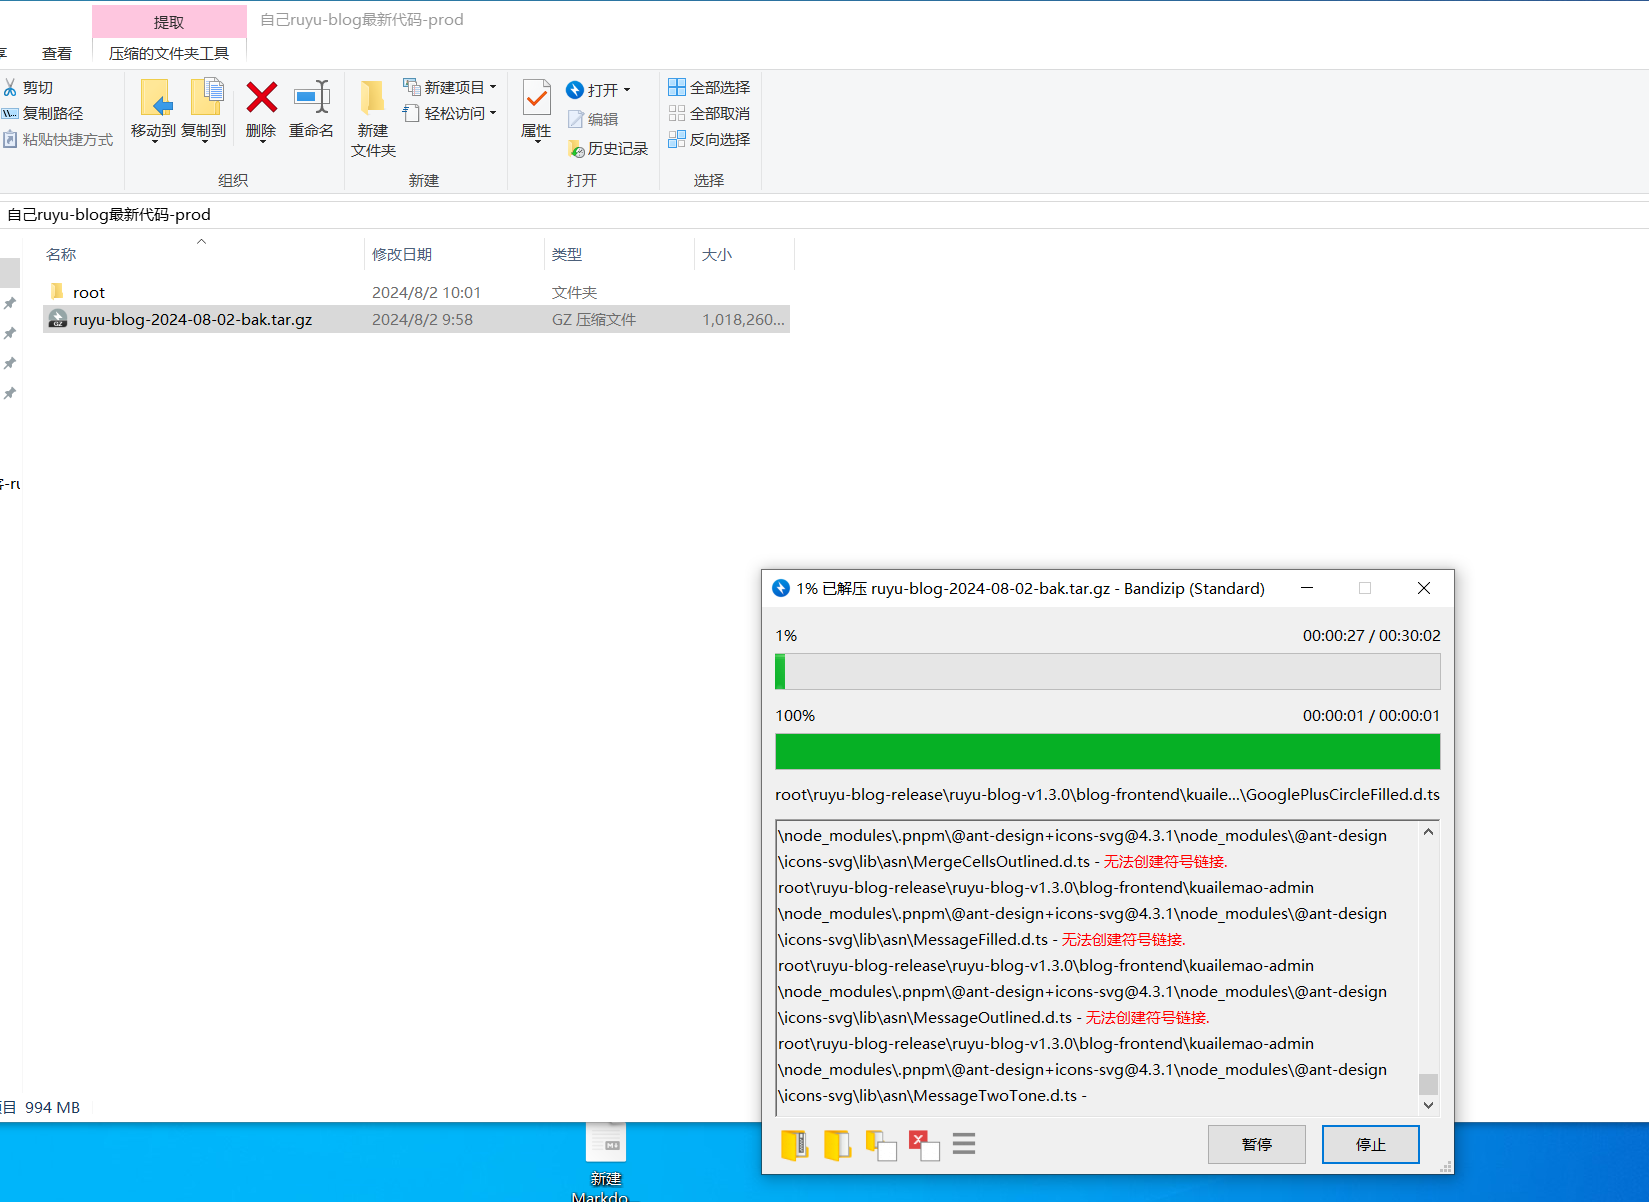
tar cf `date +%F`-ruyu-blog-hg-prod-sourceCode-bak.tar.gz `date +%F`-ruyu-blog-hg-prod-sourceCode-bak
ls -lh
#cd ~
echo "bak success……"
## sz /root/ruyu-blog-hg-prod-sourceCode-bak/`date +%F`-ruyu-blog-hg-prod-sourceCode-bak.tar.gz
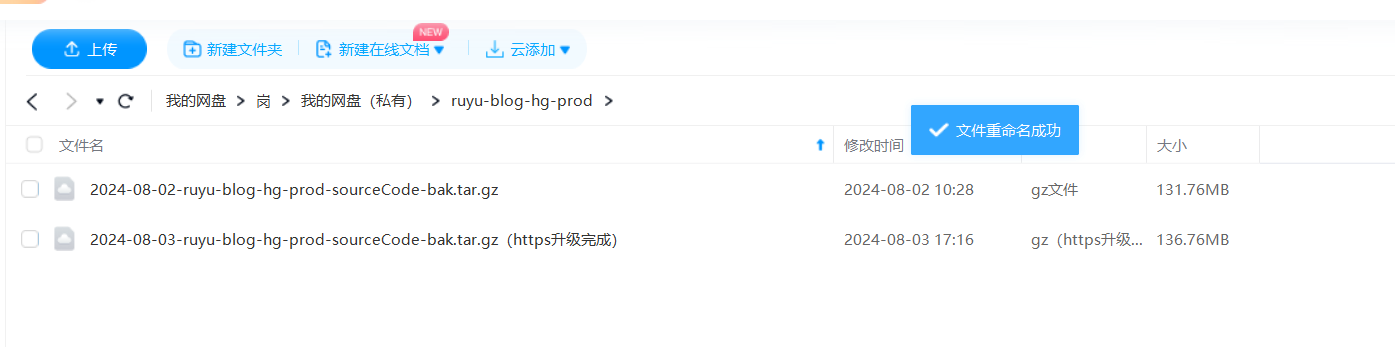
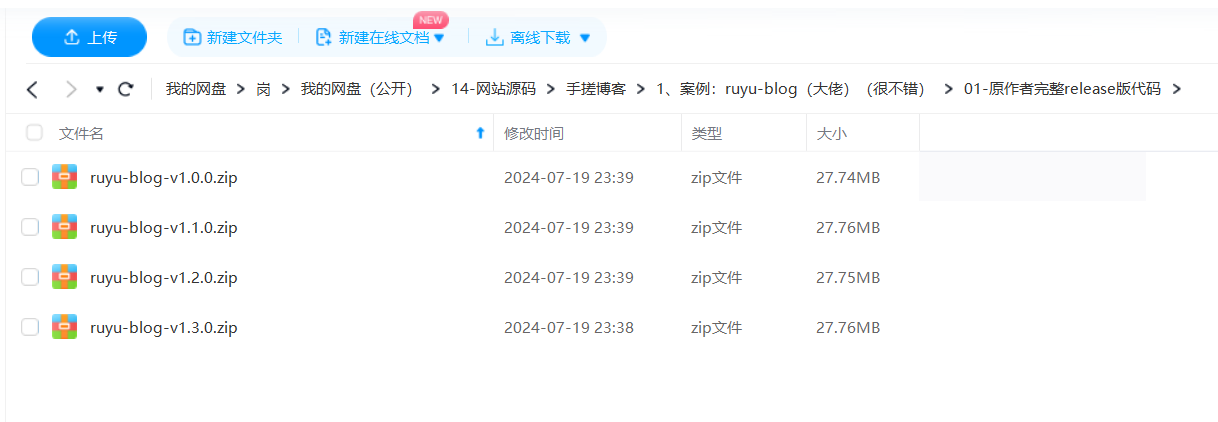
- 作者发版源码(百度盘,用于备份)
4、备份数据库、docker本地数据
#备份mysql?redis? rabbit? minio?

#应该只需要备份mysql、minio就好。

#对于docker,如何进行数据备份??
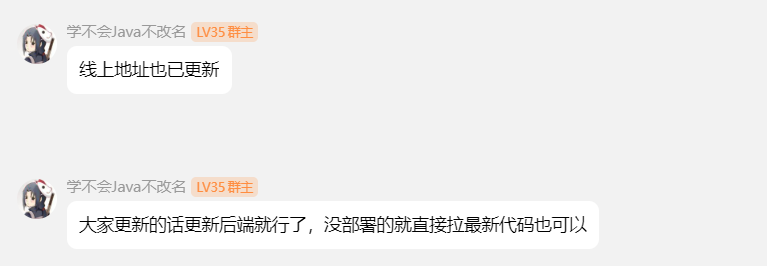
案例:如何更新项目代码?(更新成功)😍
群主更新公告
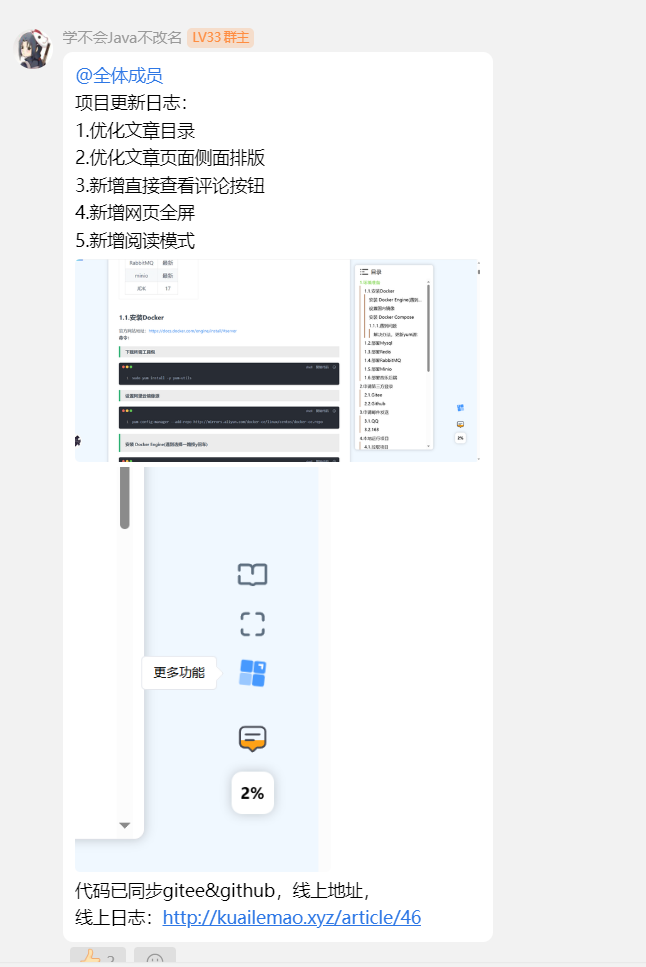
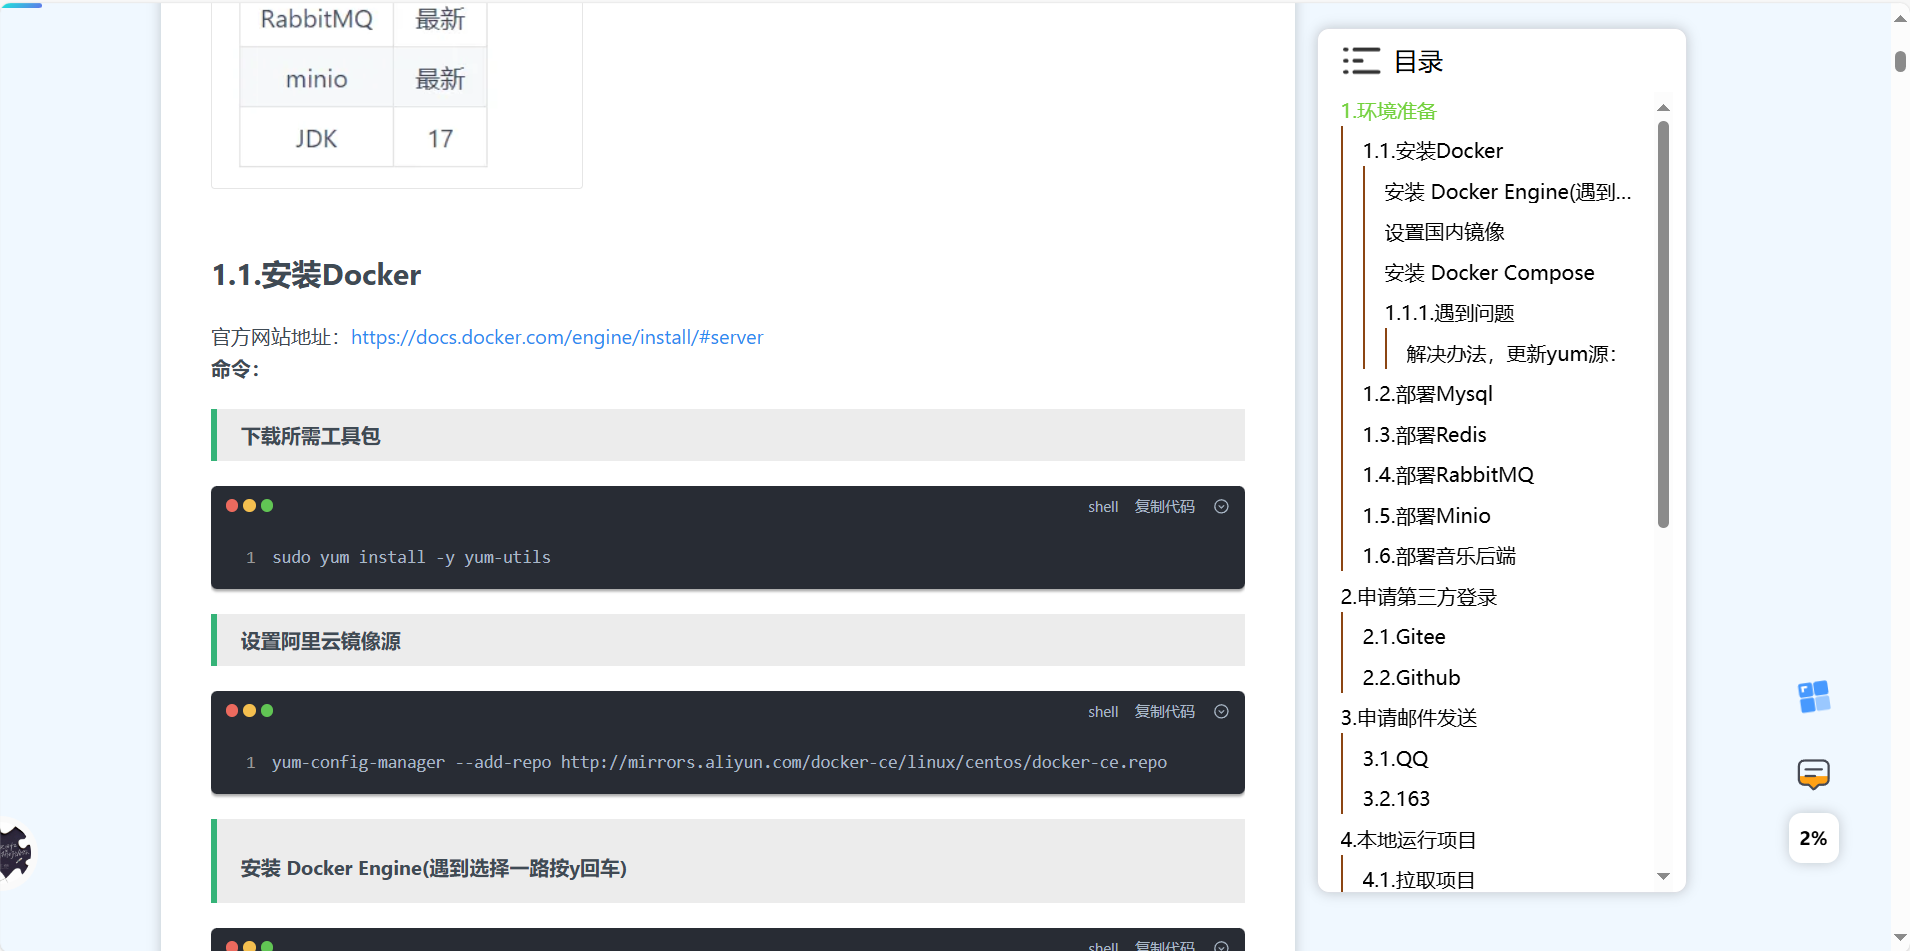

代码已同步gitee&github,线上地址, 线上日志:http://kuailemao.xyz/article/46
1、做vm备份
已完成。
2、拉取前端前台代码,直接更新,重新打包部署。
我们只需要��单独对blog-qt打包即可:
##1、拷贝代码
cd /root/ruyu-blog-v1.3.0/blog-frontend/kuailemao-blog
cp  /root/ruyu-blog-v1.2.0/blog-frontend/kuailemao-blog/default.conf .
#输入yes


##2、生产dist
pnpm install
#pnpm run dev
pnpm build


##3、构建镜像
docker rm -f blog-qt
docker rmi -f blog-qt

docker build . -t blog-qt-v1.3.0
docker run --name blog-qt -d -p 80:80 blog-qt-v1.3.0
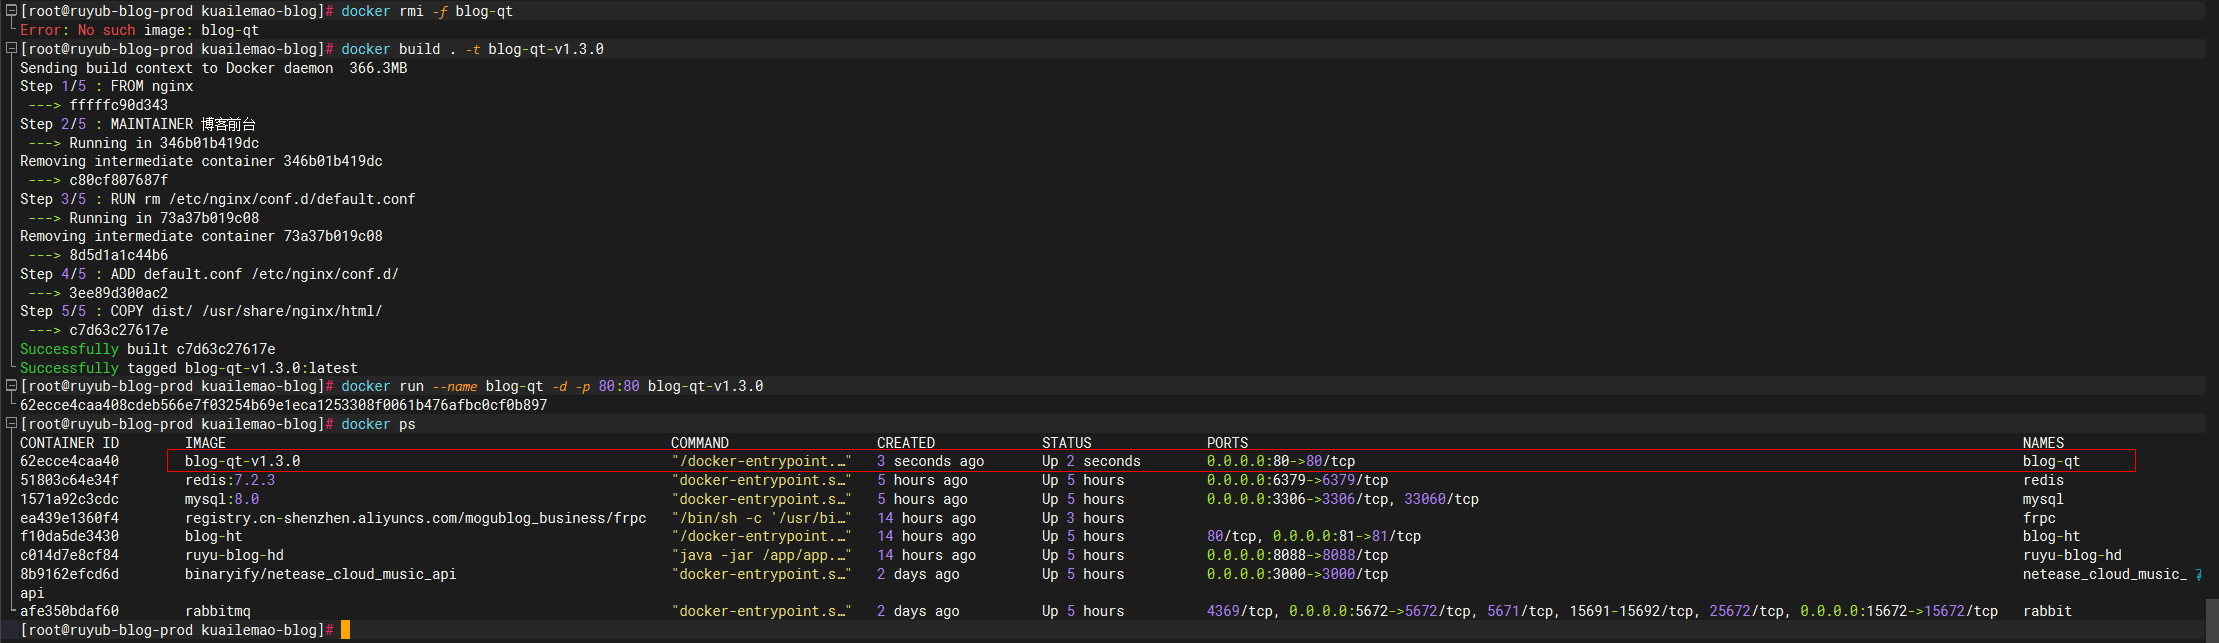
3、验证
完美。
4、那目前哪里是最新的代码?
当然是v1.3.0版本目录了呀:
/root/ruyu-blog-v1.3.0
##拷贝blog-ht 配置代码到新版本
cd /root/ruyu-blog-v1.3.0/blog-frontend/kuailemao-admin
cp  /root/ruyu-blog-v1.2.0/blog-frontend/kuailemao-admin/default.conf .
#输入yes


##拷贝ruyu-blog-hd 配置代码到新版本
cd /root/ruyu-blog-v1.3.0/blog-backend/src/main/resources
cp  /root/ruyu-blog-v1.2.0/blog-backend/src/main/resources/application.yml .
#输入yes
本次只更新了blog-qt代码,其余2个模块代码未更新。
5、备份vm和上传代码到百度网盘
范例:前端前台default文件(已解决)
/root/ruyu-blog-v1.2.0/blog-frontend/kuailemao-blog
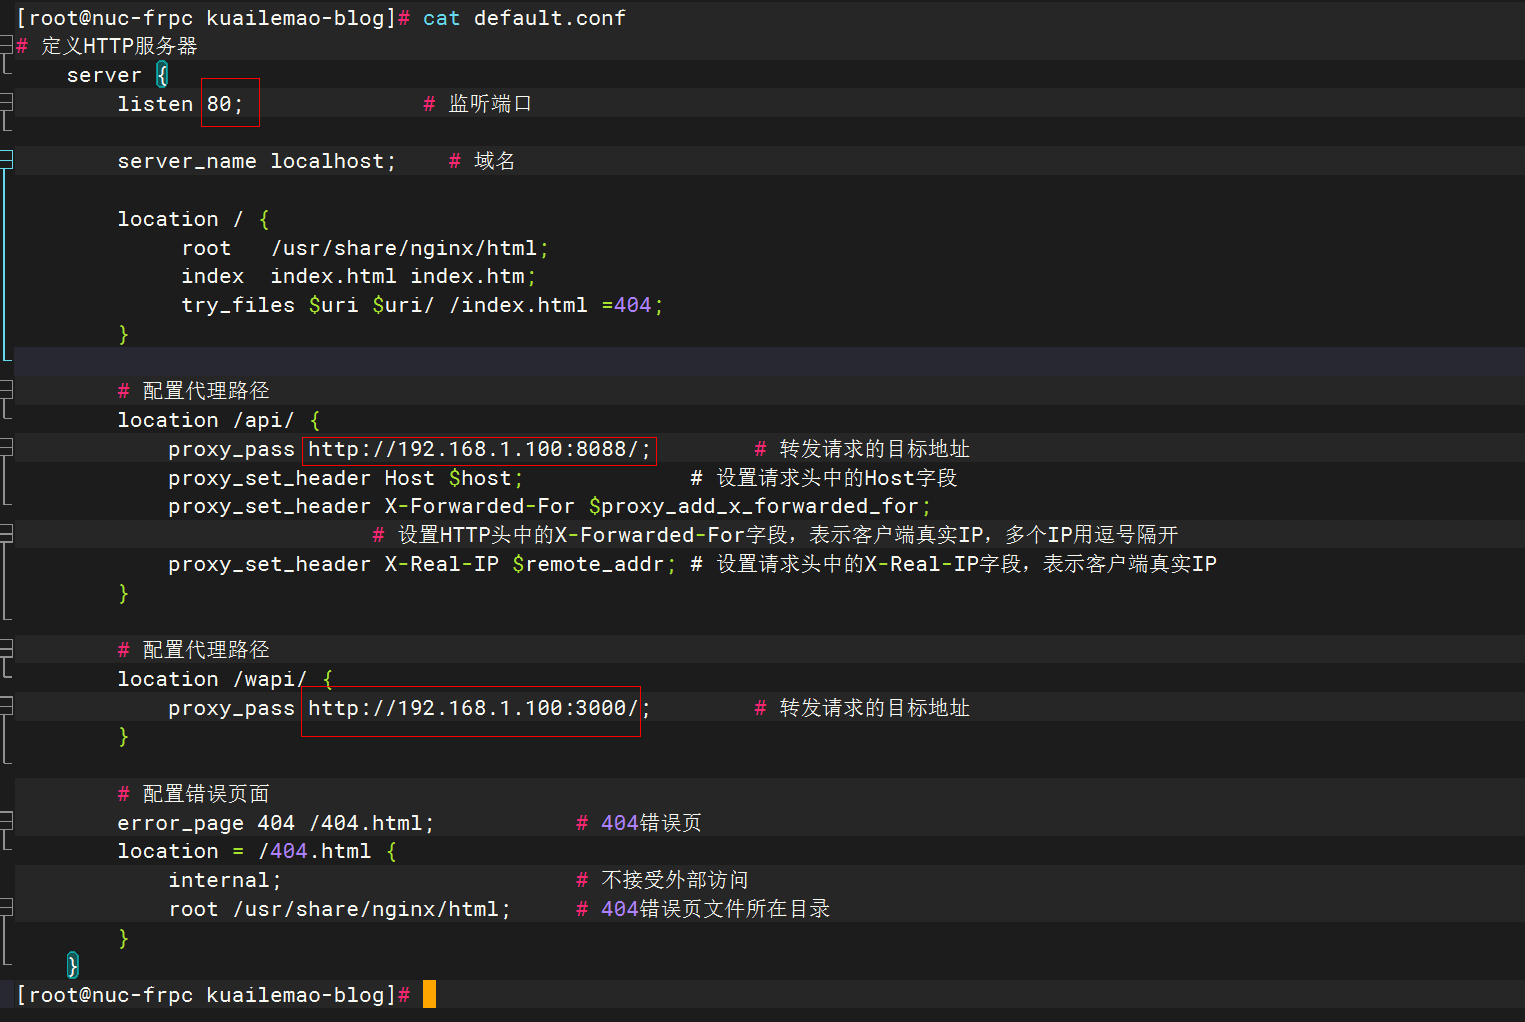
cat default.conf
default.conf文件内容:
后端指向自己服务器时(博客是没有数据的)
# 定义HTTP服务器
    server {
        listen 80;              # 监听端口

        server_name localhost;    # 域名

        location / {
             root   /usr/share/nginx/html;
             index  index.html index.htm;
             try_files $uri $uri/ /index.html =404;
        }

        # 配置代理路径
        location /api/ {
            proxy_pass http://192.168.1.100:8088/;        # 转发请求的目标地址
            proxy_set_header Host $host;             # 设置请求头中的Host字段
            proxy_set_header X-Forwarded-For $proxy_add_x_forwarded_for;
                            # 设置HTTP头中的X-Forwarded-For字段,表示客户端真实IP,多个IP用逗号隔开
            proxy_set_header X-Real-IP $remote_addr; # 设置请求头中的X-Real-IP字段,表示客户端真实IP
        }

        # 配置代理路径
        location /wapi/ {
            proxy_pass http://192.168.1.100:3000/;        # 转发请求的目标地址
        }

        # 配置错误页面
        error_page 404 /404.html;           # 404错误页
        location = /404.html {
            internal;                       # 不接受外部访问
            root /usr/share/nginx/html;     # 404错误页文件所在目录
        }
    }
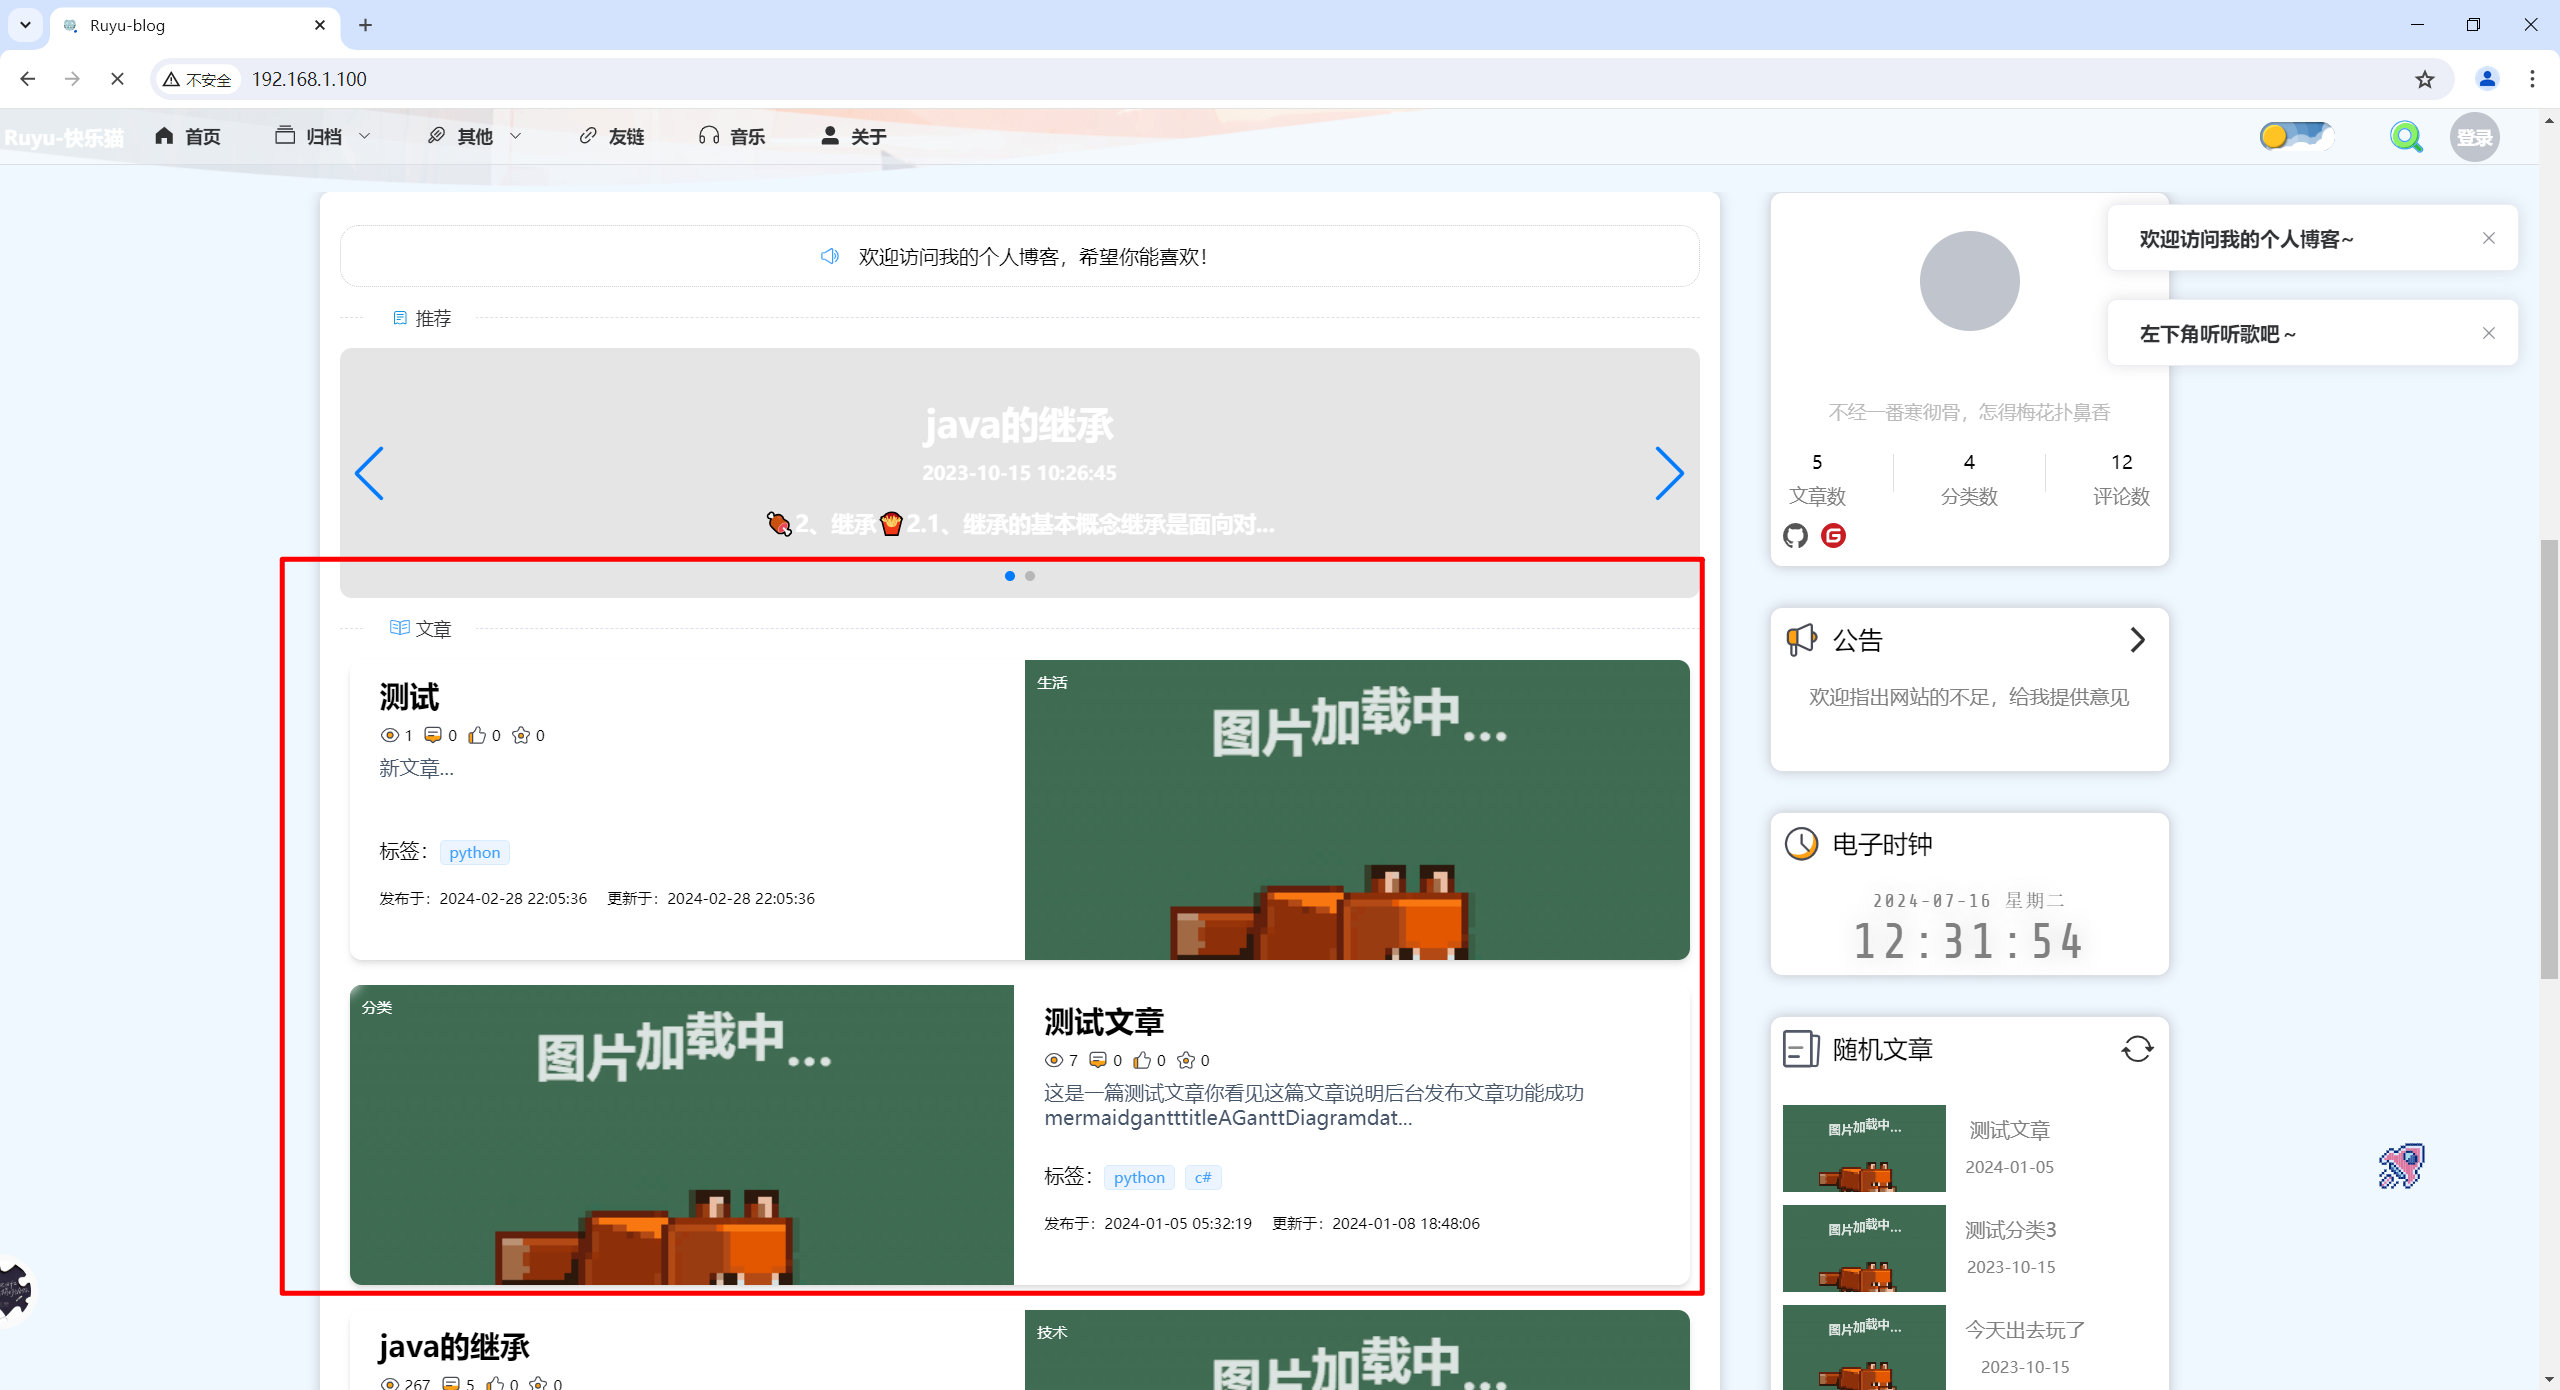
docker容器:80-->80

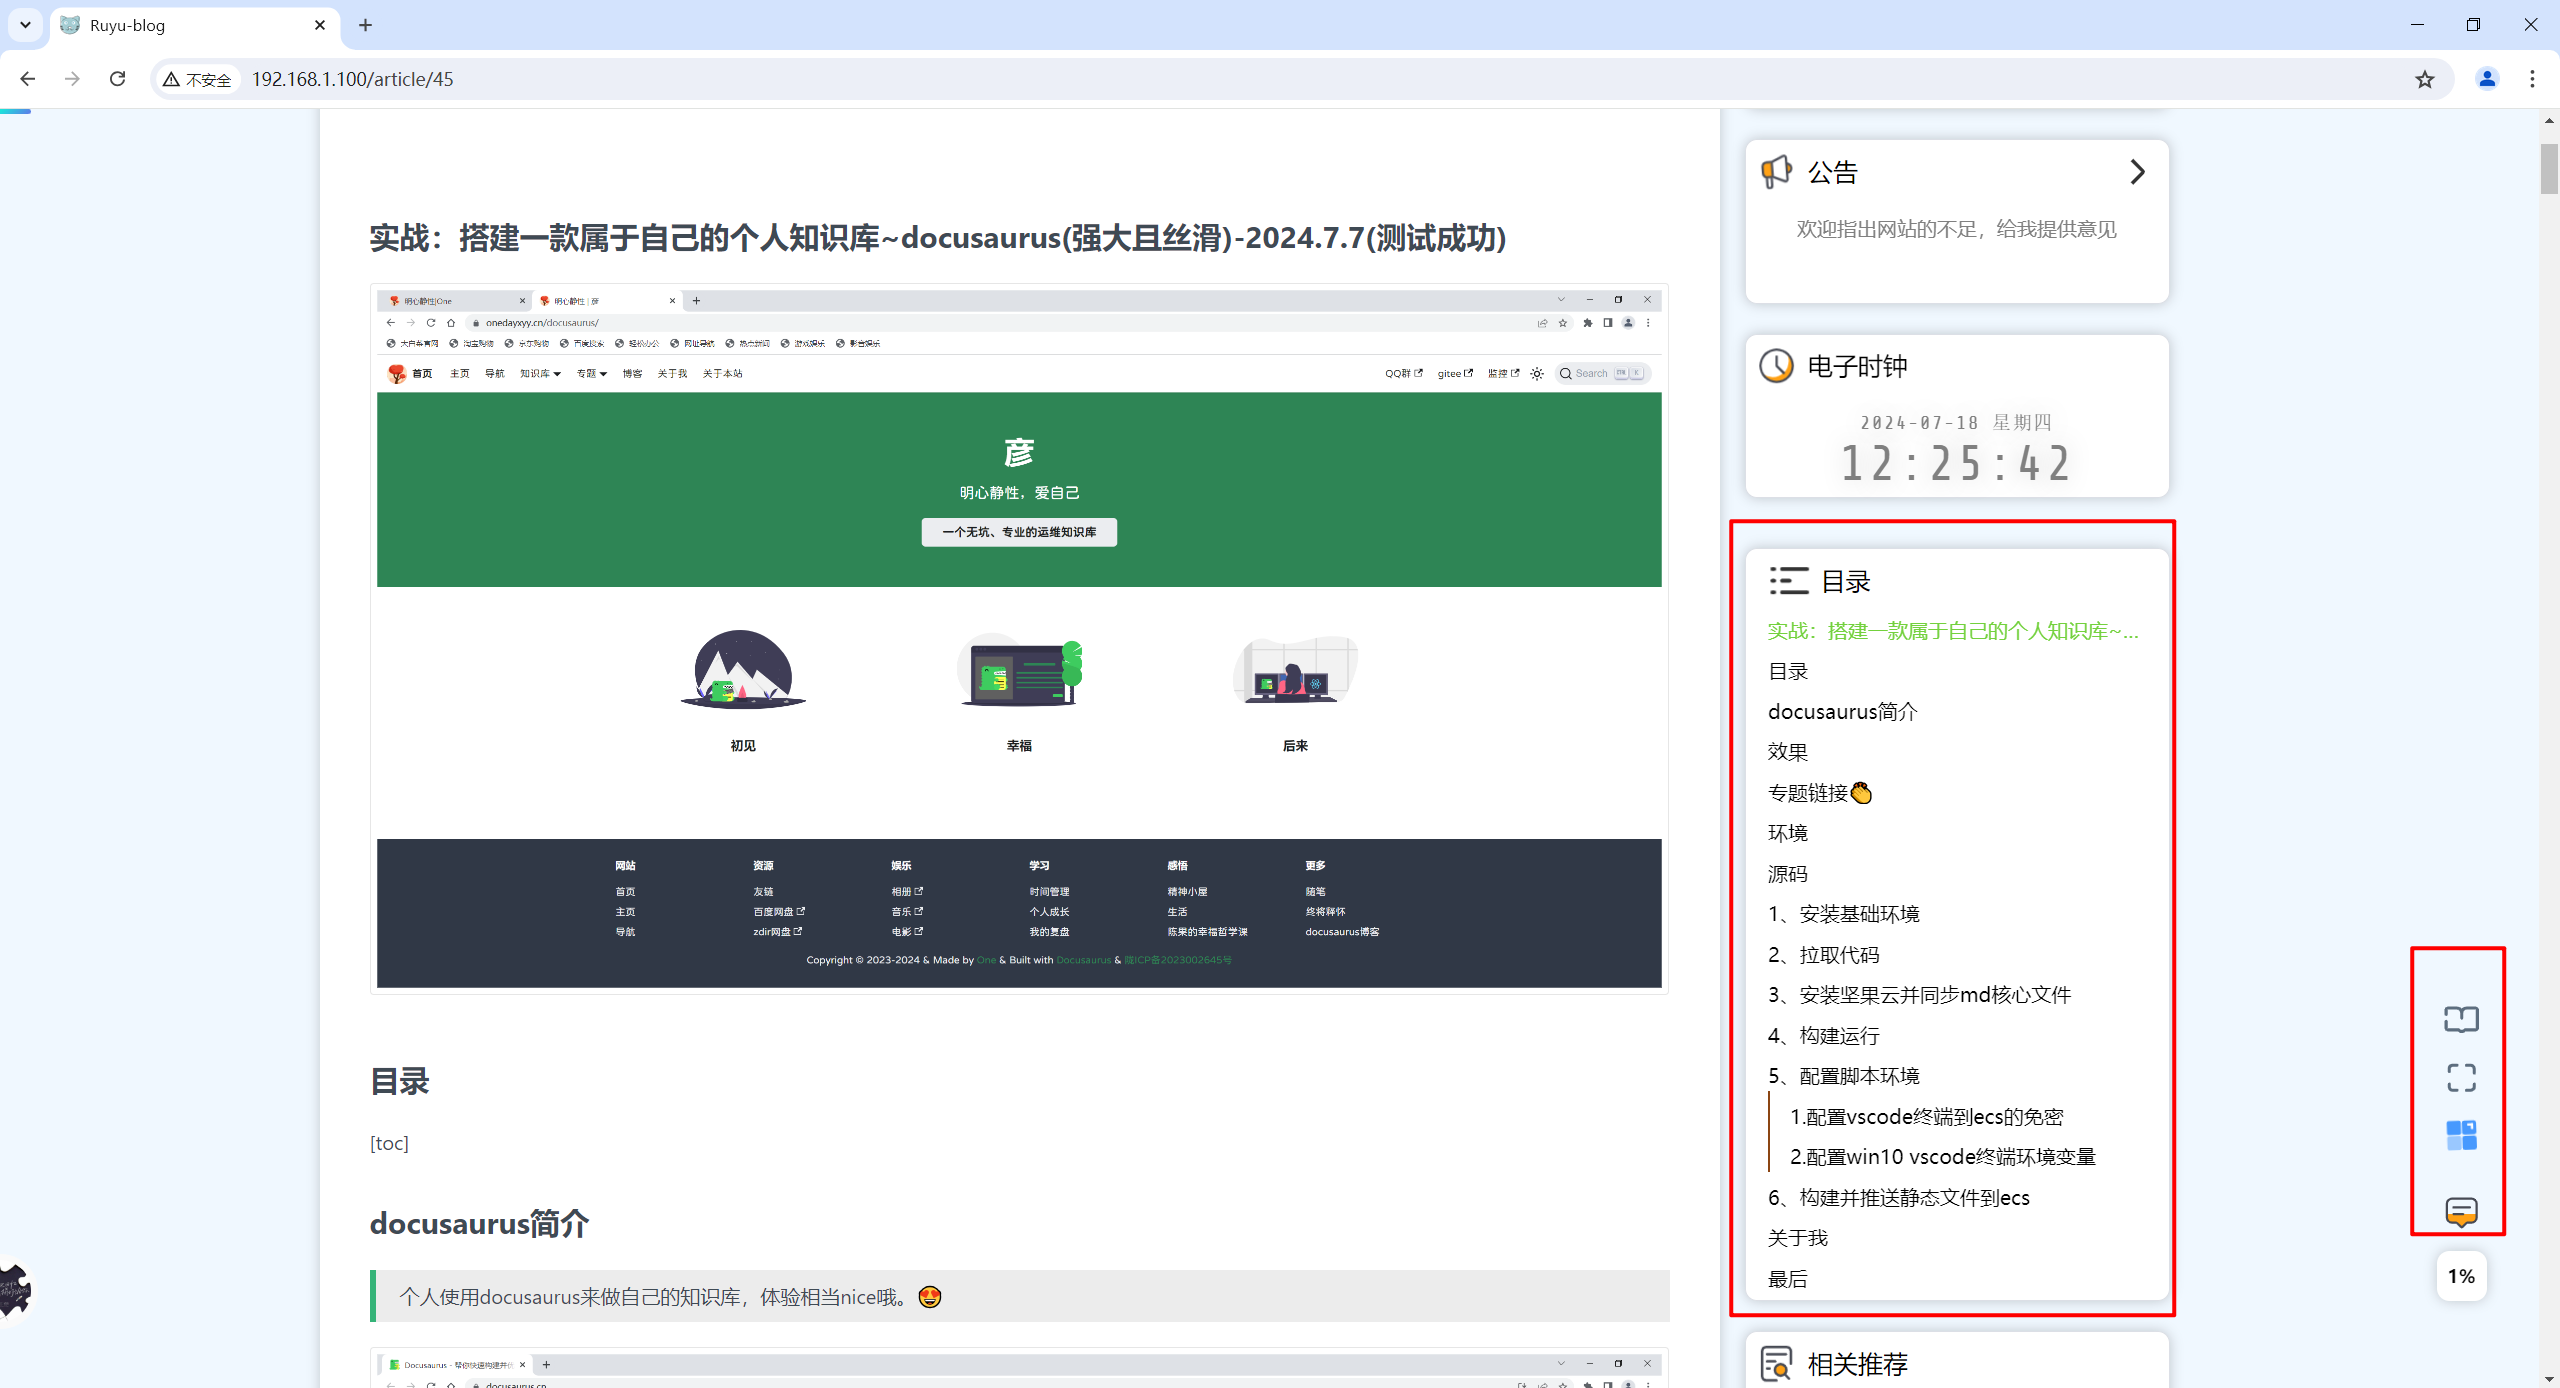
访问效果:(博客是没有数据的)
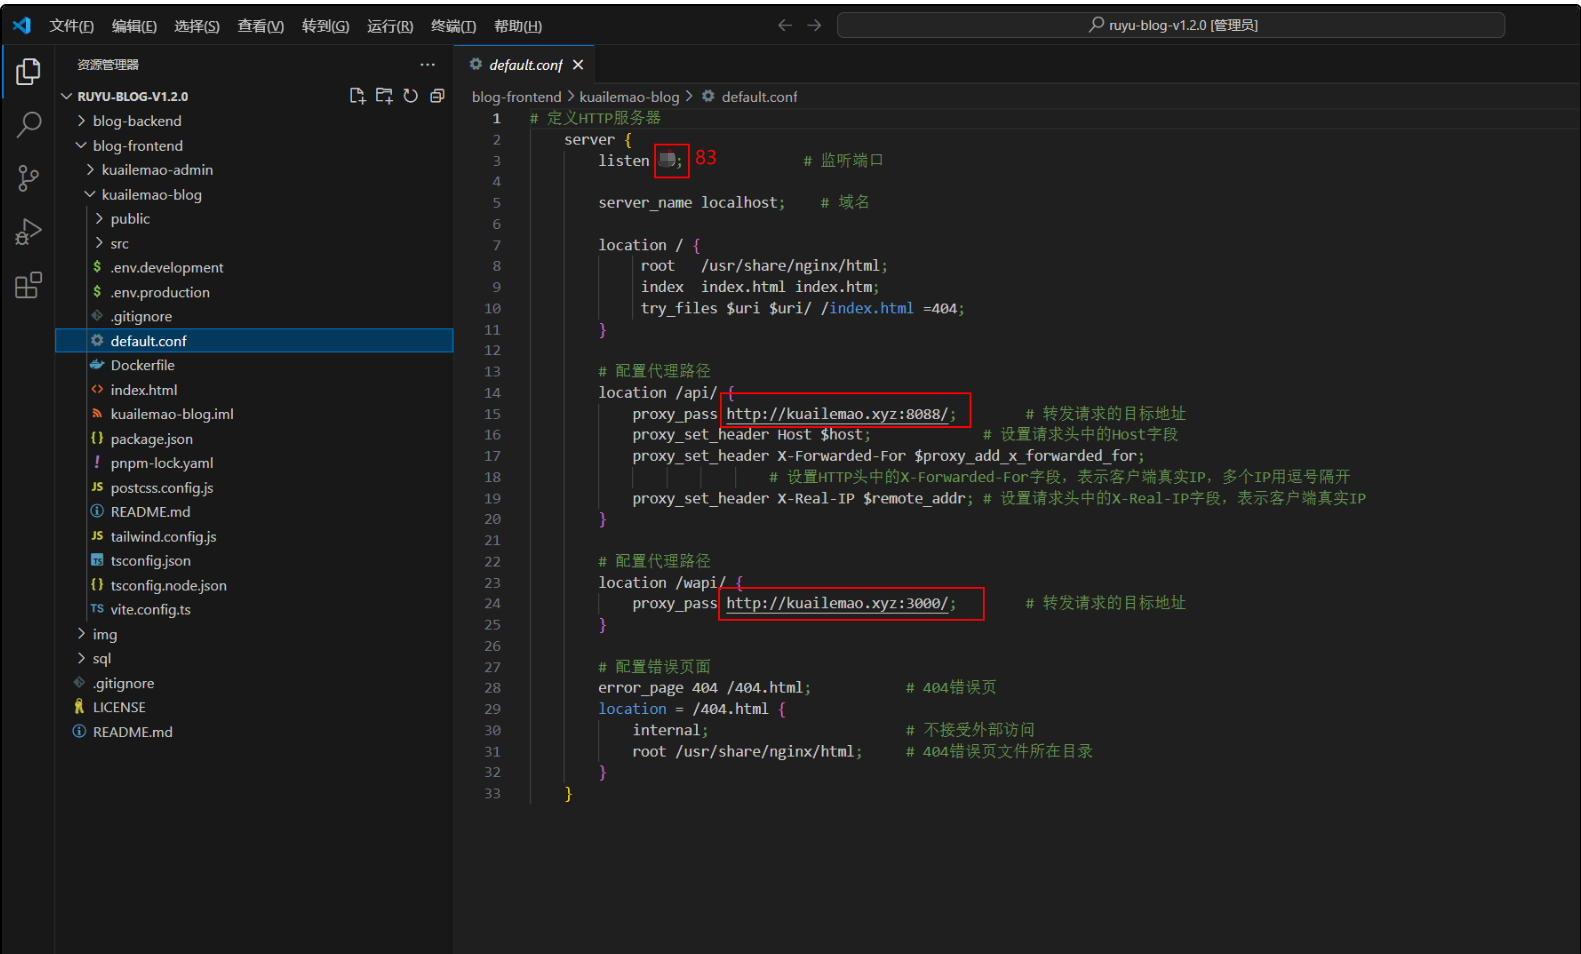
后端指向源作者服务器时(博客是有数据的)
# 定义HTTP服务器
    server {
        listen 83;              # 监听端口

        server_name localhost;    # 域名

        location / {
             root   /usr/share/nginx/html;
             index  index.html index.htm;
             try_files $uri $uri/ /index.html =404;
        }

        # 配置代理路径
        location /api/ {
            proxy_pass http://kuailemao.xyz:8088/;        # 转发请求的目标地址
            proxy_set_header Host $host;             # 设置请求头中的Host字段
            proxy_set_header X-Forwarded-For $proxy_add_x_forwarded_for;
                            # 设置HTTP头中的X-Forwarded-For字段,表示客户端真实IP,多个IP用逗号隔开
            proxy_set_header X-Real-IP $remote_addr; # 设置请求头中的X-Real-IP字段,表示客户端真实IP
        }

        # 配置代理路径
        location /wapi/ {
            proxy_pass http://kuailemao.xyz:3000/;        # 转发请求的目标地址
        }

        # 配置错误页面
        error_page 404 /404.html;           # 404错误页
        location = /404.html {
            internal;                       # 不接受外部访问
            root /usr/share/nginx/html;     # 404错误页文件所在目录
        }
    }
- 构建镜像并启动容器
cd /root/ruyu-blog-v1.2.0/blog-frontend/kuailemao-blog
docker build . -t blog-qt-83
docker run --name blog-qt-83 -d -p 83:83 blog-qt-83
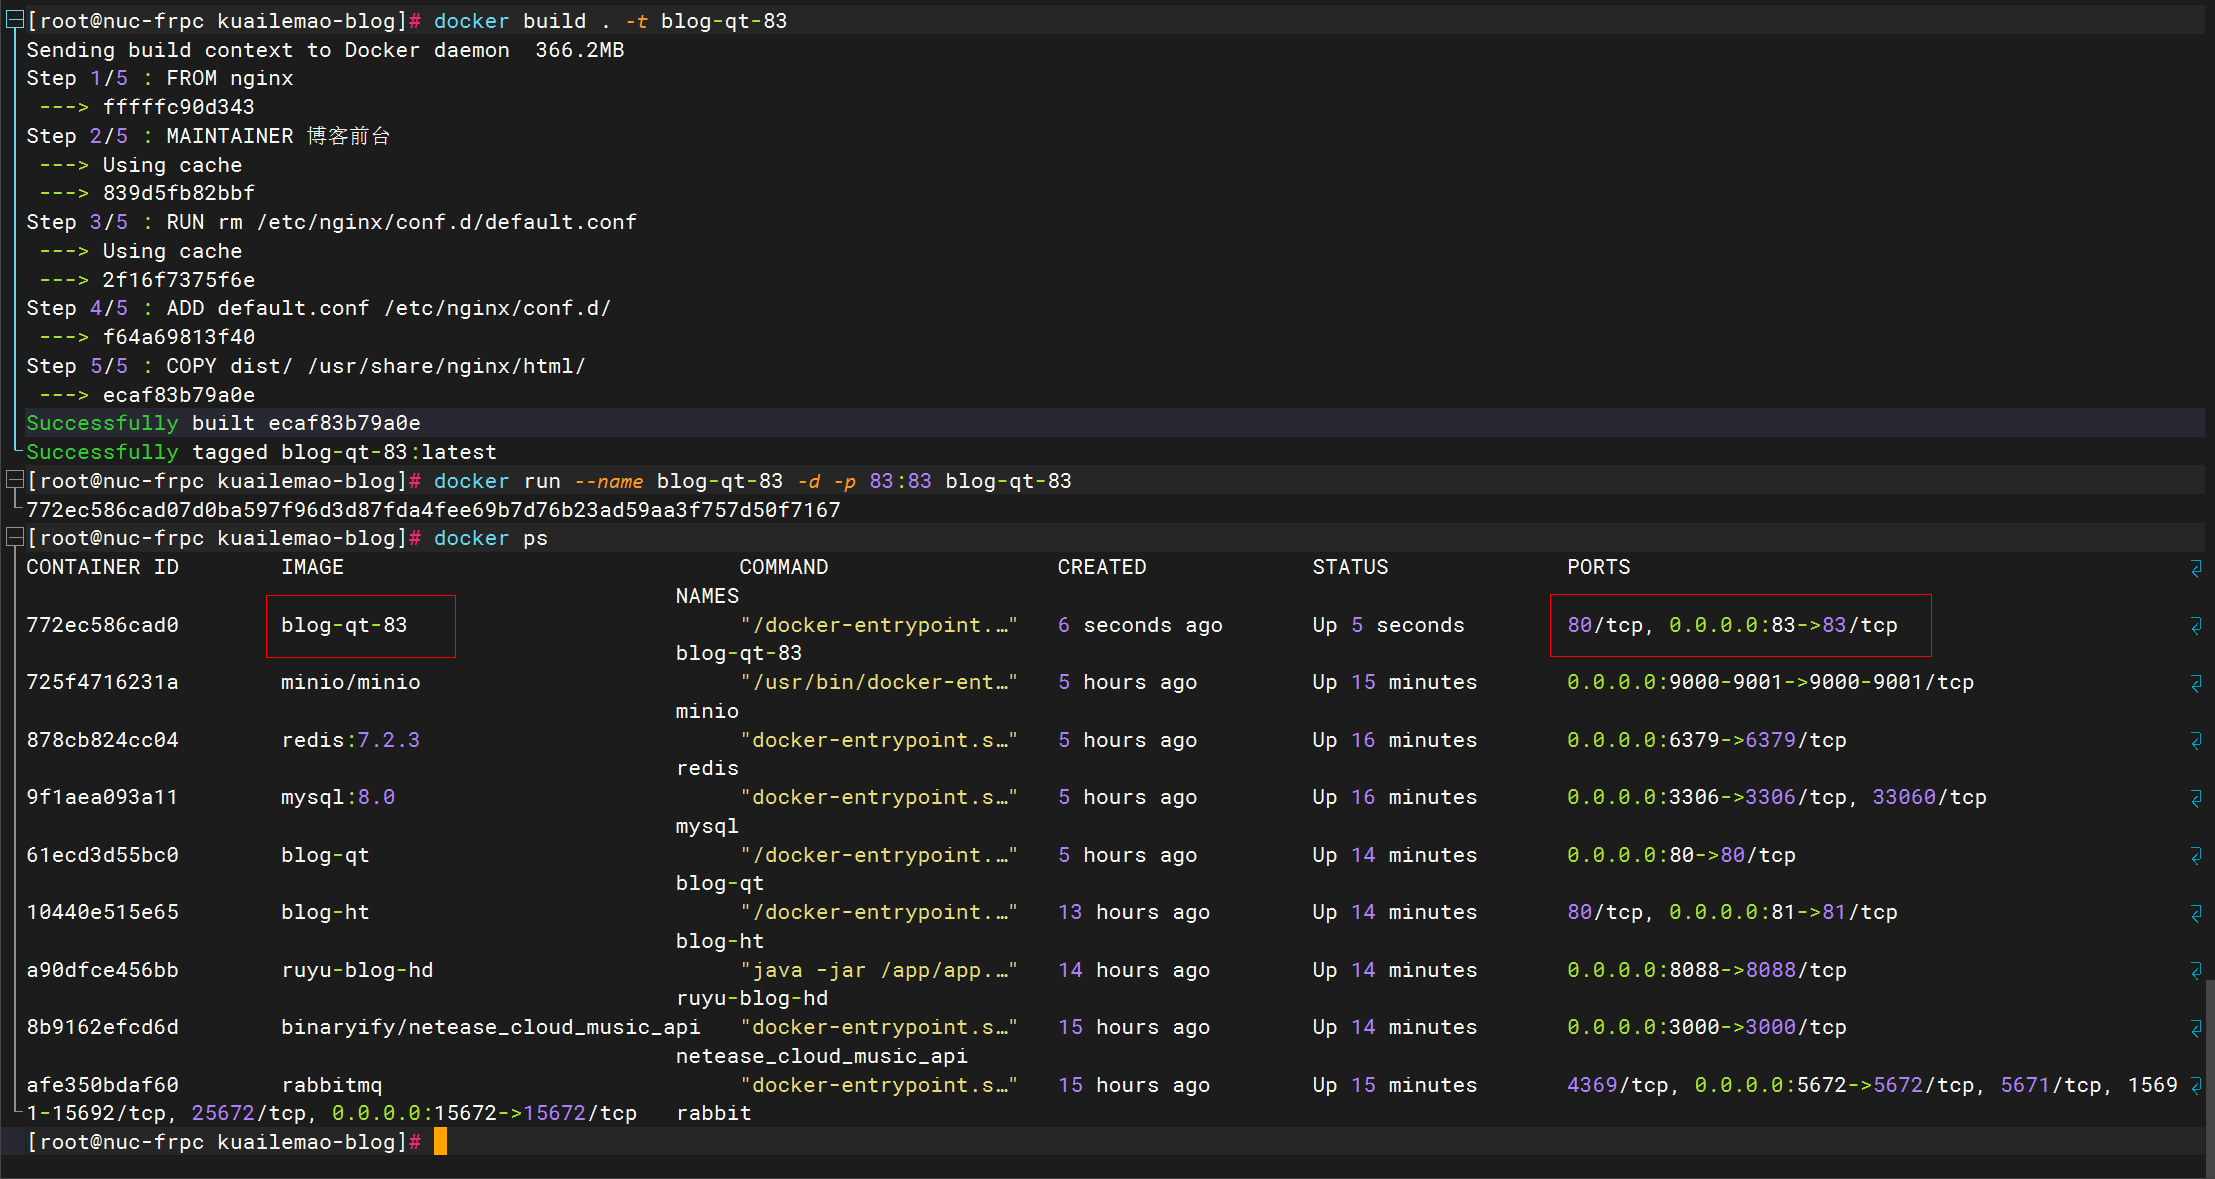
docker容器:83-->83
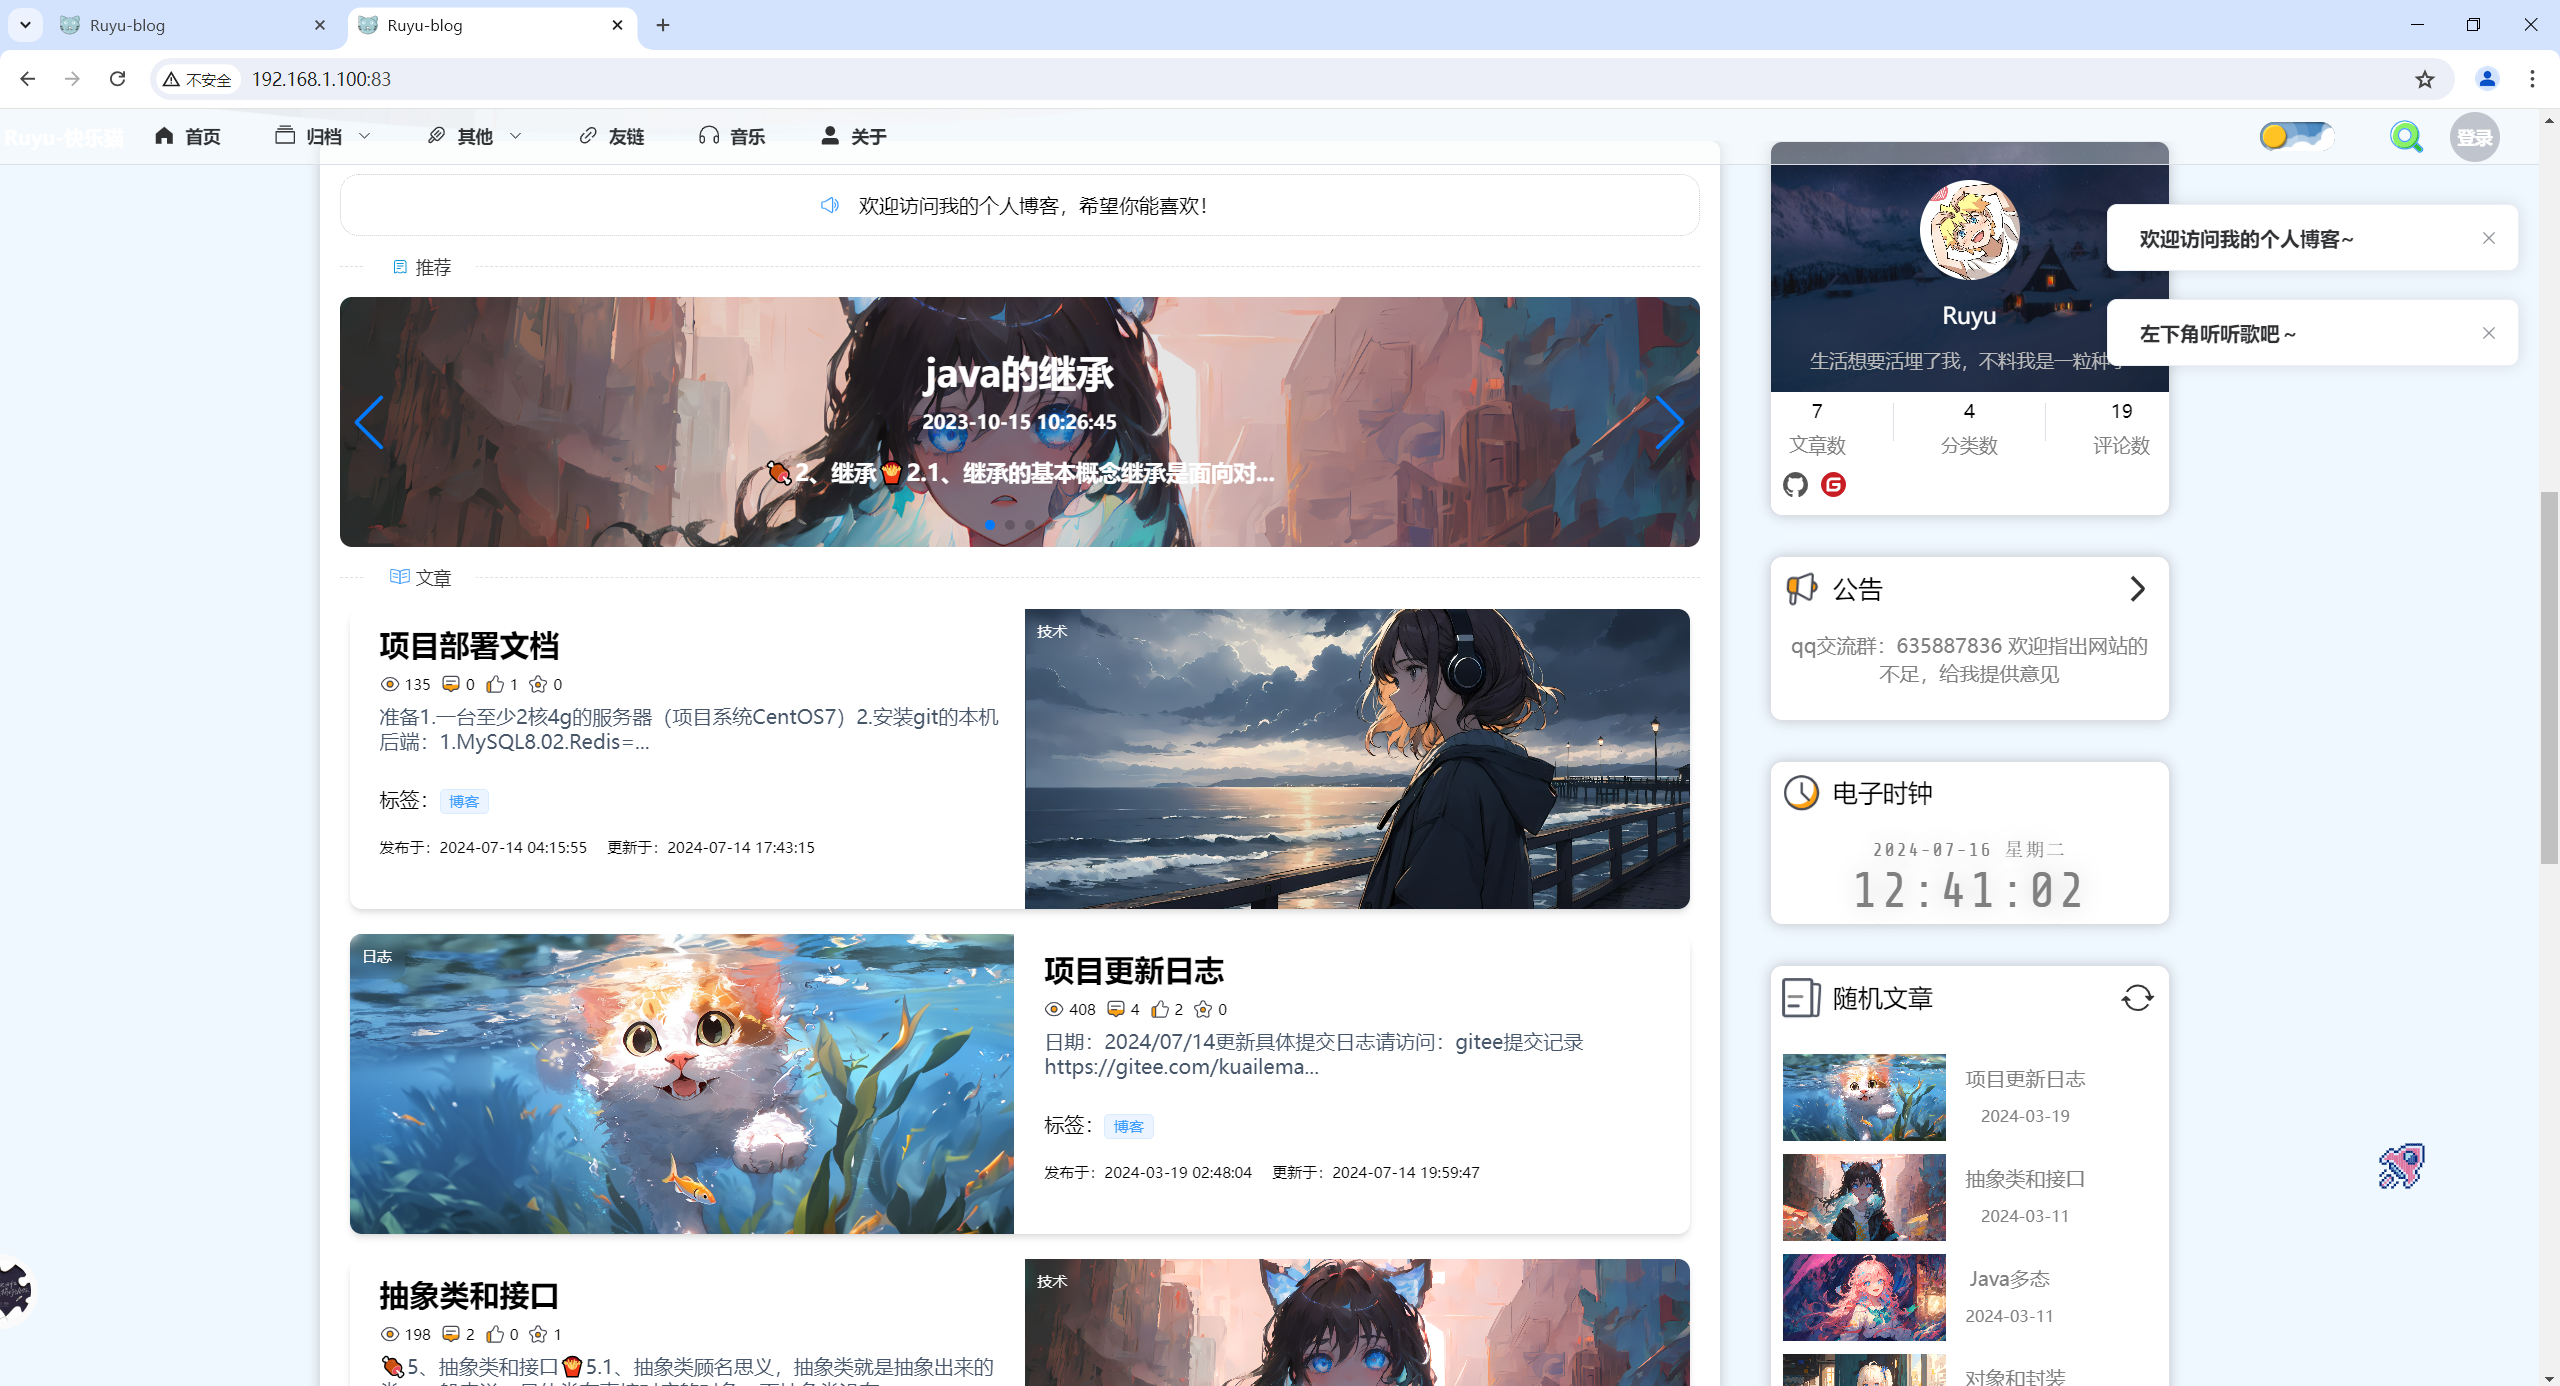
- 访问效果:(博客是有数据的)
范例:如何更改网页标签的logo?-2024.7.21(已解决)
1.需求
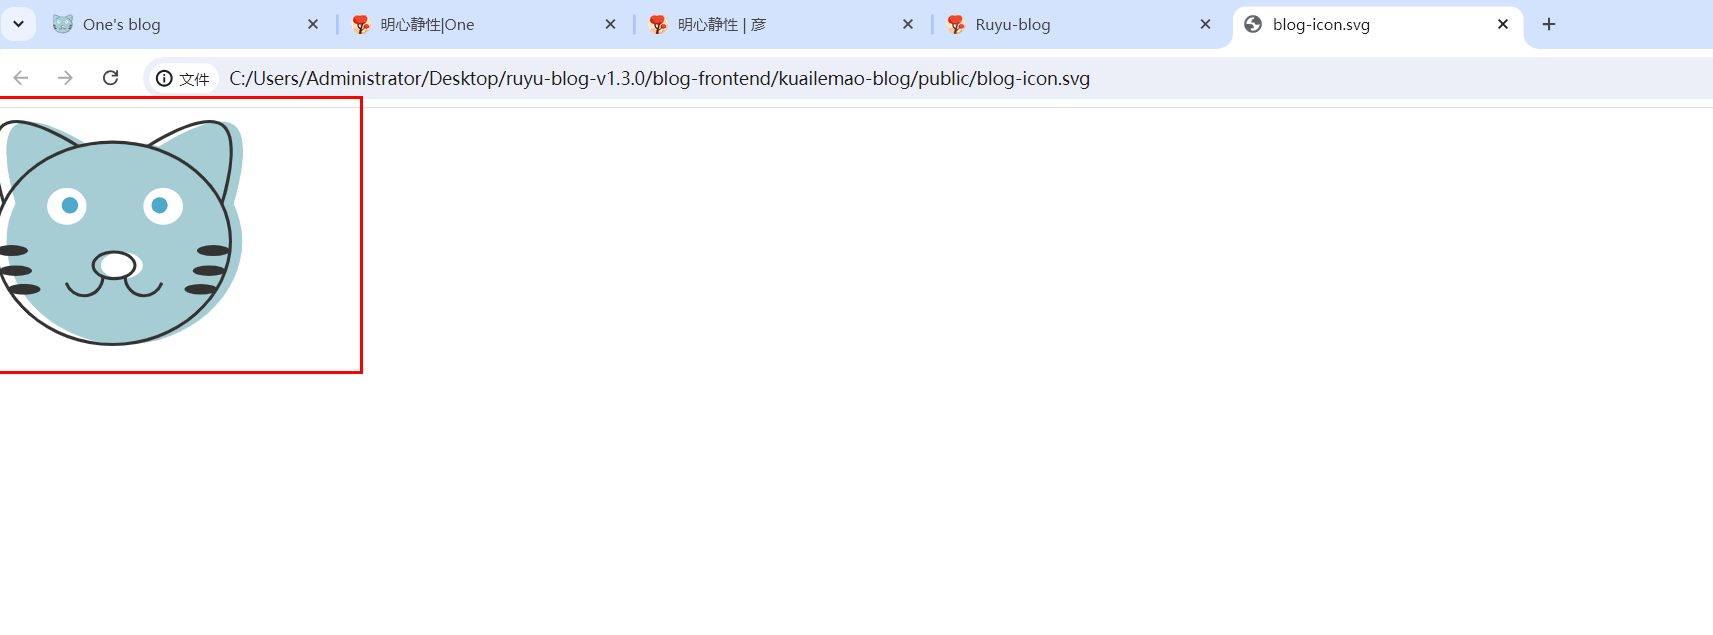
如何更改网页标签的logo?
当前默认的网页标签logo为原作者提供的logo:
我想更改为自己的logo,该怎么办呢?
2.方法
来到前端前台目录:

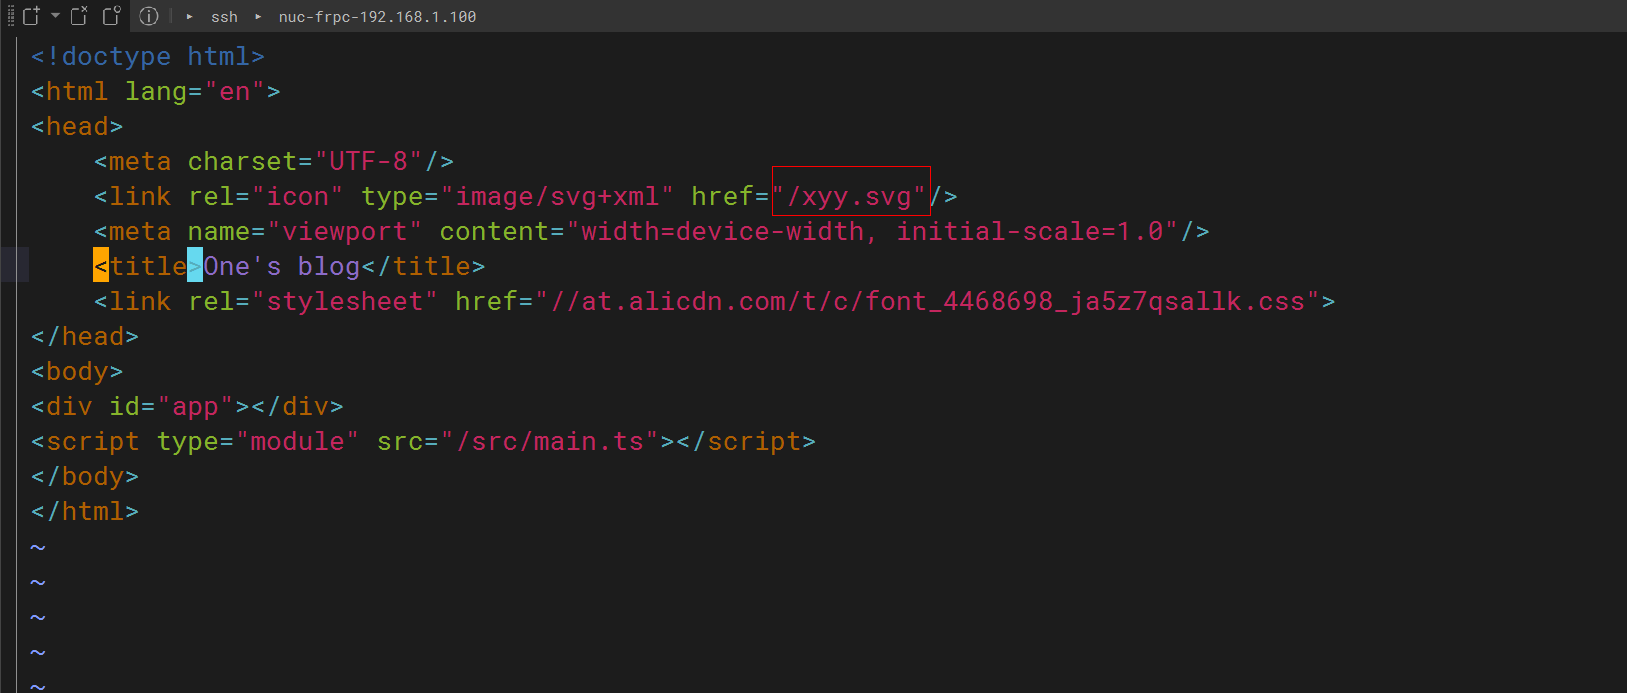
看下index.html文件:
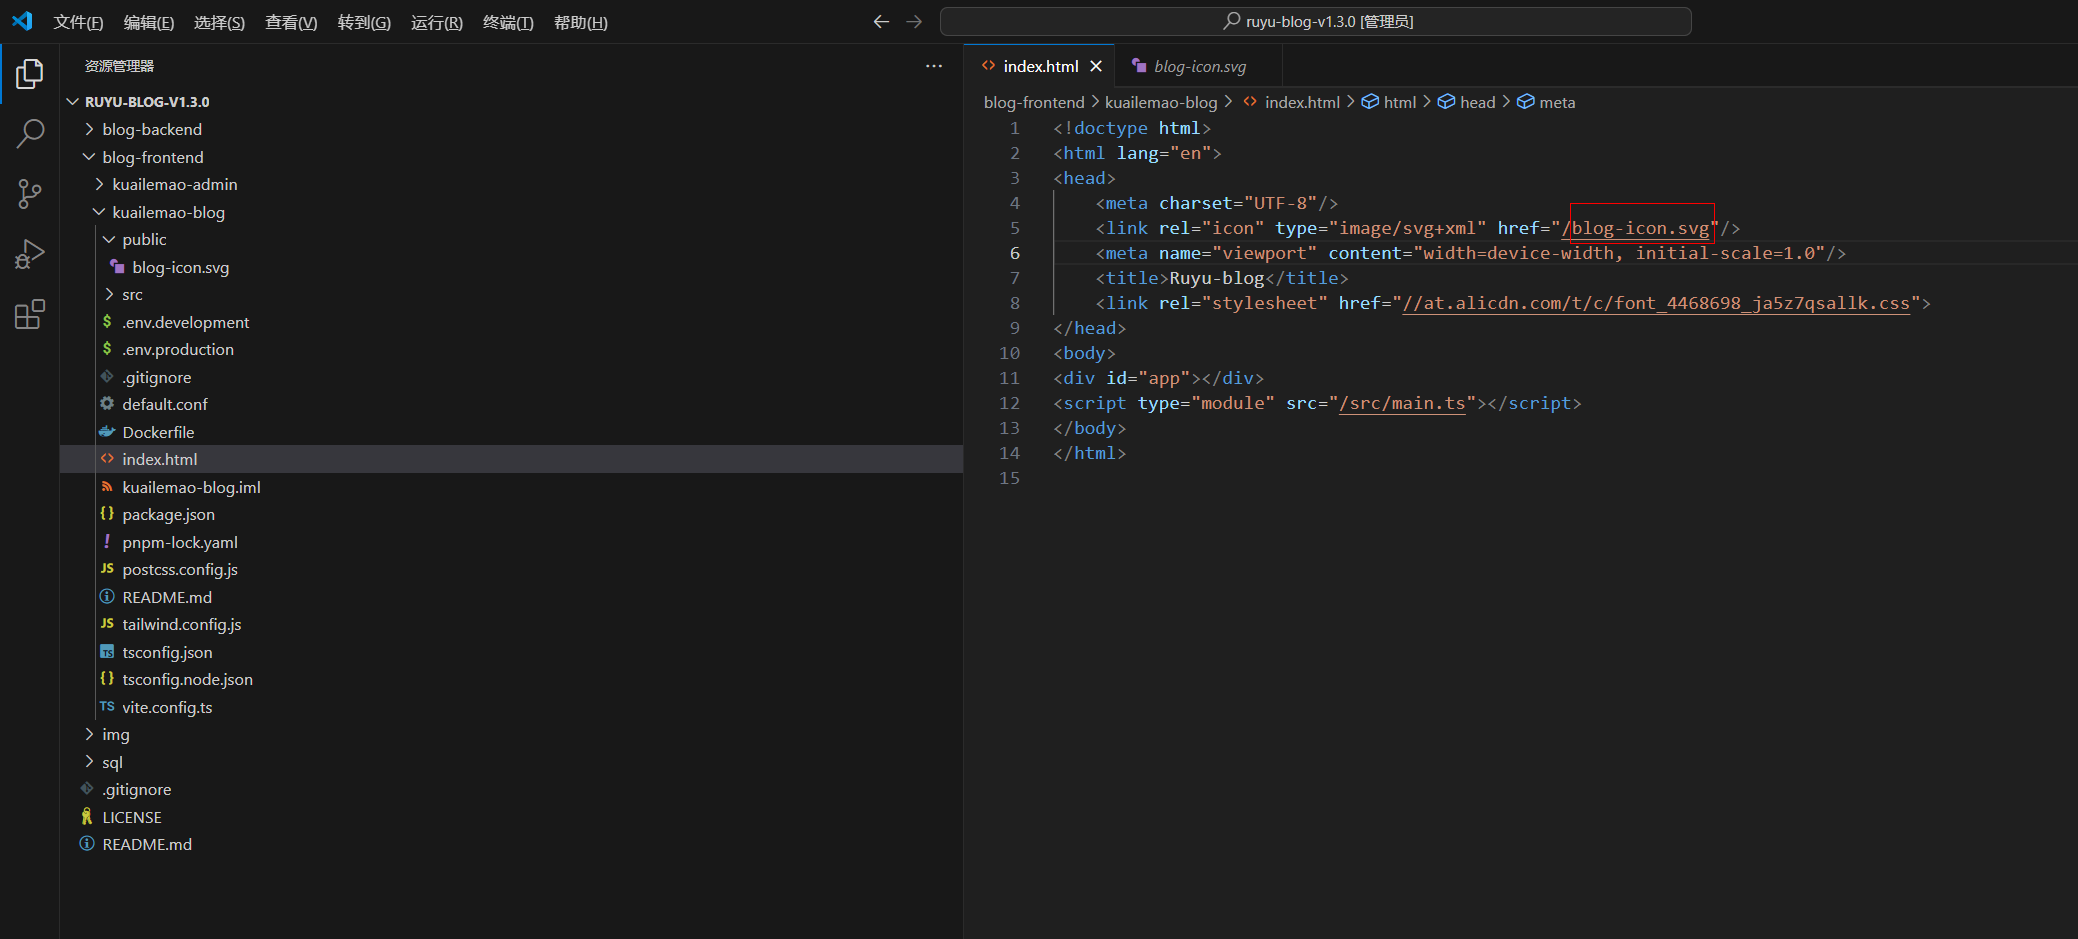
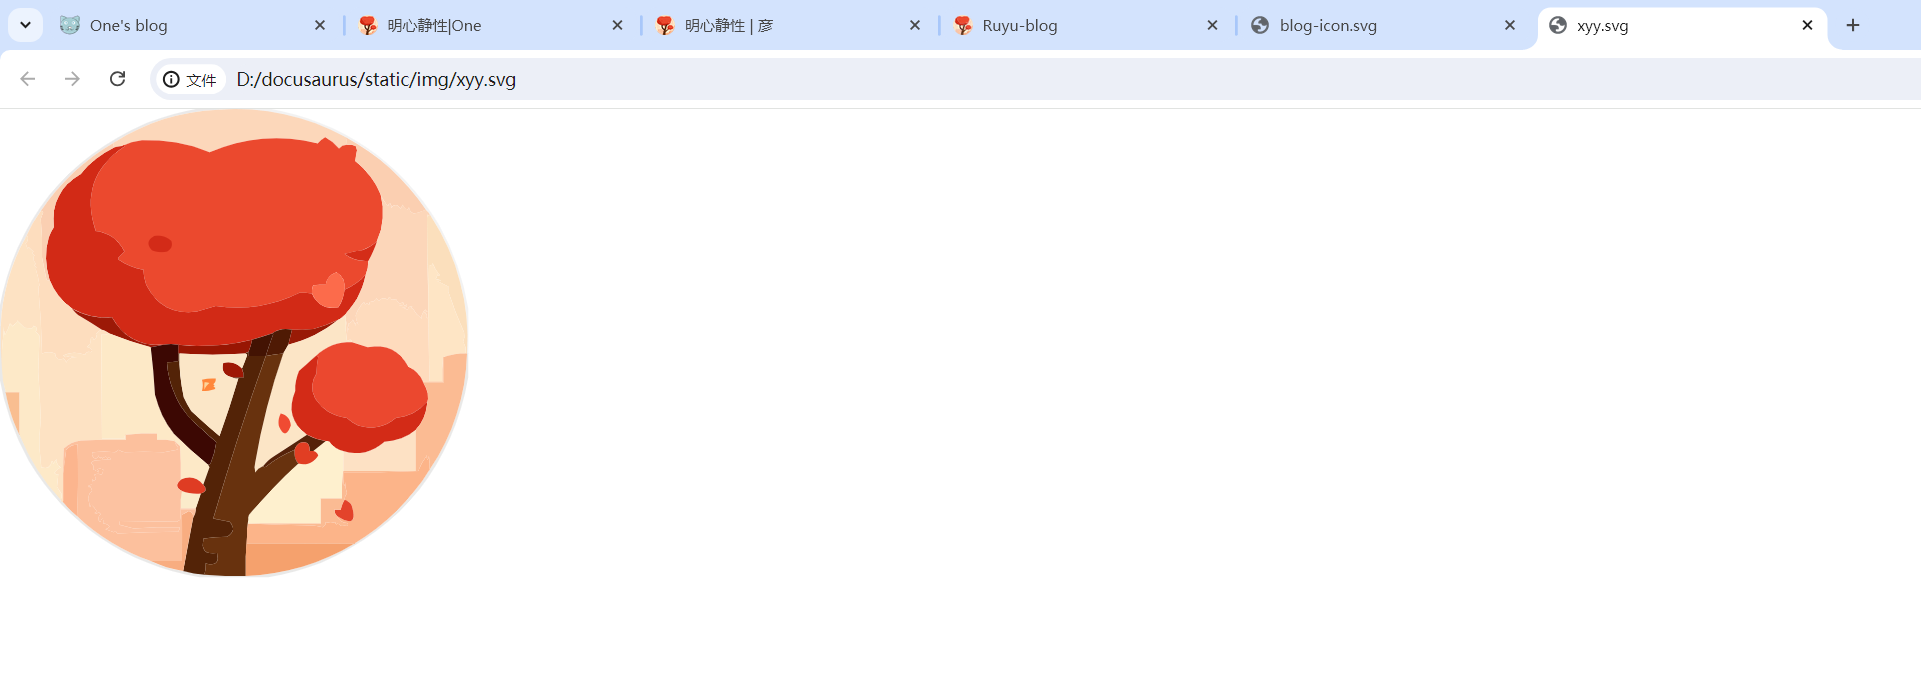
看下public目录下有一个blog-icon.svg文件,我们双击打开:
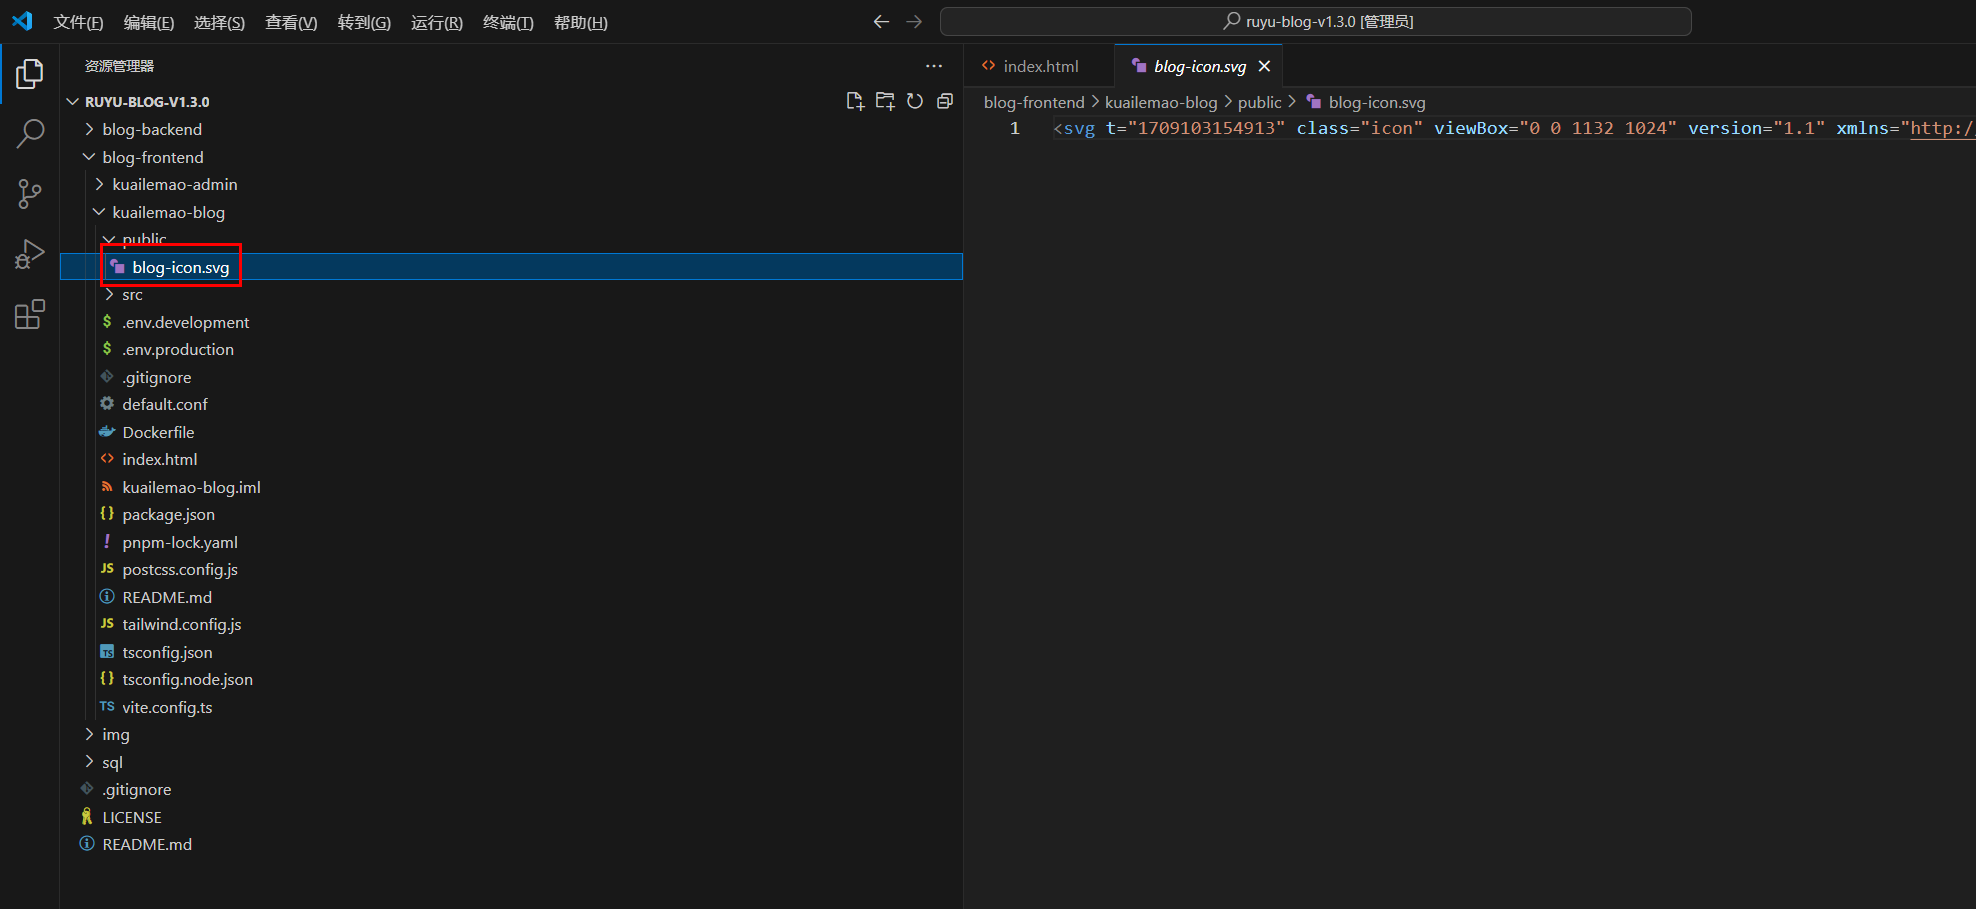
可以看到,这个就是默认网页标签的logo:
那么我们将其替换为自己的图片后,这个需求应该就解决了:
上传自己的logo图片到public目录:

修改index.html里的内容:
vim index.html
然后,运行服务:
cd /root/ruyu-blog/blog-frontend/kuailemao-blog
pnpm run dev
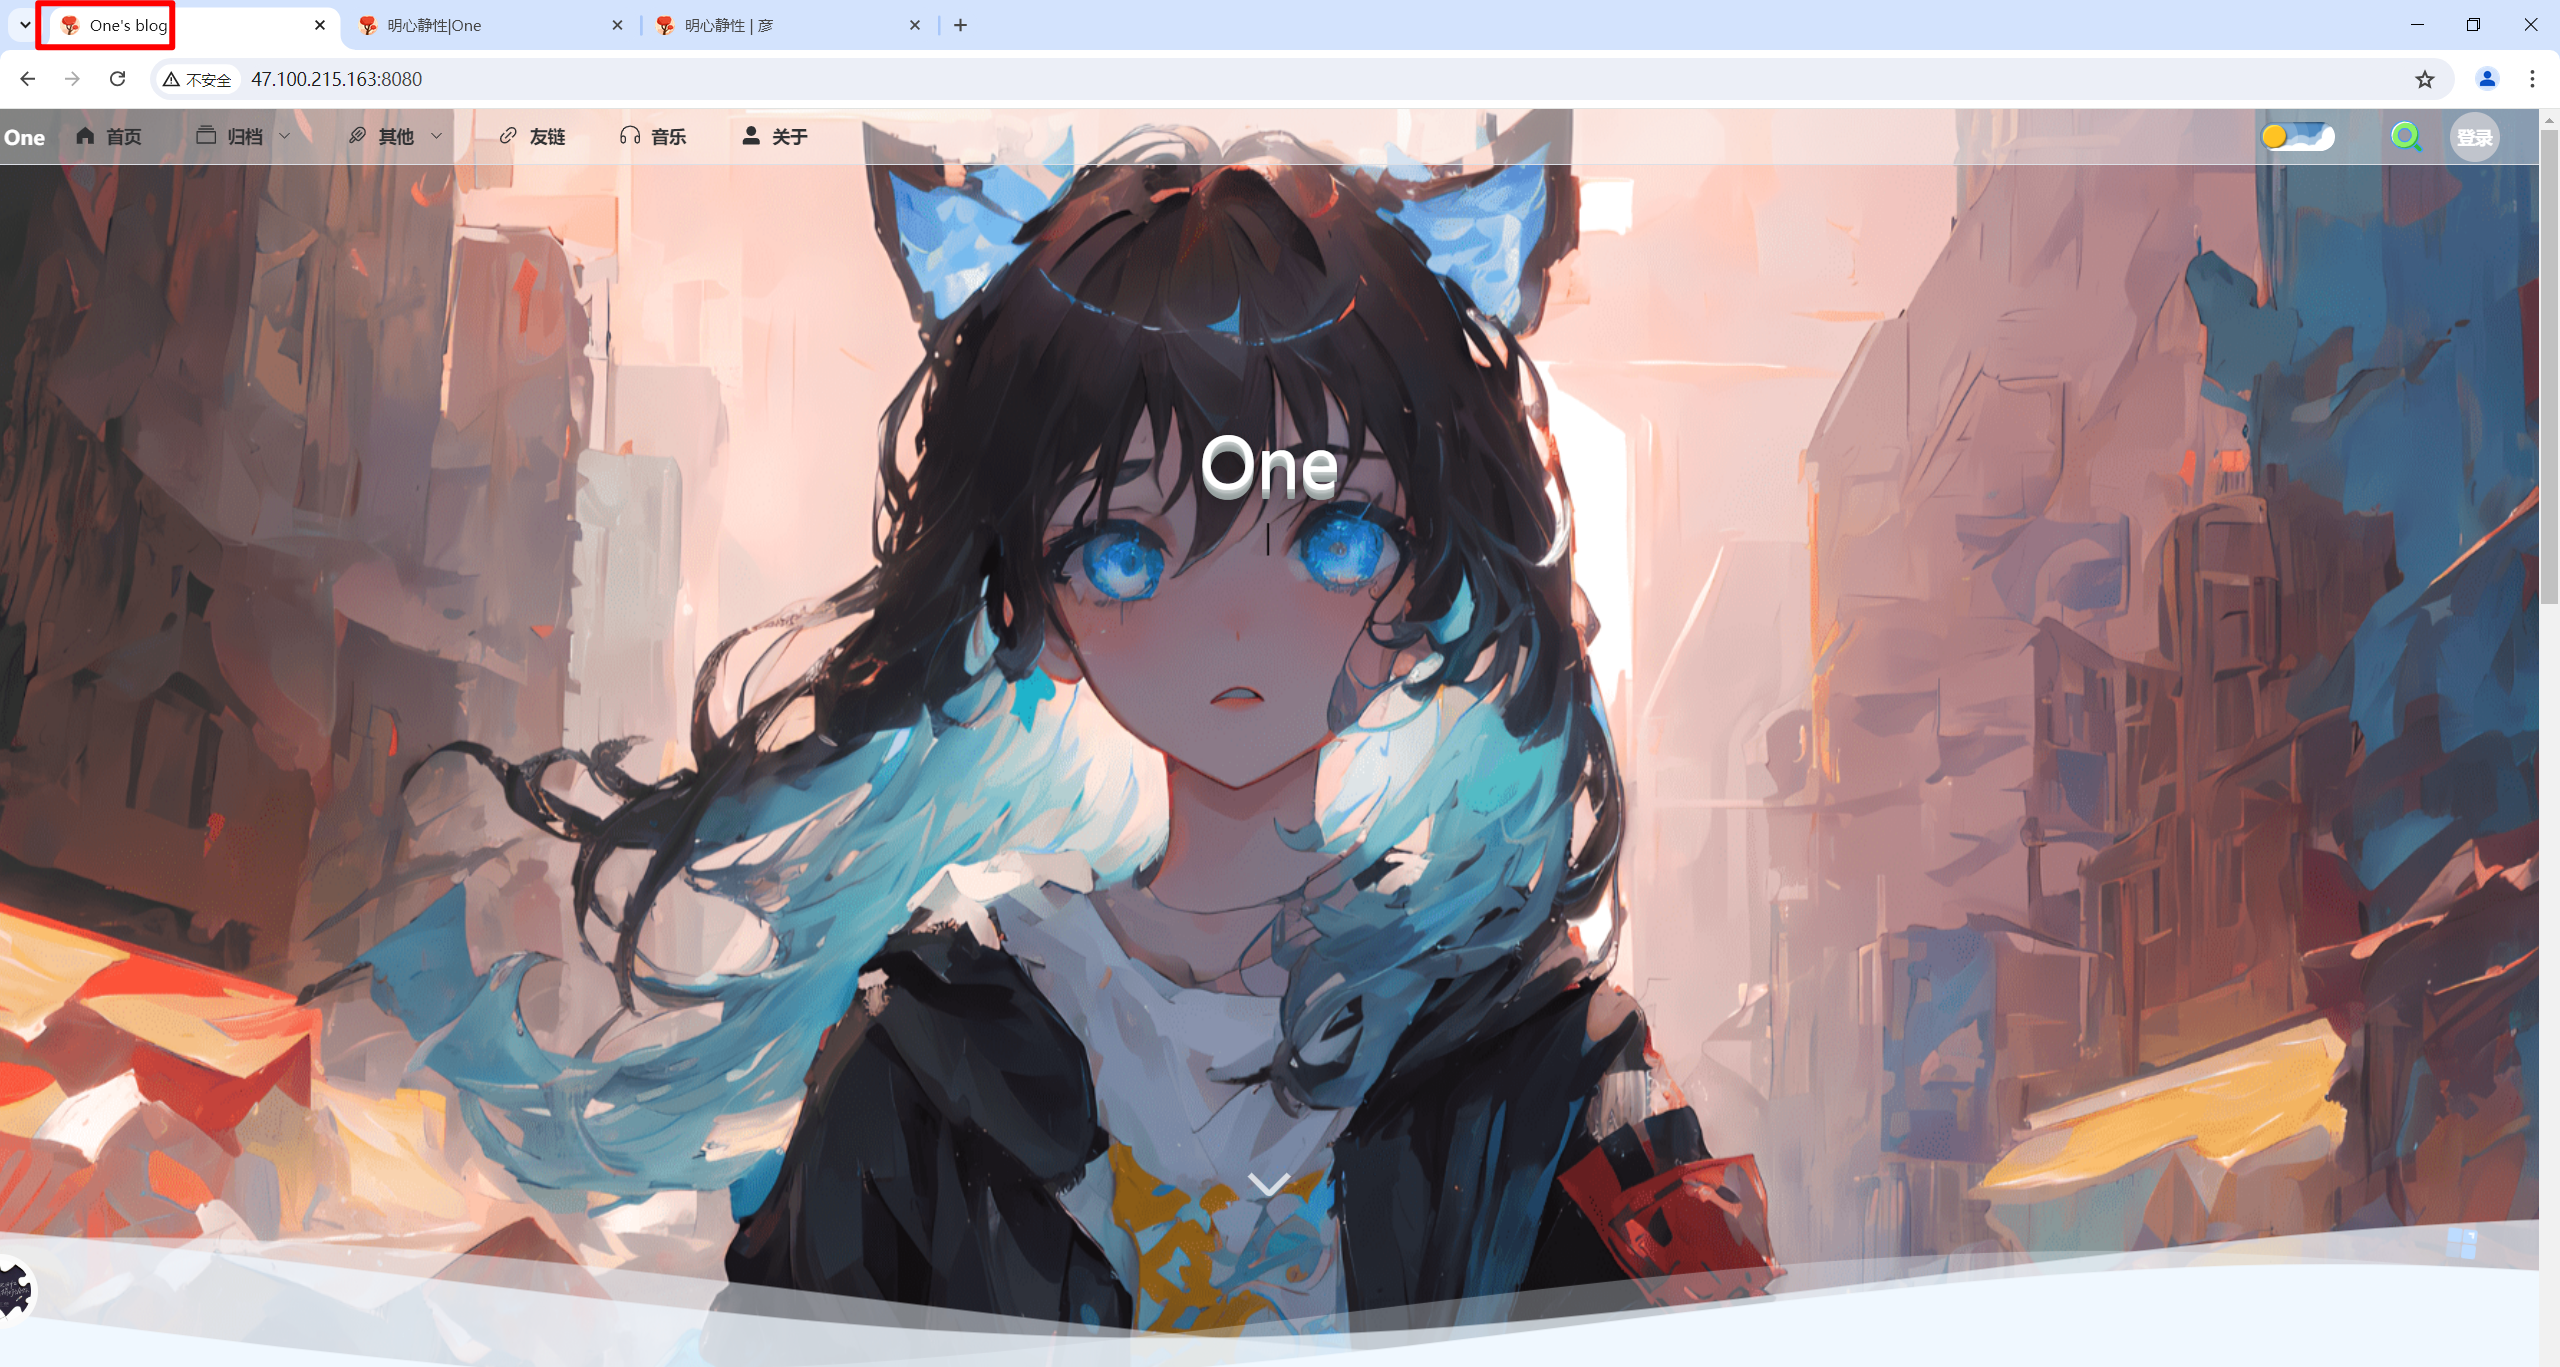
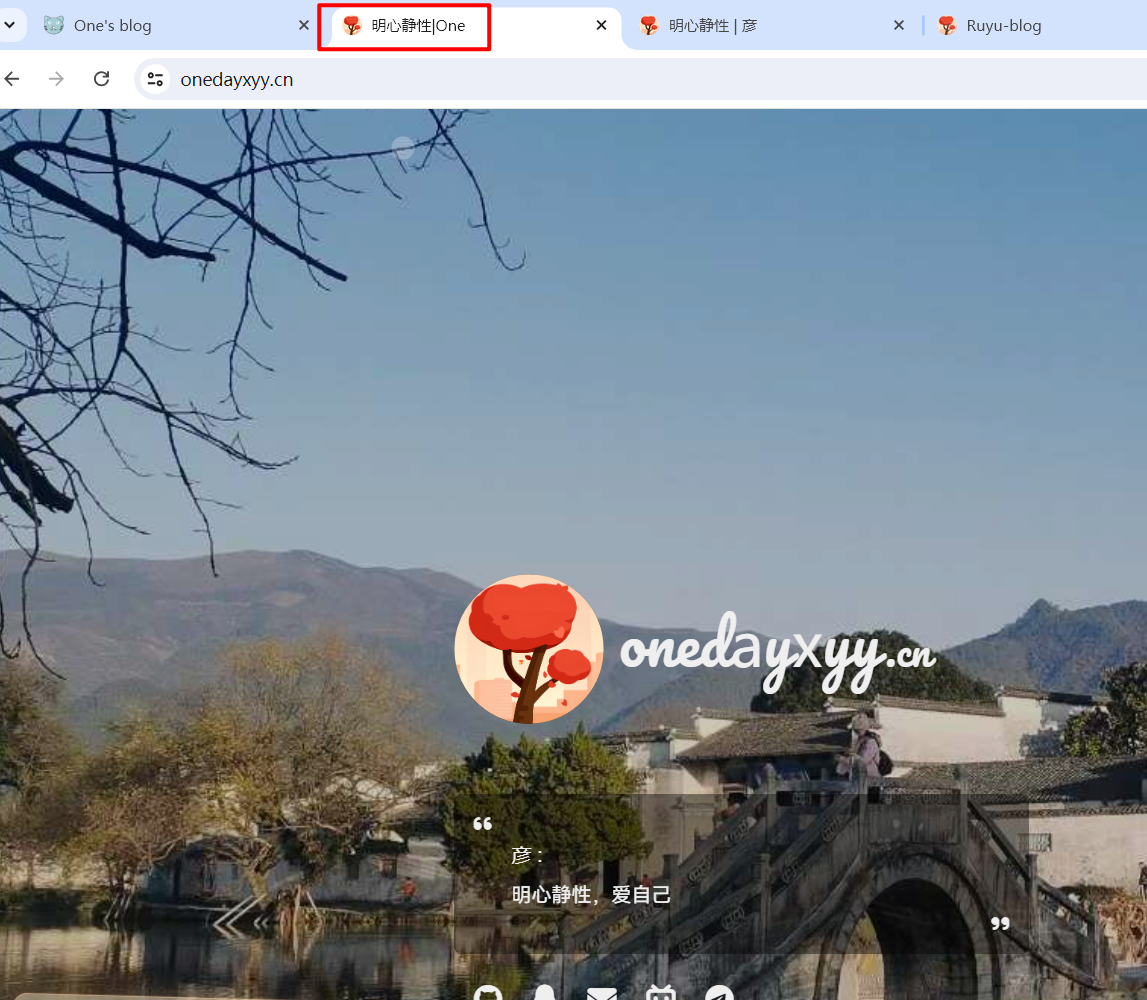
3.验证
可以看到,此时网页标签变成我们自己的logo了,完美:
然后把这个前端重新打包成新的镜像:
#重新构建dist
cd /root/ruyu-blog/blog-frontend/kuailemao-blog/
rm -rf dist
pnpm install
pnpm build

#删除老容器和老镜像
docker rm -f blog-qt
docker rmi -f blog-qt-v1.3.0-v3-2024.7.21

#构建新镜像和启动新容器
docker build . -t blog-qt-v1.3.0-v3-2024.7.21
docker run --name blog-qt -d -p 80:80 blog-qt-v1.3.0-v3-2024.7.21
##

验证:(完美)😘
范例:如何更改博客首页壁纸切换时间及个数?-2024.7.22(已解决)
1.提出需求
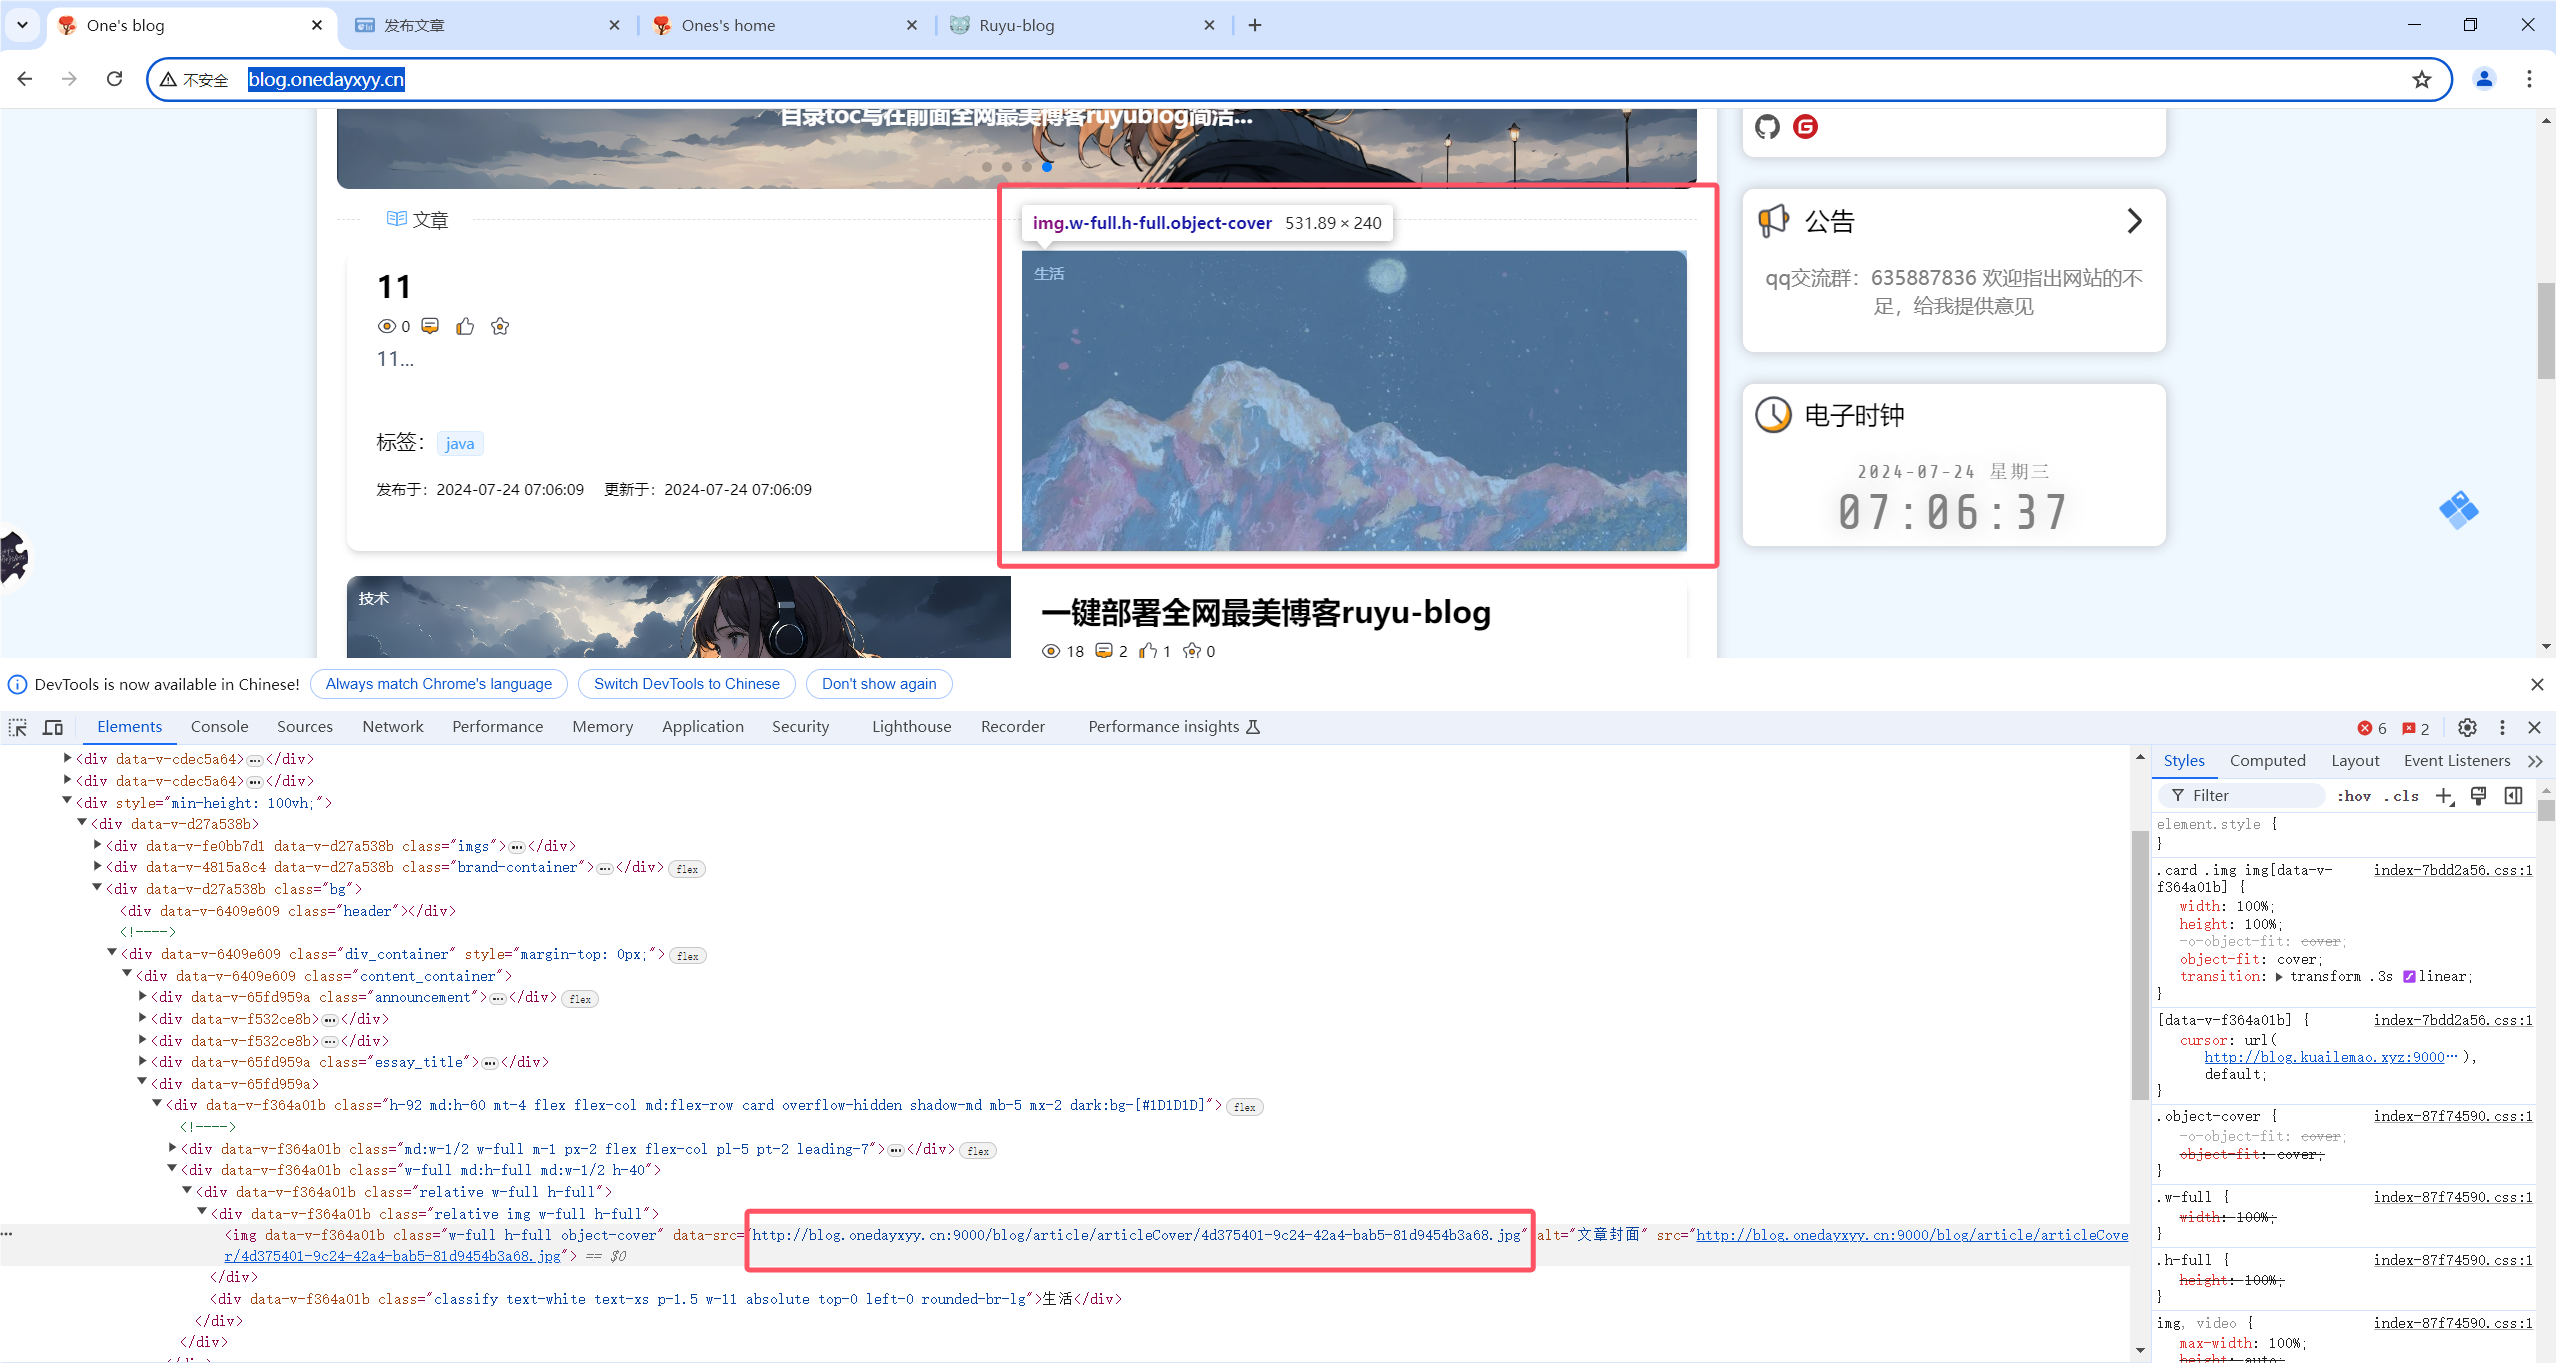
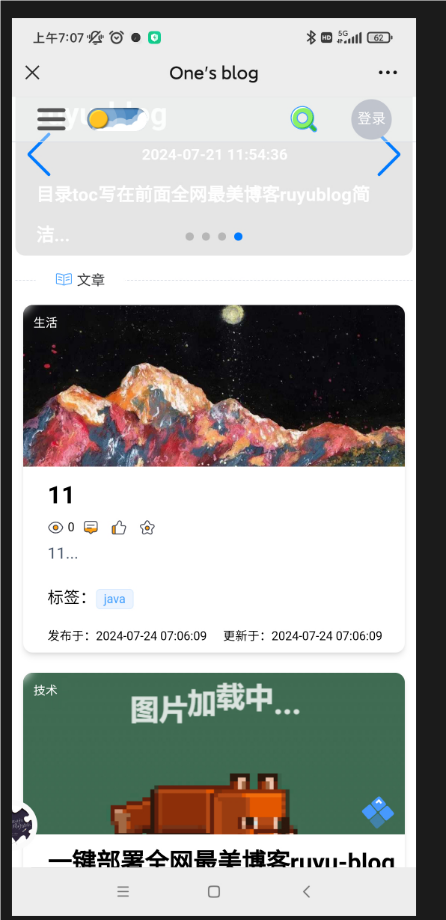
如何更改博客首页壁纸切换时间及个数?
2.排查过程
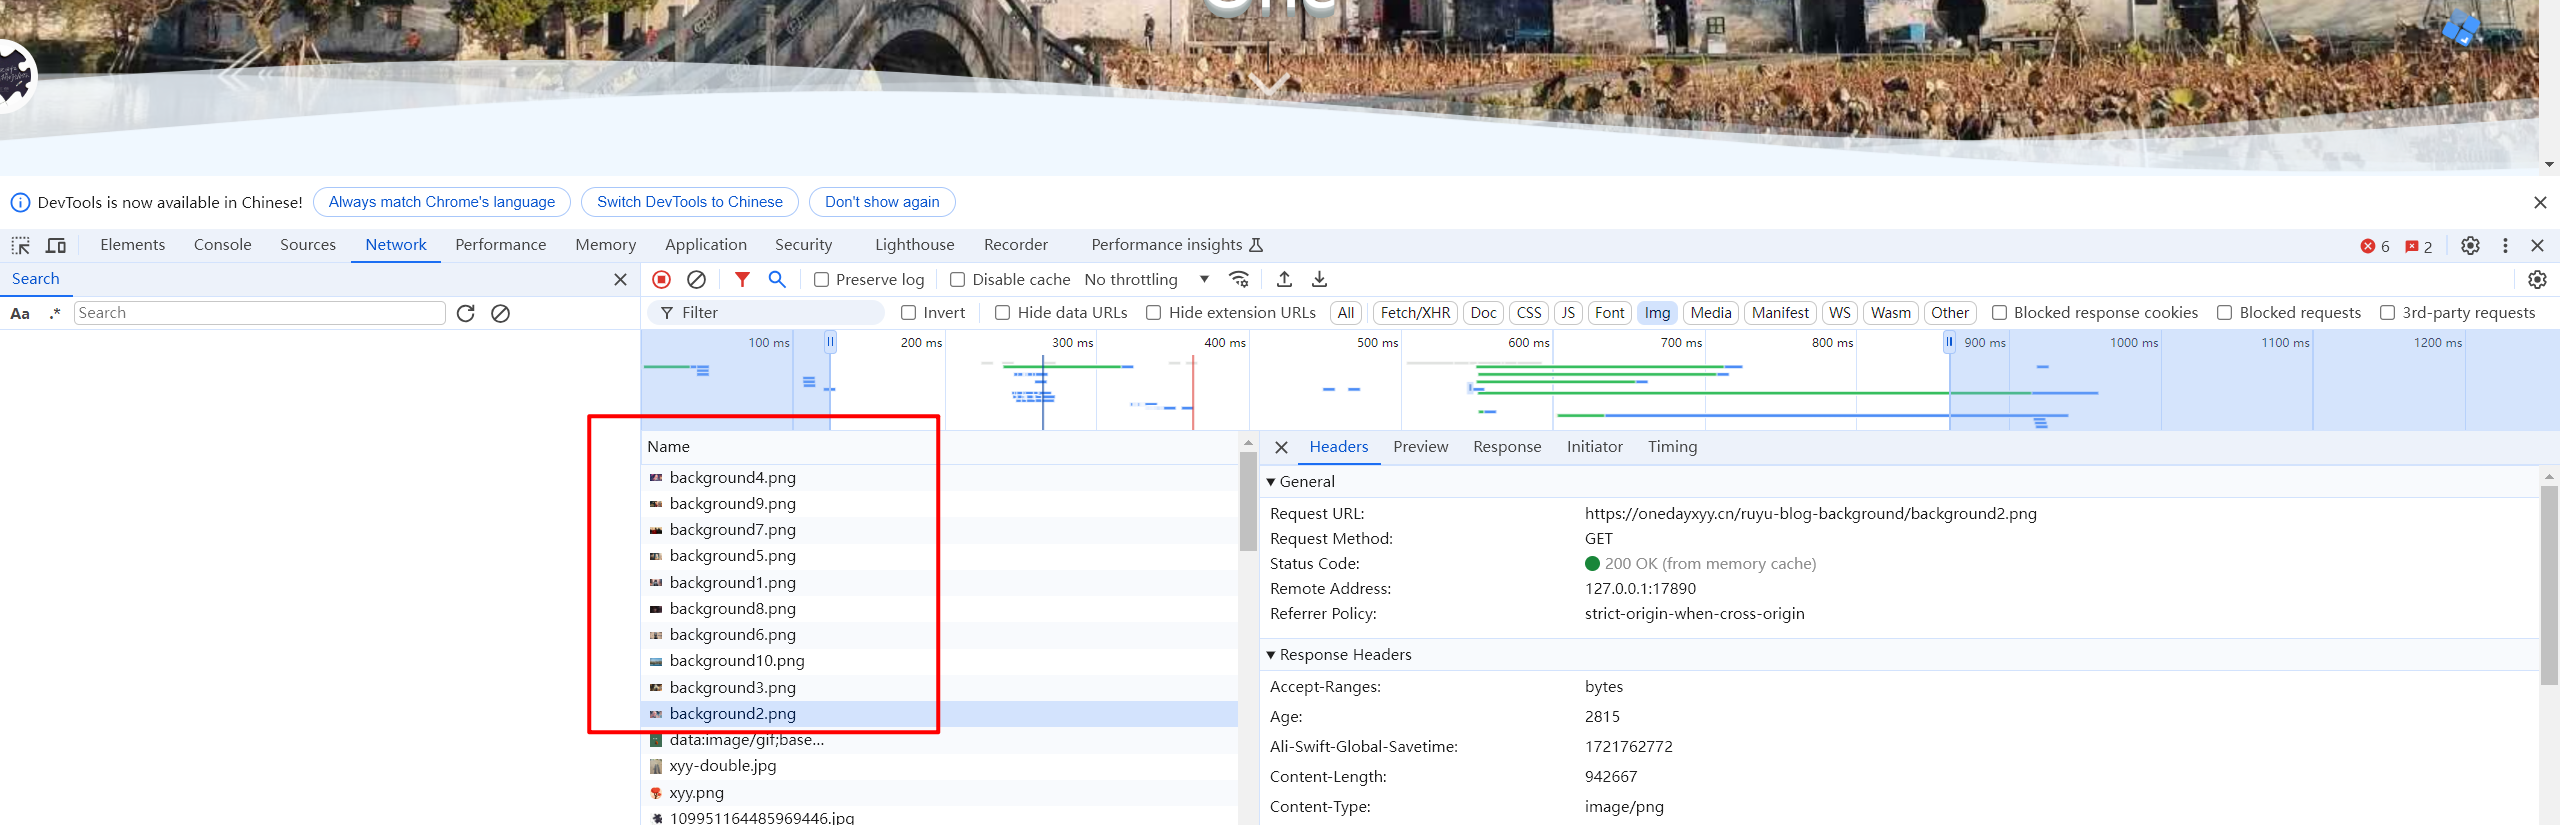
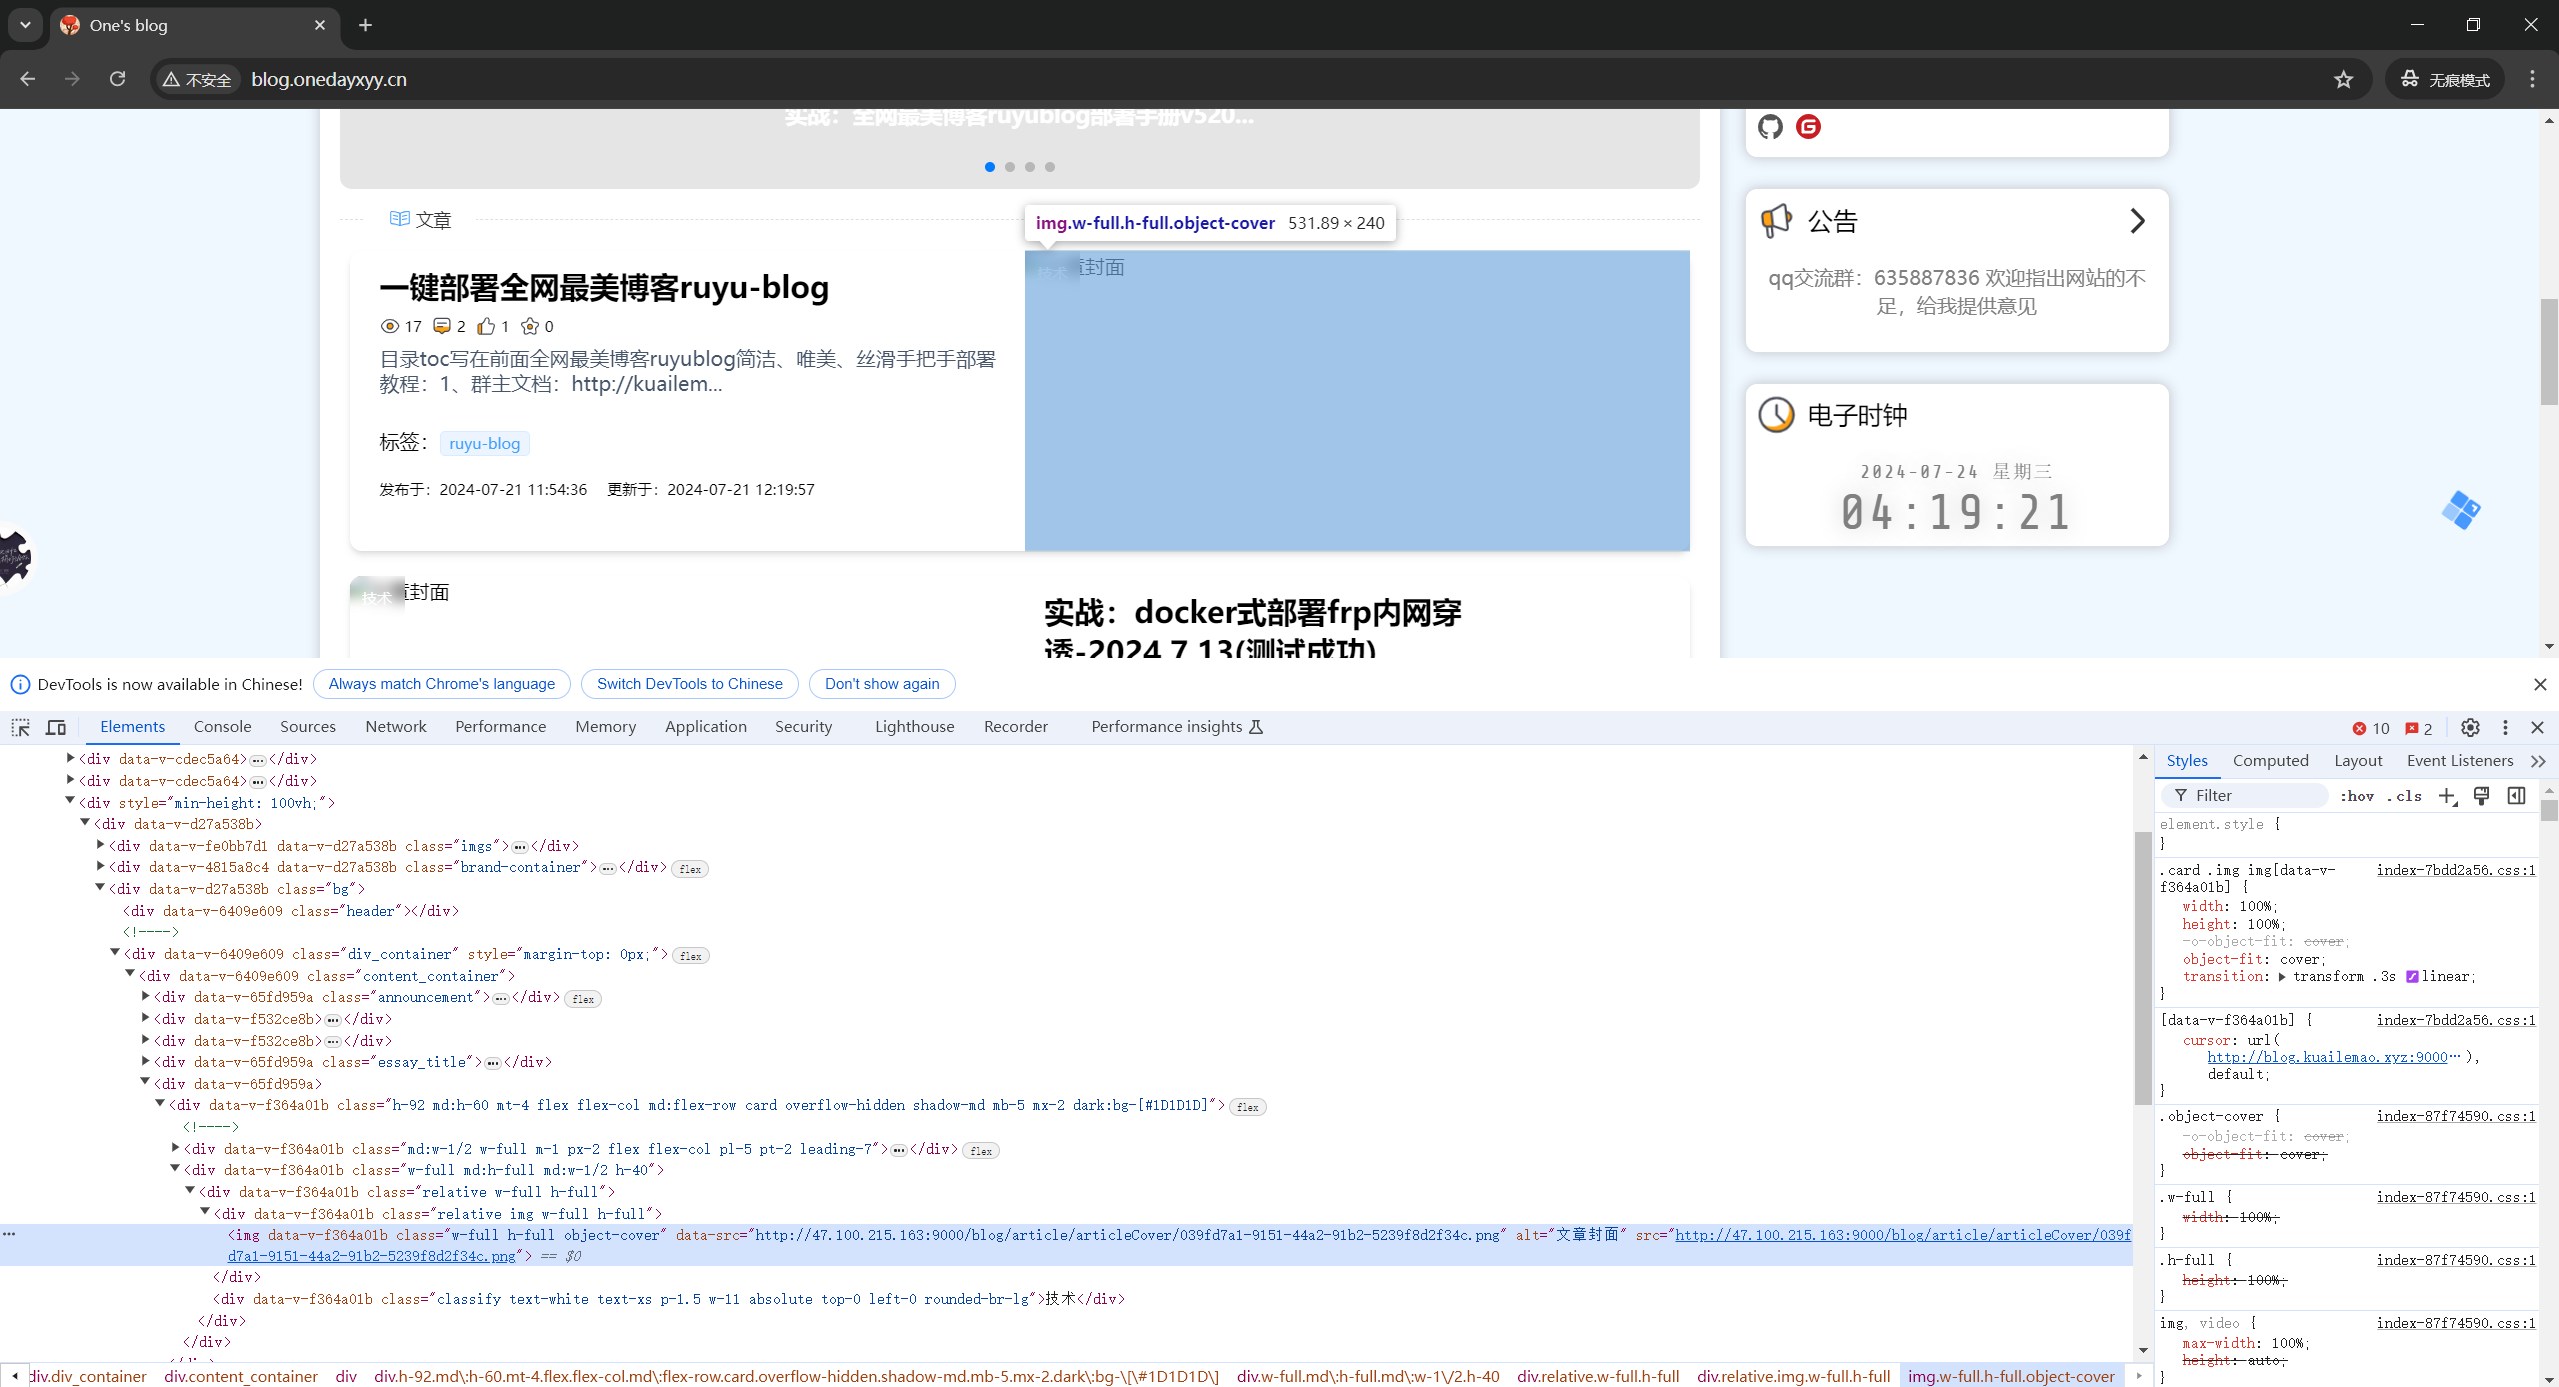
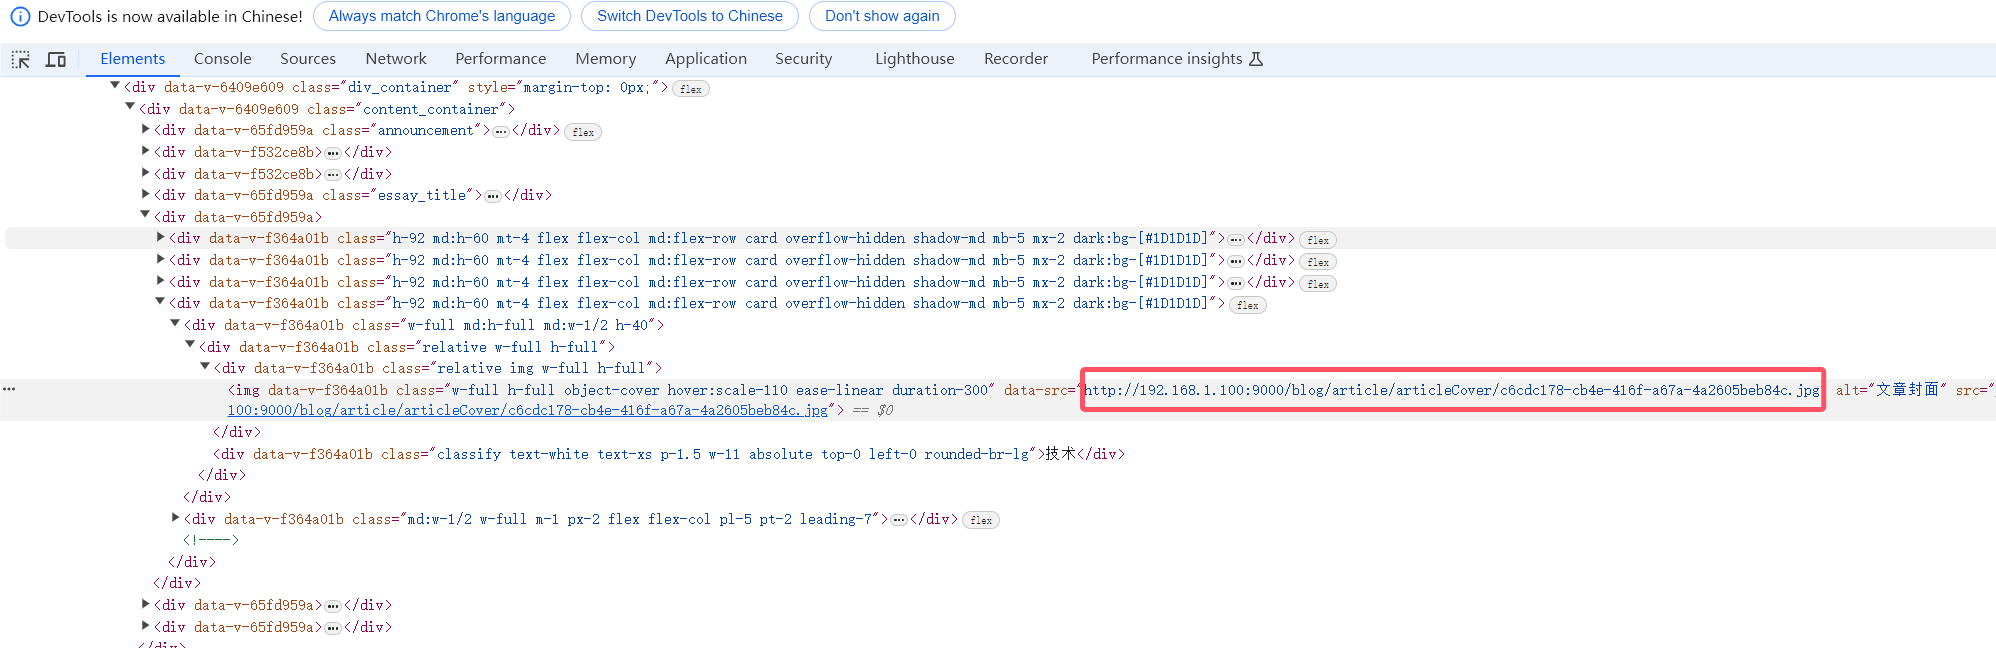
- 这些封面目前存在什么地方呢?
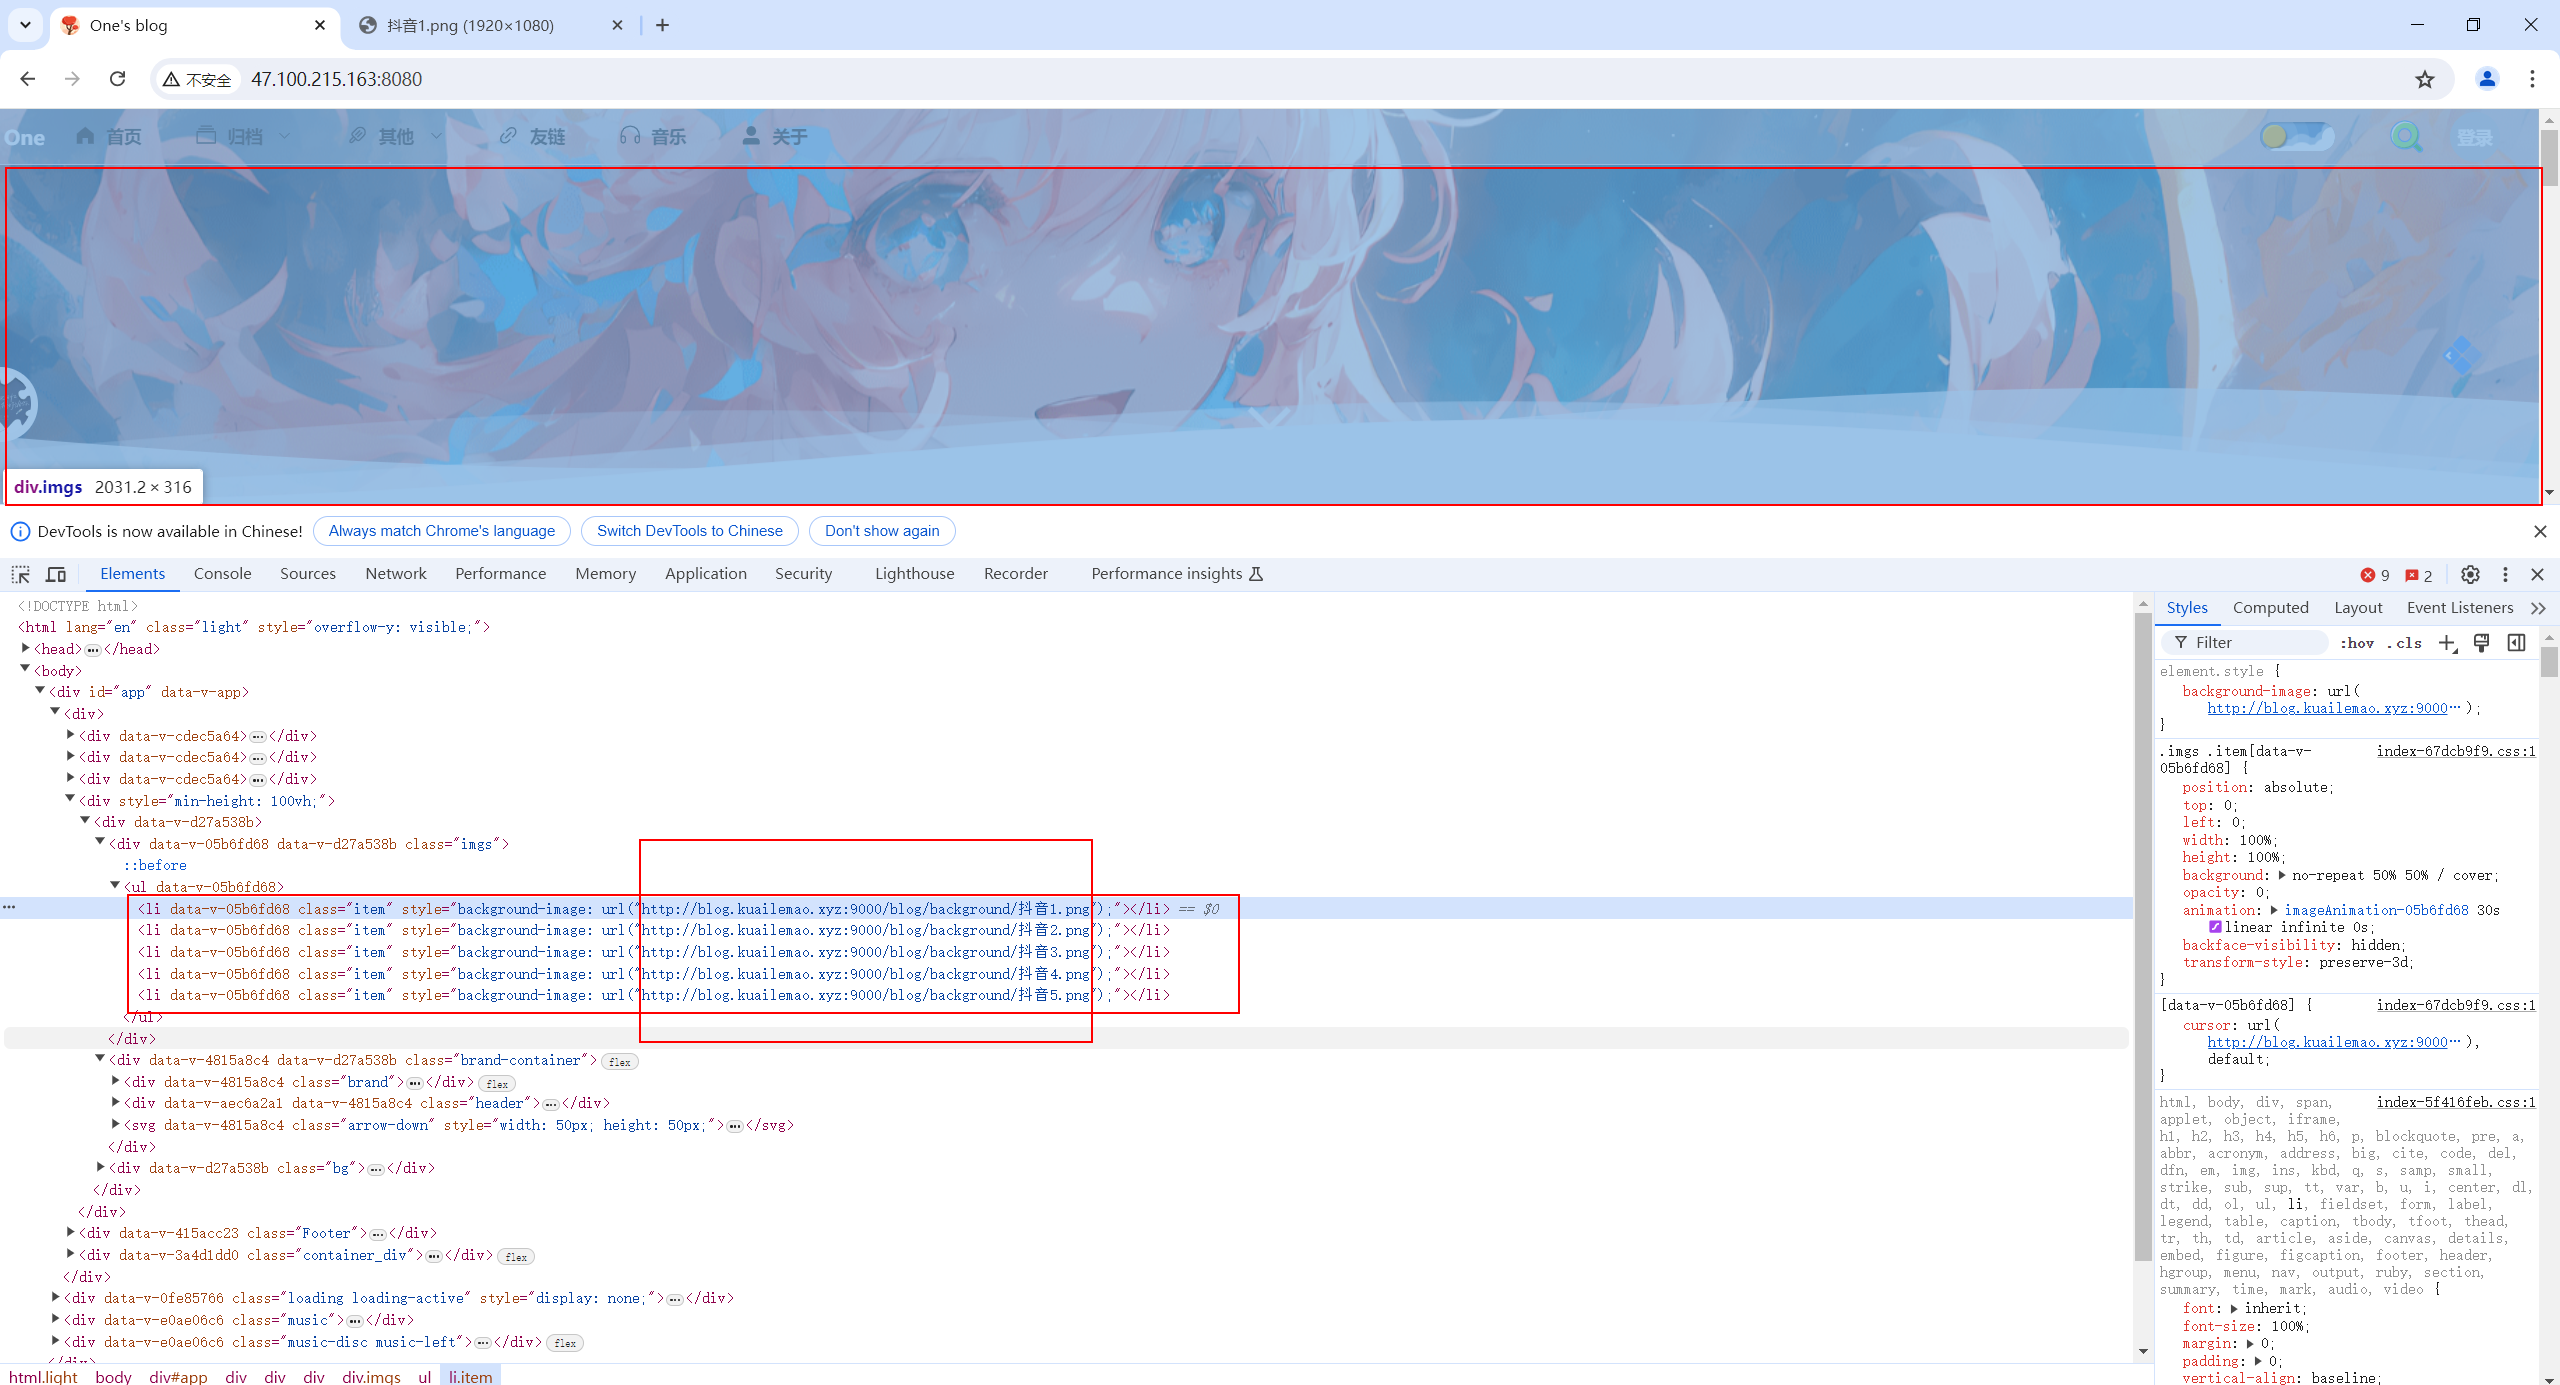
打开f12检查下。
咦,找到位置了。
- 下载这些图片到本地,然后并传到自己网站里

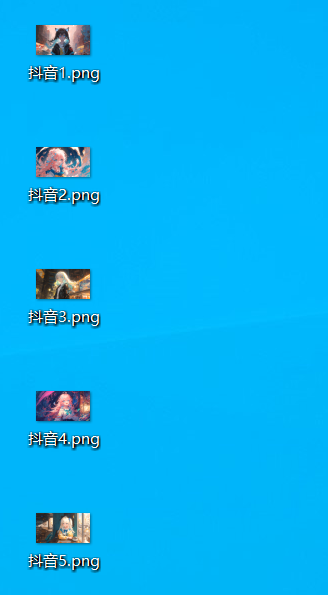
作者这里是对minio做了下子域名哦.
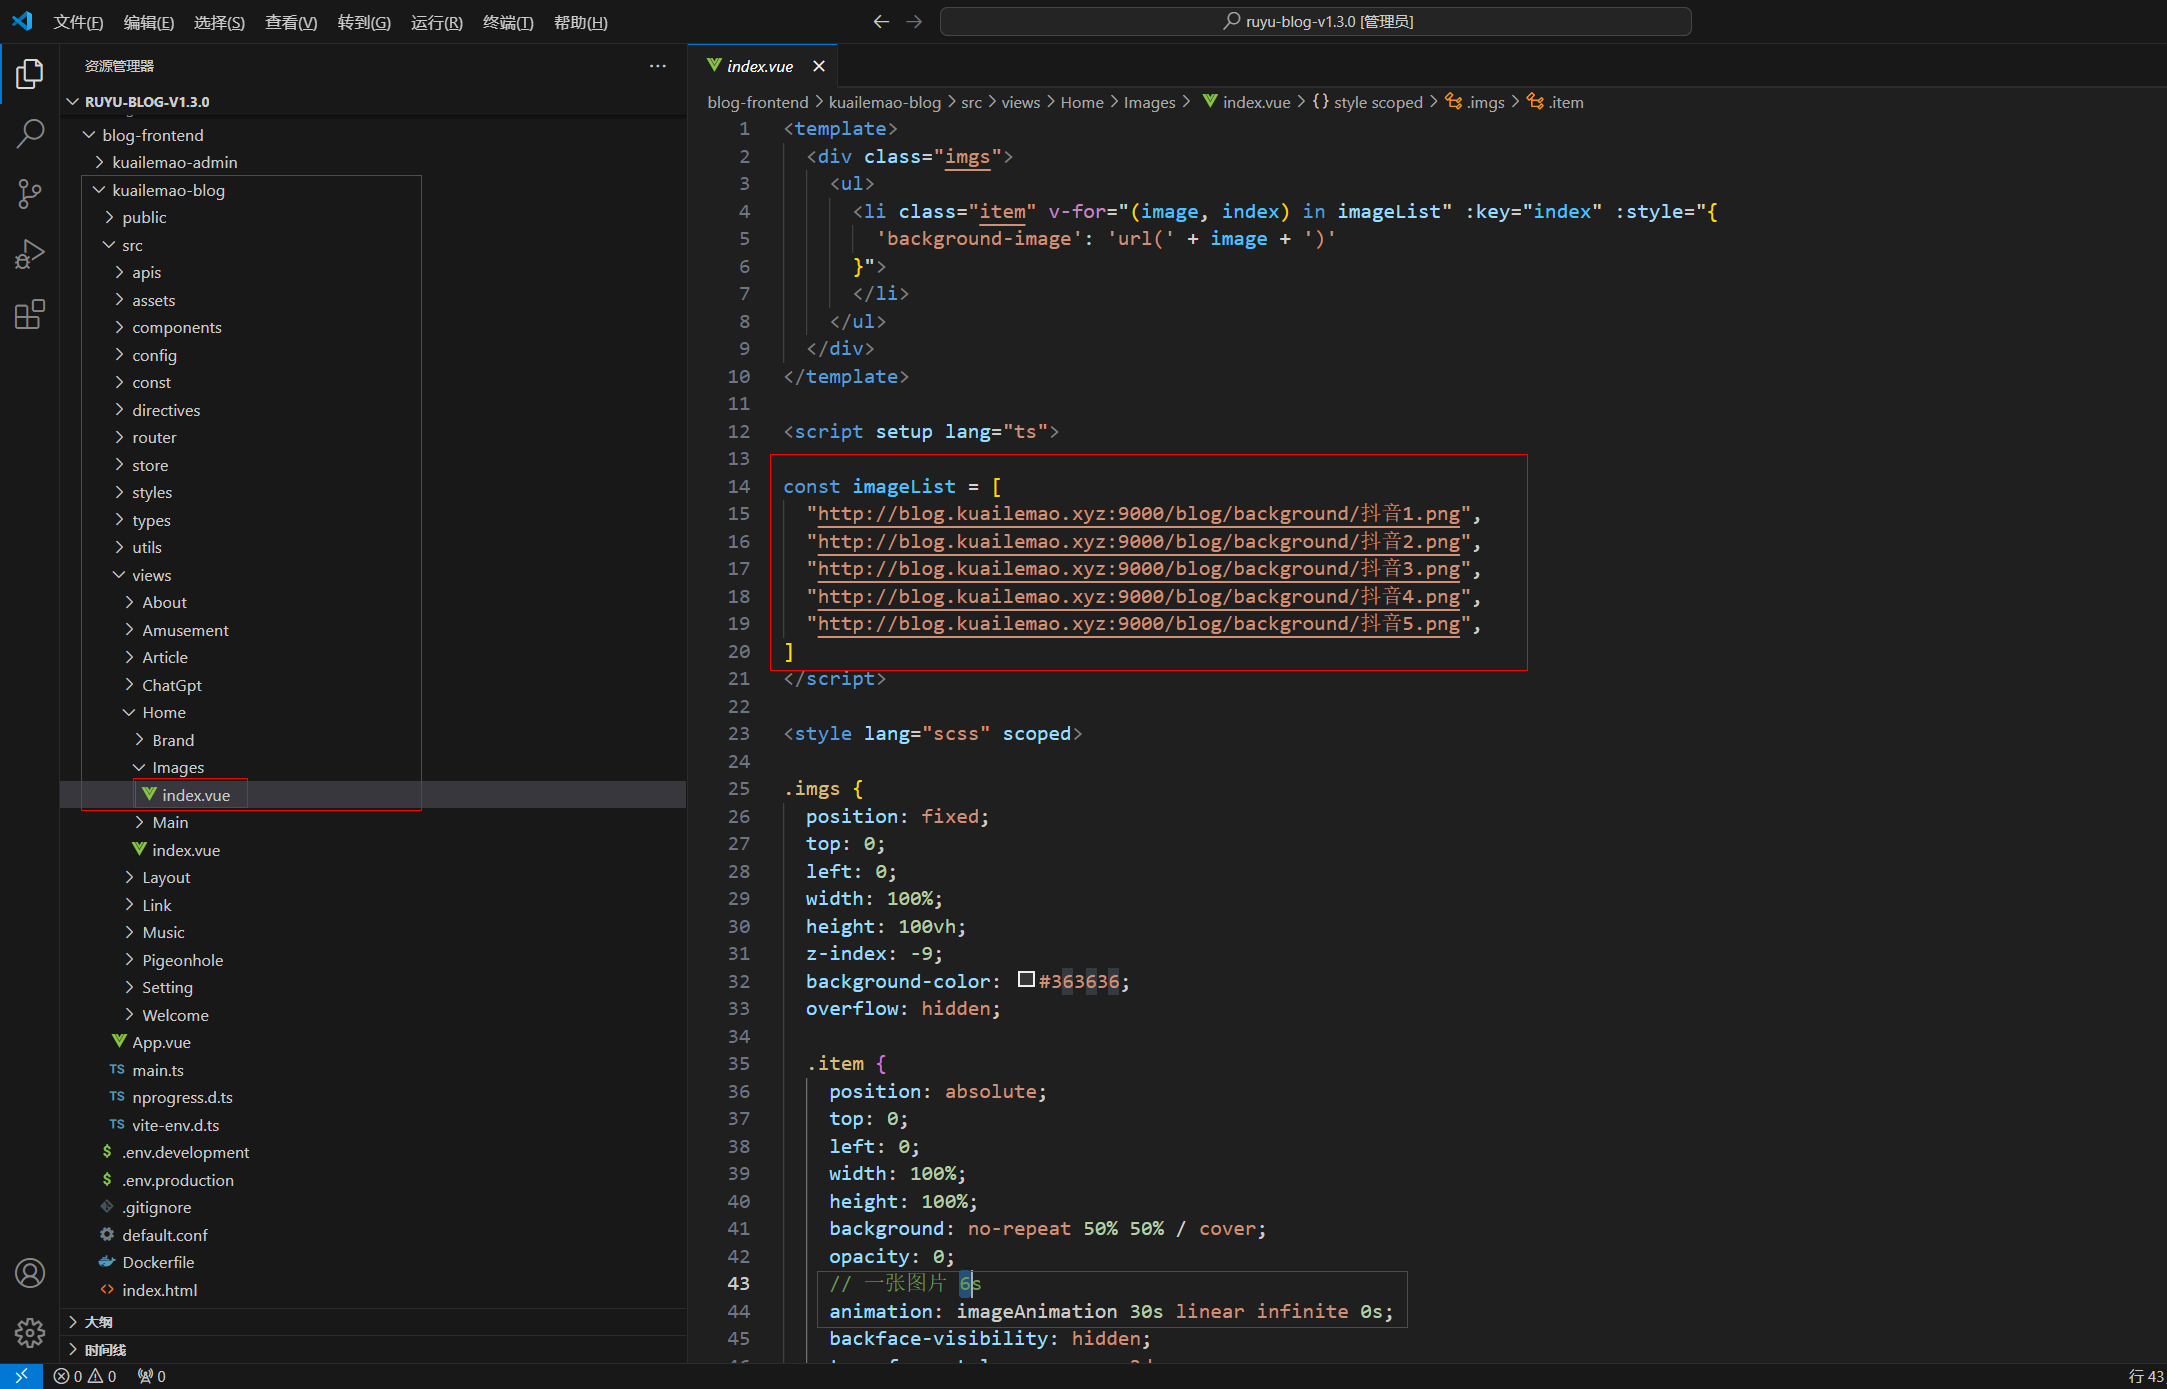
- 我们在代码里搜索下这里的信息位置,看与哪段代码有关?
能够看到,是这里的代码控制博客背景的。/ruyu-blog-v1.3.0/blog-frontend/kuailemao-blog/src/views/Home/Images
- 我们现在重新把这些背景图片放在在自己后端,并观察现象
利用nginx的静态站点功能来存放自己的背景图片:
mkdir /root/ruyu-blog-background
vim /etc/nginx/nginx.conf
nginx -s reload

background1.png
background2.png
background3.png
background4.png
background5.png

https://onedayxyy.cn/ruyu-blog-background/background1.png
https://onedayxyy.cn/ruyu-blog-background/background2.png
https://onedayxyy.cn/ruyu-blog-background/background3.png
https://onedayxyy.cn/ruyu-blog-background/background4.png
https://onedayxyy.cn/ruyu-blog-background/background5.png
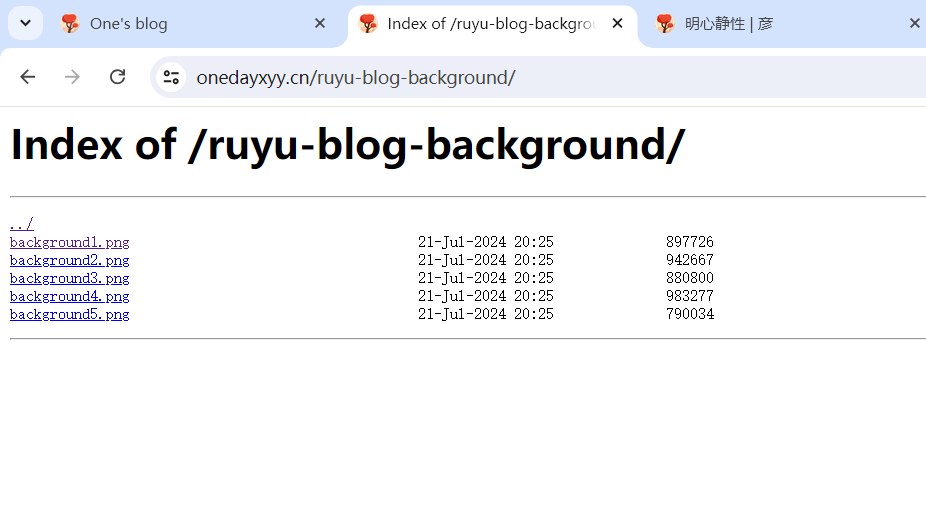
这个功能坏的一点是没图片缩略图哦。
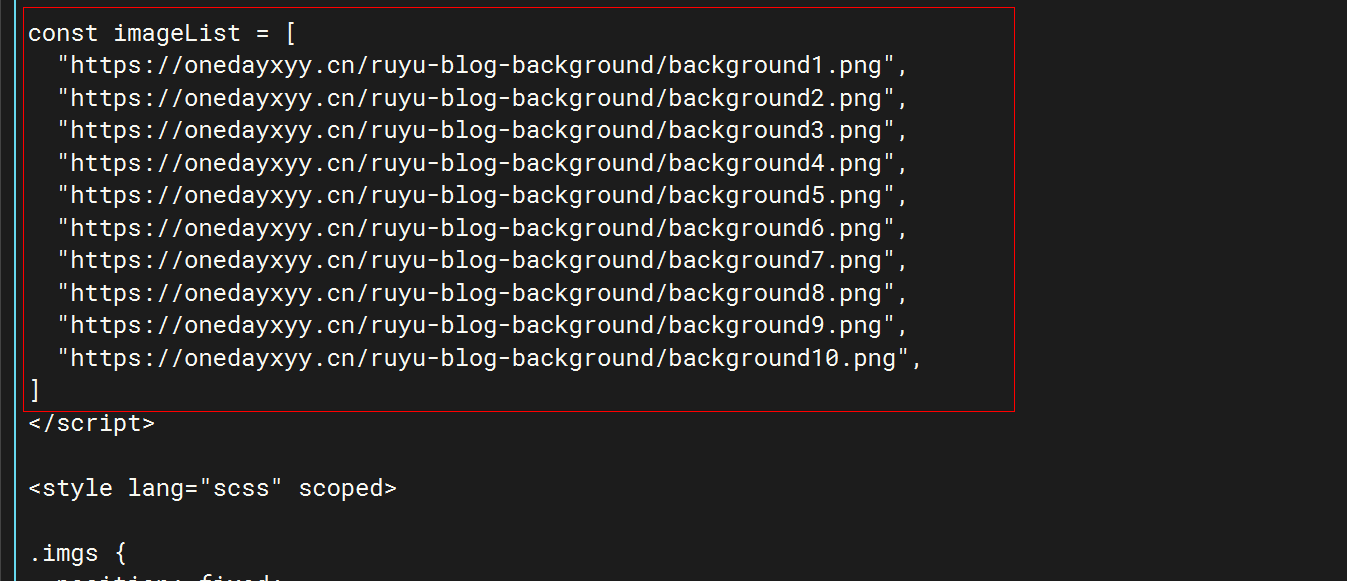
- 现在开始编辑项目里次文件
vim /root/ruyu-blog/blog-frontend/kuailemao-blog/src/views/Home/Images/index.vue

cp index.vue index.vue.bak

  "https://onedayxyy.cn/ruyu-blog-background/background1.png",
  "https://onedayxyy.cn/ruyu-blog-background/background2.png",
  "https://onedayxyy.cn/ruyu-blog-background/background3.png",
  "https://onedayxyy.cn/ruyu-blog-background/background4.png",
  "https://onedayxyy.cn/ruyu-blog-background/background5.png",
  "https://onedayxyy.cn/ruyu-blog-background/background6.png",
  "https://onedayxyy.cn/ruyu-blog-background/background7.png",
  "https://onedayxyy.cn/ruyu-blog-background/background8.png",
  "https://onedayxyy.cn/ruyu-blog-background/background9.png",
  "https://onedayxyy.cn/ruyu-blog-background/background10.png",
- 本地运行前端
cd /root/ruyu-blog/blog-frontend/kuailemao-blog
pnpm run dev

目前是有点问题的,有些图片显示时间比较异常
gpt
<template>
  <div class="imgs">
    <ul>
      <li class="item" v-for="(image, index) in imageList" :key="index" :style="{
        'background-image': 'url(' + image + ')'
      }">
      </li>
    </ul>
  </div>
</template>

<script setup lang="ts">

const imageList = [
  "http://blog.kuailemao.xyz:9000/blog/background/抖音1.png",
  "http://blog.kuailemao.xyz:9000/blog/background/抖音2.png",
  "http://blog.kuailemao.xyz:9000/blog/background/抖音3.png",
  "http://blog.kuailemao.xyz:9000/blog/background/抖音4.png",
  "http://blog.kuailemao.xyz:9000/blog/background/抖音5.png",
]
</script>

<style lang="scss" scoped>

.imgs {
  position: fixed;
  top: 0;
  left: 0;
  width: 100%;
  height: 100vh;
  z-index: -9;
  background-color: #363636;
  overflow: hidden;

  .item {
    position: absolute;
    top: 0;
    left: 0;
    width: 100%;
    height: 100%;
    background: no-repeat 50% 50% / cover;
    opacity: 0;
    // 一张图片 6s
    animation: imageAnimation 30s linear infinite 0s;
    backface-visibility: hidden;
    transform-style: preserve-3d;

    &:nth-child(2) {
      animation-delay: 6s;
    }

    &:nth-child(3) {
      animation-delay: 12s;
    }

    &:nth-child(4) {
      animation-delay: 18s;
    }

    &:nth-child(5) {
      animation-delay: 24s;
    }

    &:nth-child(6) {
      animation-delay: 30s;
    }
  }

  &::before {
    content: '';
    display: block;
    position: absolute;
    top: 0;
    left: 0;
    width: 100%;
    height: 100%;
    background-color: rgba(0, 0, 0, .2);
    transition: all .2s ease-in-out 0s;
  }
}

@keyframes imageAnimation {
  0% {
    opacity: 0;
    animation-timing-function: ease-in;
  }

  2% {
    opacity: 1;
  }

  8% {
    opacity: 1;
    transform: scale(1.05);
    animation-timing-function: ease-out;
  }

  17% {
    opacity: 1;
    transform: scale(1.1);
  }

  25% {
    opacity: 0;
    transform: scale(1.1);
  }

  100% {
    opacity: 0;
  }
}
</style>

这段代码里,哪里能控制背景图片的显示时间呢?如果我想增加背景图片到10张,那么这个如何控制这个现实时间呢?
gpt回答
在这段代码中,背景图片的显示时间是通过 CSS 动画 @keyframes imageAnimation 和每个 .item 元素的 animation-delay 属性来控制的。具体来说,@keyframes imageAnimation 定义了每个图片的显示和隐藏过程,而 animation-delay 属性则控制了每个图片开始动画的时间。
控制背景图片的显示时间
-
@keyframes imageAnimation:- 这个动画定义了图片从透明到完全显示再到透明消失的过程。
- 当前的动画时长是 30 秒(
animation: imageAnimation 30s linear infinite 0s;)。 - 在
@keyframes中,从 0% 到 25% 的时间段内,图片逐渐显示并达到最大尺寸,然后从 25% 到 100% 的时间段内,图片逐渐消失。
-
animation-delay:- 每个
.item元素的animation-delay属性定义了该图片开始动画的时间。 - 例如,第二个图片的
animation-delay是 6 秒,第三个图片的animation-delay是 12 秒,依此类推。
- 每个
增加背景图片到 10 张
如果你想增加背景图片到 10 张,你需要做以下几步:
-
增加图片列表:
- 在
imageList数组中增加更多的图片 URL。
- 在
-
调整 CSS:
- 增加更多的
.item元素的animation-delay属性,以确保每张图片都有正确的开始时间。
- 增加更多的
下面是修改后的代码示例:
<template>
  <div class="imgs">
    <ul>
      <li class="item" v-for="(image, index) in imageList" :key="index" :style="{
        'background-image': 'url(' + image + ')'
      }">
      </li>
    </ul>
  </div>
</template>

<script setup lang="ts">
const imageList = [
  "https://onedayxyy.cn/ruyu-blog-background/background1.png",
  "https://onedayxyy.cn/ruyu-blog-background/background2.png",
  "https://onedayxyy.cn/ruyu-blog-background/background3.png",
  "https://onedayxyy.cn/ruyu-blog-background/background4.png",
  "https://onedayxyy.cn/ruyu-blog-background/background5.png",
  "https://onedayxyy.cn/ruyu-blog-background/background6.png",
  "https://onedayxyy.cn/ruyu-blog-background/background7.png",
  "https://onedayxyy.cn/ruyu-blog-background/background8.png",
  "https://onedayxyy.cn/ruyu-blog-background/background9.png",
  "https://onedayxyy.cn/ruyu-blog-background/background10.png",
]
</script>

<style lang="scss" scoped>
.imgs {
  position: fixed;
  top: 0;
  left: 0;
  width: 100%;
  height: 100vh;
  z-index: -9;
  background-color: #363636;
  overflow: hidden;

  .item {
    position: absolute;
    top: 0;
    left: 0;
    width: 100%;
    height: 100%;
    background: no-repeat 50% 50% / cover;
    opacity: 0;
    animation: imageAnimation 30s linear infinite 0s;
    backface-visibility: hidden;
    transform-style: preserve-3d;

    &:nth-child(2) {
      animation-delay: 6s;
    }

    &:nth-child(3) {
      animation-delay: 12s;
    }

    &:nth-child(4) {
      animation-delay: 18s;
    }

    &:nth-child(5) {
      animation-delay: 24s;
    }

    &:nth-child(6) {
      animation-delay: 30s;
    }

    &:nth-child(7) {
      animation-delay: 36s;
    }

    &:nth-child(8) {
      animation-delay: 42s;
    }

    &:nth-child(9) {
      animation-delay: 48s;
    }

    &:nth-child(10) {
      animation-delay: 54s;
    }
  }

  &::before {
    content: '';
    display: block;
    position: absolute;
    top: 0;
    left: 0;
    width: 100%;
    height: 100%;
    background-color: rgba(0, 0, 0, .2);
    transition: all .2s ease-in-out 0s;
  }
}

@keyframes imageAnimation {
  0% {
    opacity: 0;
    animation-timing-function: ease-in;
  }

  2% {
    opacity: 1;
  }

  8% {
    opacity: 1;
    transform: scale(1.05);
    animation-timing-function: ease-out;
  }

  17% {
    opacity: 1;
    transform: scale(1.1);
  }

  25% {
    opacity: 0;
    transform: scale(1.1);
  }

  100% {
    opacity: 0;
  }
}
</style>
在这个修改后的代码中,imageList 数组增加了 5 张新的图片 URL,并且 .item 元素的 animation-delay 属性也相应地增加了,以确保每张图片都有正确的开始时间。这样,你就可以控制每张图片的显示时间,并且增加到 10 张图片。
- gpt这段代码,目前测试下来没啥问题,nice
可能还存在的问题:
- 风景背景图片不够清晰;
- 后面一张图片切换完后到第一张图片,切换顺序很快;
- 能否随机切换呢?
再次gpt
能否改下代码,让其随机切换背景图片呢?
要实现背景图片的随机切换,我们需要对代码进行一些调整。具体来说,我们需要使用 JavaScript 来动态生成每个图片的 animation-delay 值,以确保它们是随机的。
以下是修改后的代码示例:
<template>
  <div class="imgs">
    <ul>
      <li class="item" v-for="(image, index) in imageList" :key="index" :style="{
        'background-image': 'url(' + image + ')',
        'animation-delay': getRandomDelay() + 's'
      }">
      </li>
    </ul>
  </div>
</template>

<script setup lang="ts">
import { ref, onMounted } from 'vue';

const imageList = [
  "http://blog.kuailemao.xyz:9000/blog/background/抖音1.png",
  "http://blog.kuailemao.xyz:9000/blog/background/抖音2.png",
  "http://blog.kuailemao.xyz:9000/blog/background/抖音3.png",
  "http://blog.kuailemao.xyz:9000/blog/background/抖音4.png",
  "http://blog.kuailemao.xyz:9000/blog/background/抖音5.png",
  "http://blog.kuailemao.xyz:9000/blog/background/抖音6.png",
  "http://blog.kuailemao.xyz:9000/blog/background/抖音7.png",
  "http://blog.kuailemao.xyz:9000/blog/background/抖音8.png",
  "http://blog.kuailemao.xyz:9000/blog/background/抖音9.png",
  "http://blog.kuailemao.xyz:9000/blog/background/抖音10.png",
];

function getRandomDelay() {
  return Math.random() * 30; // 生成一个 0 到 30 之间的随机数
}
</script>

<style lang="scss" scoped>
.imgs {
  position: fixed;
  top: 0;
  left: 0;
  width: 100%;
  height: 100vh;
  z-index: -9;
  background-color: #363636;
  overflow: hidden;

  .item {
    position: absolute;
    top: 0;
    left: 0;
    width: 100%;
    height: 100%;
    background: no-repeat 50% 50% / cover;
    opacity: 0;
    animation: imageAnimation 30s linear infinite 0s;
    backface-visibility: hidden;
    transform-style: preserve-3d;
  }

  &::before {
    content: '';
    display: block;
    position: absolute;
    top: 0;
    left: 0;
    width: 100%;
    height: 100%;
    background-color: rgba(0, 0, 0, .2);
    transition: all .2s ease-in-out 0s;
  }
}

@keyframes imageAnimation {
  0% {
    opacity: 0;
    animation-timing-function: ease-in;
  }

  2% {
    opacity: 1;
  }

  8% {
    opacity: 1;
    transform: scale(1.05);
    animation-timing-function: ease-out;
  }

  17% {
    opacity: 1;
    transform: scale(1.1);
  }

  25% {
    opacity: 0;
    transform: scale(1.1);
  }

  100% {
    opacity: 0;
  }
}
</style>
在这个修改后的代码中��,我们添加了一个 getRandomDelay 函数,该函数生成一个 0 到 30 之间的随机数,并将其作为 animation-delay 的值。这样,每个图片的 animation-delay 值都是随机的,从而实现了背景图片的随机切换。
请注意,这种方法可能会导致某些图片的显示时间非常短,因为随机数可能会非常小。如果你希望每个图片的显示时间更均匀,可以调整 getRandomDelay 函数,使其生成一个更大的随机数范围,或者使用其他方法来确保每个图片的显示时间更加均匀。
我希望每个图片的显示时间更均匀,请帮我调整 getRandomDelay 函数,使其生成一个更大的随机数范围。并给出完整的代码,多谢
为了确保每个图片的显示时间更均匀,我们可以调整 getRandomDelay 函数,使其生成一个更大的随机数范围,并且确保每个图片的显示时间更加均匀。我们可以通过生成一个随机的延迟时间,并确保这些延迟时间在整个动画周期内均匀分布。
以下是修改后的代码示例:
<template>
  <div class="imgs">
    <ul>
      <li class="item" v-for="(image, index) in imageList" :key="index" :style="{
        'background-image': 'url(' + image + ')',
        'animation-delay': getRandomDelay(index) + 's'
      }">
      </li>
    </ul>
  </div>
</template>

<script setup lang="ts">
import { ref, onMounted } from 'vue';

const imageList = [
  "https://onedayxyy.cn/ruyu-blog-background/background1.png",
  "https://onedayxyy.cn/ruyu-blog-background/background2.png",
  "https://onedayxyy.cn/ruyu-blog-background/background3.png",
  "https://onedayxyy.cn/ruyu-blog-background/background4.png",
  "https://onedayxyy.cn/ruyu-blog-background/background5.png",
  "https://onedayxyy.cn/ruyu-blog-background/background6.png",
  "https://onedayxyy.cn/ruyu-blog-background/background7.png",
  "https://onedayxyy.cn/ruyu-blog-background/background8.png",
  "https://onedayxyy.cn/ruyu-blog-background/background9.png",
  "https://onedayxyy.cn/ruyu-blog-background/background10.png",
];

function getRandomDelay(index: number) {
  const totalDuration = 30; // 总动画时长
  const numImages = imageList.length; // 图片数量
  const interval = totalDuration / numImages; // 每个图片的间隔时间
  return index * interval; // 根据索引计算延迟时间
}
</script>

<style lang="scss" scoped>
.imgs {
  position: fixed;
  top: 0;
  left: 0;
  width: 100%;
  height: 100vh;
  z-index: -9;
  background-color: #363636;
  overflow: hidden;

  .item {
    position: absolute;
    top: 0;
    left: 0;
    width: 100%;
    height: 100%;
    background: no-repeat 50% 50% / cover;
    opacity: 0;
    animation: imageAnimation 30s linear infinite 0s;
    backface-visibility: hidden;
    transform-style: preserve-3d;
  }

  &::before {
    content: '';
    display: block;
    position: absolute;
    top: 0;
    left: 0;
    width: 100%;
    height: 100%;
    background-color: rgba(0, 0, 0, .2);
    transition: all .2s ease-in-out 0s;
  }
}

@keyframes imageAnimation {
  0% {
    opacity: 0;
    animation-timing-function: ease-in;
  }

  2% {
    opacity: 1;
  }

  8% {
    opacity: 1;
    transform: scale(1.05);
    animation-timing-function: ease-out;
  }

  17% {
    opacity: 1;
    transform: scale(1.1);
  }

  25% {
    opacity: 0;
    transform: scale(1.1);
  }

  100% {
    opacity: 0;
  }
}
</style>
在这个修改后的代码中,我们调整了 getRandomDelay 函数,使其根据图片的索引计算延迟时间。每个图片的延迟时间是根据其在 imageList 中的索引和总动画时长计算得出的,从而确保每个图片的显示时间更加均匀。
这样,每个图片的显示时间将会更加均匀,并且背景图片的切换将会更加随机和自然。
编辑后,再次观察现象
但是修改了,背景切换还不是随机的呀?
抱歉,我理解错了您的需求。您希望背景图片的切换是完全随机的,而不是按照固定的顺序。为了实现这一点,我们需要在每次页面加载时随机排列图片列表,并根据随机排列的结果来设置每个图片的 animation-delay。
以下是修改后的代码示例:
<template>
  <div class="imgs">
    <ul>
      <li class="item" v-for="(image, index) in shuffledImageList" :key="index" :style="{
        'background-image': 'url(' + image + ')',
        'animation-delay': getRandomDelay(index) + 's'
      }">
      </li>
    </ul>
  </div>
</template>

<script setup lang="ts">
import { ref, onMounted } from 'vue';

const imageList = [
  "https://onedayxyy.cn/ruyu-blog-background/background1.png",
  "https://onedayxyy.cn/ruyu-blog-background/background2.png",
  "https://onedayxyy.cn/ruyu-blog-background/background3.png",
  "https://onedayxyy.cn/ruyu-blog-background/background4.png",
  "https://onedayxyy.cn/ruyu-blog-background/background5.png",
  "https://onedayxyy.cn/ruyu-blog-background/background6.png",
  "https://onedayxyy.cn/ruyu-blog-background/background7.png",
  "https://onedayxyy.cn/ruyu-blog-background/background8.png",
  "https://onedayxyy.cn/ruyu-blog-background/background9.png",
  "https://onedayxyy.cn/ruyu-blog-background/background10.png",
];

const shuffledImageList = ref<string[]>([]);

function shuffleArray(array: string[]) {
  for (let i = array.length - 1; i > 0; i--) {
    const j = Math.floor(Math.random() * (i + 1));
    [array[i], array[j]] = [array[j], array[i]];
  }
  return array;
}

function getRandomDelay(index: number) {
  const totalDuration = 30; // 总动画时长
  const numImages = shuffledImageList.value.length; // 图片数量
  const interval = totalDuration / numImages; // 每个图片的间隔时间
  return index * interval; // 根据索引计算延迟时间
}

onMounted(() => {
  shuffledImageList.value = shuffleArray([...imageList]);
});
</script>

<style lang="scss" scoped>
.imgs {
  position: fixed;
  top: 0;
  left: 0;
  width: 100%;
  height: 100vh;
  z-index: -9;
  background-color: #363636;
  overflow: hidden;

  .item {
    position: absolute;
    top: 0;
    left: 0;
    width: 100%;
    height: 100%;
    background: no-repeat 50% 50% / cover;
    opacity: 0;
    animation: imageAnimation 30s linear infinite 0s;
    backface-visibility: hidden;
    transform-style: preserve-3d;
  }

  &::before {
    content: '';
    display: block;
    position: absolute;
    top: 0;
    left: 0;
    width: 100%;
    height: 100%;
    background-color: rgba(0, 0, 0, .2);
    transition: all .2s ease-in-out 0s;
  }
}

@keyframes imageAnimation {
  0% {
    opacity: 0;
    animation-timing-function: ease-in;
  }

  2% {
    opacity: 1;
  }

  8% {
    opacity: 1;
    transform: scale(1.05);
    animation-timing-function: ease-out;
  }

  17% {
    opacity: 1;
    transform: scale(1.1);
  }

  25% {
    opacity: 0;
    transform: scale(1.1);
  }

  100% {
    opacity: 0;
  }
}
</style>
在这个修改后的代码中,我们添加了一个 shuffleArray 函数来随机排列图片列表,并在 onMounted 生命周期钩子中调用这个函数来初始化 shuffledImageList。这样,每次页面加载时,图片列表都会被随机排列,从而实现背景图片的随机切换。
同时,getRandomDelay 函数根据随机排列后的图片索引计算延迟时间,确保每个图片的显示时间更加均匀。这样,背景图片的切换将会更加随机和自然。
这次是可以了,但是目前不同壁纸之间切换时间太快了,能不能稍微延长一点?
当然可以。为了延长不同壁纸之间的切换时间,我们需要调整动画的总时长和每个图片的显示时间。我们可以通过增加动画的总时长和调整每个图片的显示时间来实现这一点。
以下是修改后的代码示例:
<template>
  <div class="imgs">
    <ul>
      <li class="item" v-for="(image, index) in shuffledImageList" :key="index" :style="{
        'background-image': 'url(' + image + ')',
        'animation-delay': getRandomDelay(index) + 's'
      }">
      </li>
    </ul>
  </div>
</template>

<script setup lang="ts">
import { ref, onMounted } from 'vue';

const imageList = [
  "https://onedayxyy.cn/ruyu-blog-background/background1.png",
  "https://onedayxyy.cn/ruyu-blog-background/background2.png",
  "https://onedayxyy.cn/ruyu-blog-background/background3.png",
  "https://onedayxyy.cn/ruyu-blog-background/background4.png",
  "https://onedayxyy.cn/ruyu-blog-background/background5.png",
  "https://onedayxyy.cn/ruyu-blog-background/background6.png",
  "https://onedayxyy.cn/ruyu-blog-background/background7.png",
  "https://onedayxyy.cn/ruyu-blog-background/background8.png",
  "https://onedayxyy.cn/ruyu-blog-background/background9.png",
  "https://onedayxyy.cn/ruyu-blog-background/background10.png",
];

const shuffledImageList = ref<string[]>([]);

function shuffleArray(array: string[]) {
  for (let i = array.length - 1; i > 0; i--) {
    const j = Math.floor(Math.random() * (i + 1));
    [array[i], array[j]] = [array[j], array[i]];
  }
  return array;
}

function getRandomDelay(index: number) {
  const totalDuration = 60; // 增加总动画时长
  const numImages = shuffledImageList.value.length; // 图片数量
  const interval = totalDuration / numImages; // 每个图片的间隔时间
  return index * interval; // 根据索引计算延迟时间
}

onMounted(() => {
  shuffledImageList.value = shuffleArray([...imageList]);
});
</script>

<style lang="scss" scoped>
.imgs {
  position: fixed;
  top: 0;
  left: 0;
  width: 100%;
  height: 100vh;
  z-index: -9;
  background-color: #363636;
  overflow: hidden;

  .item {
    position: absolute;
    top: 0;
    left: 0;
    width: 100%;
    height: 100%;
    background: no-repeat 50% 50% / cover;
    opacity: 0;
    animation: imageAnimation 60s linear infinite 0s; // 增加动画时长
    backface-visibility: hidden;
    transform-style: preserve-3d;
  }

  &::before {
    content: '';
    display: block;
    position: absolute;
    top: 0;
    left: 0;
    width: 100%;
    height: 100%;
    background-color: rgba(0, 0, 0, .2);
    transition: all .2s ease-in-out 0s;
  }
}

@keyframes imageAnimation {
  0% {
    opacity: 0;
    animation-timing-function: ease-in;
  }

  2% {
    opacity: 1;
  }

  8% {
    opacity: 1;
    transform: scale(1.05);
    animation-timing-function: ease-out;
  }

  17% {
    opacity: 1;
    transform: scale(1.1);
  }

  25% {
    opacity: 0;
    transform: scale(1.1);
  }

  100% {
    opacity: 0;
  }
}
</style>
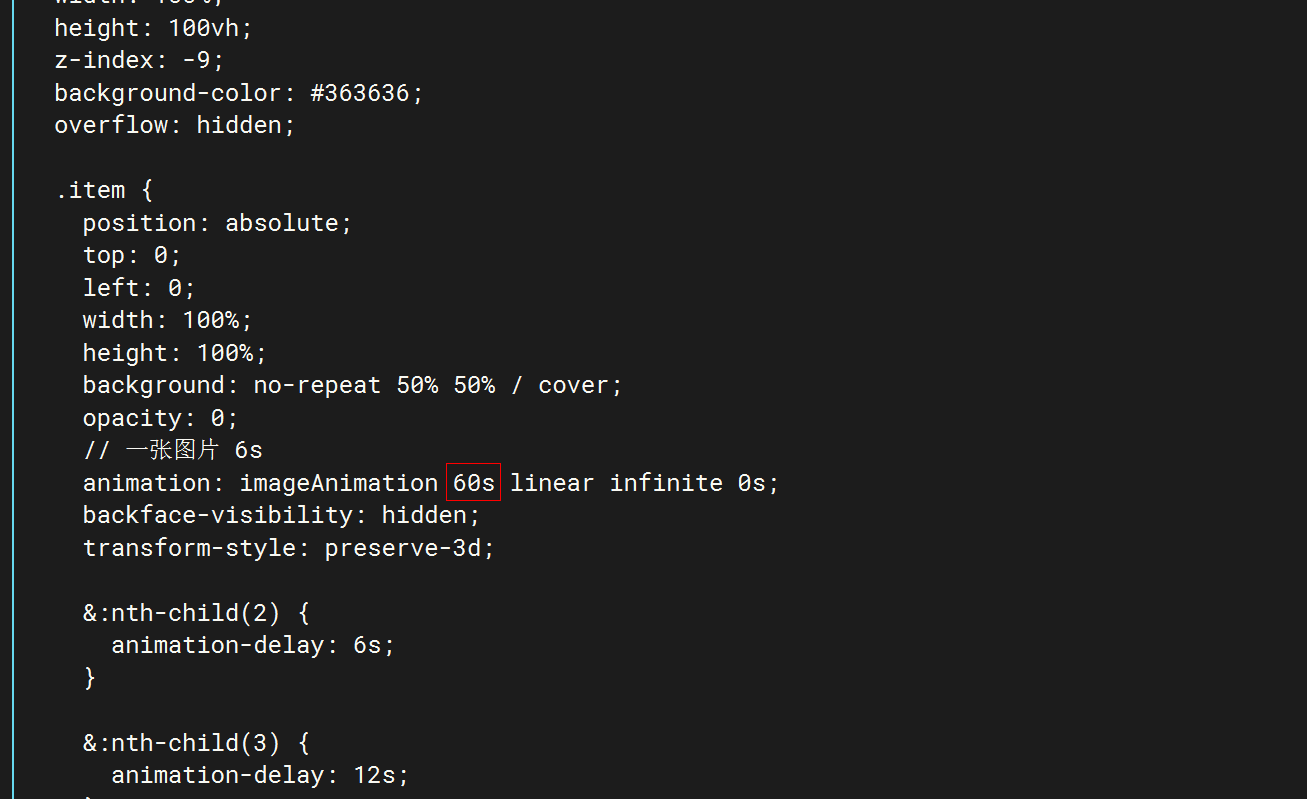
在这个修改后的代码中,我们将动画的总时长从 30 秒增加到 60 秒,并在 getRandomDelay 函数中相应地调整了每个图片的间隔时间。这样,每个图片的显示时间将会更长,从而实现不同壁纸之间切换时间的延长。
同时,我们仍然保持了图片列表的随机排列,确保背景图片的切换是随机的。这样,背景图片的切换将会更加随机和自然,同时每个图片的显示时间也会更加均匀。
OK,这次代码OK了,符合我的预期。
3.解决办法
完整代码:
vim /root/ruyu-blog/blog-frontend/kuailemao-blog/src/views/Home/Images/index.vue
<template>
  <div class="imgs">
    <ul>
      <li class="item" v-for="(image, index) in shuffledImageList" :key="index" :style="{
        'background-image': 'url(' + image + ')',
        'animation-delay': getRandomDelay(index) + 's'
      }">
      </li>
    </ul>
  </div>
</template>

<script setup lang="ts">
import { ref, onMounted } from 'vue';

const imageList = [
  "https://onedayxyy.cn/ruyu-blog-background/background1.png",
  "https://onedayxyy.cn/ruyu-blog-background/background2.png",
  "https://onedayxyy.cn/ruyu-blog-background/background3.png",
  "https://onedayxyy.cn/ruyu-blog-background/background4.png",
  "https://onedayxyy.cn/ruyu-blog-background/background5.png",
  "https://onedayxyy.cn/ruyu-blog-background/background6.png",
  "https://onedayxyy.cn/ruyu-blog-background/background7.png",
  "https://onedayxyy.cn/ruyu-blog-background/background8.png",
  "https://onedayxyy.cn/ruyu-blog-background/background9.png",
  "https://onedayxyy.cn/ruyu-blog-background/background10.png",
];

const shuffledImageList = ref<string[]>([]);

function shuffleArray(array: string[]) {
  for (let i = array.length - 1; i > 0; i--) {
    const j = Math.floor(Math.random() * (i + 1));
    [array[i], array[j]] = [array[j], array[i]];
  }
  return array;
}

function getRandomDelay(index: number) {
  const totalDuration = 60; // 增加总动画时长
  const numImages = shuffledImageList.value.length; // 图片数量
  const interval = totalDuration / numImages; // 每个图片的间隔时间
  return index * interval; // 根据索引计算延迟时间
}

onMounted(() => {
  shuffledImageList.value = shuffleArray([...imageList]);
});
</script>

<style lang="scss" scoped>
.imgs {
  position: fixed;
  top: 0;
  left: 0;
  width: 100%;
  height: 100vh;
  z-index: -9;
  background-color: #363636;
  overflow: hidden;

  .item {
    position: absolute;
    top: 0;
    left: 0;
    width: 100%;
    height: 100%;
    background: no-repeat 50% 50% / cover;
    opacity: 0;
    animation: imageAnimation 60s linear infinite 0s; // 增加动画时长
    backface-visibility: hidden;
    transform-style: preserve-3d;
  }

  &::before {
    content: '';
    display: block;
    position: absolute;
    top: 0;
    left: 0;
    width: 100%;
    height: 100%;
    background-color: rgba(0, 0, 0, .2);
    transition: all .2s ease-in-out 0s;
  }
}

@keyframes imageAnimation {
  0% {
    opacity: 0;
    animation-timing-function: ease-in;
  }

  2% {
    opacity: 1;
  }

  8% {
    opacity: 1;
    transform: scale(1.05);
    animation-timing-function: ease-out;
  }

  17% {
    opacity: 1;
    transform: scale(1.1);
  }

  25% {
    opacity: 0;
    transform: scale(1.1);
  }

  100% {
    opacity: 0;
  }
}
</style>
- 重新打包,构建镜像
#重新构建dist
cd /root/ruyu-blog/blog-frontend/kuailemao-blog/
rm -rf dist
pnpm install
pnpm build

#删除老容器和老镜像
docker rm -f blog-qt
#docker rmi -f blog-qt

#构建新镜像和启动新容器
docker build . -t blog-qt-v1.3.0-v4-2024.7.22 #更新首页壁纸为随机切换,切增加了5张图片(共计10张)
docker run --name blog-qt -d -p 80:80 blog-qt-v1.3.0-v4-2024.7.22
##
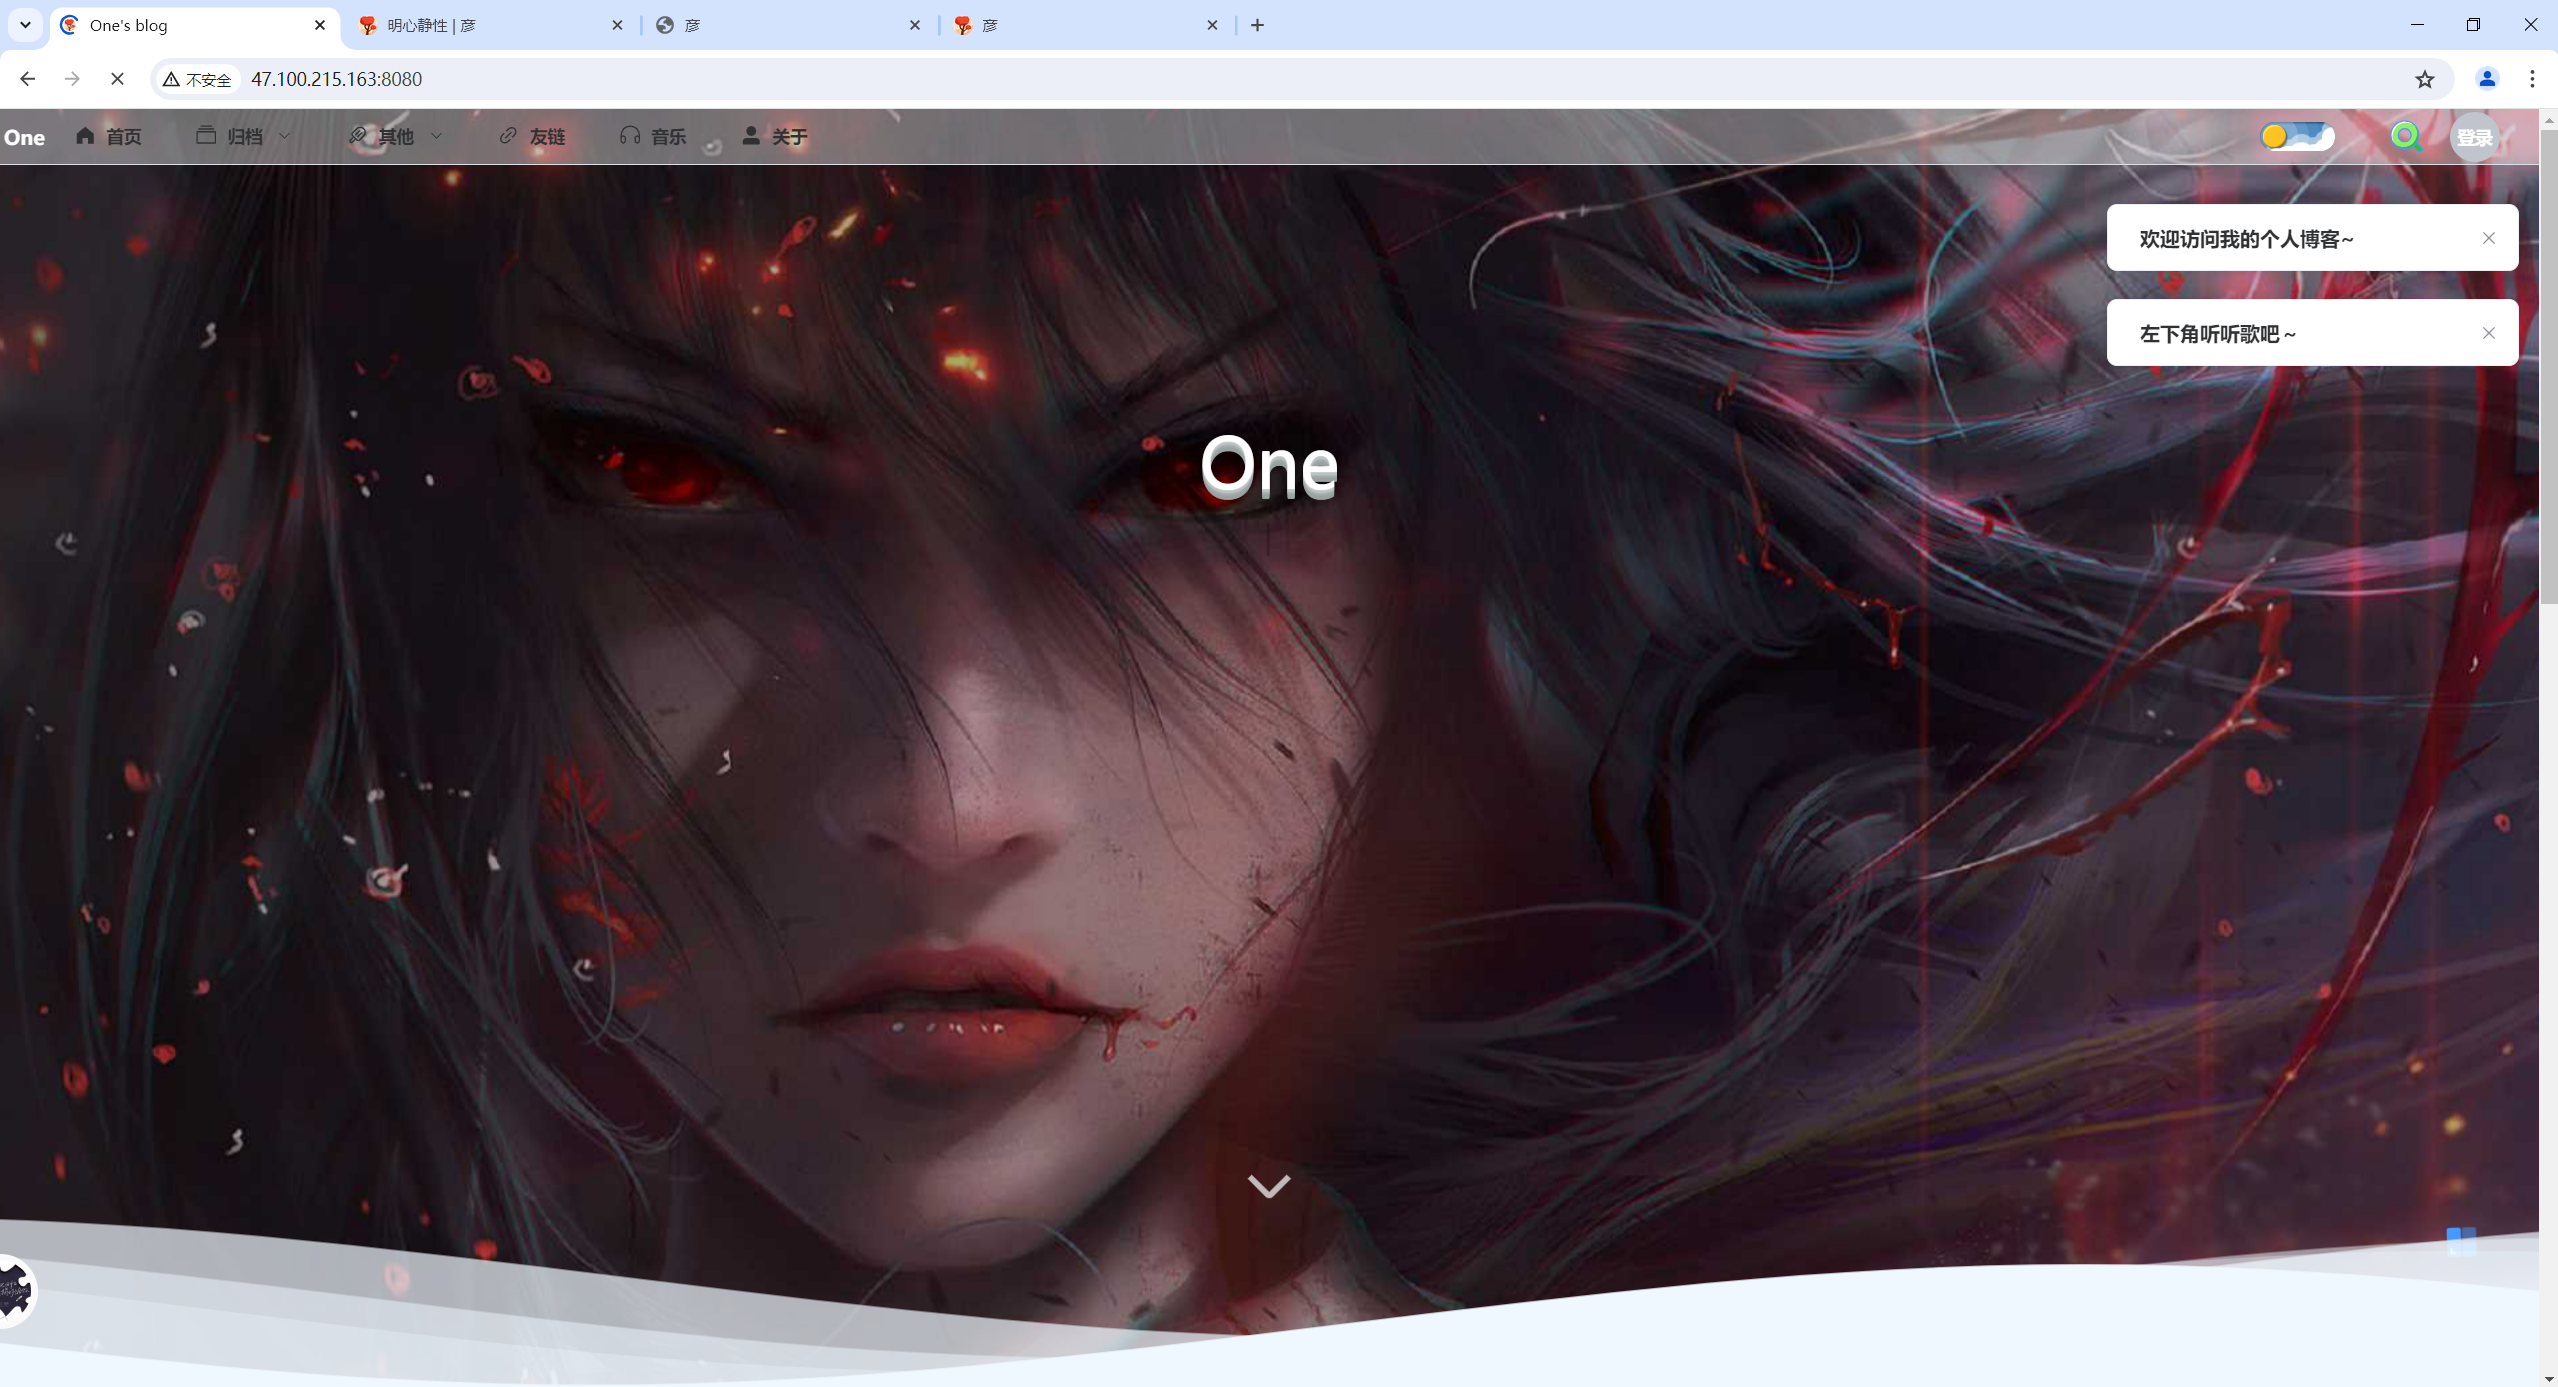
符合预期,结束。
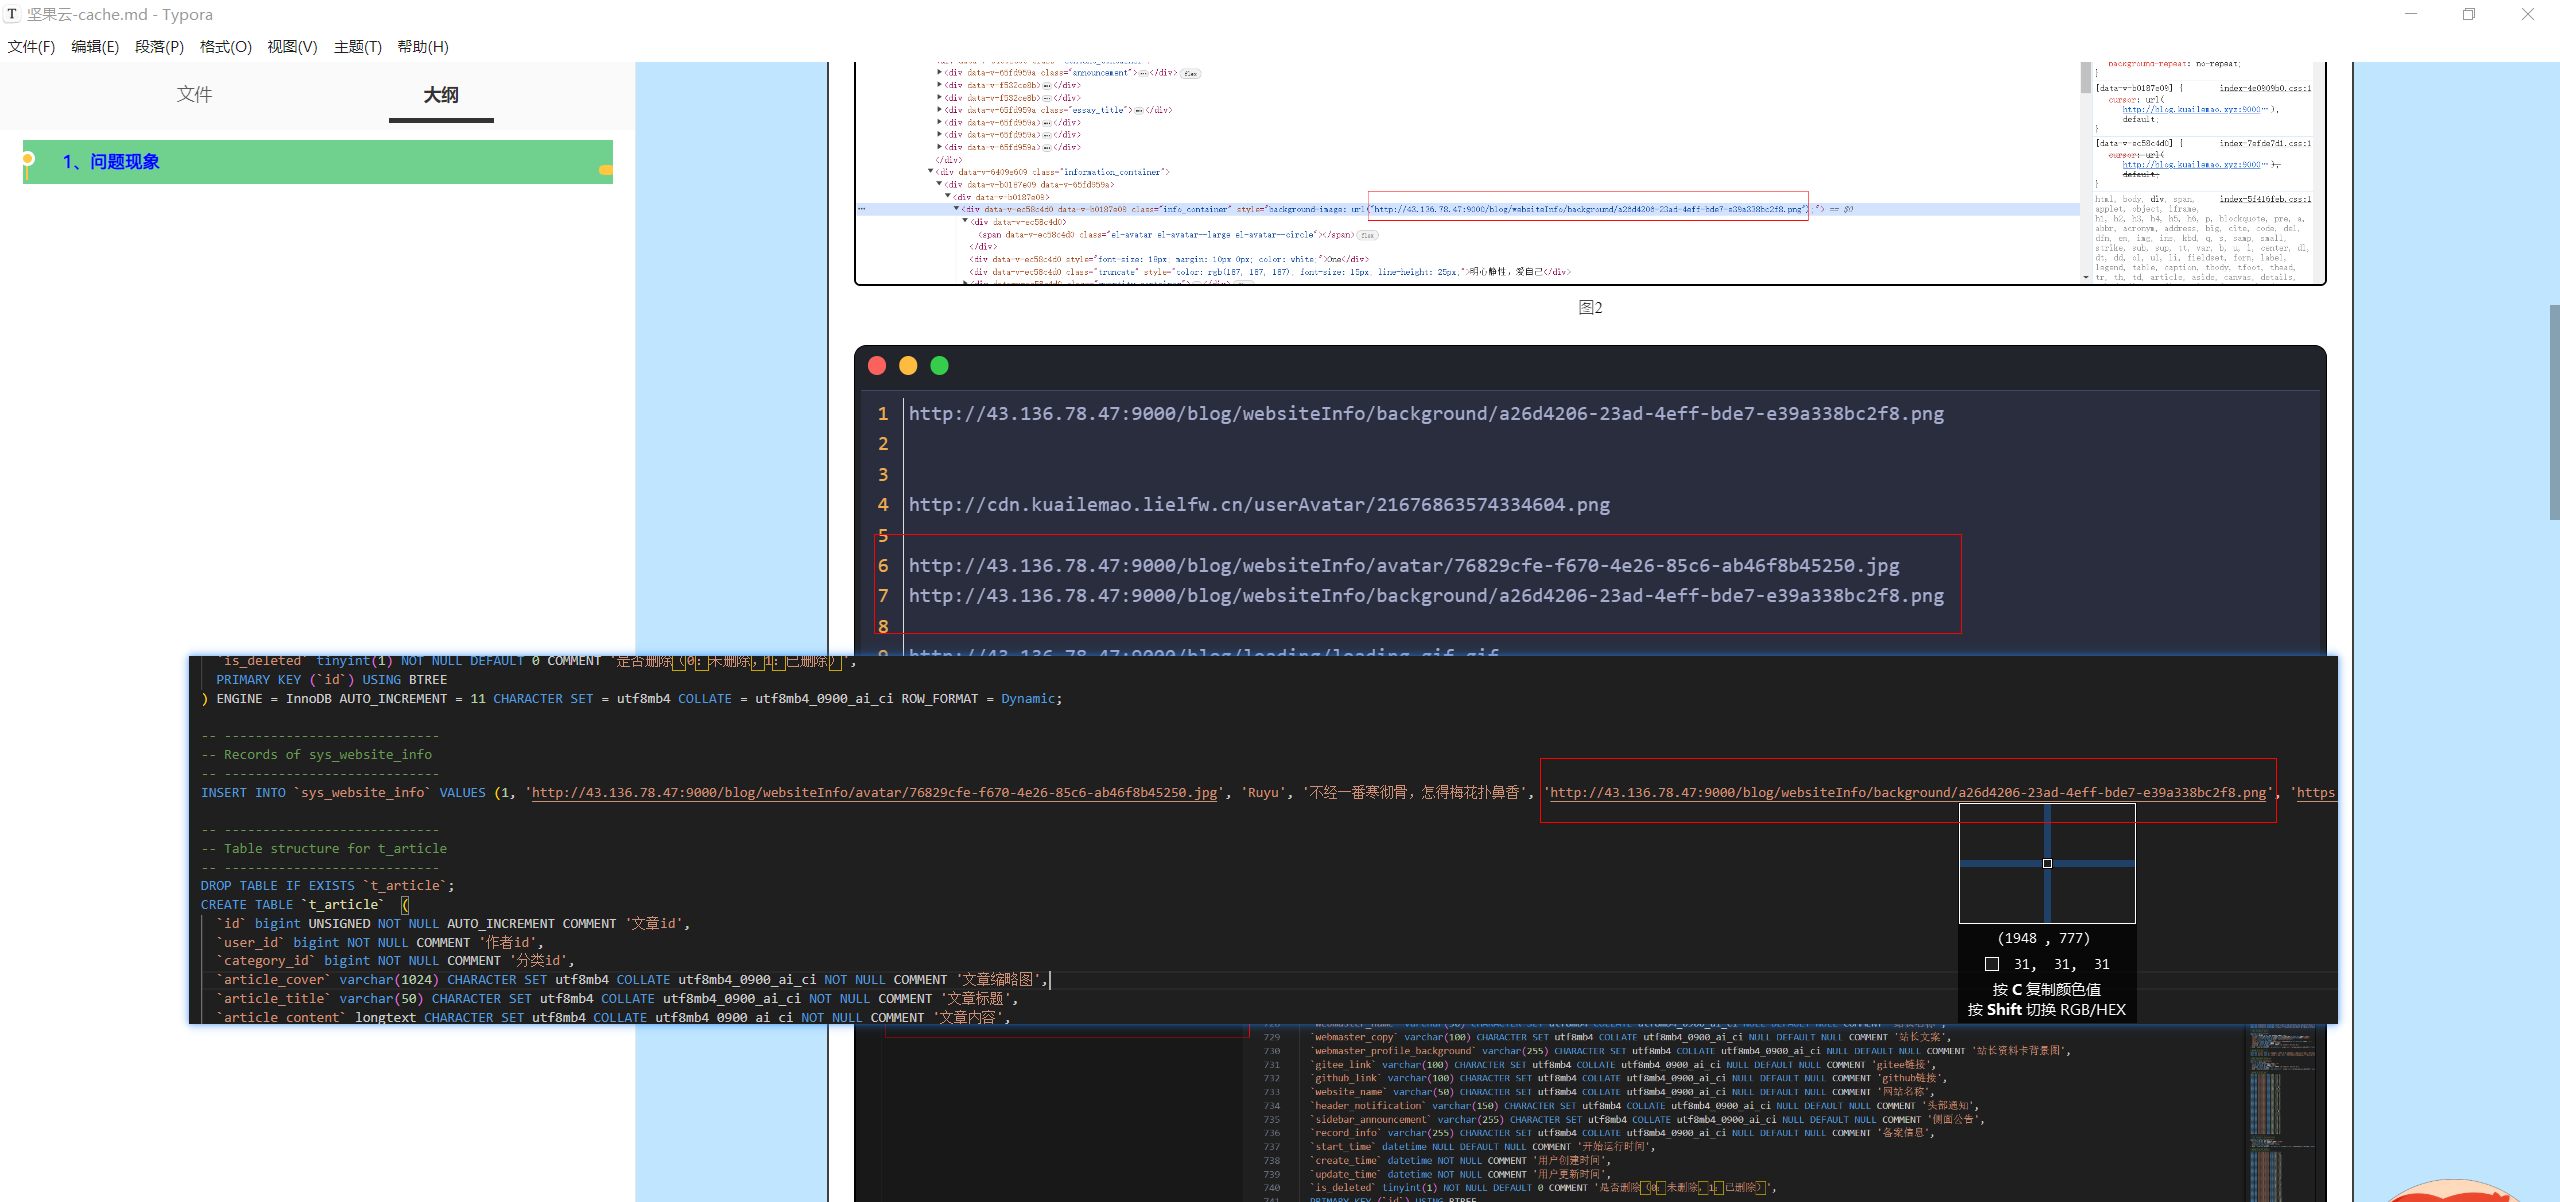
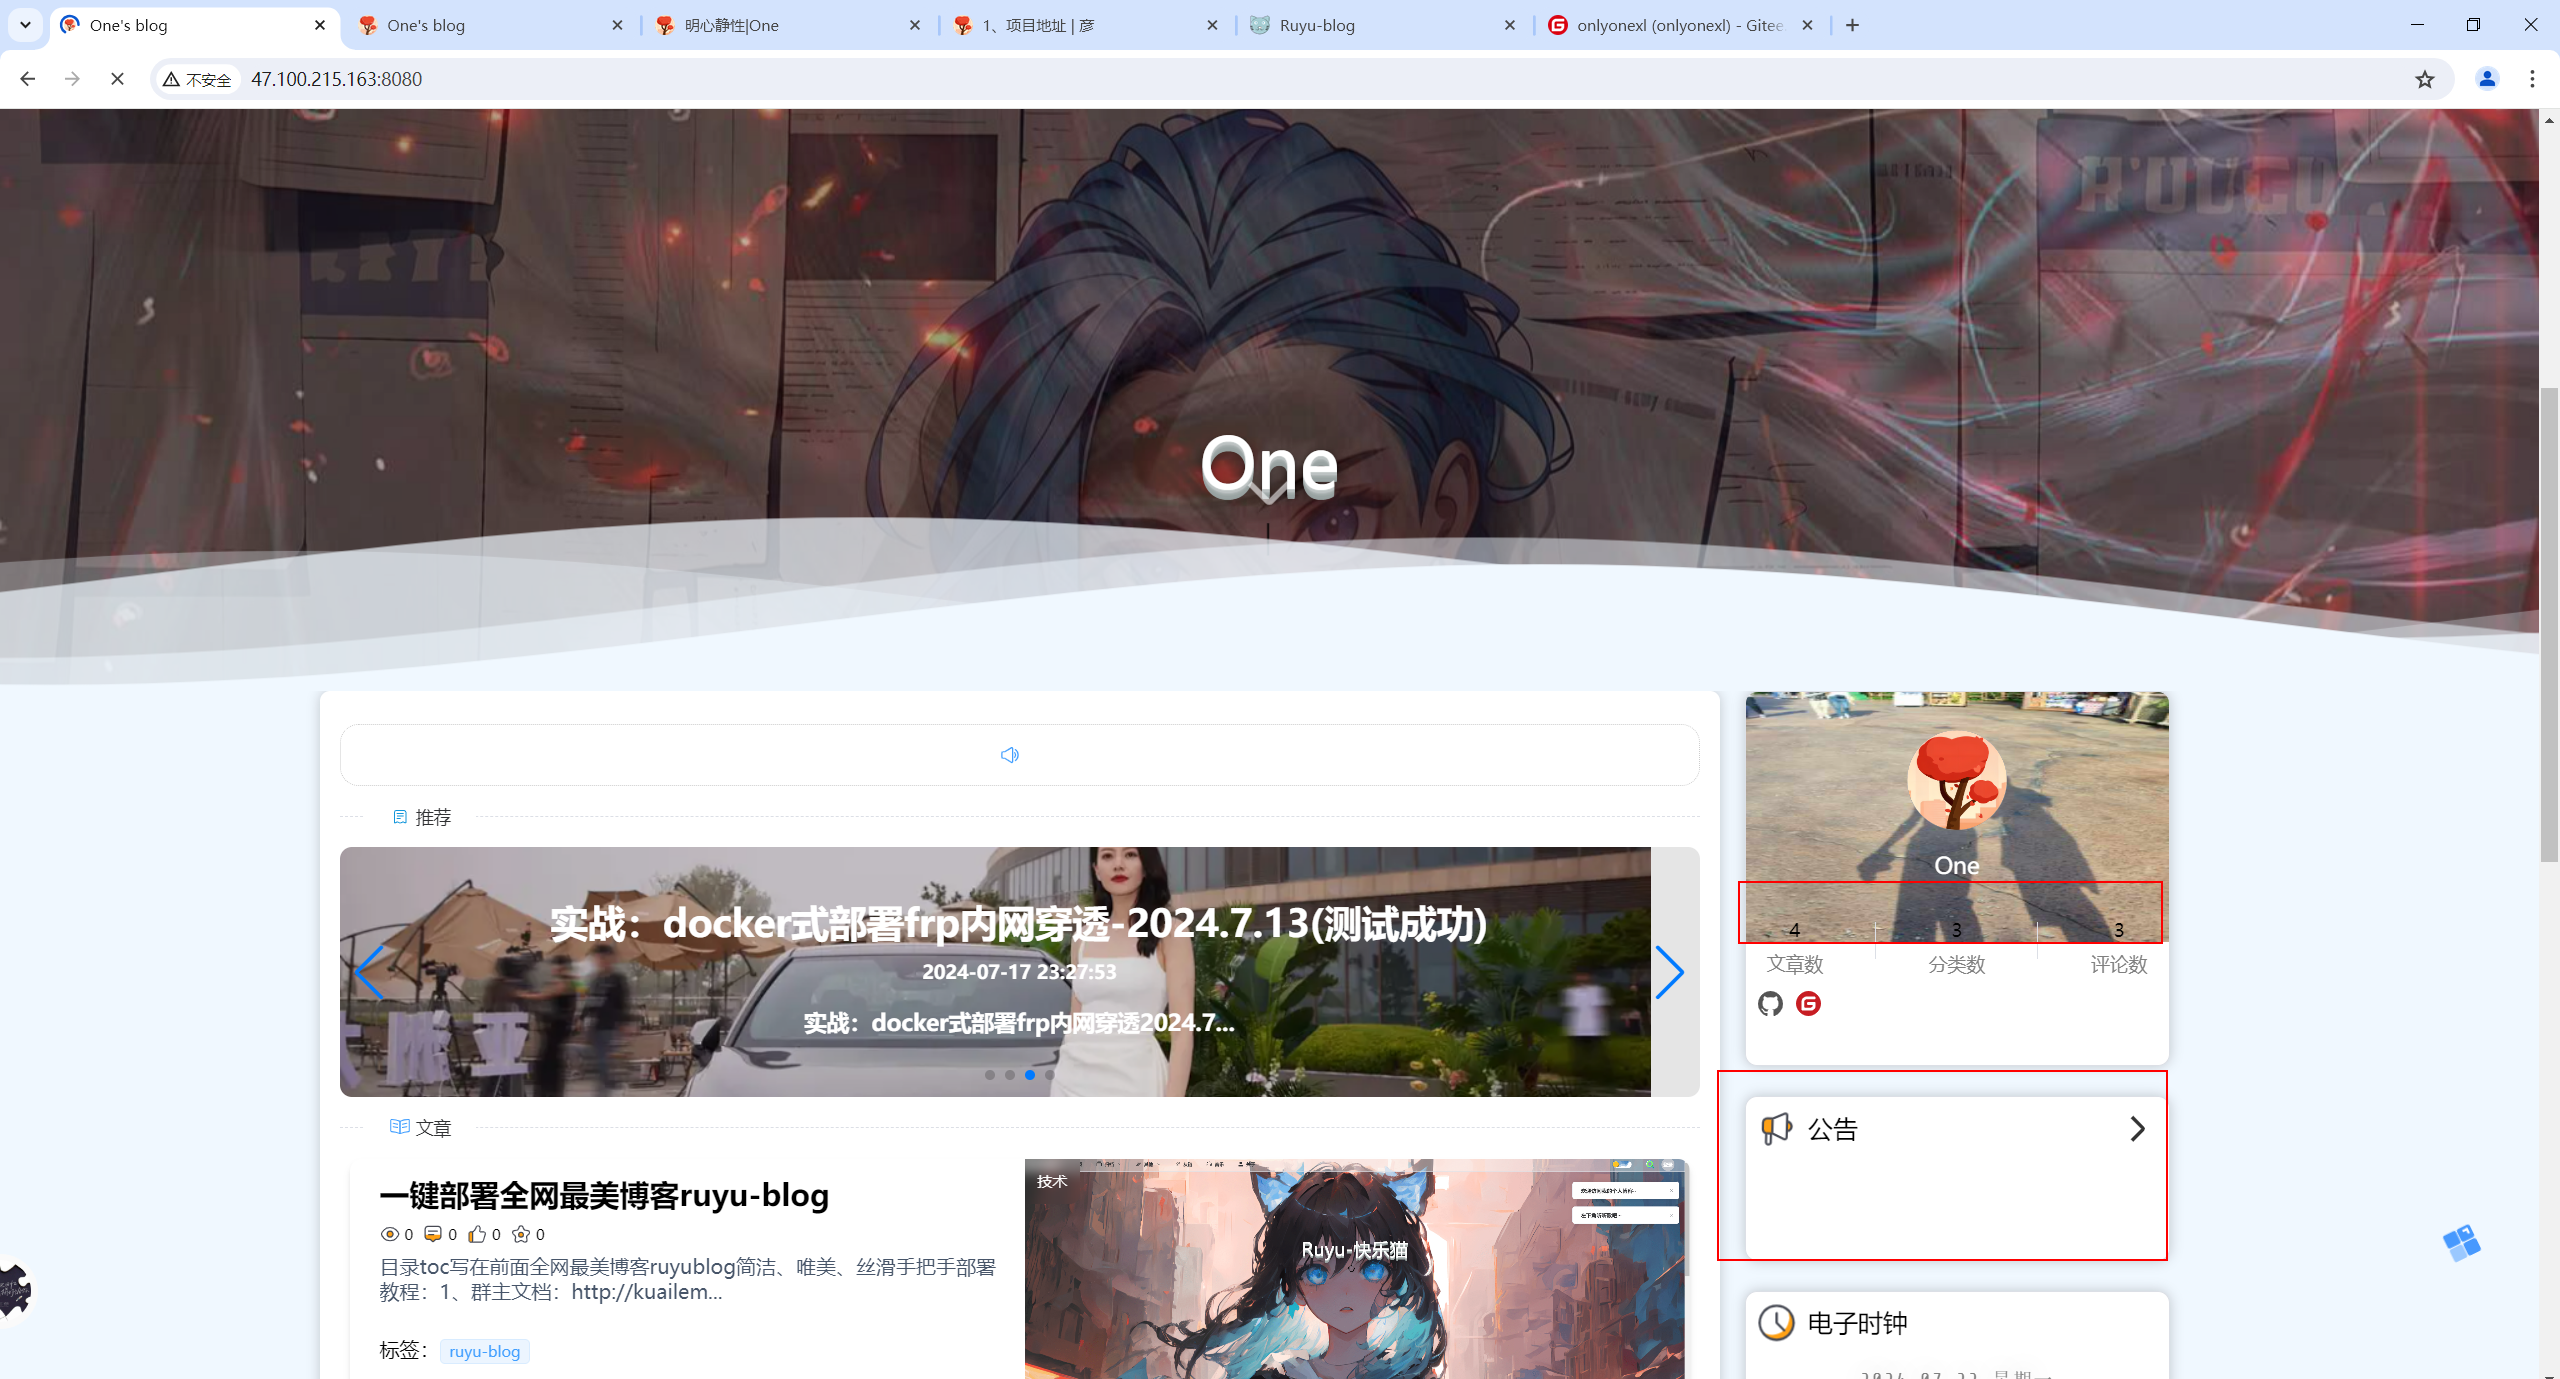
范例:如何修改首页个人头像及背景?-2024.7.22(已解决)
1.问题现象
如何修改首页个人头像及背景?
2.排查过程
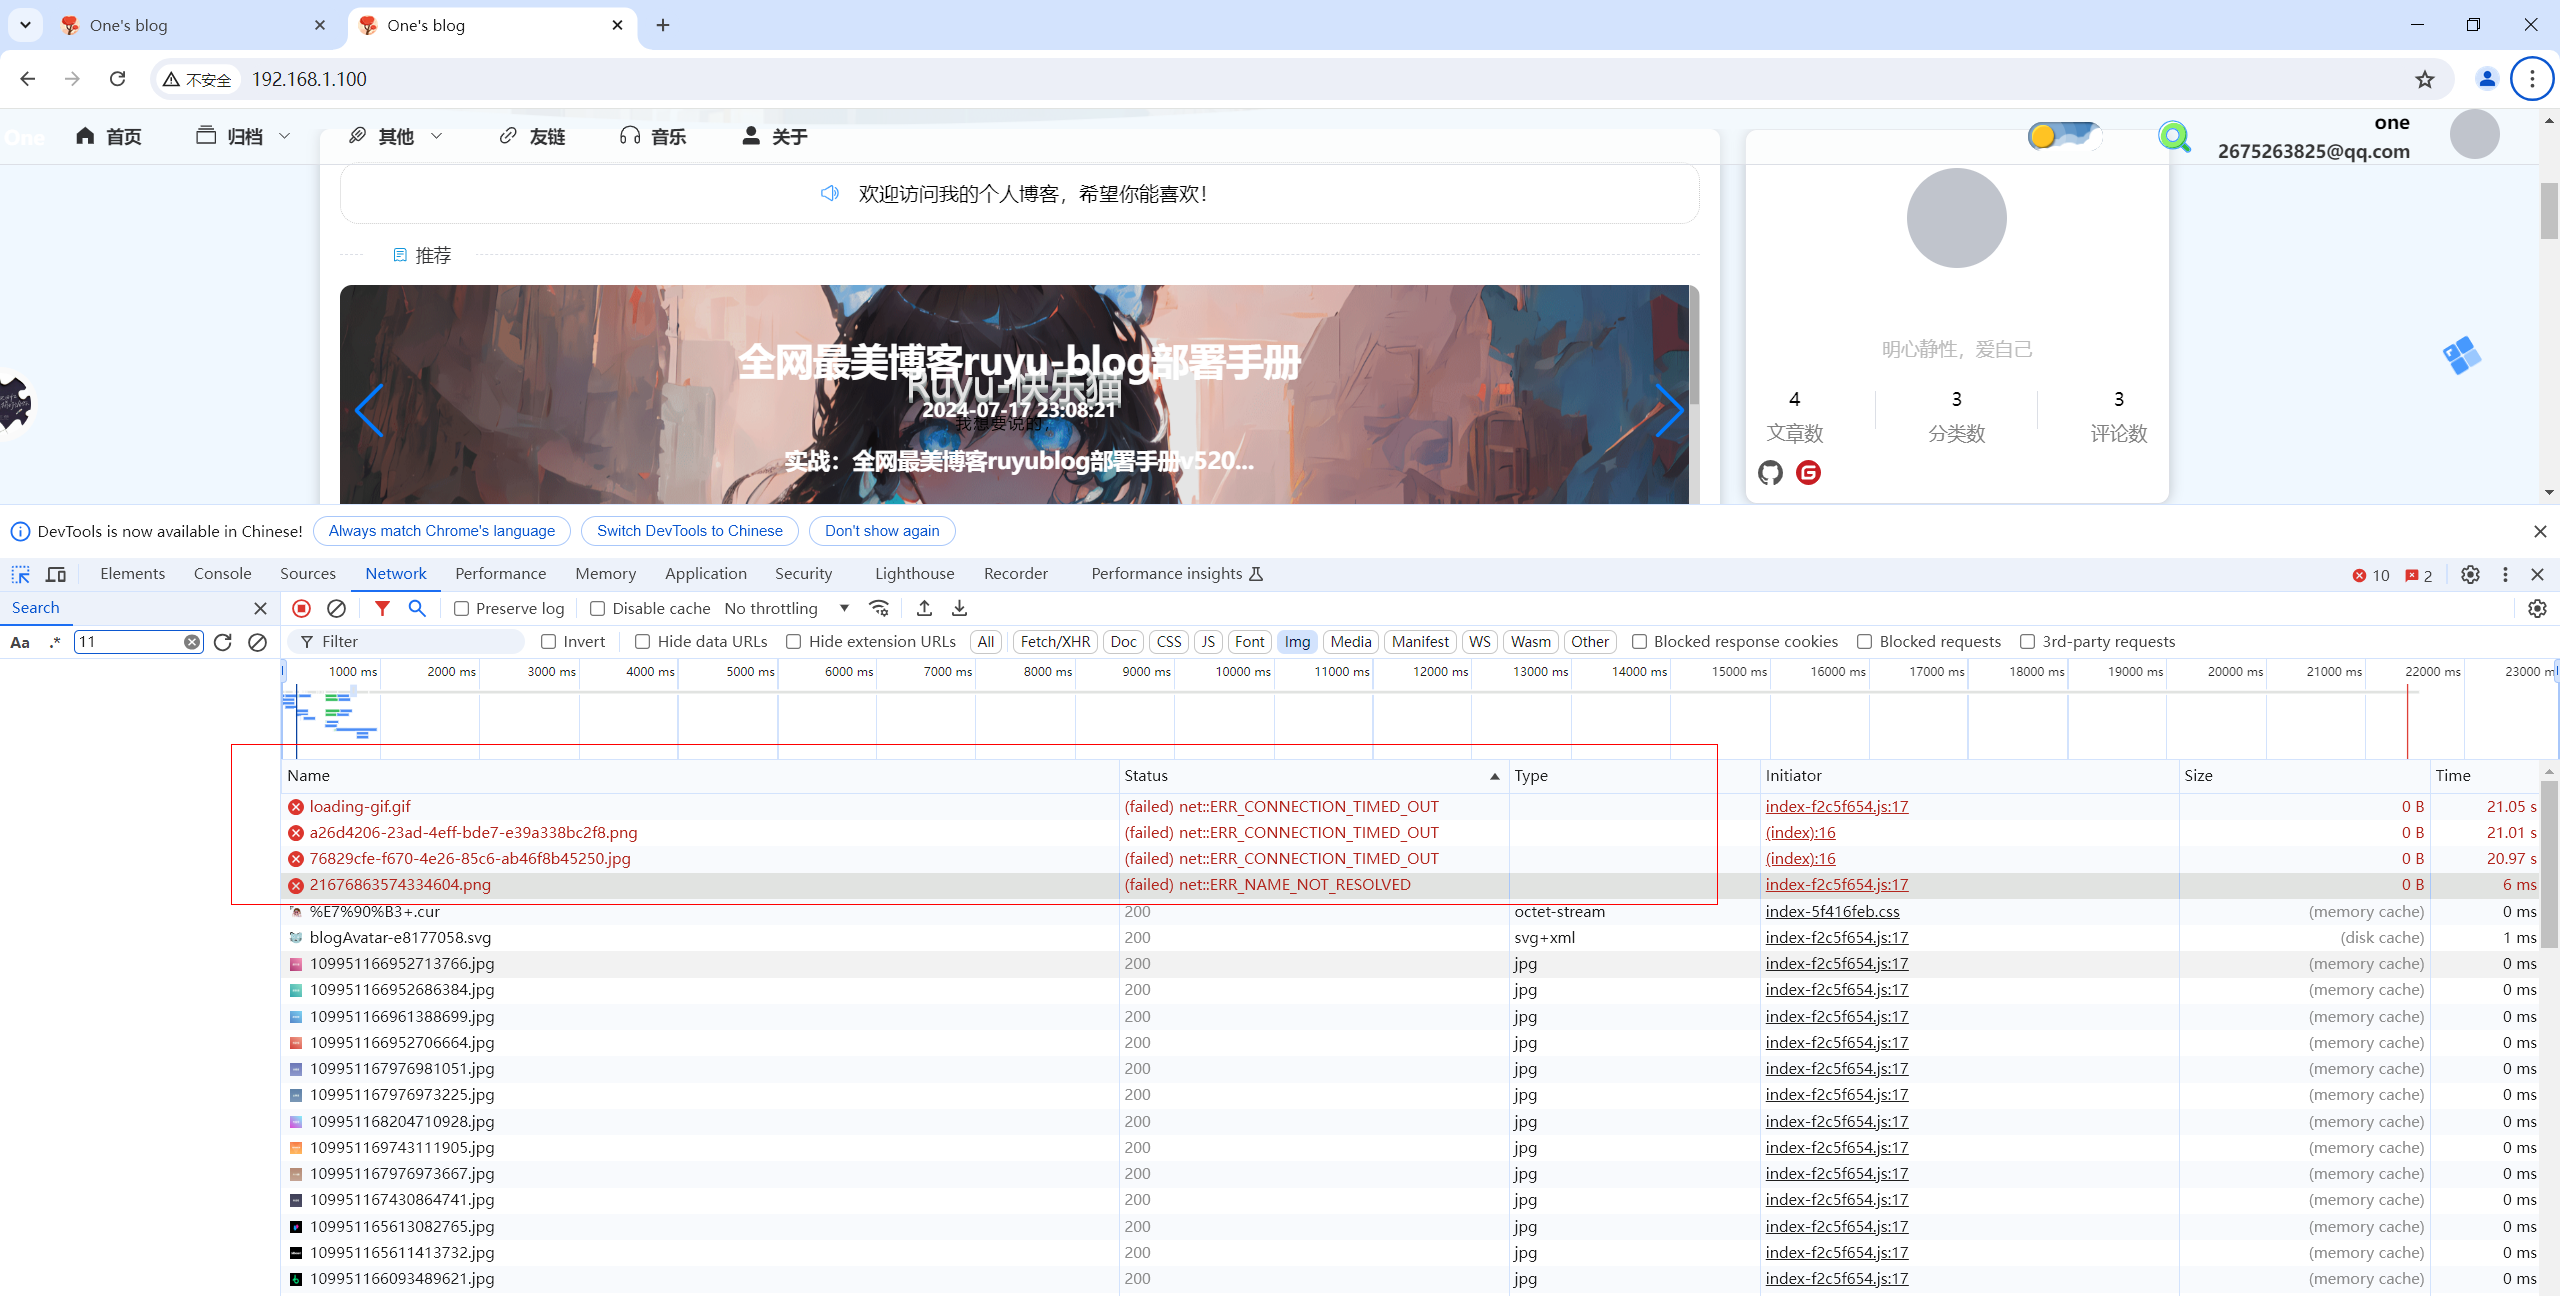

http://43.136.78.47:9000/blog/websiteInfo/background/a26d4206-23ad-4eff-bde7-e39a338bc2f8.png
http://cdn.kuailemao.lielfw.cn/userAvatar/21676863574334604.png
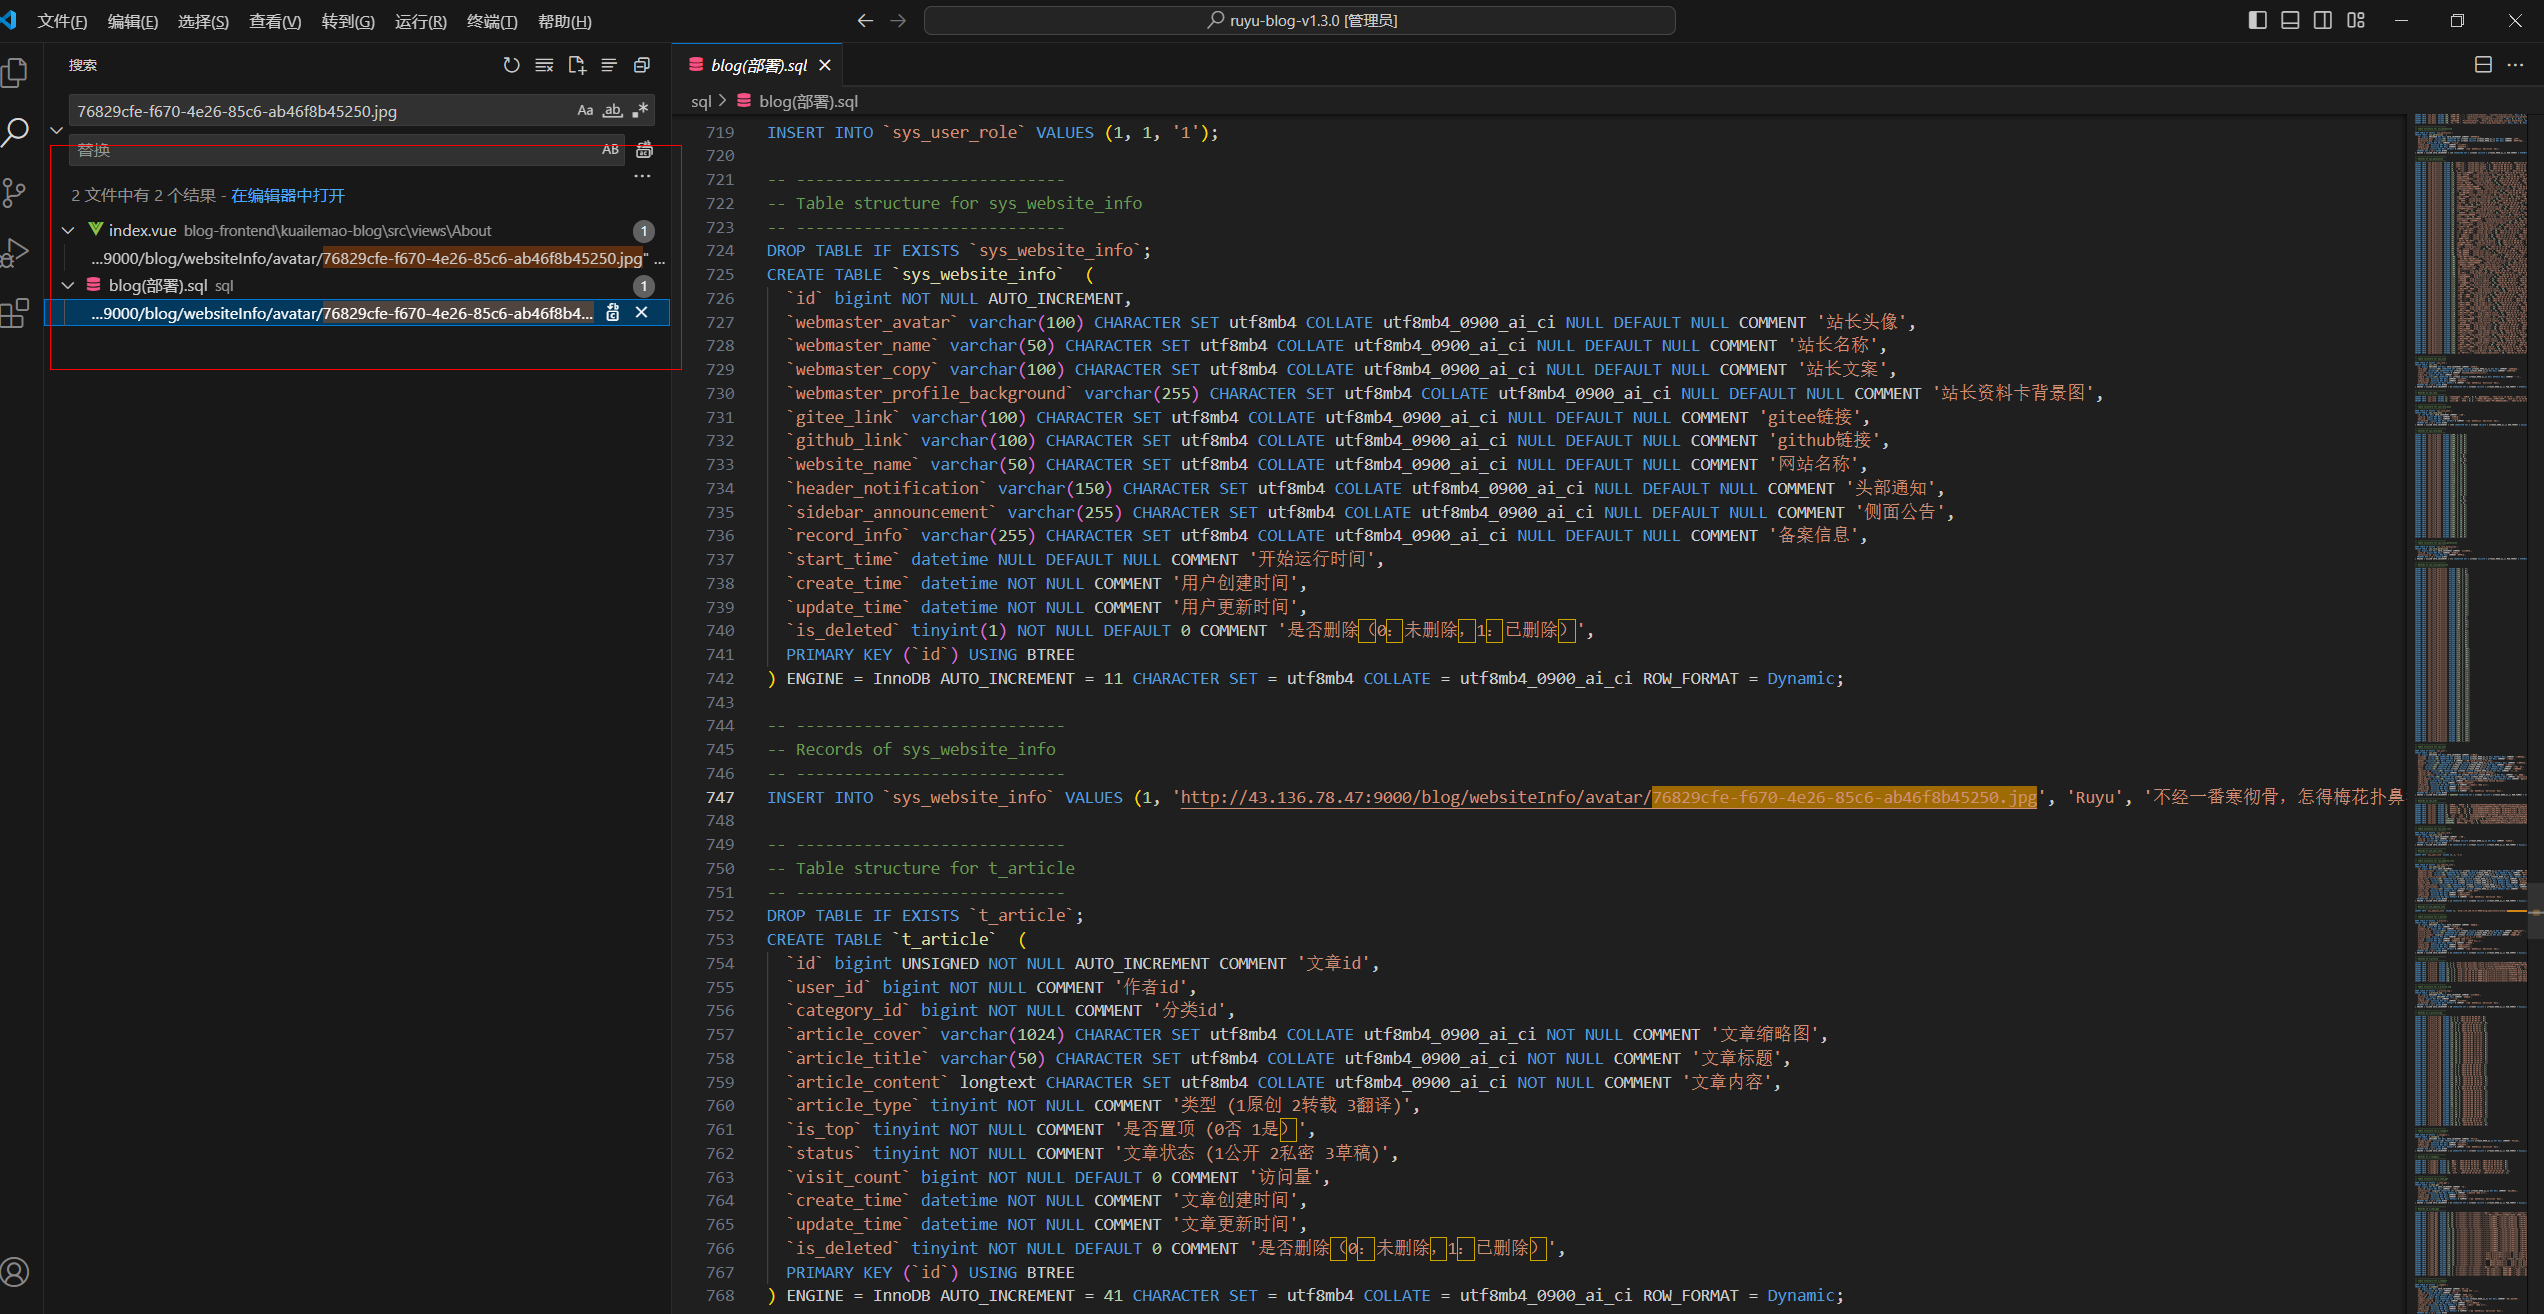
http://43.136.78.47:9000/blog/websiteInfo/avatar/76829cfe-f670-4e26-85c6-ab46f8b45250.jpg
http://43.136.78.47:9000/blog/websiteInfo/background/a26d4206-23ad-4eff-bde7-e39a338bc2f8.png
http://43.136.78.47:9000/blog/loading/loading-gif.gif
- 搜索后,有2处地方
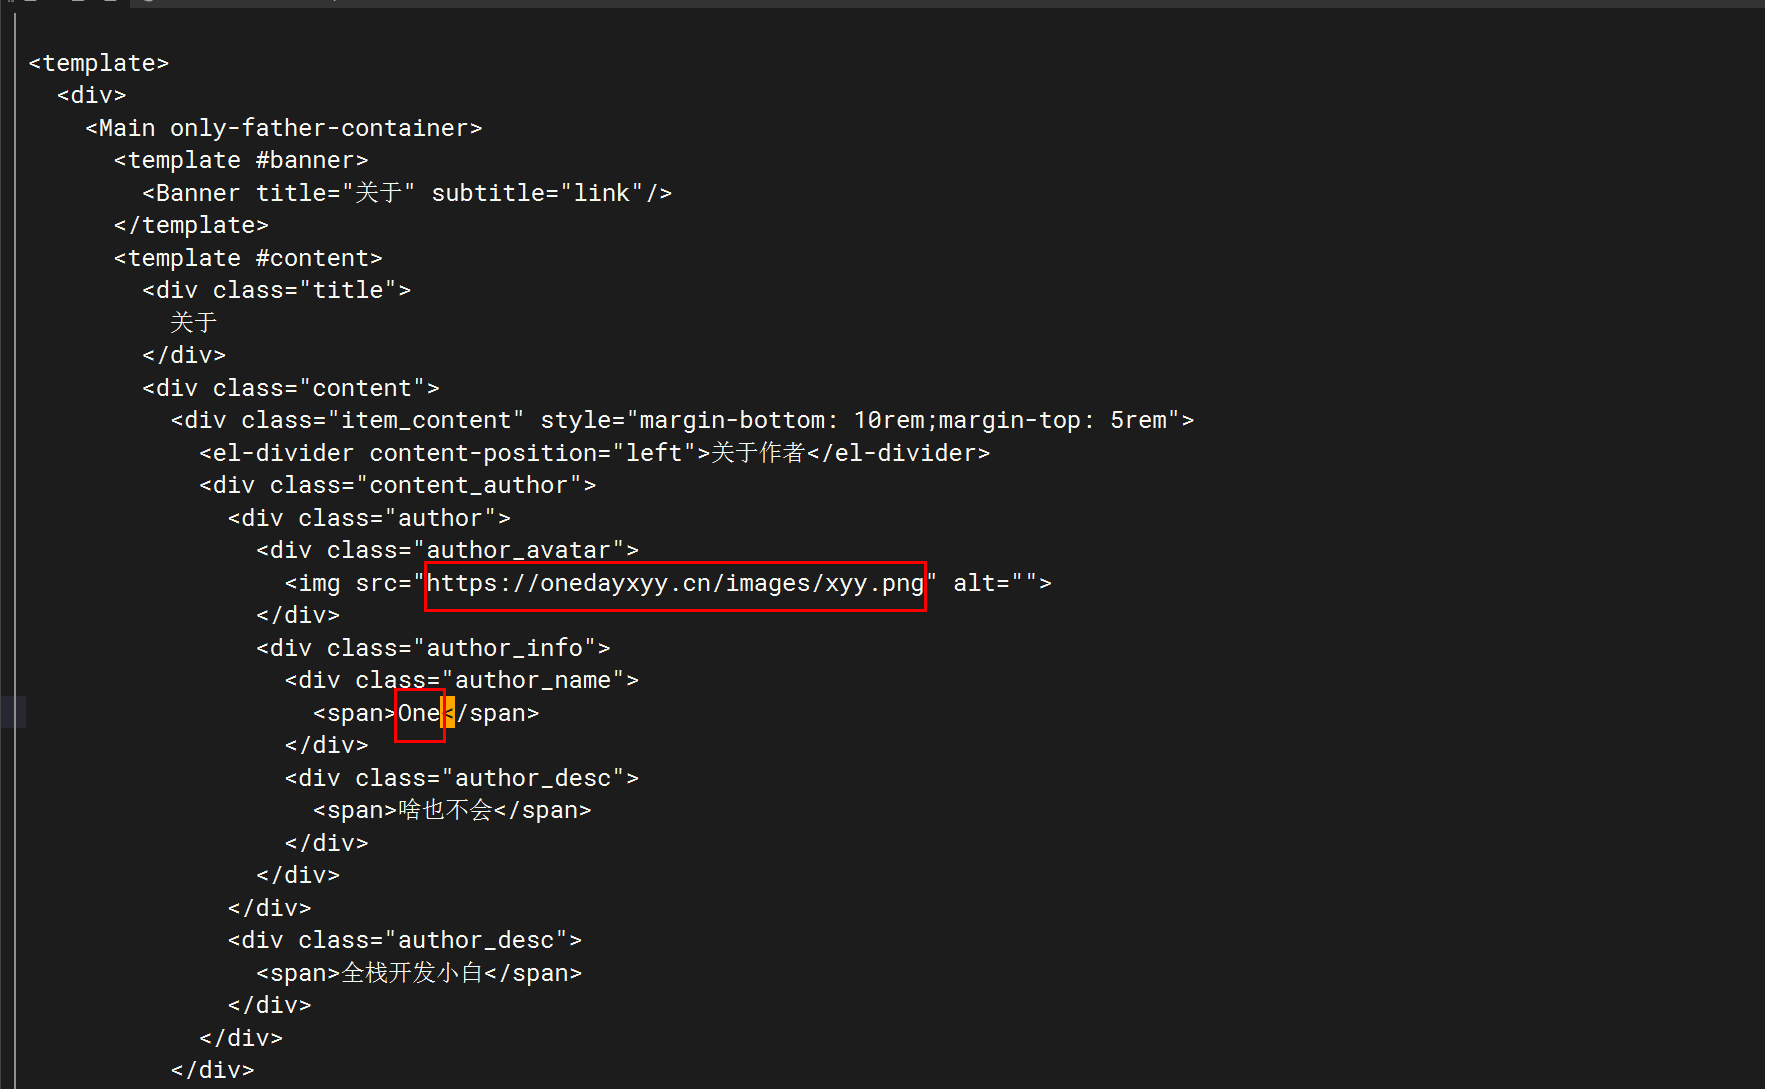
- 将其替换为我的图片
https://onedayxyy.cn/images/xyy.png
http://43.136.78.47:9000/blog/websiteInfo/avatar/76829cfe-f670-4e26-85c6-ab46f8b45250.jpg
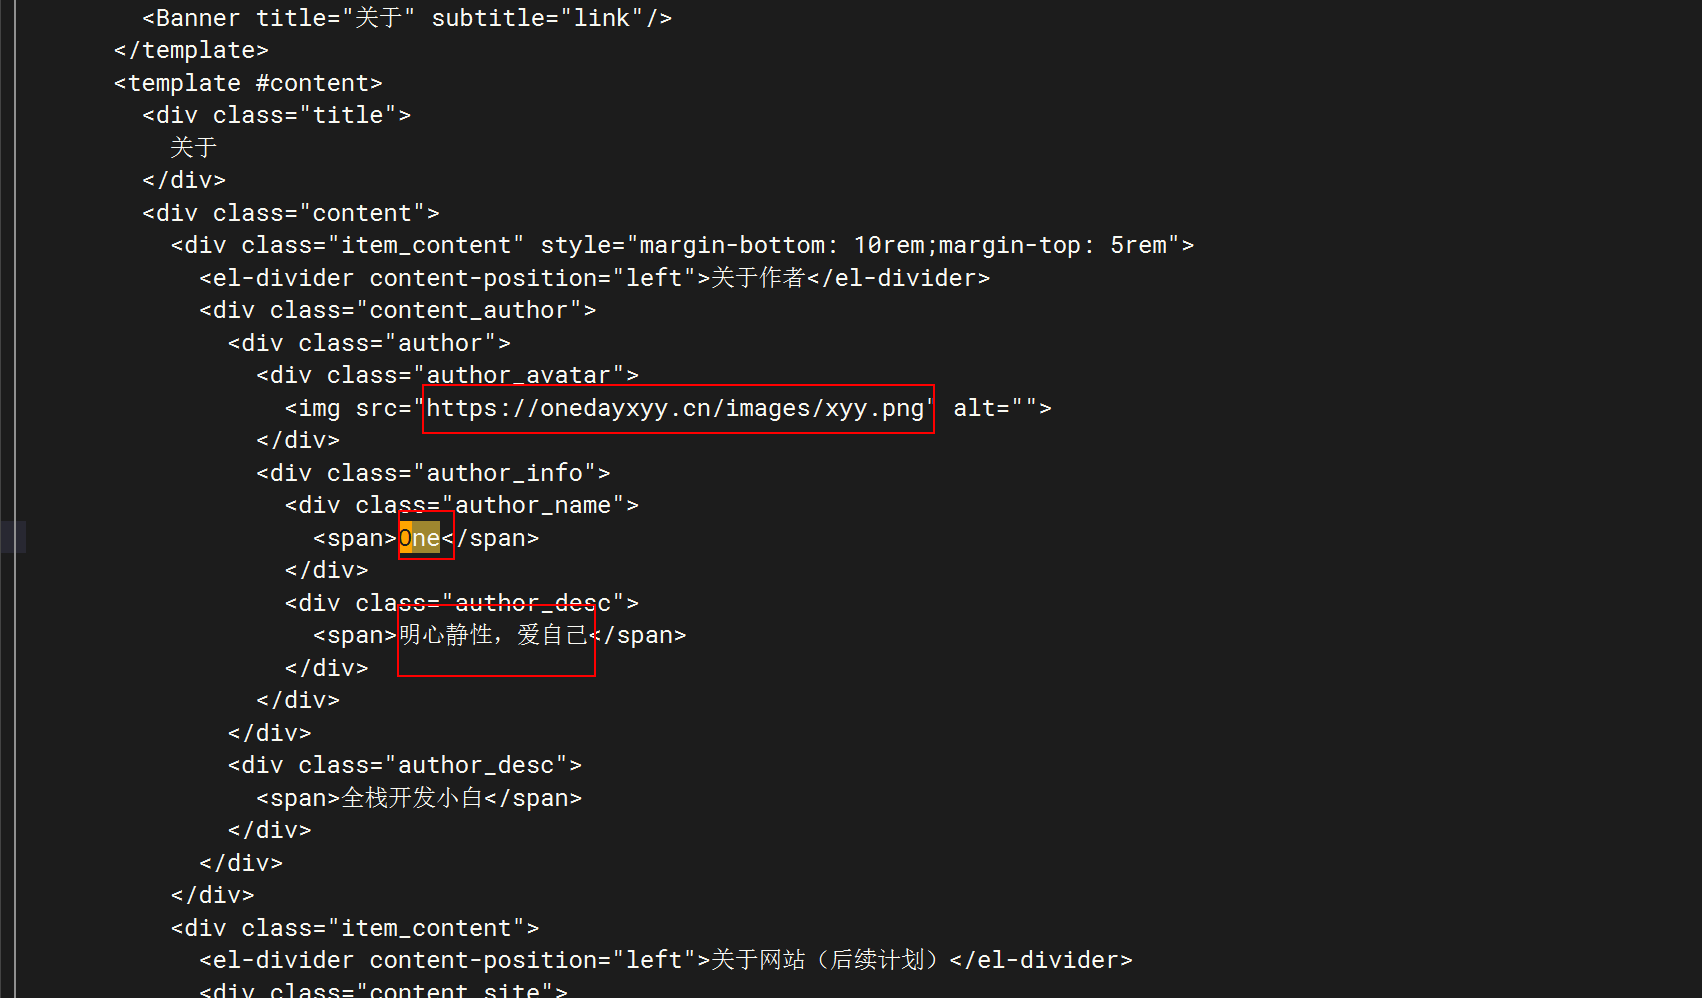
cp /root/ruyu-blog/blog-frontend/kuailemao-blog/src/views/About/index.vue{,.bak}
vim /root/ruyu-blog/blog-frontend/kuailemao-blog/src/views/About/index.vue

- 修改后运行
cd /root/ruyu-blog/blog-frontend/kuailemao-blog/
pnpm run dev
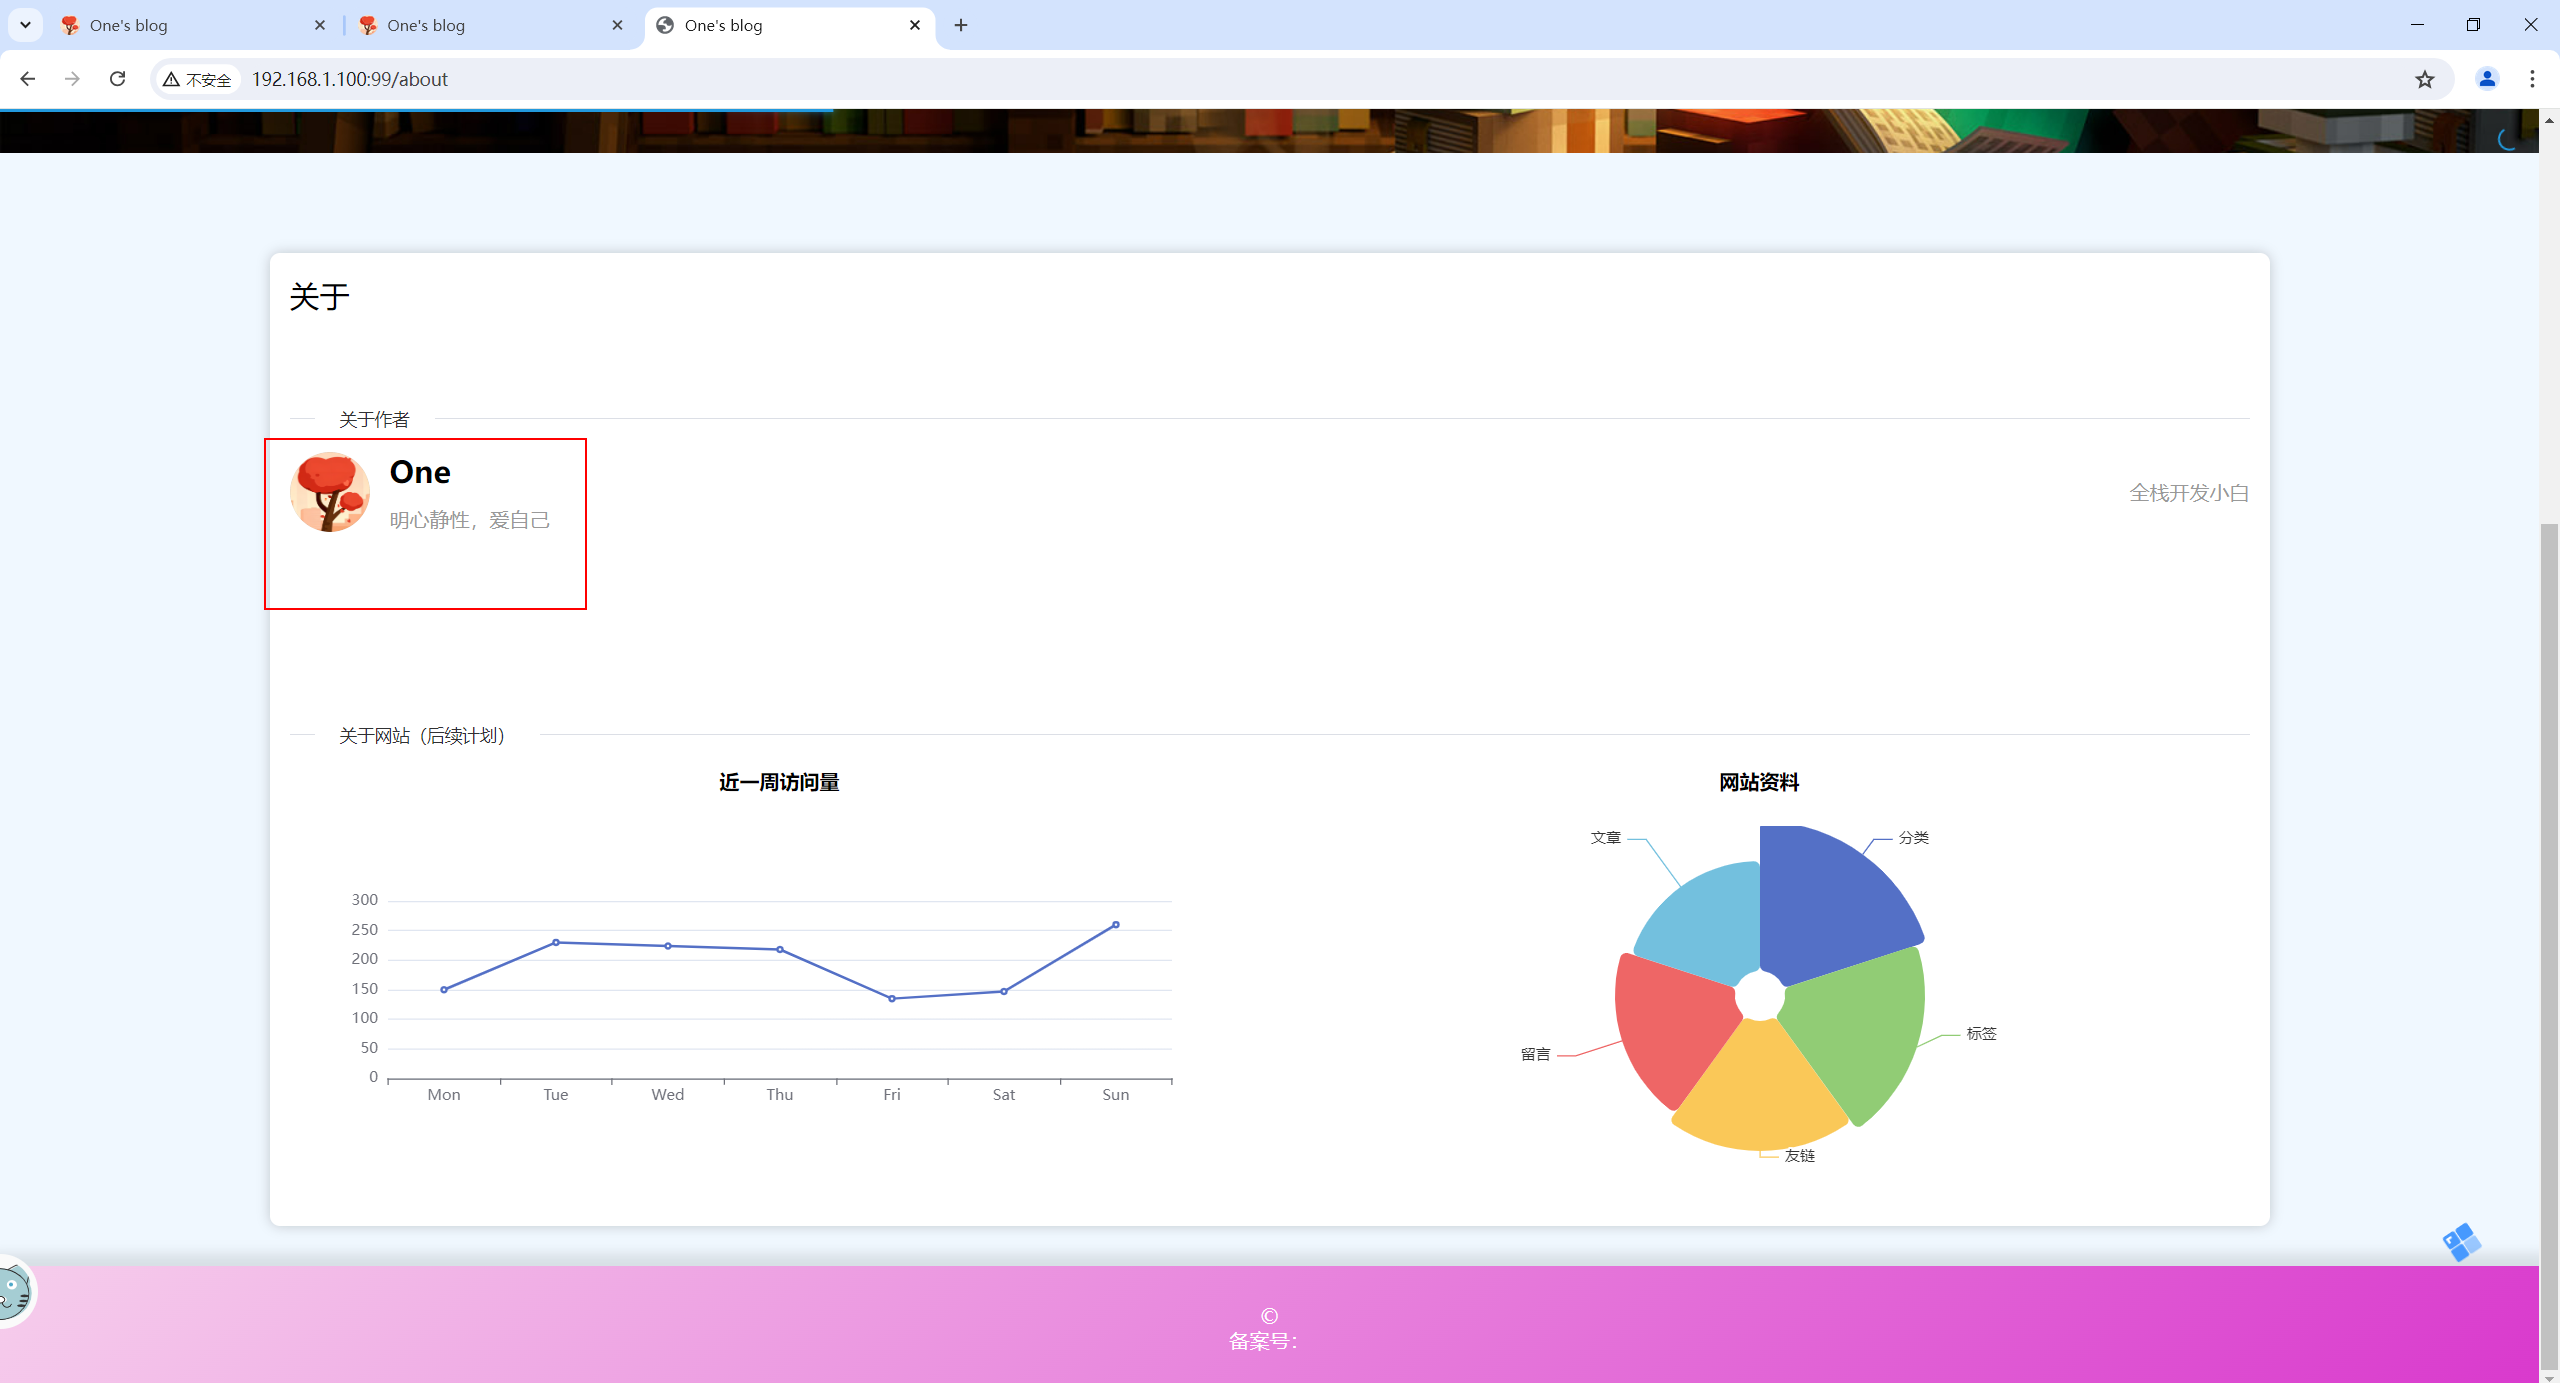
完美。
- 但是,首页那�个用户头像如何解决呢?
-- ----------------------------
-- Records of sys_website_info
-- ----------------------------
INSERT INTO `sys_website_info` VALUES (1, 'http://43.136.78.47:9000/blog/websiteInfo/avatar/76829cfe-f670-4e26-85c6-ab46f8b45250.jpg', 'Ruyu', '不经一番寒彻骨,怎得梅花扑鼻香', 'http://43.136.78.47:9000/blog/websiteInfo/background/a26d4206-23ad-4eff-bde7-e39a338bc2f8.png', 'https://gitee.com/bbbb', 'https://github.com/aaa', 'Ruyu-快乐猫', '欢迎访问我的个人博客,希望你能喜欢!', '欢迎指出网站的不足,给我提供意见', '备案信息', '2024-01-01 16:00:25', '2023-12-27 14:28:10', '2024-01-22 22:38:24', 0);
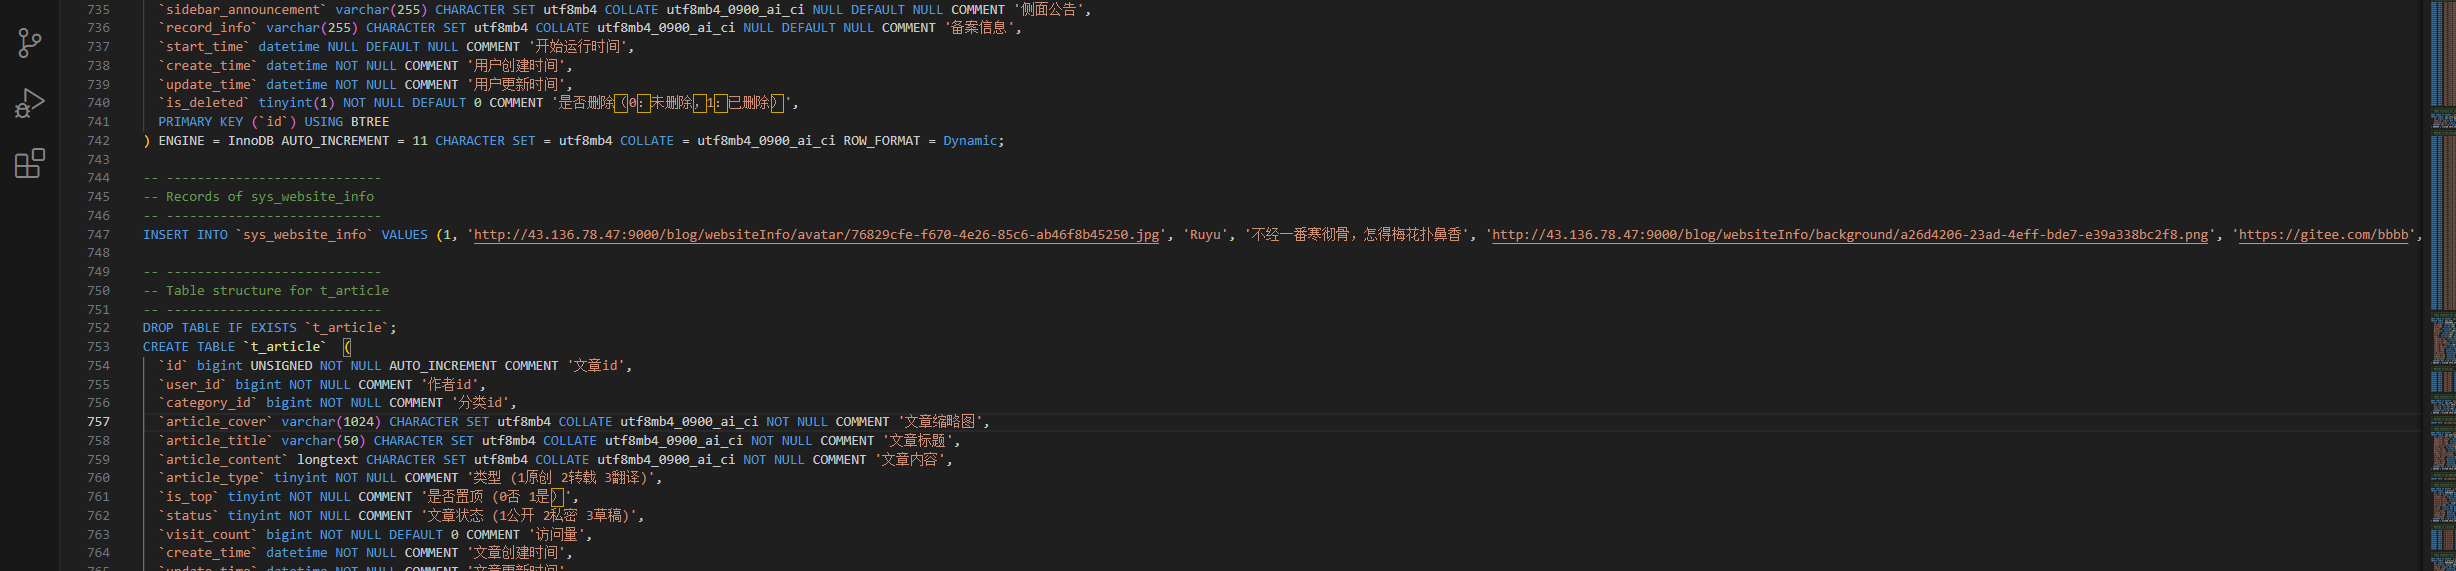
- 这个对得上的,看来得改数据库了
INSERT INTO `sys_website_info` VALUES (1, 'http://43.136.78.47:9000/blog/websiteInfo/avatar/76829cfe-f670-4e26-85c6-ab46f8b45250.jpg', 'Ruyu', '不经一番寒彻骨,怎得梅花扑鼻香', 'http://43.136.78.47:9000/blog/websiteInfo/background/a26d4206-23ad-4eff-bde7-e39a338bc2f8.png', 'https://gitee.com/bbbb', 'https://github.com/aaa', 'Ruyu-快乐猫', '欢迎访问我的个人博客,希望你能喜欢!', '欢迎指出网站的不足,给我提供意见', '备案信息', '2024-01-01 16:00:25', '2023-12-27 14:28:10', '2024-01-22 22:38:24', 0);
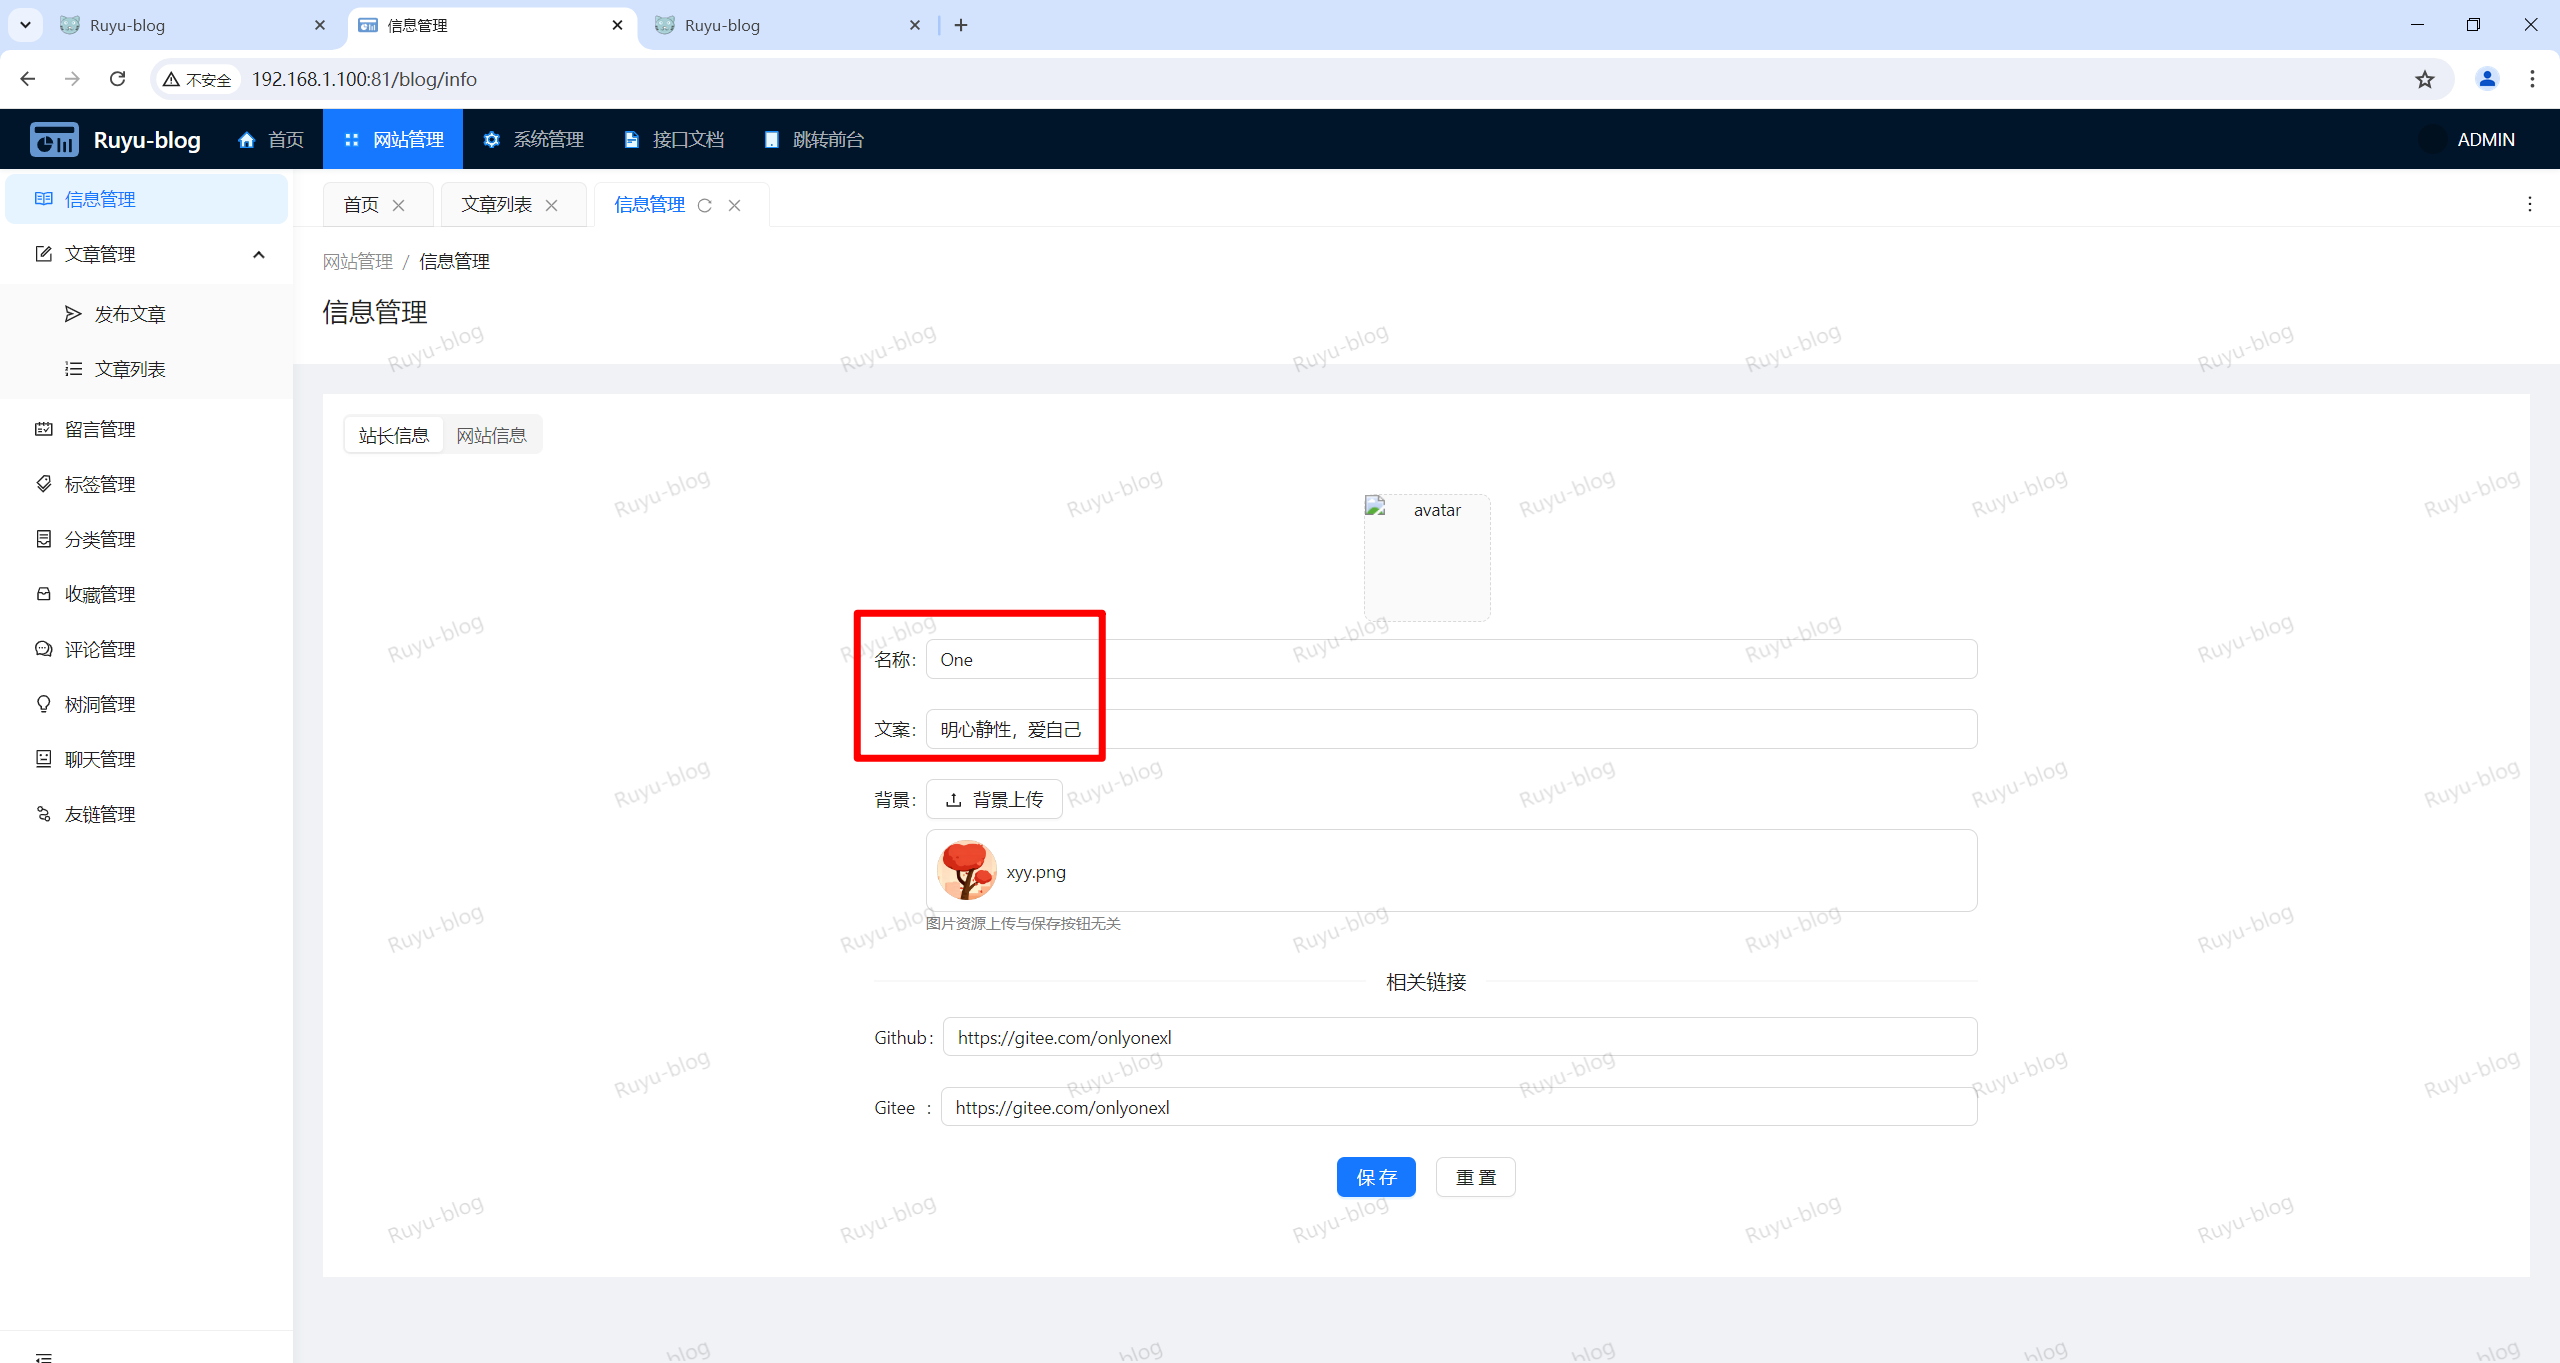
INSERT INTO `sys_website_info` VALUES (1, 'https://onedayxyy.cn/images/xyy.png', 'One', '明心静性,爱自己', 'http://43.136.78.47:9000/blog/websiteInfo/background/a26d4206-23ad-4eff-bde7-e39a338bc2f8.png', 'https://gitee.com/onlyonexl', 'https://gitee.com/onlyonexl', 'One', '欢迎访问我的个人博客,希望你能喜欢!', '欢迎指出网站的不足,给我提供意见', '备案信息', '2024-01-01 16:00:25', '2023-12-27 14:28:10', '2024-01-22 22:38:24', 0);
这个是原作者效果:

gpt
INSERT INTO `sys_website_info` VALUES (1, 'http://43.136.78.47:9000/blog/websiteInfo/avatar/76829cfe-f670-4e26-85c6-ab46f8b45250.jpg', 'Ruyu', '不经一番寒彻骨,怎得梅花扑鼻香', 'http://43.136.78.47:9000/blog/websiteInfo/background/a26d4206-23ad-4eff-bde7-e39a338bc2f8.png', 'https://gitee.com/bbbb', 'https://github.com/aaa', 'Ruyu-快乐猫', '欢迎访问我的个人博客,希望你能喜欢!', '欢迎指出网站的不足,给我提供意见', '备案信息', '2024-01-01 16:00:25', '2023-12-27 14:28:10', '2024-01-22 22:38:24', 0);
这段SQL语句是用于向名为 sys_website_info 的数据库表中插入一条记录。具体来说,这条语句执行了以下操作:
INSERT INTO是SQL语句的关键字,用于插入数据。sys_website_info是目标表的名称。VALUES后面跟着的是要插入的具体数据。
插入的数据包括以下字段:
1:记录的唯一标识符,通常是主键。'http://43.136.78.47:9000/blog/websiteInfo/avatar/76829cfe-f670-4e26-85c6-ab46f8b45250.jpg':网站头像的URL。'Ruyu':网站所有者的名字或昵称。'不经一番寒彻骨,怎得梅花扑鼻香':网站的标语或格言。'http://43.136.78.47:9000/blog/websiteInfo/background/a26d4206-23ad-4eff-bde7-e39a338bc2f8.png':网站背景图片的URL。'https://gitee.com/bbbb':Gitee(码云)个人主页的URL。'https://github.com/aaa':GitHub个人主页的URL。'Ruyu-快乐猫':网站的名称或标题。'欢迎访问我的个人博客,希望你能喜欢!':欢迎信息或网站介绍。'欢迎指出网站的不足,给我提供意见':用户反馈的邀请或提示。'备案信息':网站的备案信息。'2024-01-01 16:00:25':记录的创建时间。'2023-12-27 14:28:10':记录的最后更新时间。'2024-01-22 22:38:24':记录的最后修改时间。0:可能是一个标志位或状态码,表示某种状态(例如,是否启用、是否删除等)。
总结来说,这段SQL语句向 sys_website_info 表中插入了一条包含网站基本信息的记录。
我现在想修改这里条数据里的一些内容,请问该用什么命令呢?
要修改数据库表中的现有数据,可以使用SQL的 UPDATE 语句。以下是一个示例,展示了如何修改 sys_website_info 表中ID为1的记录的部分字段:
INSERT INTO `sys_website_info` VALUES (1, 'https://onedayxyy.cn/images/xyy.png', 'One', '明心静性,爱自己', 'http://43.136.78.47:9000/blog/websiteInfo/background/a26d4206-23ad-4eff-bde7-e39a338bc2f8.png', 'https://gitee.com/onlyonexl', 'https://gitee.com/onlyonexl', 'One', '欢迎访问我的个人博客,希望你能喜欢!', '欢迎指出网站的不足,给我提供意见', '备案信息', '2024-01-01 16:00:25', '2023-12-27 14:28:10', '2024-01-22 22:38:24', 0);
!
UPDATE `sys_website_info`
SET
    `avatar_url` = 'https://onedayxyy.cn/images/xyy.png',
    `name` = 'One',
    `slogan` = '新的标语',
    `background_url` = 'http://new-background-url.com/background.png',
    `gitee_url` = 'https://new-gitee-url.com',
    `github_url` = 'https://new-github-url.com',
    `website_name` = '新的网站名称',
    `welcome_message` = '新的欢迎信息',
    `feedback_message` = '新的反馈信息',
    `record_info` = '新的备案信息',
    `create_time` = '2024-01-02 16:00:25',
    `update_time` = '2023-12-28 14:28:10',
    `modify_time` = '2024-01-23 22:38:24',
    `status` = 1
WHERE `id` = 1;
在这个示例中:
UPDATE是SQL语句的关键字,用于更新数据。sys_website_info是目标表的名称。SET后面跟着的是要更新的字段及其新值。WHERE子句用于指定要更新的记录的条件,这里使用id = 1来指定要更新ID为1的记录。
请根据实际需要修改字段名称和值。确保在执行 UPDATE 语句之前备份数据,以防止意外修改导致数据丢失。
查看本地数据库:
docker exec -it mysql bash
mysql -uroot -pxxxx
use blog;
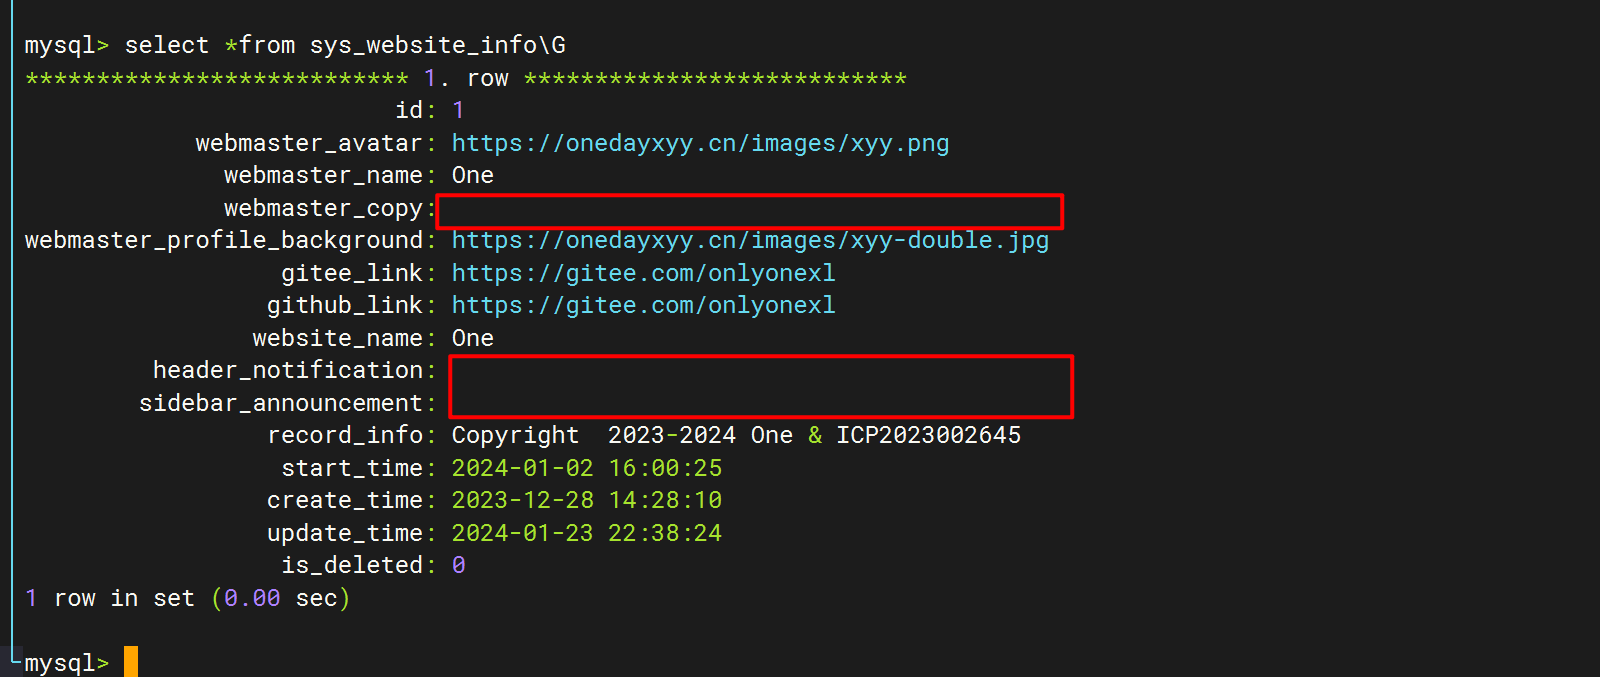
select *from sys_website_info\G
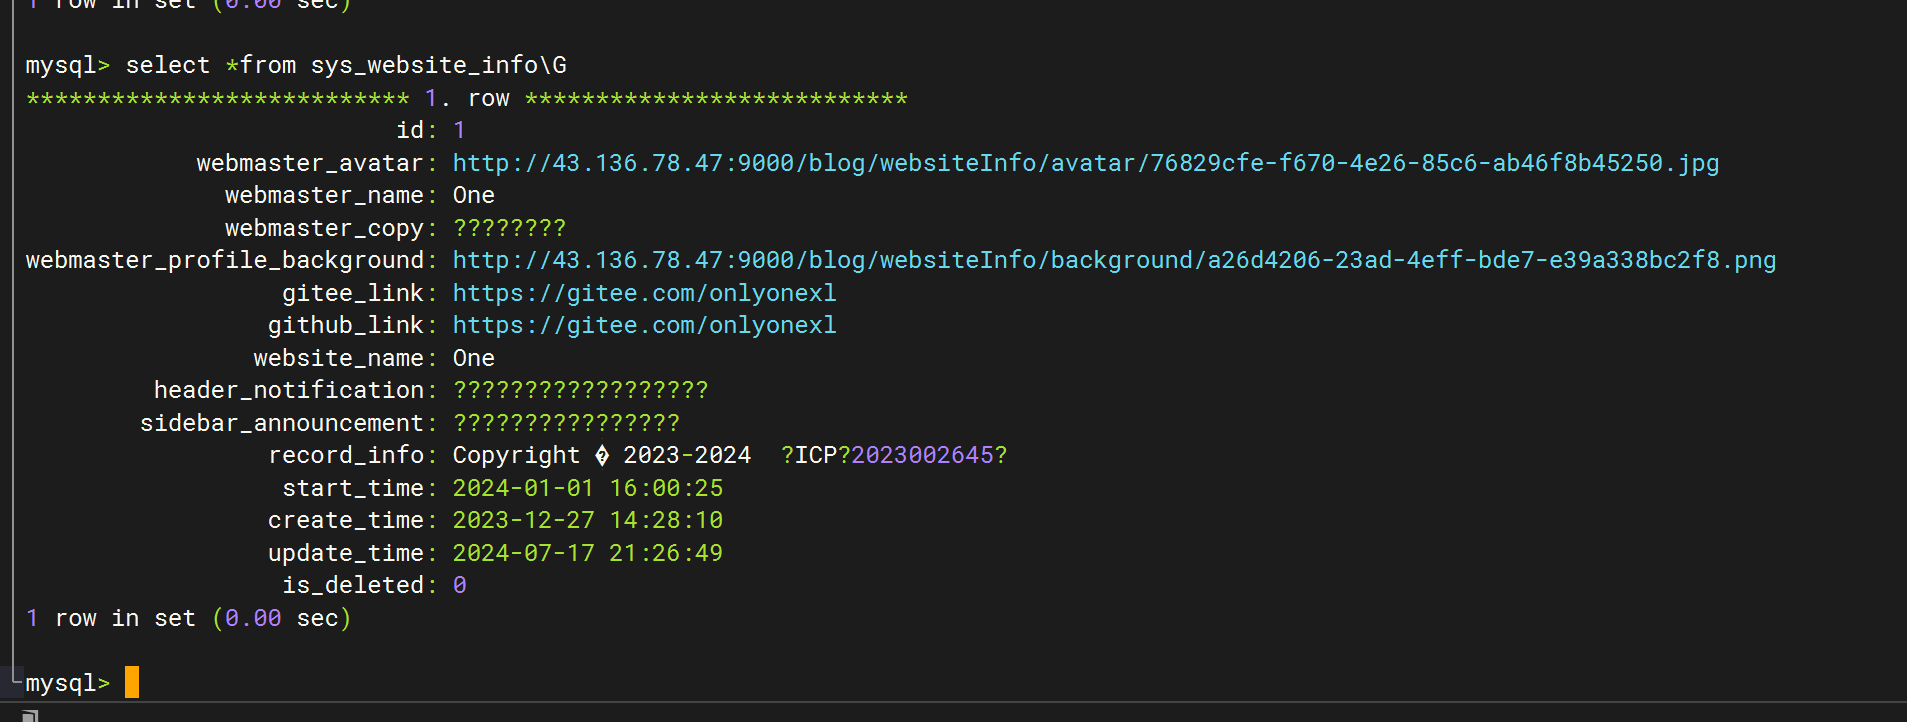
id: 1
webmaster_avatar: http://43.136.78.47:9000/blog/websiteInfo/avatar/76829cfe-f670-4e26-85c6-ab46f8b45250.jpg
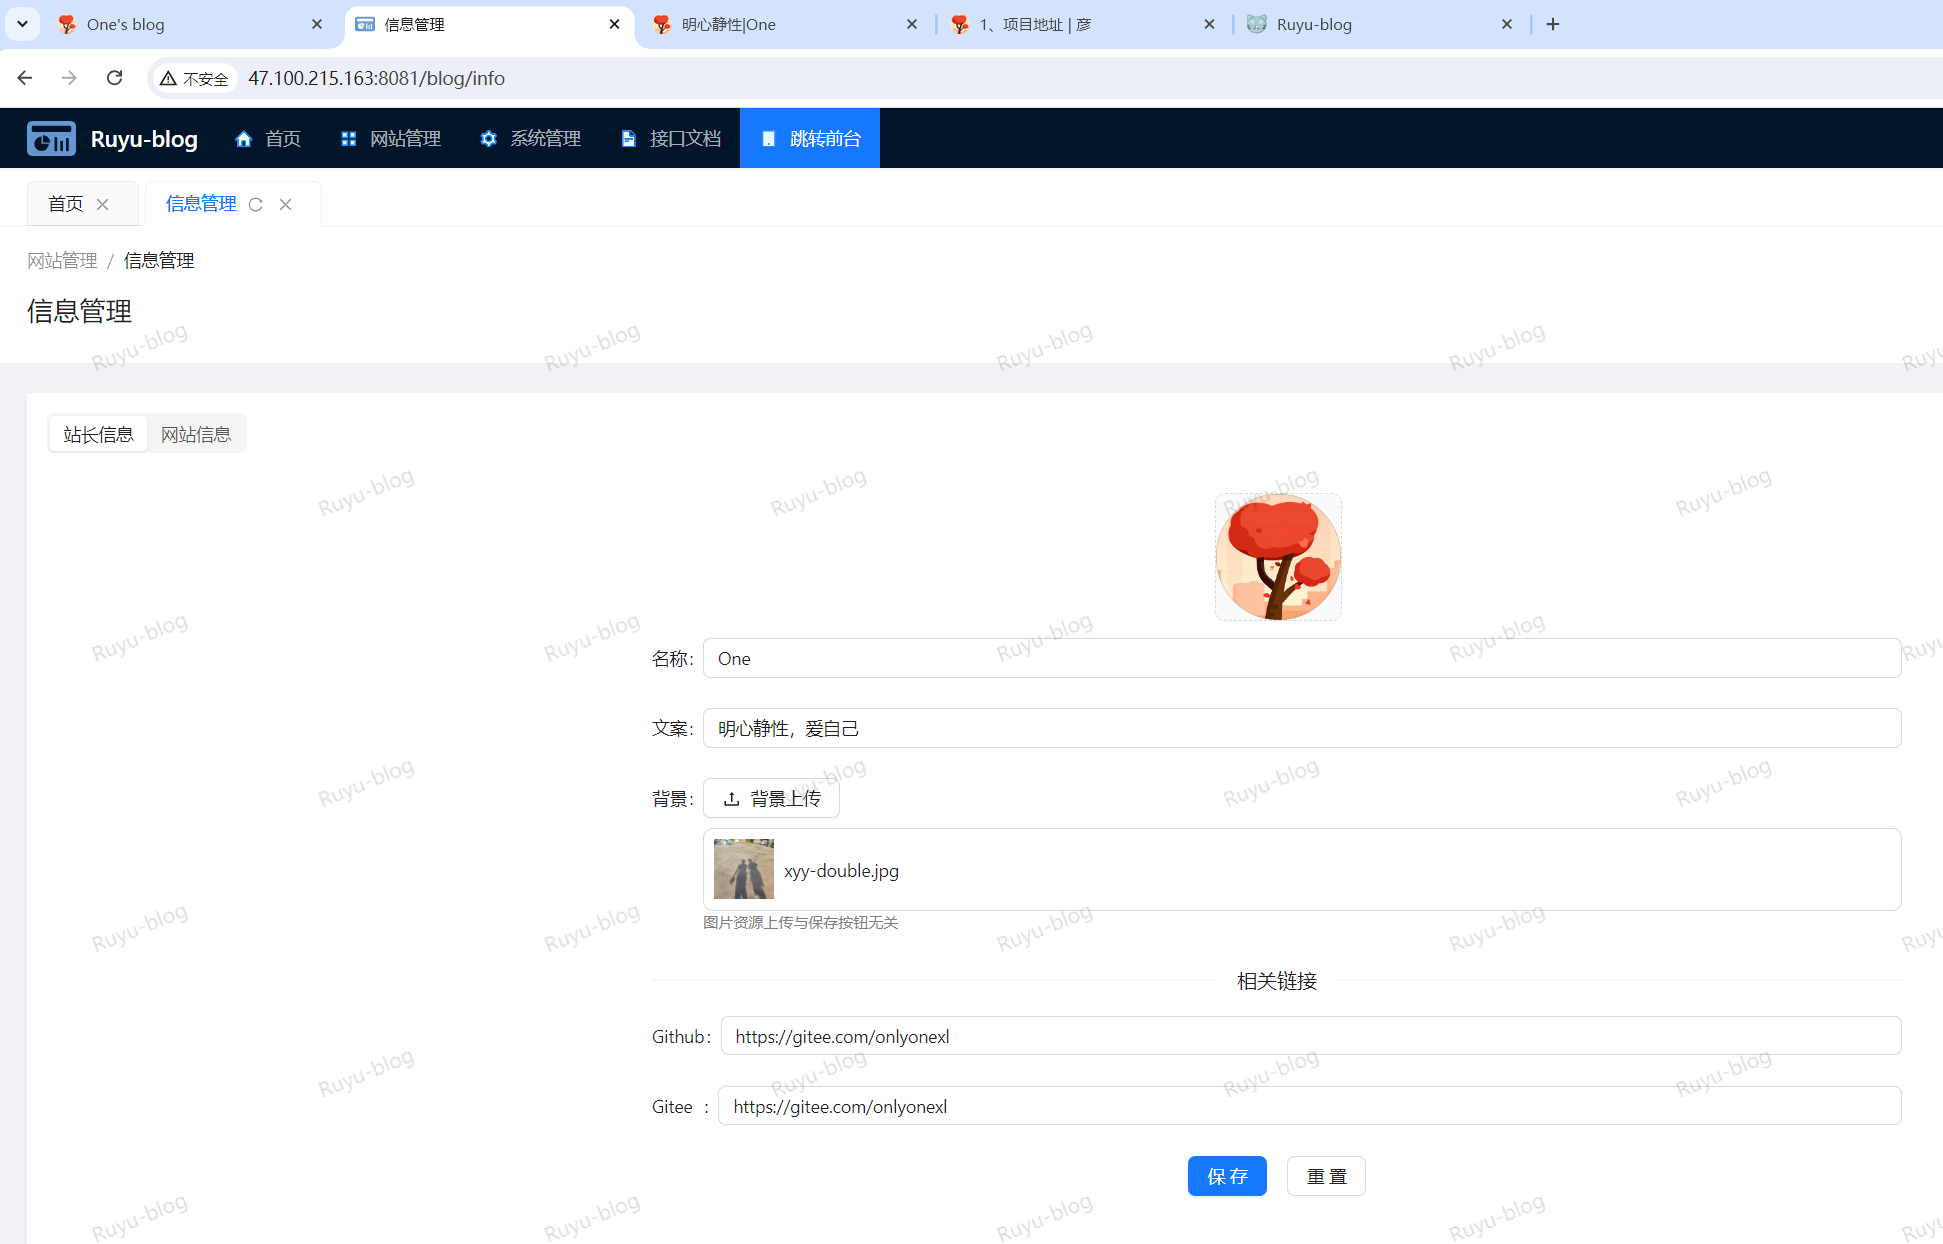
webmaster_name: One
webmaster_copy: ????????
webmaster_profile_background: http://43.136.78.47:9000/blog/websiteInfo/background/a26d4206-23ad-4eff-bde7-e39a338bc2f8.png
gitee_link: https://gitee.com/onlyonexl
github_link: https://gitee.com/onlyonexl
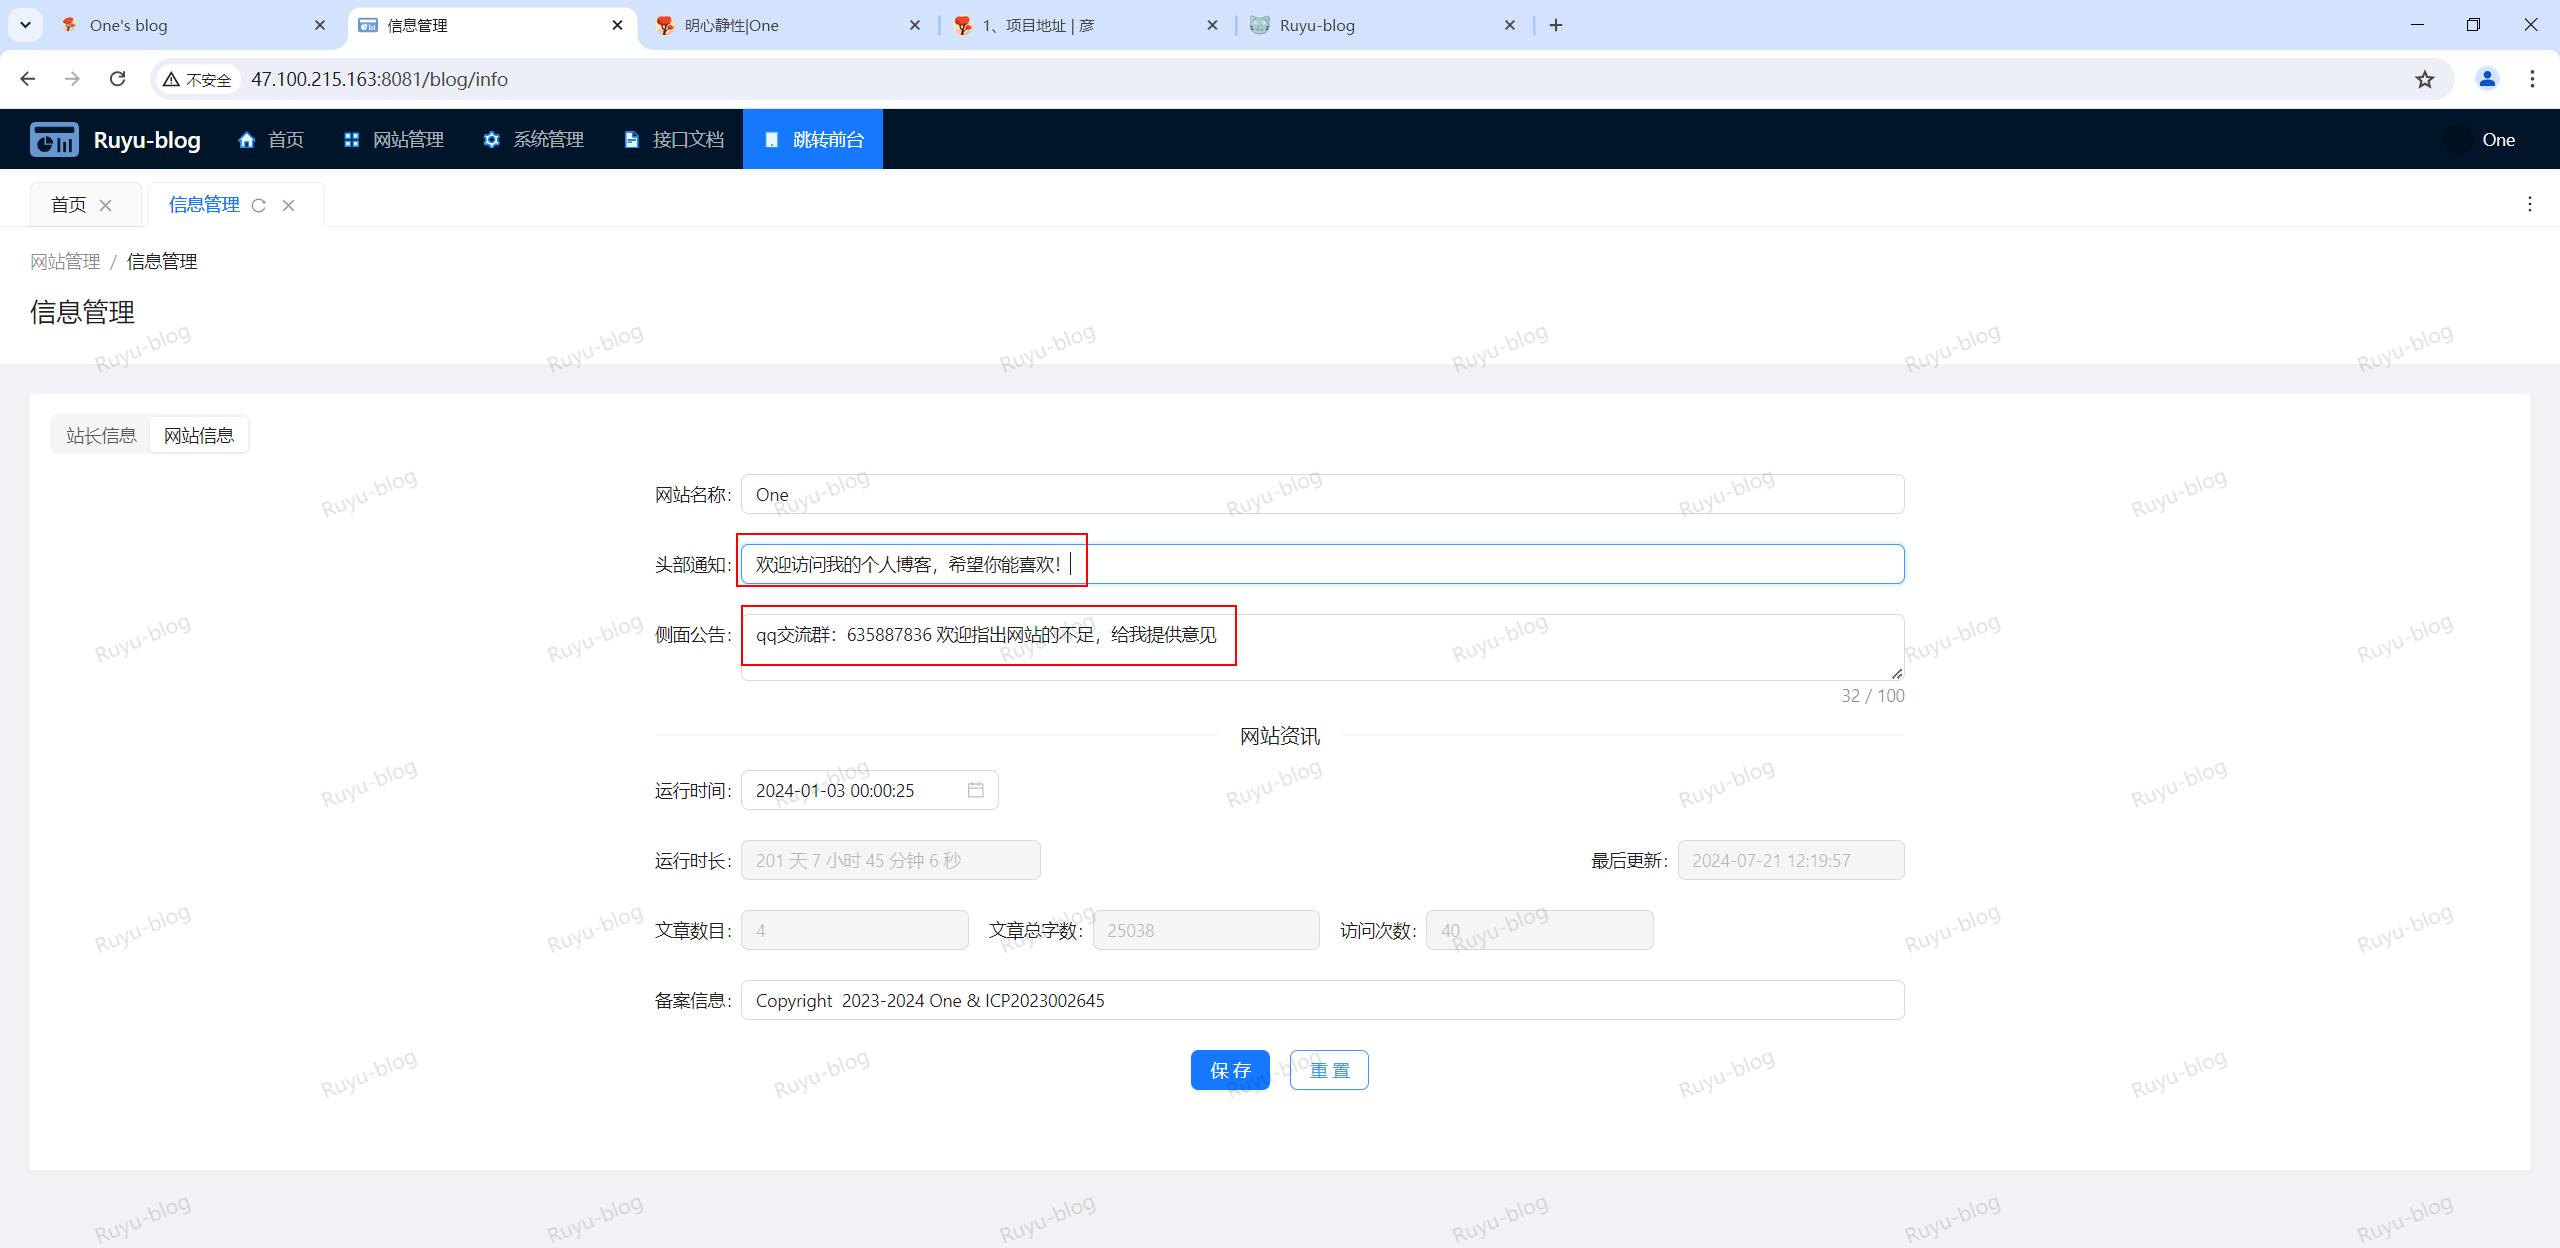
website_name: One
header_notification: ??????????????????
sidebar_announcement: ????????????????
record_info: Copyright � 2023-2024 ?ICP?2023002645?
start_time: 2024-01-01 16:00:25
create_time: 2023-12-27 14:28:10
update_time: 2024-07-17 21:26:49
is_deleted: 0
输出:
INSERT INTO `sys_website_info` VALUES (1, 'https://onedayxyy.cn/images/xyy.png', 'One', '明心静性,爱自己', 'http://43.136.78.47:9000/blog/websiteInfo/background/a26d4206-23ad-4eff-bde7-e39a338bc2f8.png', 'https://gitee.com/onlyonexl', 'https://gitee.com/onlyonexl', 'One', '欢迎访问我的个人博客,希望你能喜欢!', '欢迎指出网��站的不足,给我提供意见', '备案信息', '2024-01-01 16:00:25', '2023-12-27 14:28:10', '2024-01-22 22:38:24', 0);
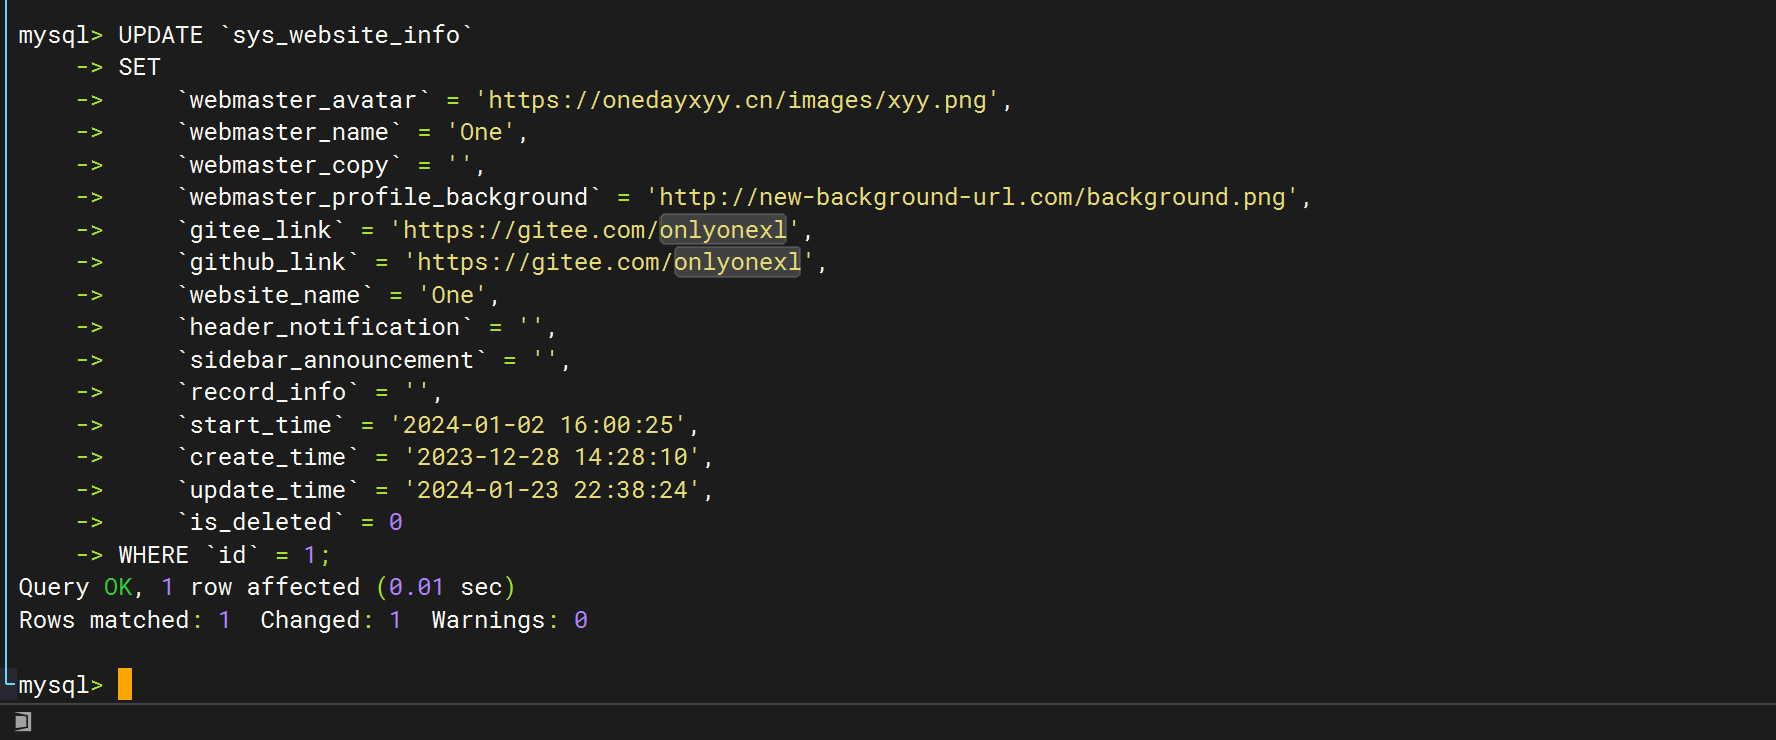
!
UPDATE `sys_website_info`
SET
    `webmaster_avatar` = 'https://onedayxyy.cn/images/xyy.png',
    `webmaster_name` = 'One',
    `webmaster_copy` = '明心静性,爱自己',
    `webmaster_profile_background` = 'http://new-background-url.com/background.png',
    `gitee_link` = 'https://gitee.com/onlyonexl',
    `github_link` = 'https://gitee.com/onlyonexl',
    `website_name` = 'One',
    `header_notification` = '欢迎访问我的个人博客,希望你能喜欢!',
    `sidebar_announcement` = '欢迎指出网站的不足,给我提供意见',
    `record_info` = '备案信息',
    `start_time` = '2024-01-02 16:00:25',
    `create_time` = '2023-12-28 14:28:10',
    `update_time` = '2024-01-23 22:38:24',
    `is_deleted` = 0
WHERE `id` = 1;
修改成功:


3.解决办法
- 再次更新
UPDATE `sys_website_info`
SET
`webmaster_avatar` = 'https://onedayxyy.cn/images/xyy.png',
`webmaster_name` = 'One',
`webmaster_copy` = "明心静性,爱自��己",
`webmaster_profile_background` = 'https://onedayxyy.cn/images/xyy-double.jpg',
`gitee_link` = 'https://gitee.com/onlyonexl',
`github_link` = 'https://gitee.com/onlyonexl',
`website_name` = 'One',
`header_notification` = "欢迎访问我的个人博客,希望你能喜欢!",
`sidebar_announcement` = "欢迎指出网站的不足,给我提供意见",
`record_info` = 'Copyright © 2023-2024 One & 陇ICP备2023002645号',
`start_time` = '2024-01-02 16:00:25',
`create_time` = '2023-12-28 14:28:10',
`update_time` = '2024-01-23 22:38:24',
`is_deleted` = 0
WHERE `id` = 1;
感觉像是数据库编码有问题……
- �验证
select *from sys_website_info\G
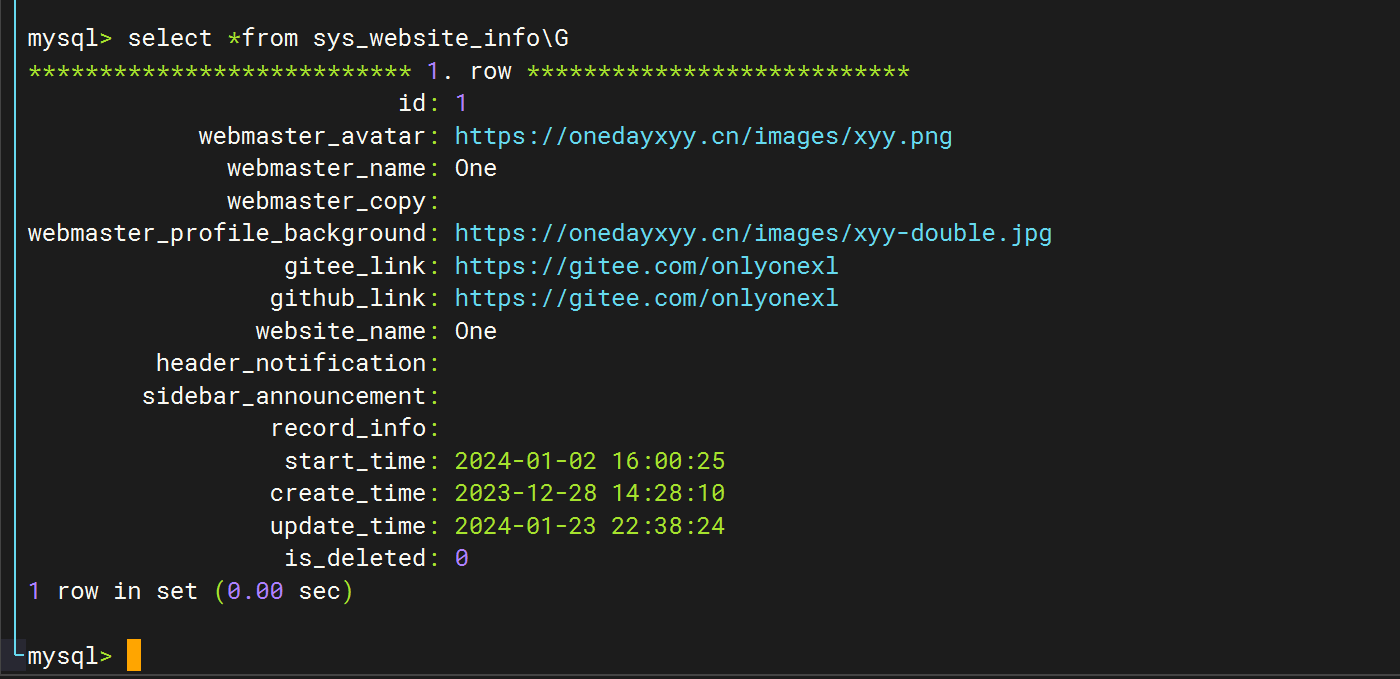
- 导致这里有点问题
- 都是正常的呀,为啥中文显示不了……
show create table sys_website_info;
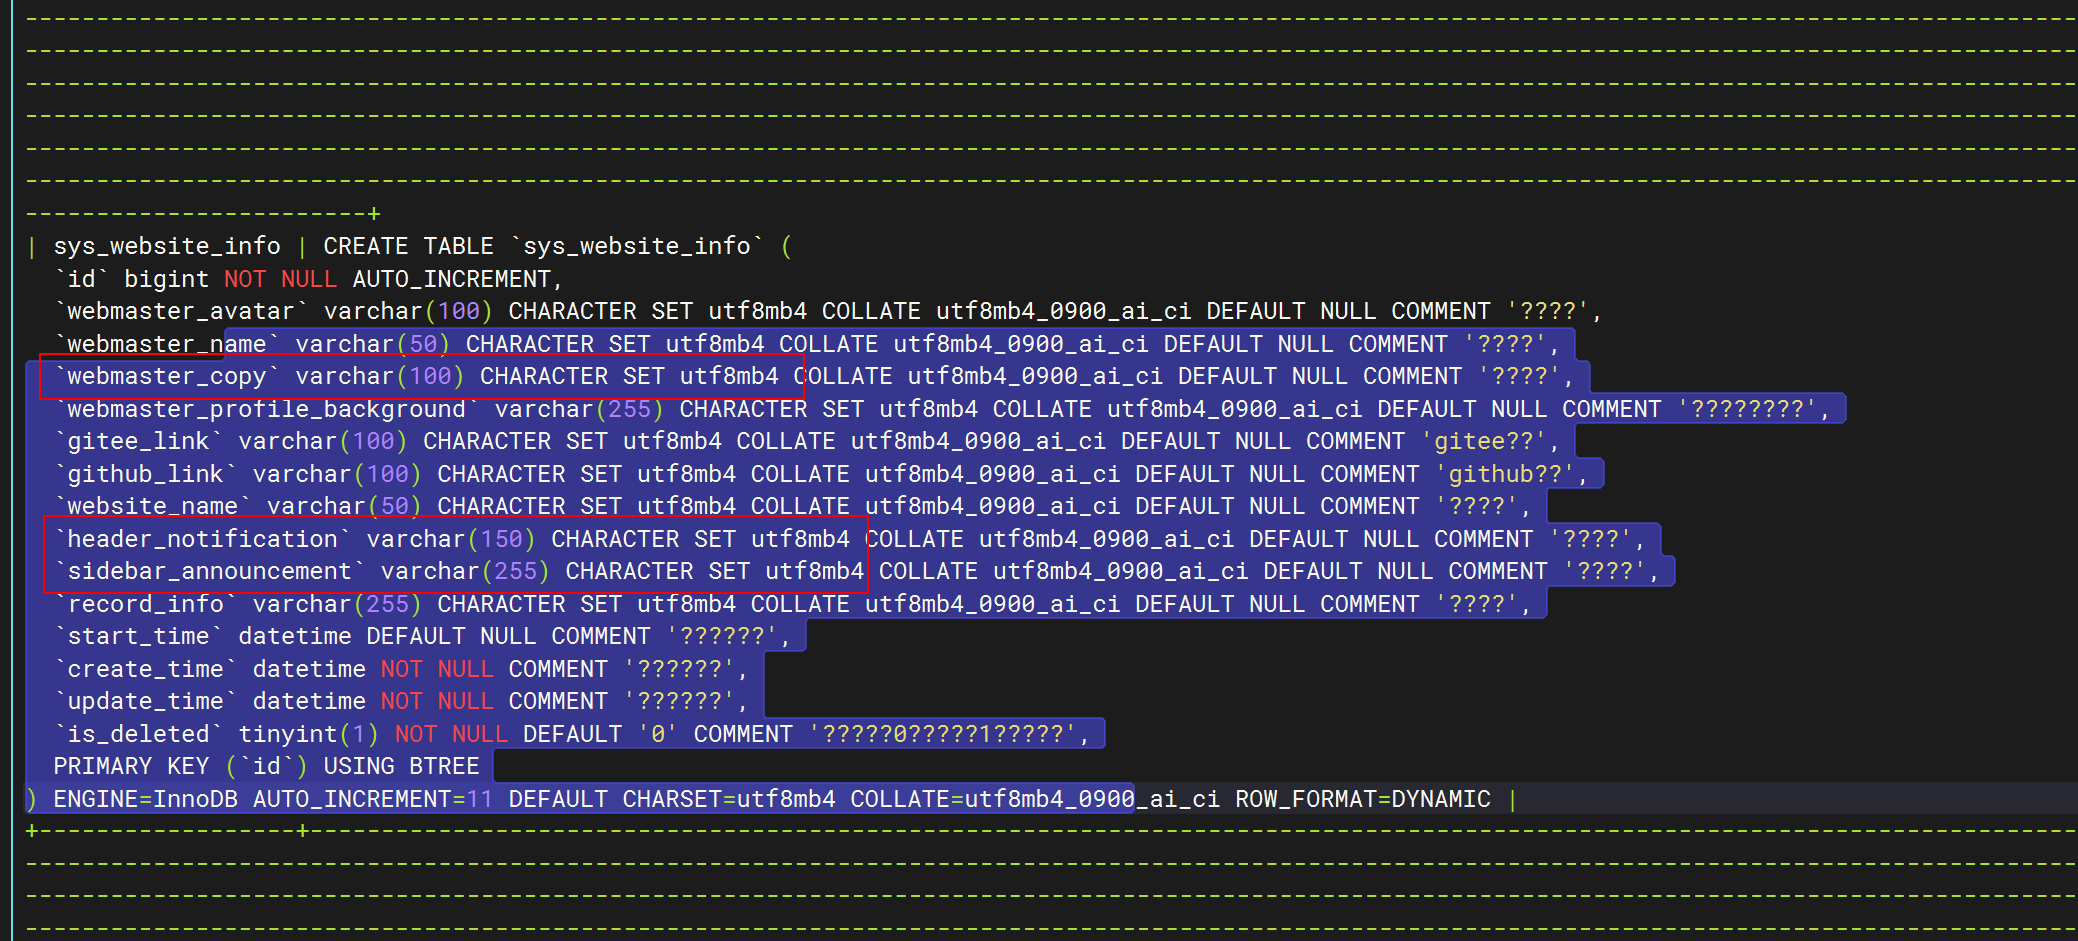
- 我重启下数据库:

还是不行哦:。。。
- 换成双引号,还是不行……

- 额。这里能配置哦(这里配置下就好了)🤣
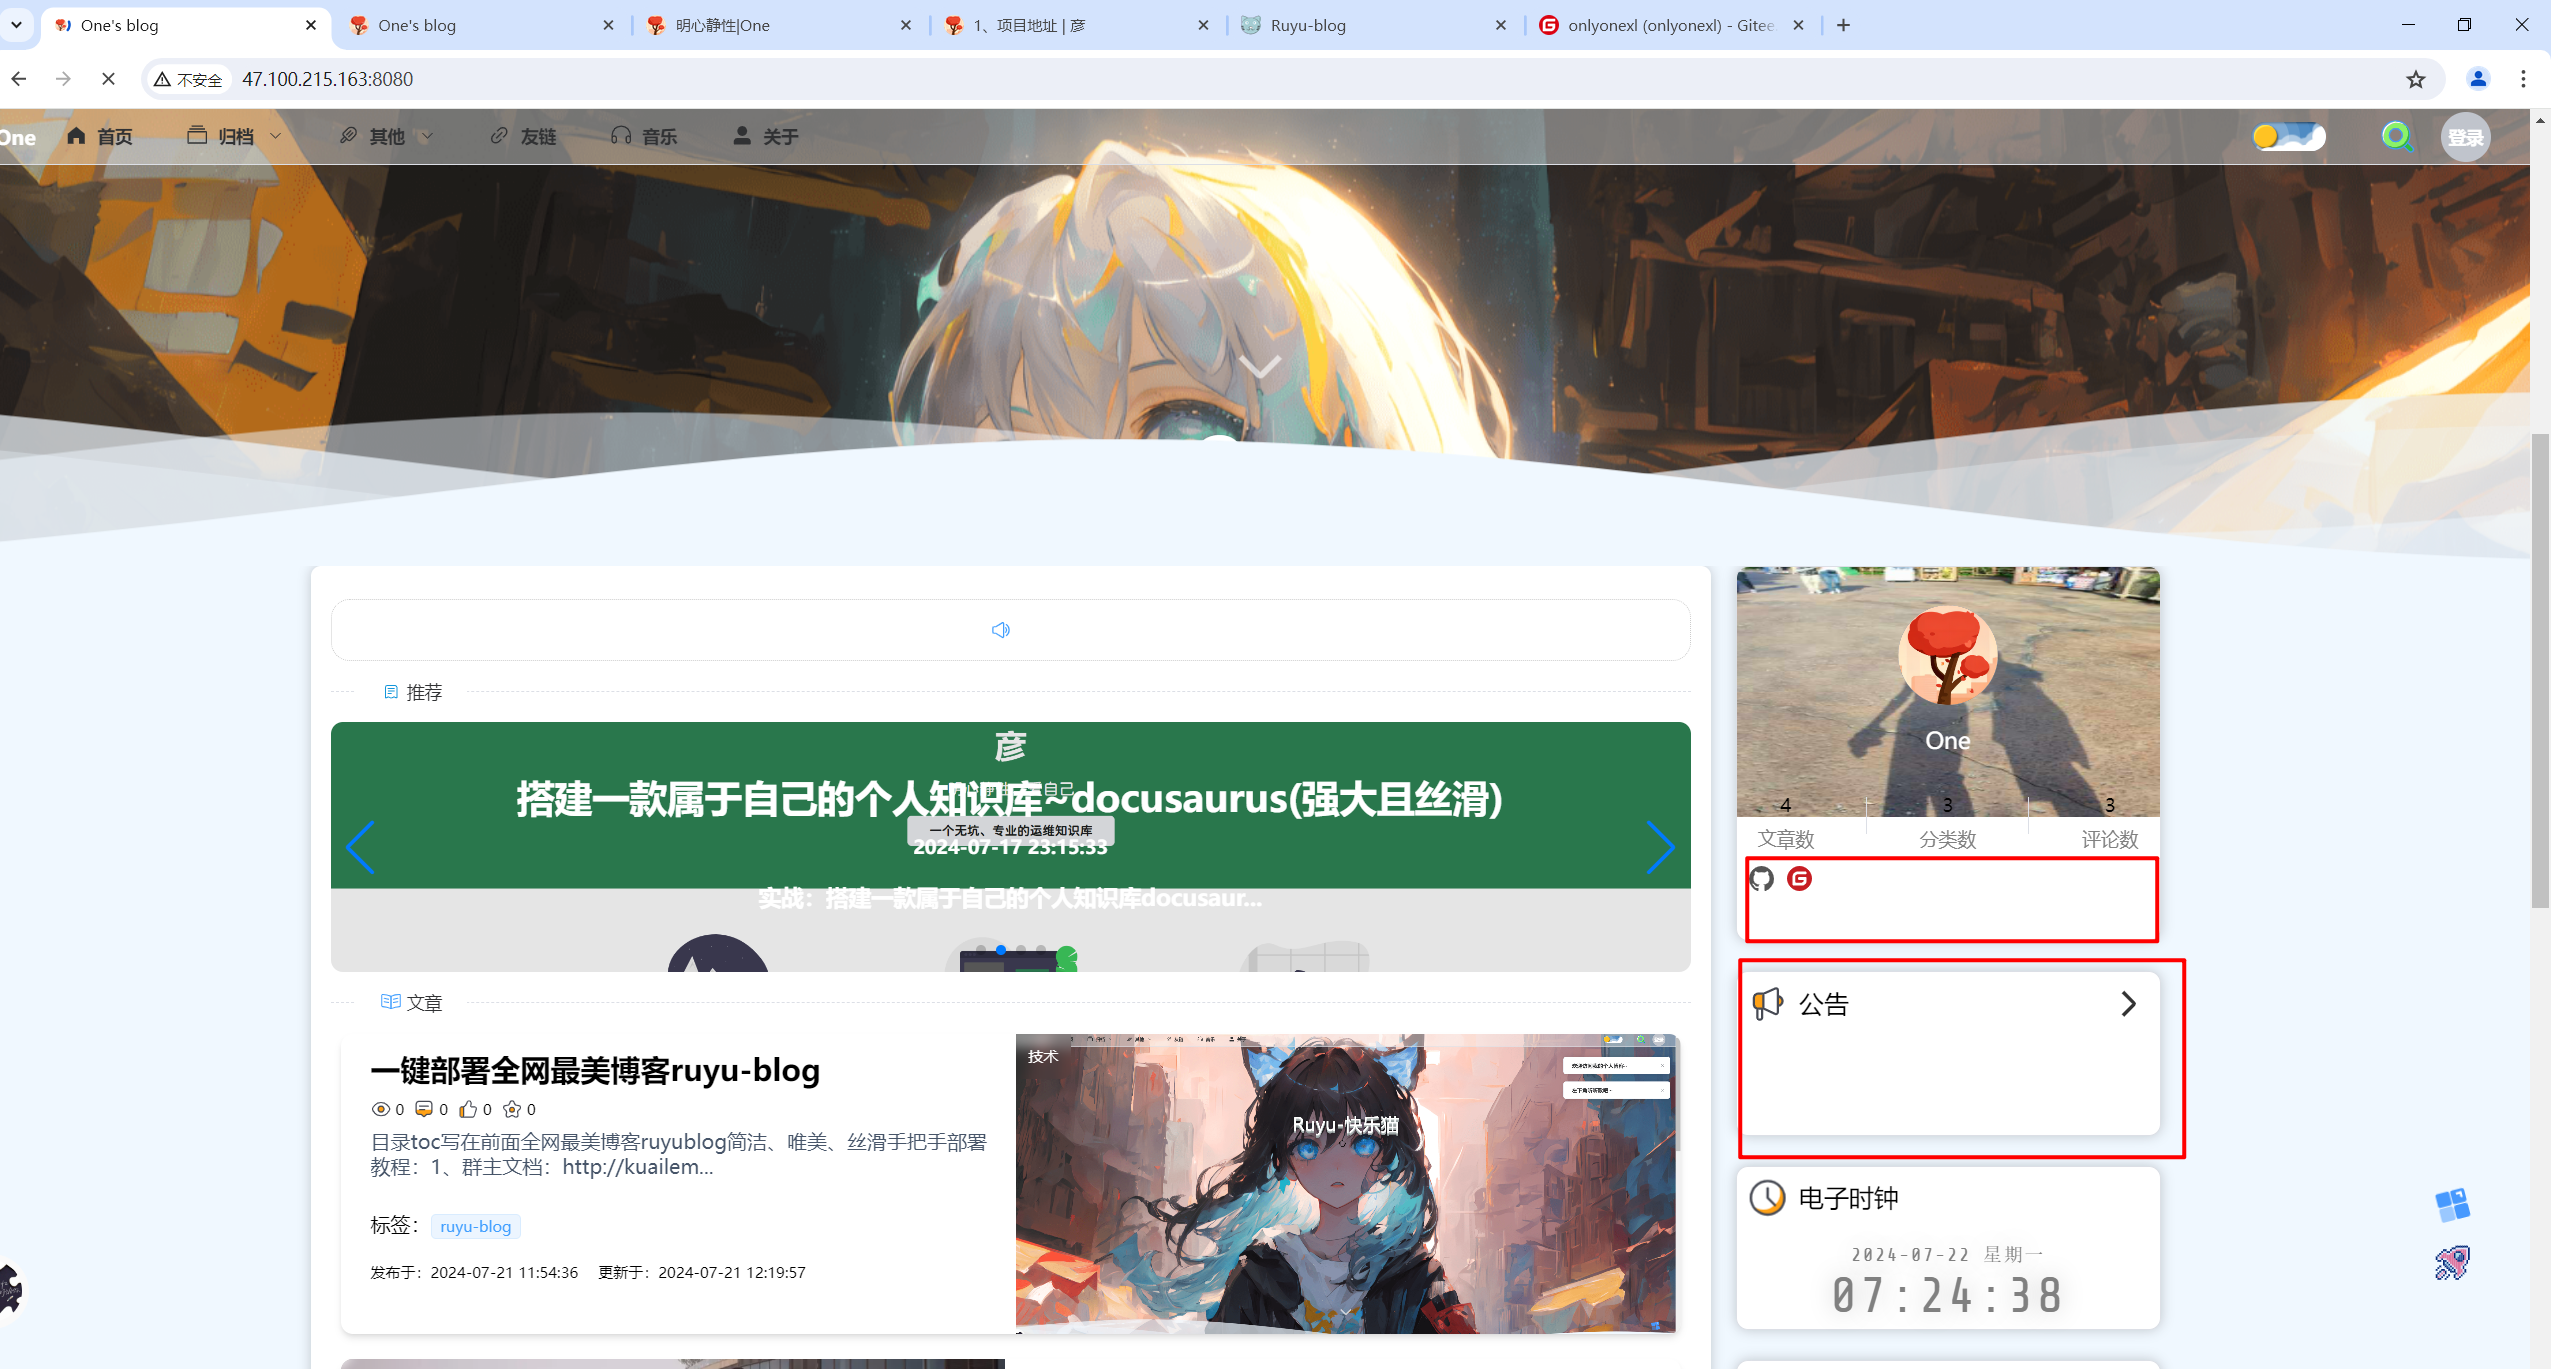
- 是有效果的,完美。
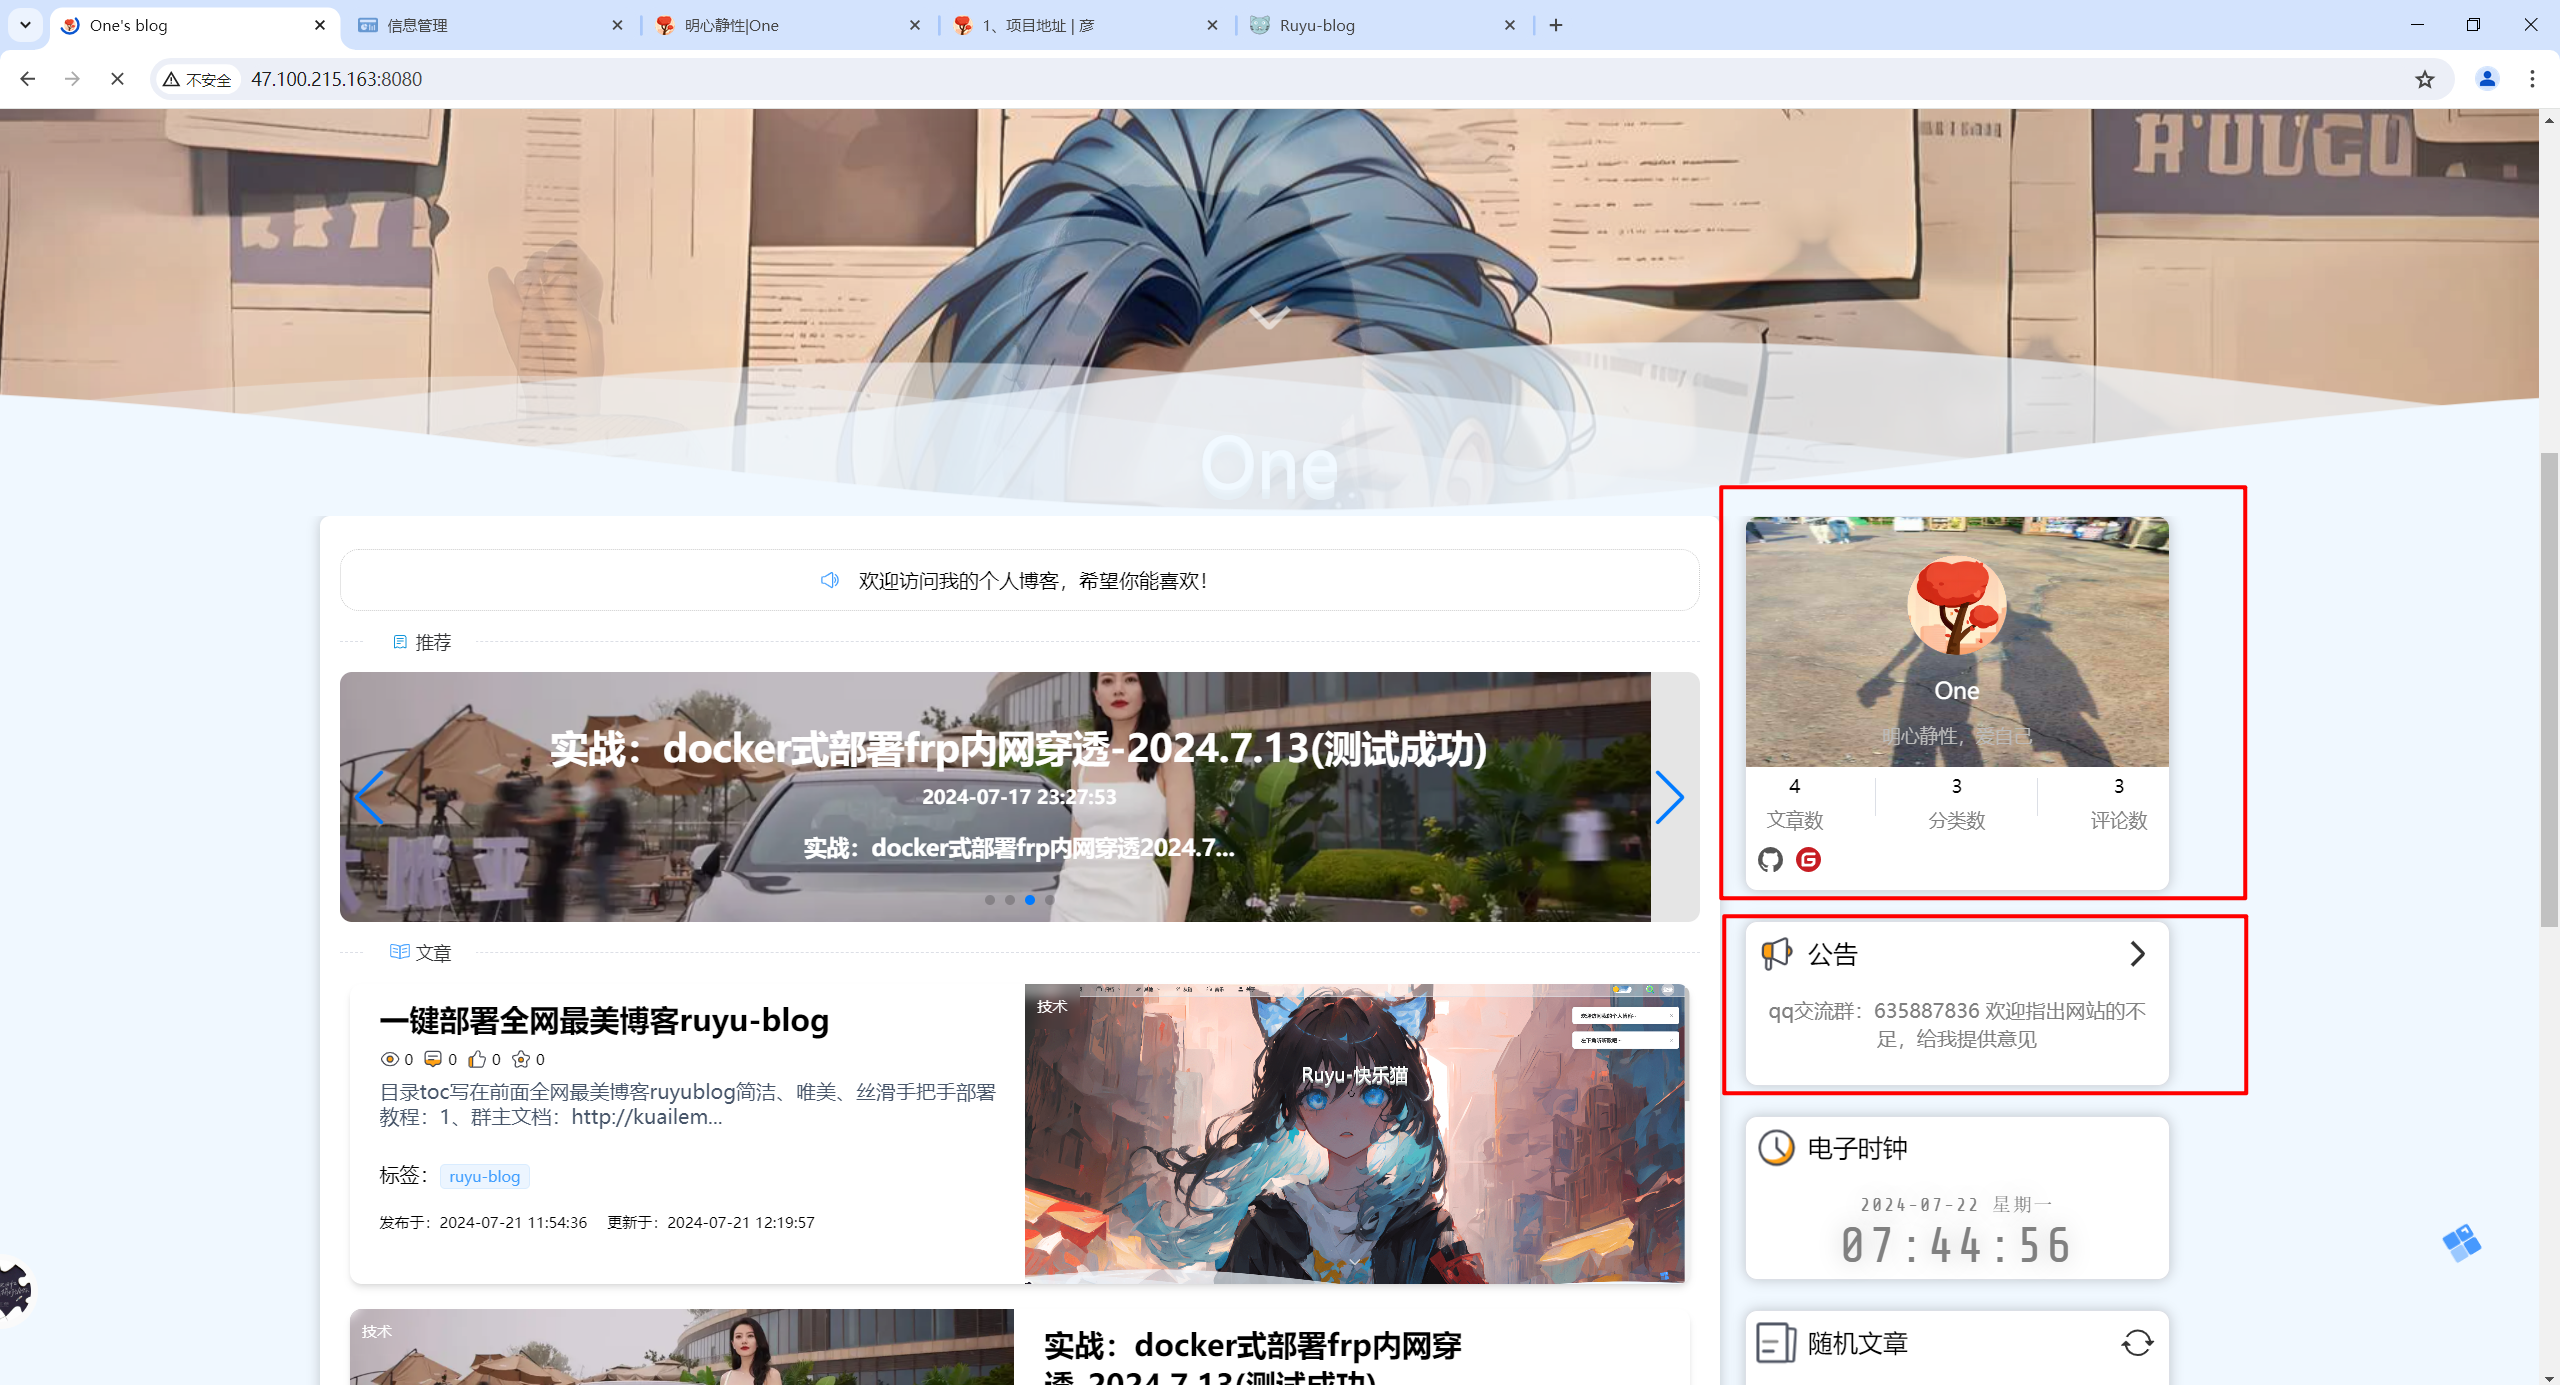
- 再次到数据库查看
可以看到,数据被写进去了哦。😘

- 此时,再做一个快照。
注意,此时的数据是写入到了mysql哦,后续记得对mysql做好数据备份。
案例:如何给frp出去的nuc(ruyu-blog)配置子域名(反向代理)呢?(已解决,完美)😘
参考
预期
范例:
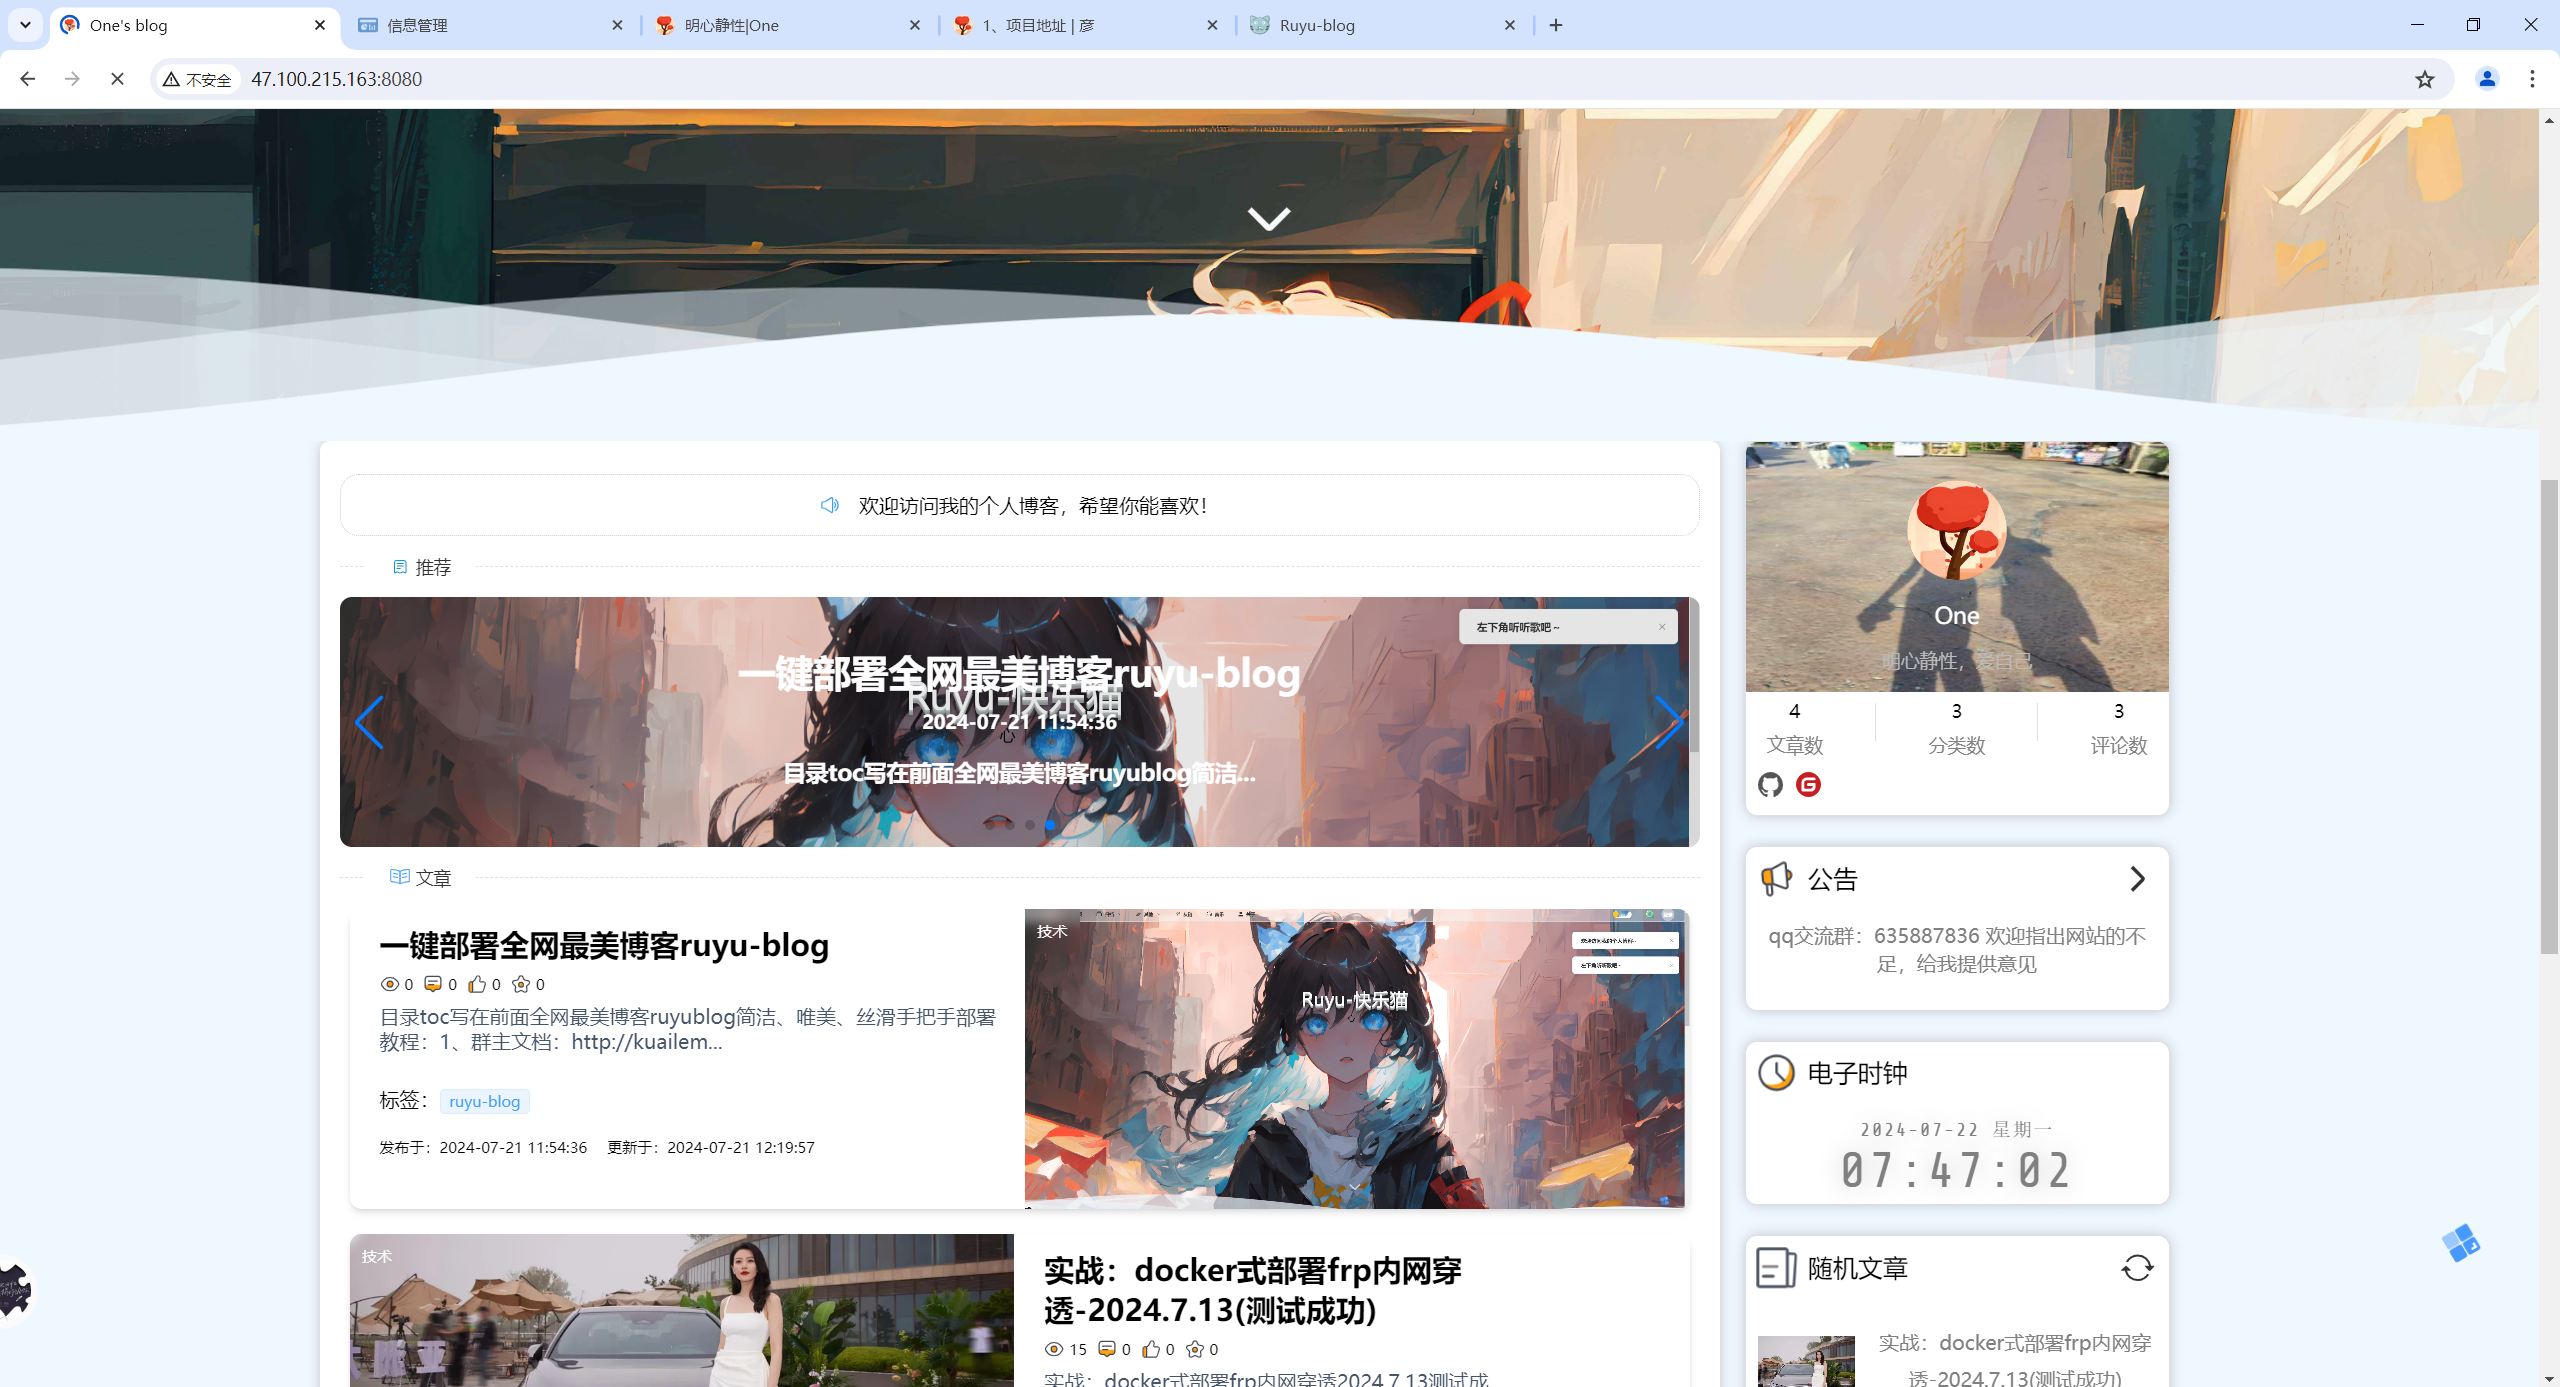
http://kuailemao.xyz/ #主域名
http://blog.kuailemao.xyz/ #二级域名
主域名:
onedayxyy.cn
子域名:
知识库 wiki.onedayxyy.cn
博客 blog.onedayxyy.cn
网盘 nas.onedayxyy.cn
相册 photo.onedayxyy.cn
音乐 music.onedayxyy.cn
影视 movie.onedayxyy.cn
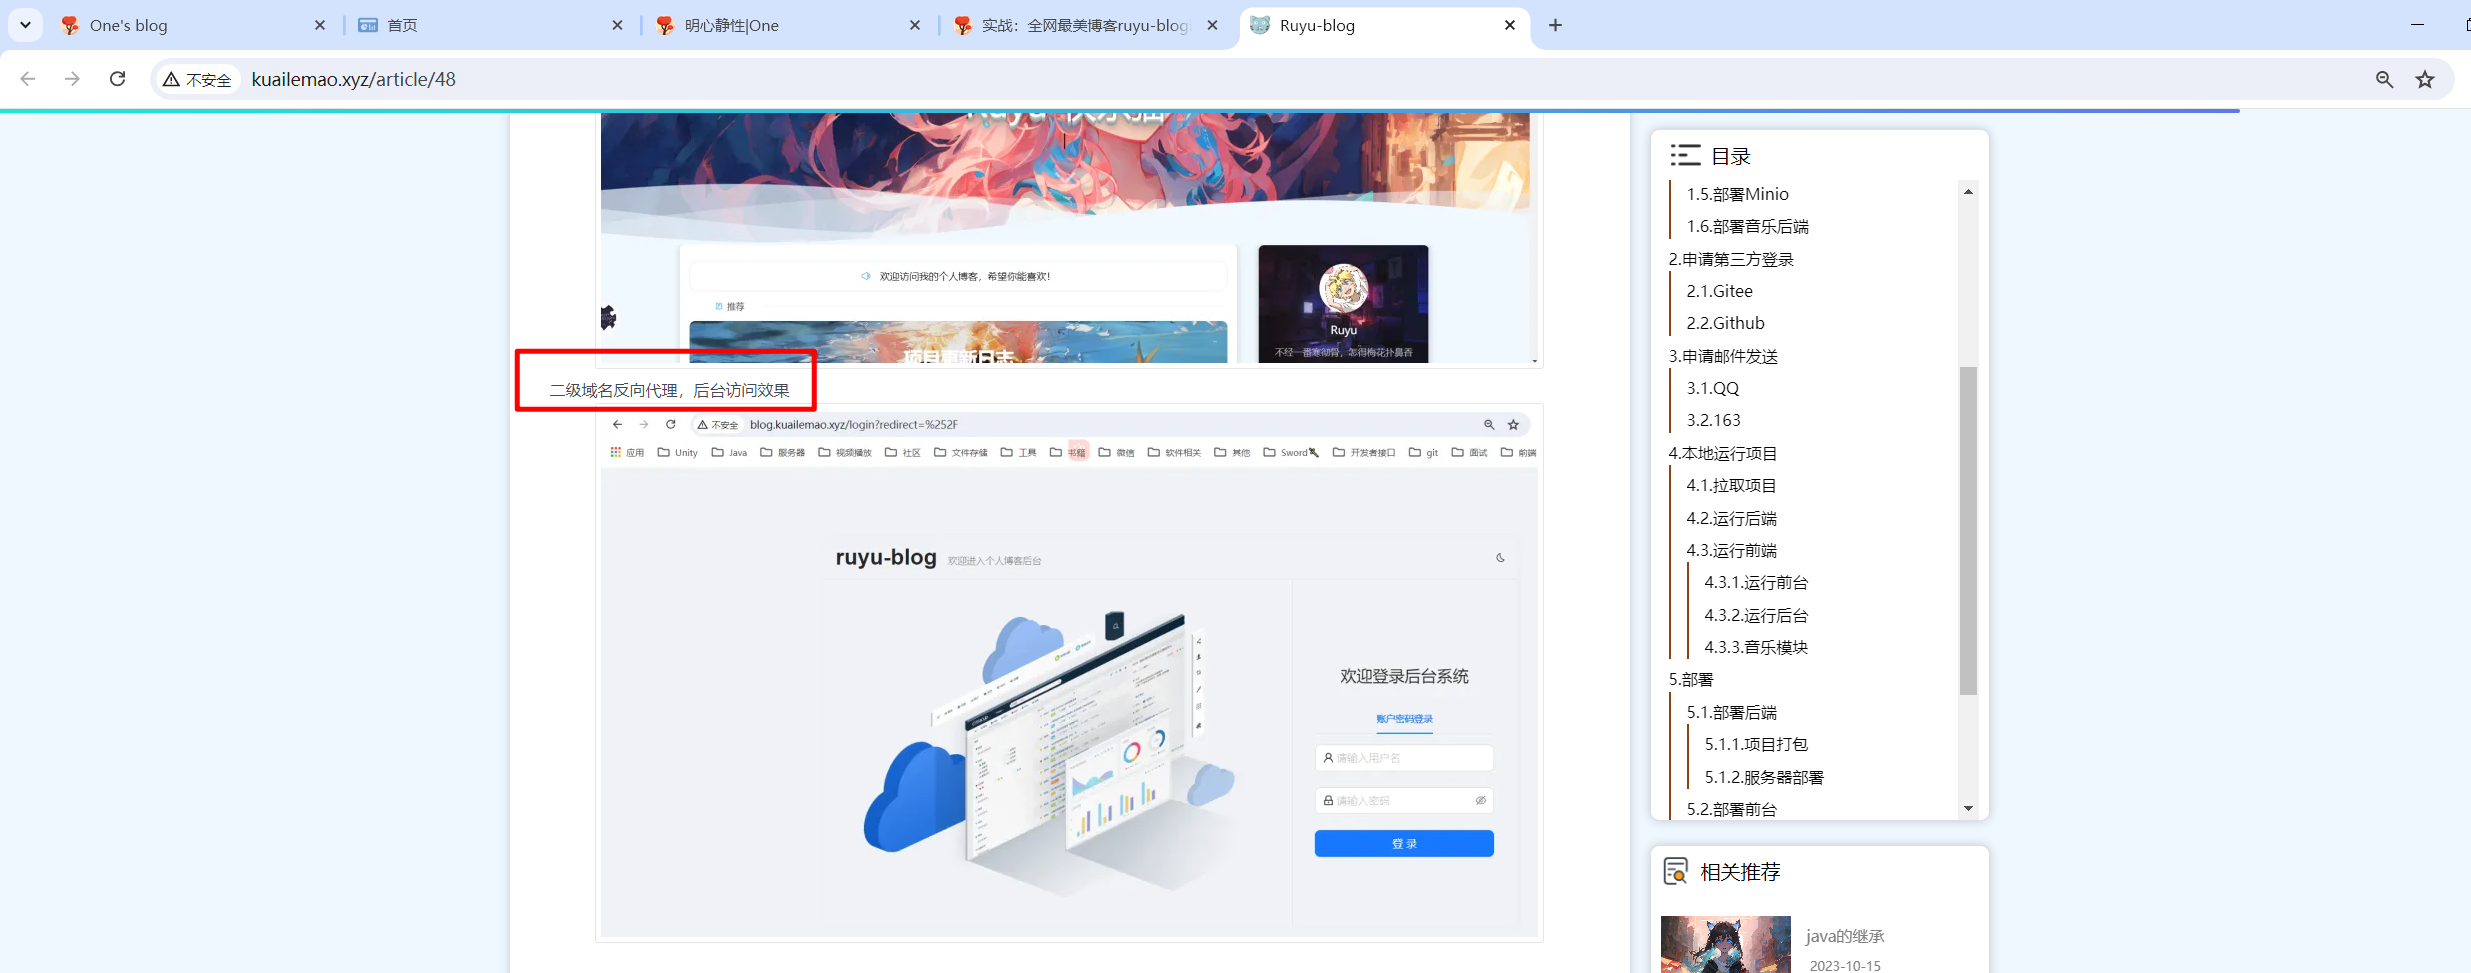
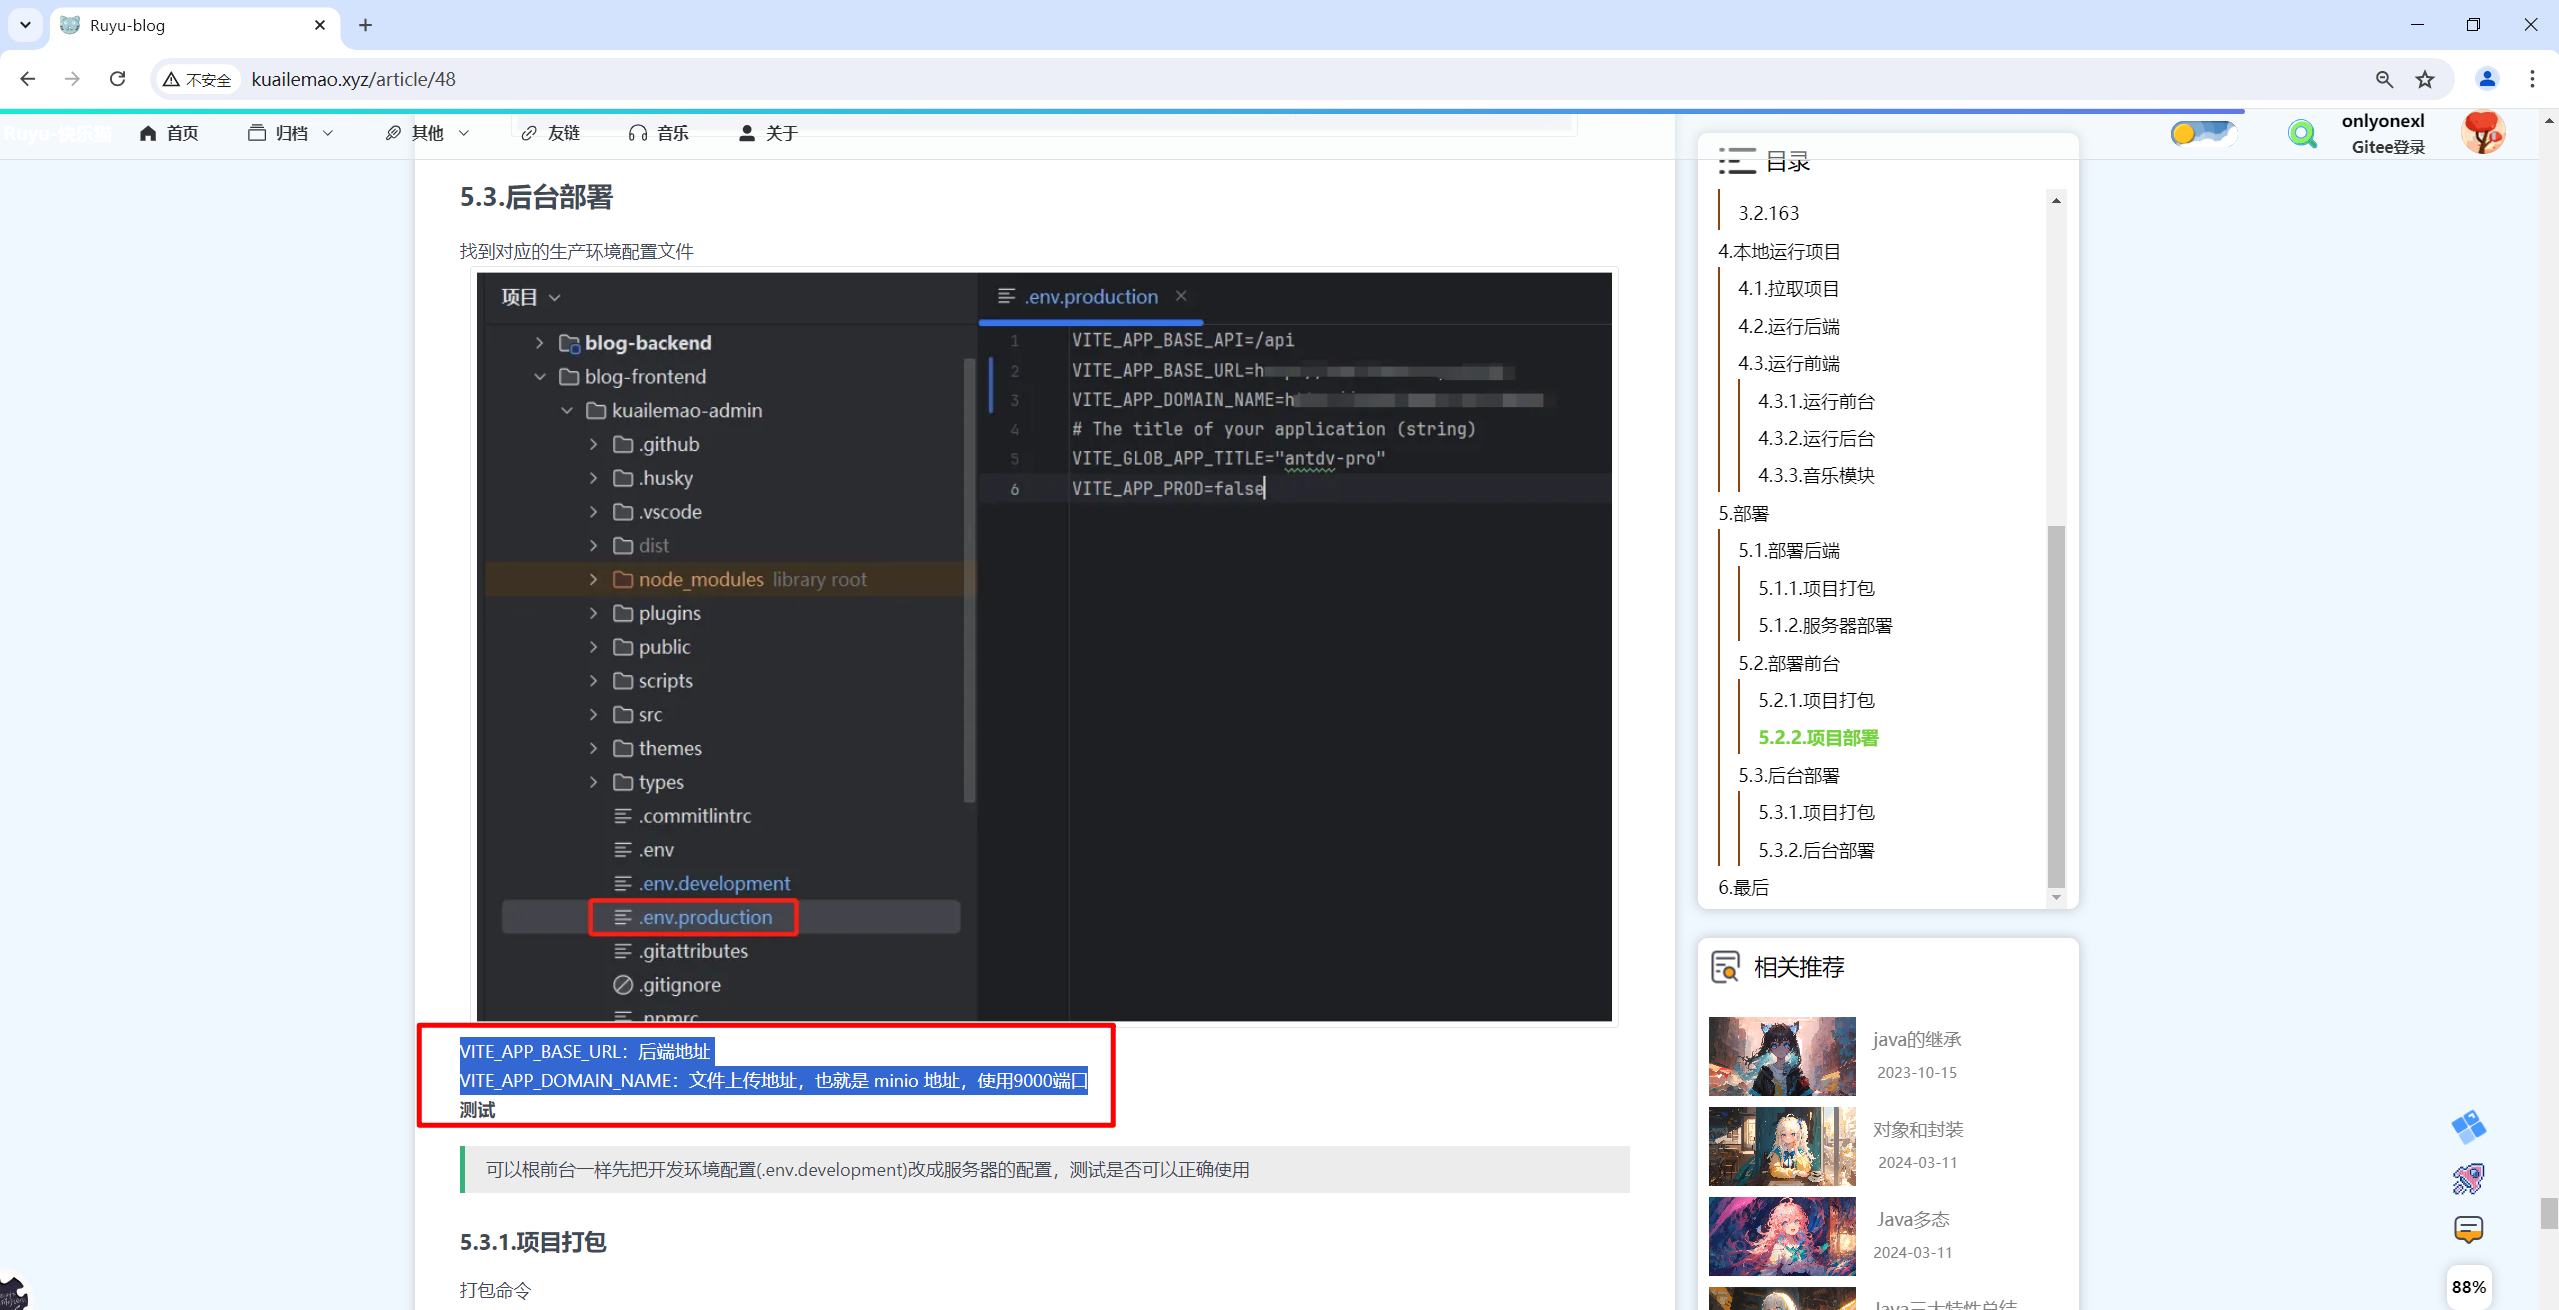
v1-作者提供的文档
http://kuailemao.xyz/article/48
二级域名反向代理,访问后台:
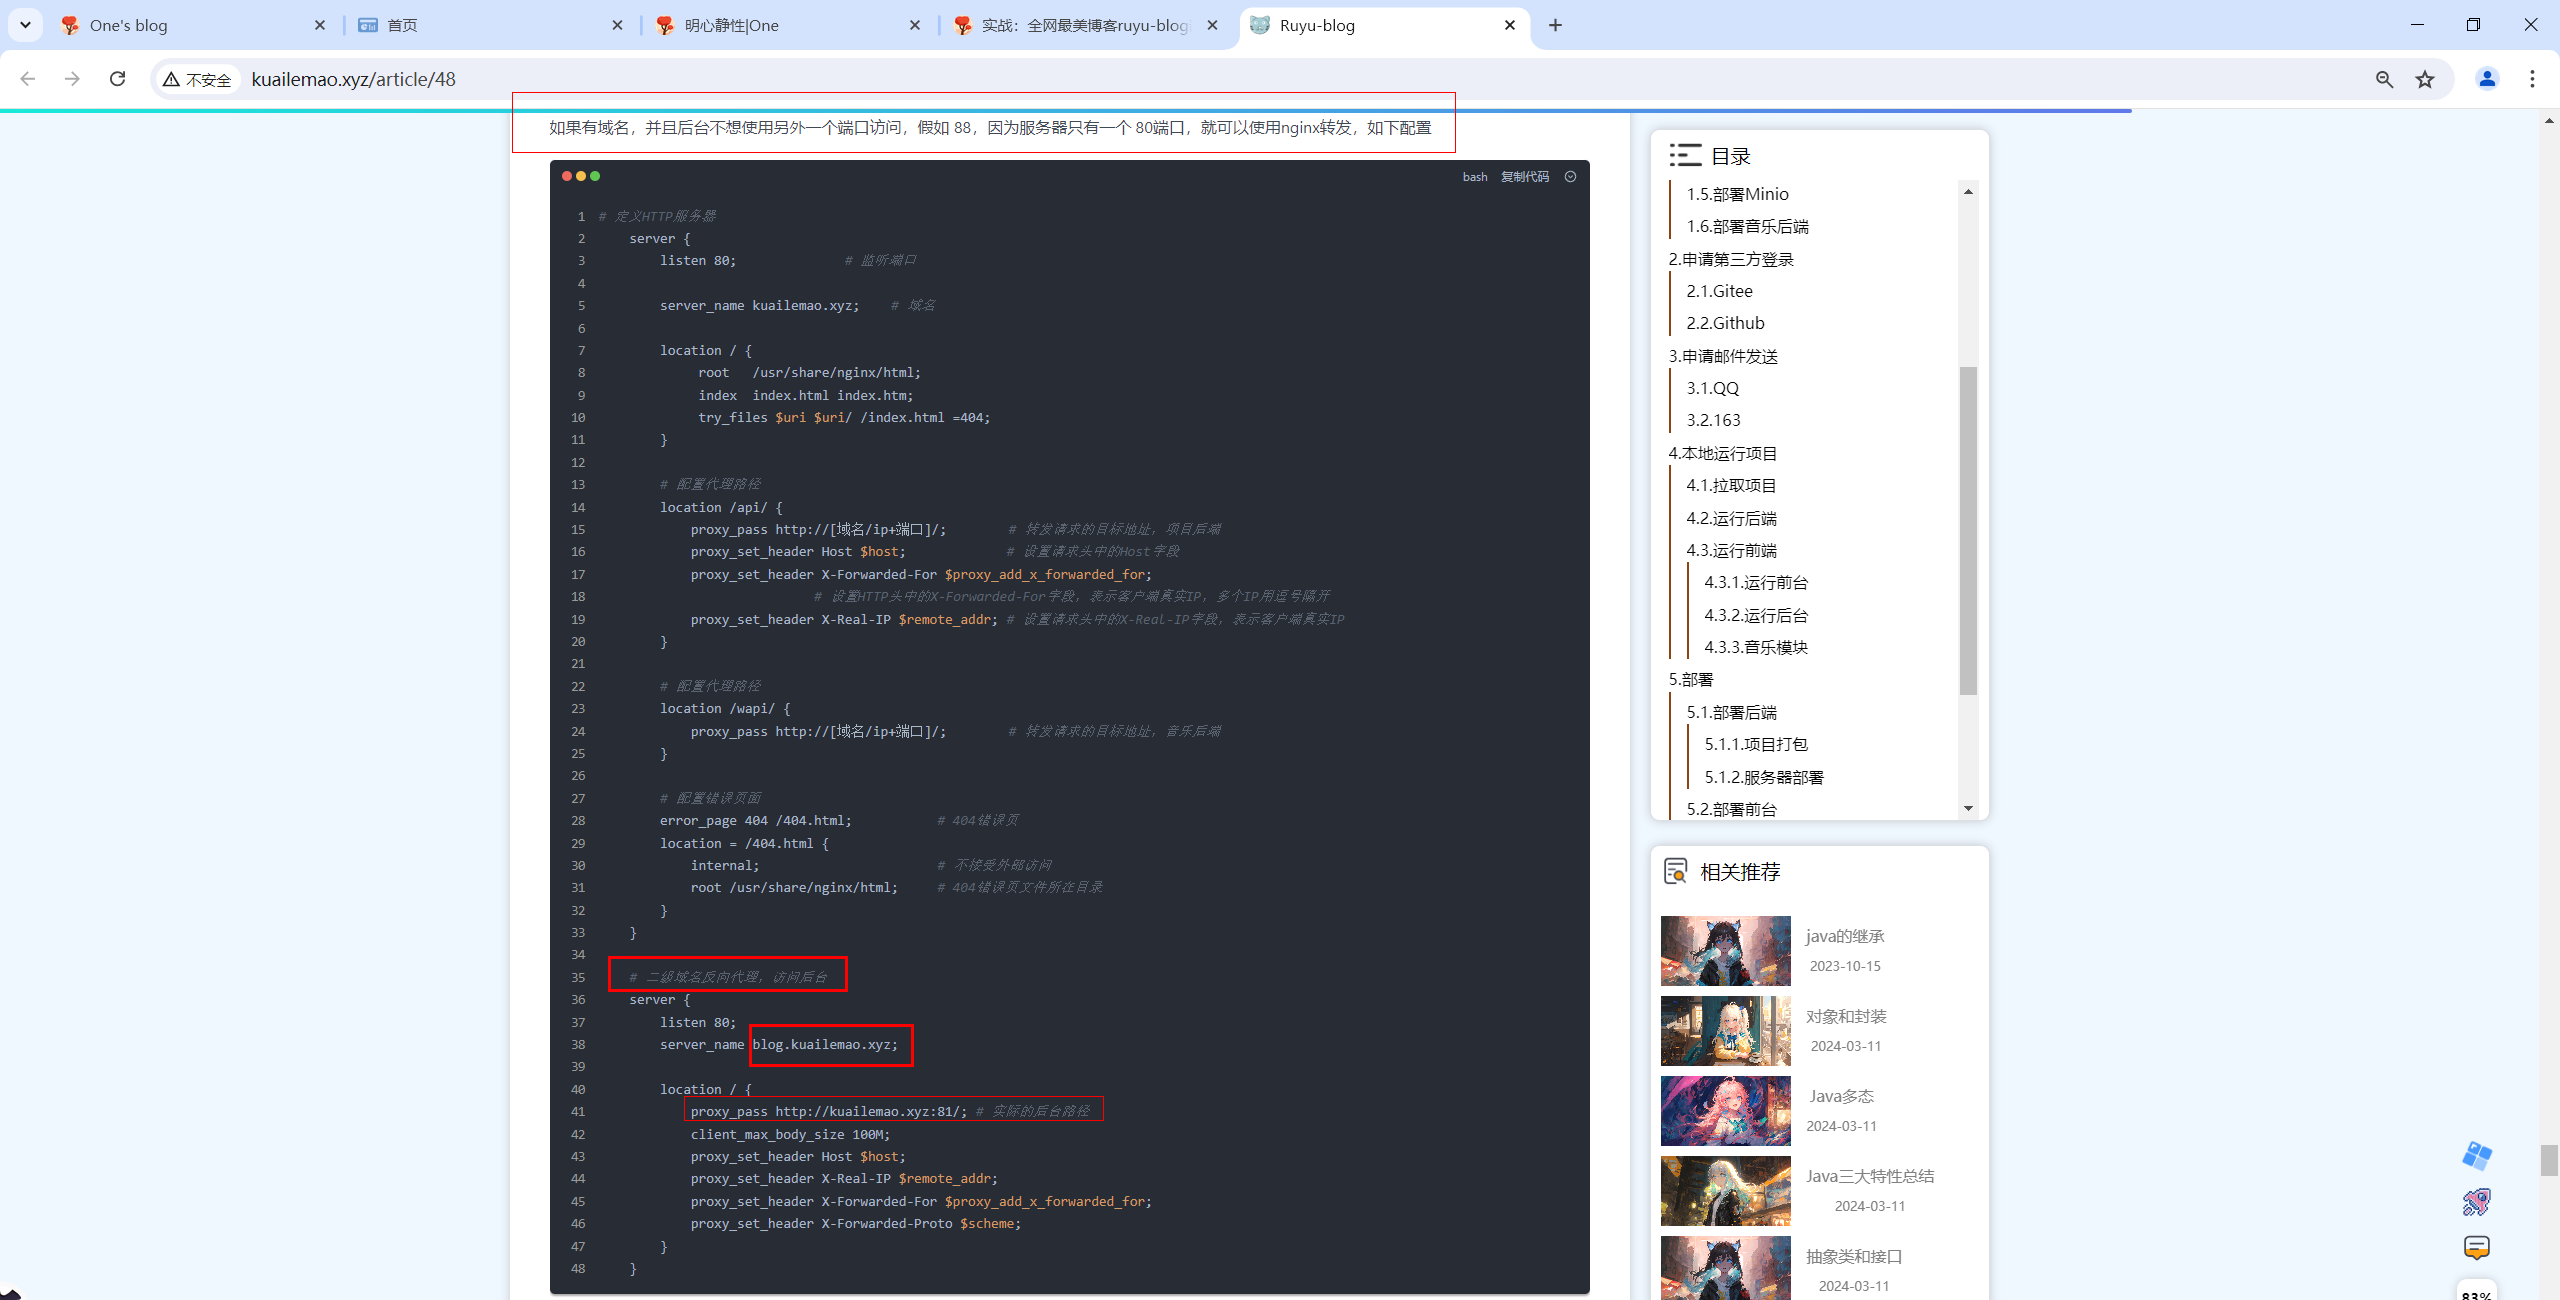
# 定义HTTP服务器
server {
listen 80; # 监听端口
server_name kuailemao.xyz; # 域名
location / {
root /usr/share/nginx/html;
index index.html index.htm;
try_files $uri $uri/ /index.html =404;
}
# 配置代理路径
location /api/ {
proxy_pass http://[域名/ip+端口]/; # 转发请求的目标地址,项目后端
proxy_set_header Host $host; # 设置请求头中的Host字段
proxy_set_header X-Forwarded-For $proxy_add_x_forwarded_for;
# 设置HTTP头中的X-Forwarded-For字段,表示客户端真实IP,多个IP用逗号隔开
proxy_set_header X-Real-IP $remote_addr; # 设置请求头中的X-Real-IP字段,表示客户端真实IP
}
# 配置代理路径
location /wapi/ {
proxy_pass http://[域名/ip+端口]/; # 转发请求的目标地址,音乐后端
}
# 配置错误页面
error_page 404 /404.html; # 404错误页
location = /404.html {
internal; # 不接受外部访问
root /usr/share/nginx/html; # 404错误页文件所在目录
}
}
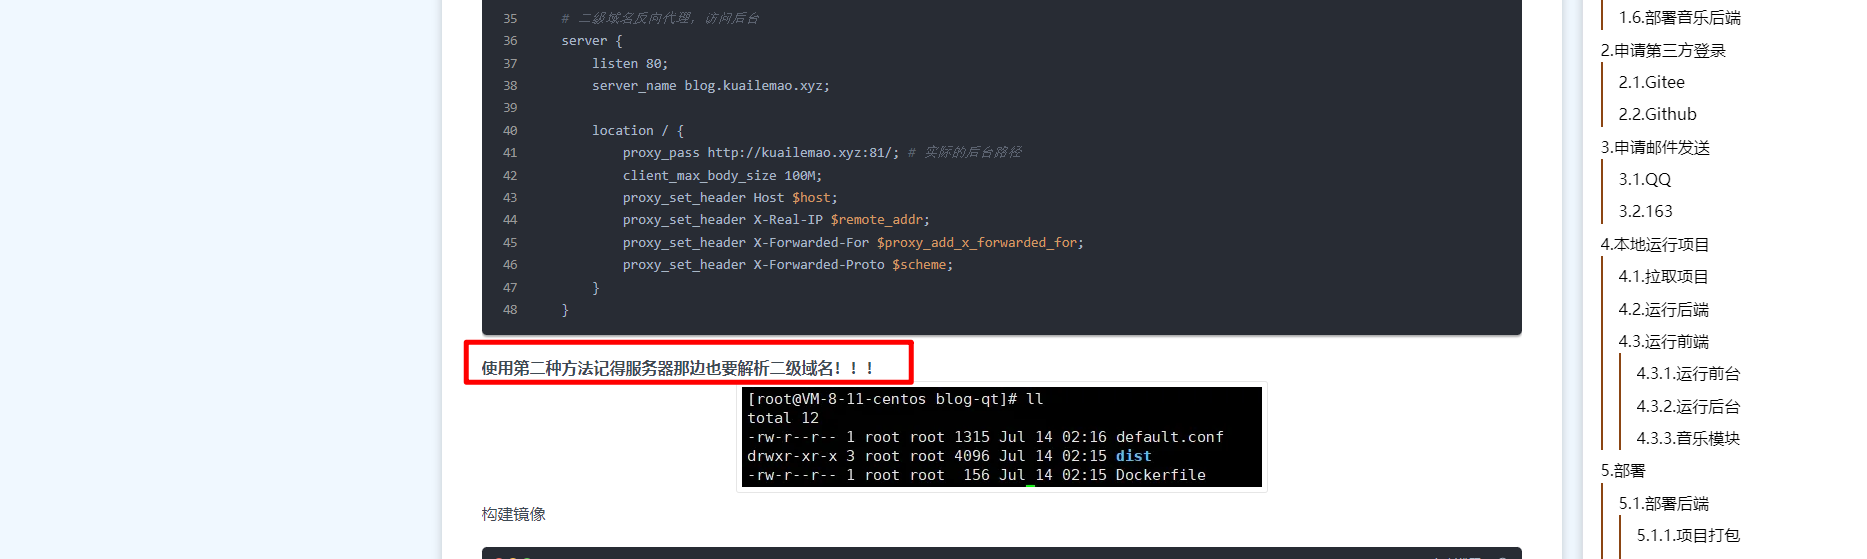
# 二级域名反向代理,访问后台
server {
listen 80;
server_name blog.kuailemao.xyz;
location / {
proxy_pass http://kuailemao.xyz:81/; # 实际的后台路径
client_max_body_size 100M;
proxy_set_header Host $host;
proxy_set_header X-Real-IP $remote_addr;
proxy_set_header X-Forwarded-For $proxy_add_x_forwarded_for;
proxy_set_header X-Forwarded-Proto $scheme;
}
}
v2-自己ruyu-blog部署环境
frp
内网机器:192.168.1.100
frp出去端口:
ecs ip
47.100.215.163

[ruyu-blog]
type = tcp
local_ip = 127.0.0.1
local_port = 80
remote_port = 8080

[ruyu-blog-admin]
type = tcp
local_ip = 127.0.0.1
local_port = 81
remote_port = 8081
v3-自己ecs情况
47.100.215.163
80是nginx端口
8080/8081 --frps---ruyu-blog
我对这个ecsip是加了一次cdn的
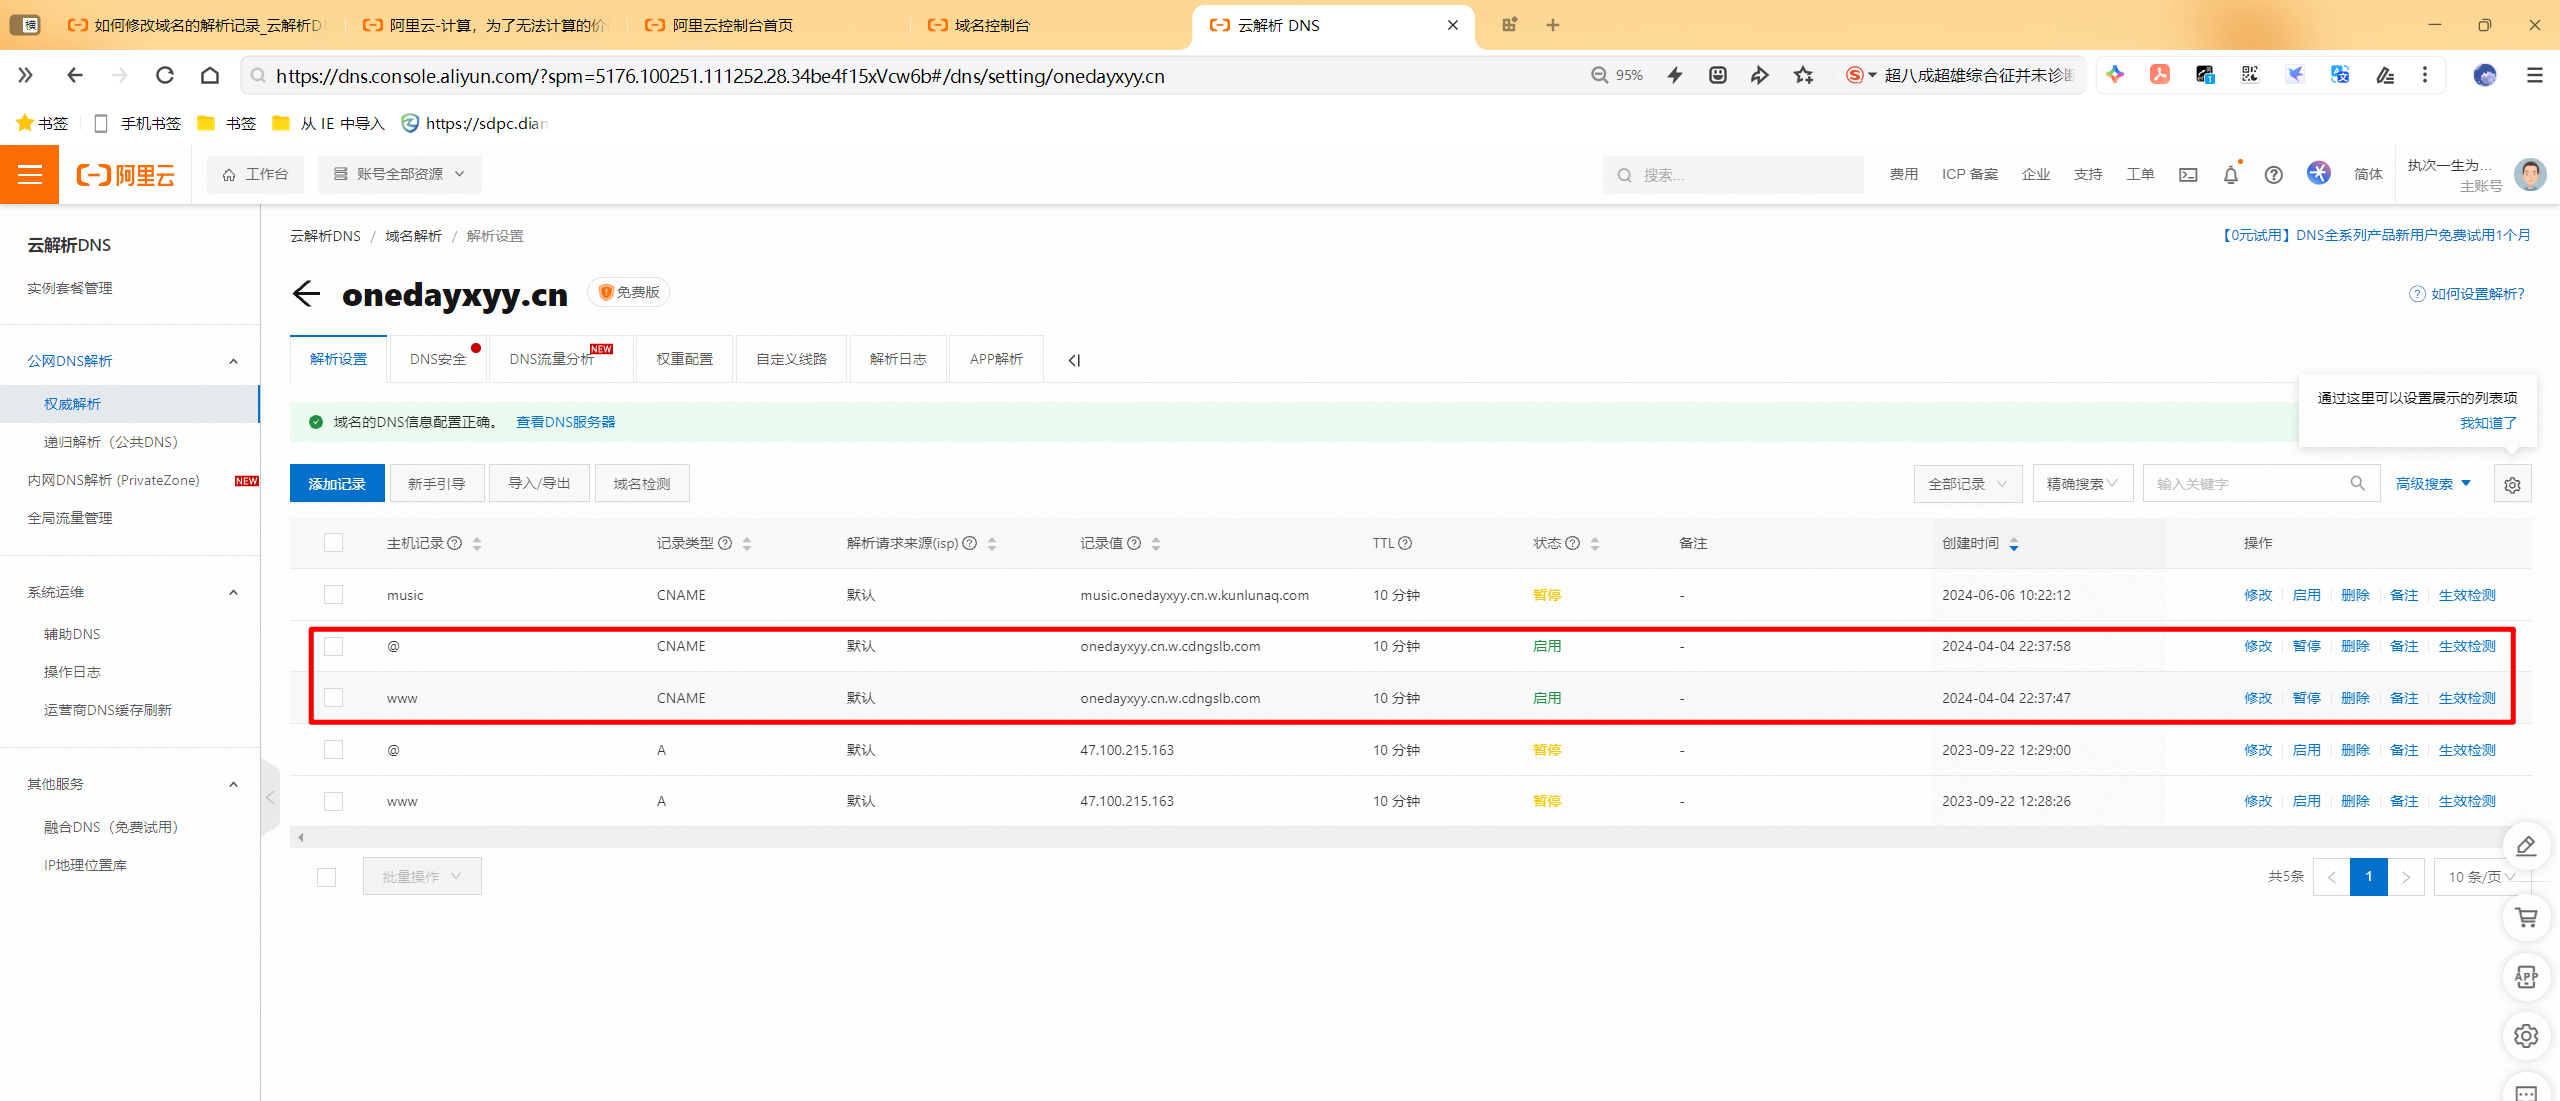
dns域名解析:
ecs ip------cdn name
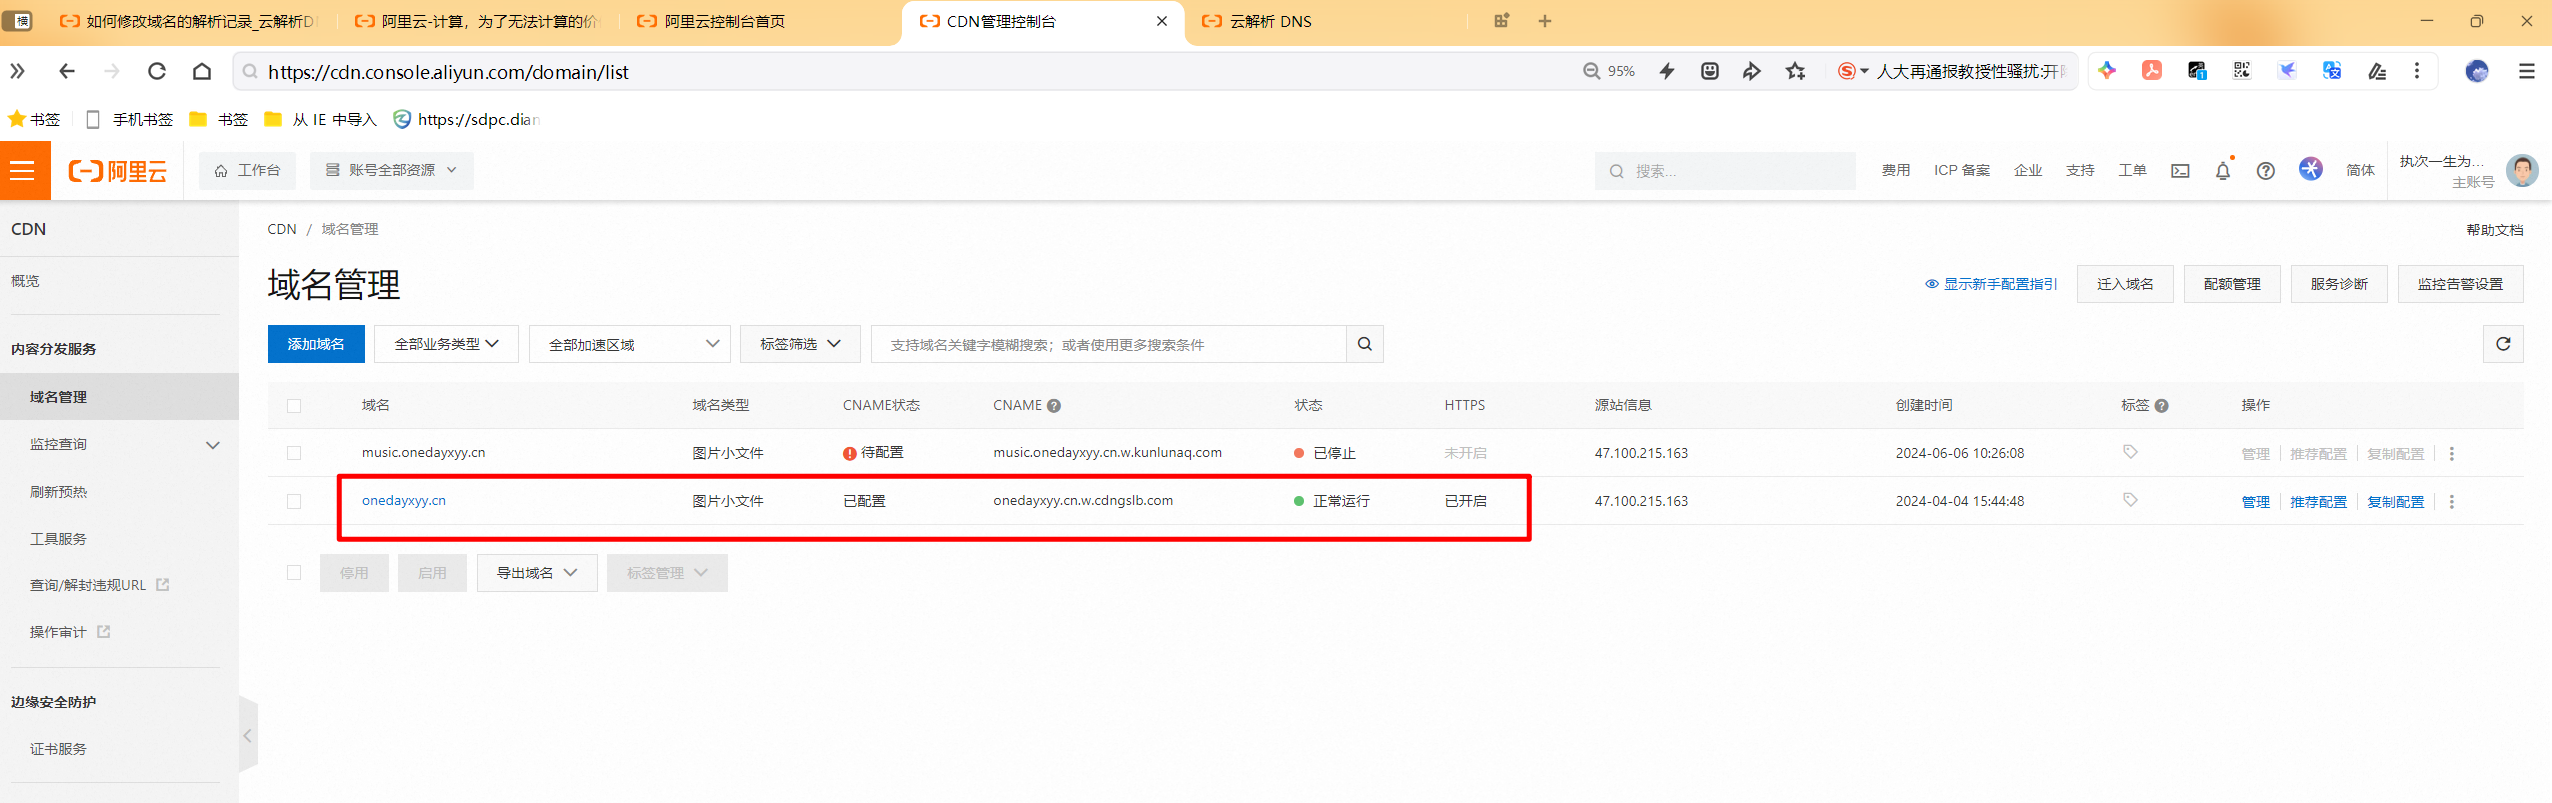
cdn:
onedayxyy.cn --- 给源站ip ---cdn name
如何使用子域名??
onedayxyy.cn
blog.onedayxyy.cn
主域名:https://onedayxyy.cn
子域名:
https://blog.onedayxyy.cn
https://docusaurus.onedayxyy.cn
blog.onedayxyy.cn
http://kuailemao.xyz/ #主域名
http://blog.kuailemao.xyz/ #子级域名
dns解析
onedayxyy.cn.w.cdngslb.com
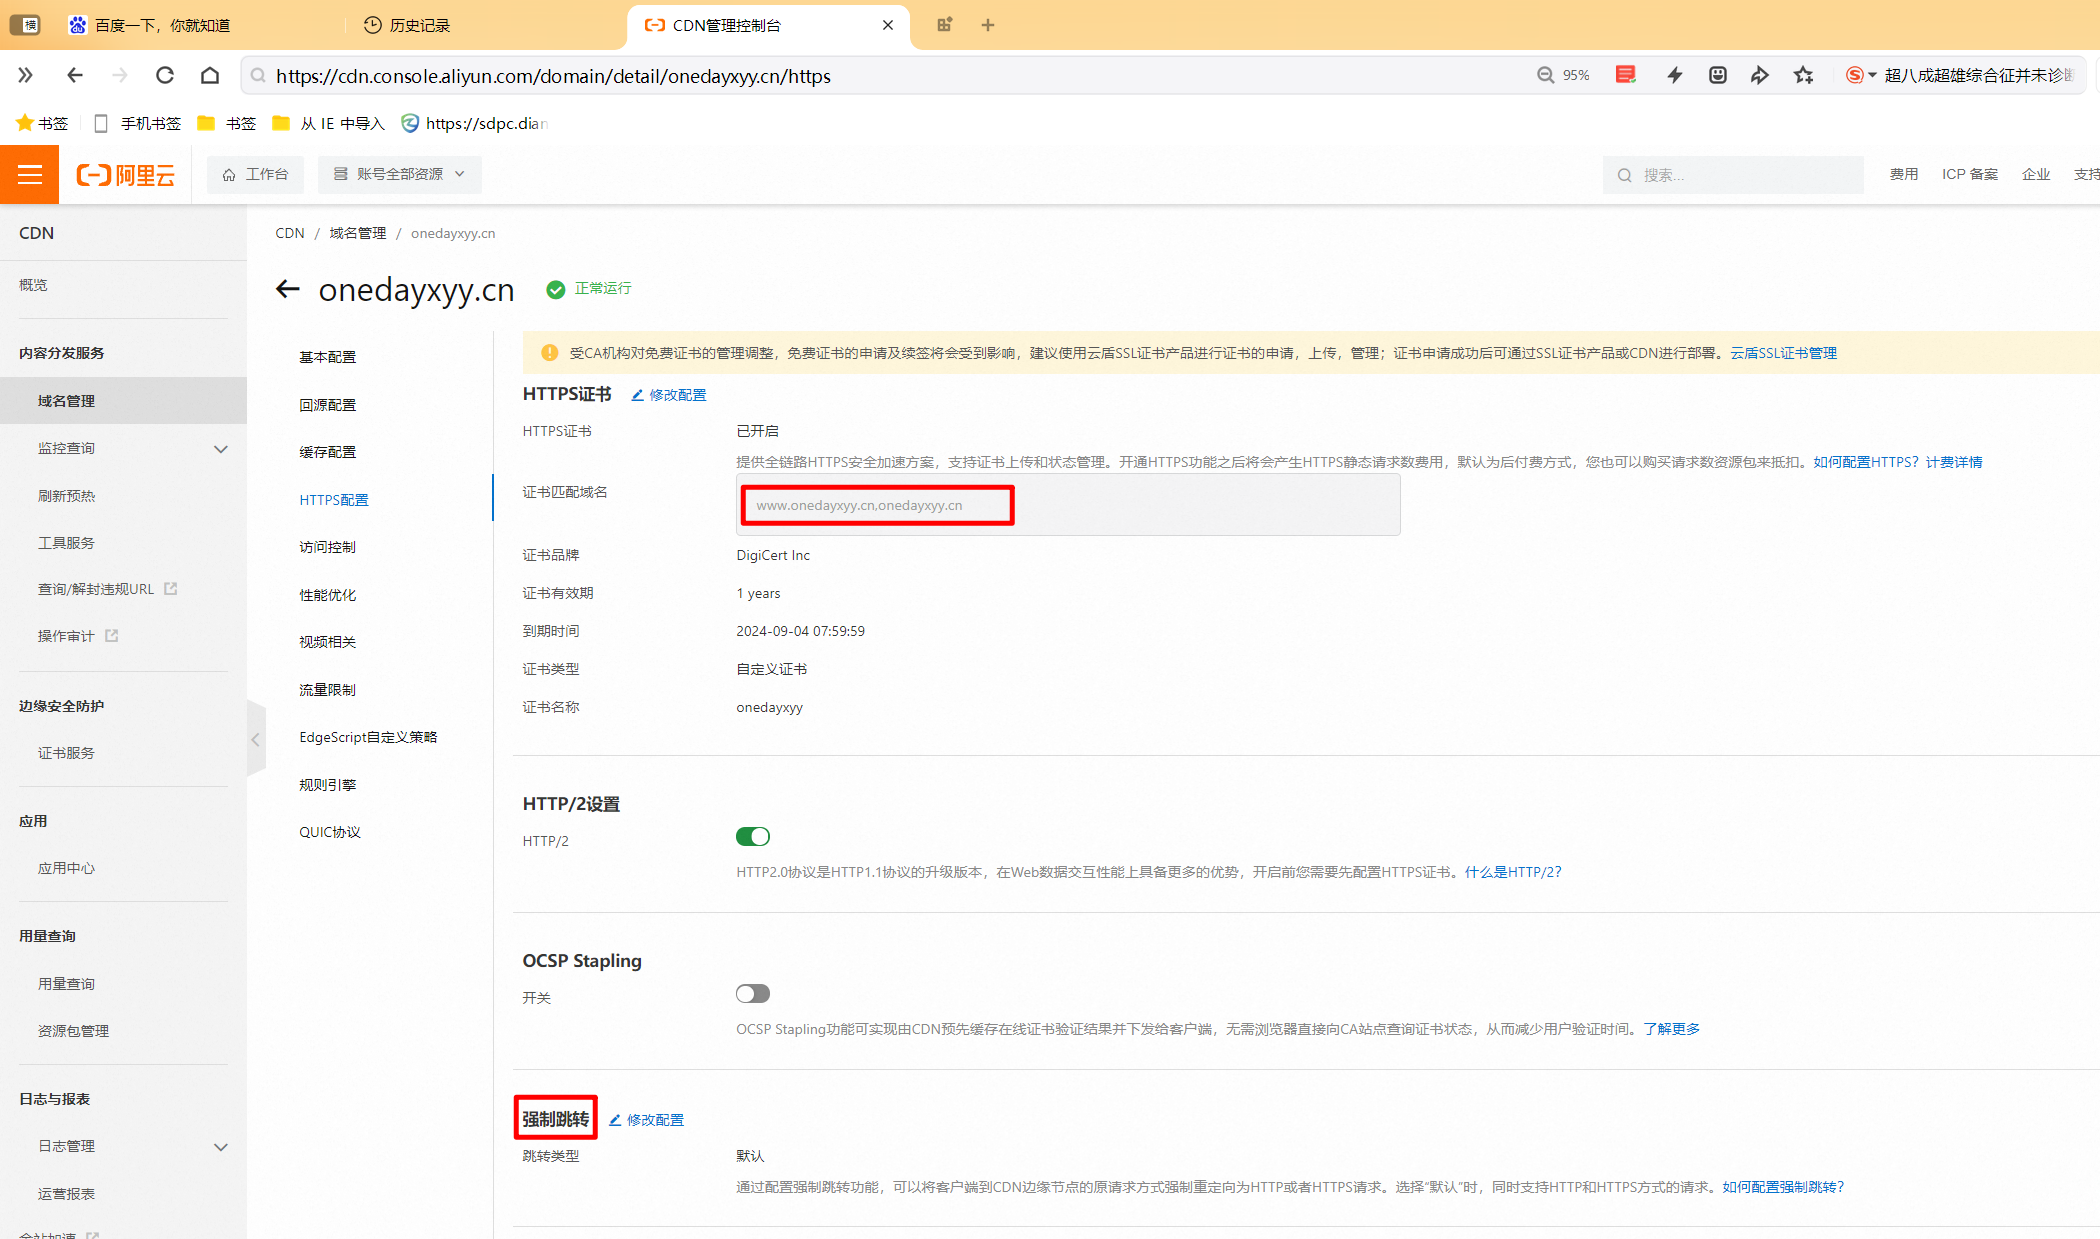
cdn配置
######## cdn配置
onedayxyy.cn.w.cdngslb.com
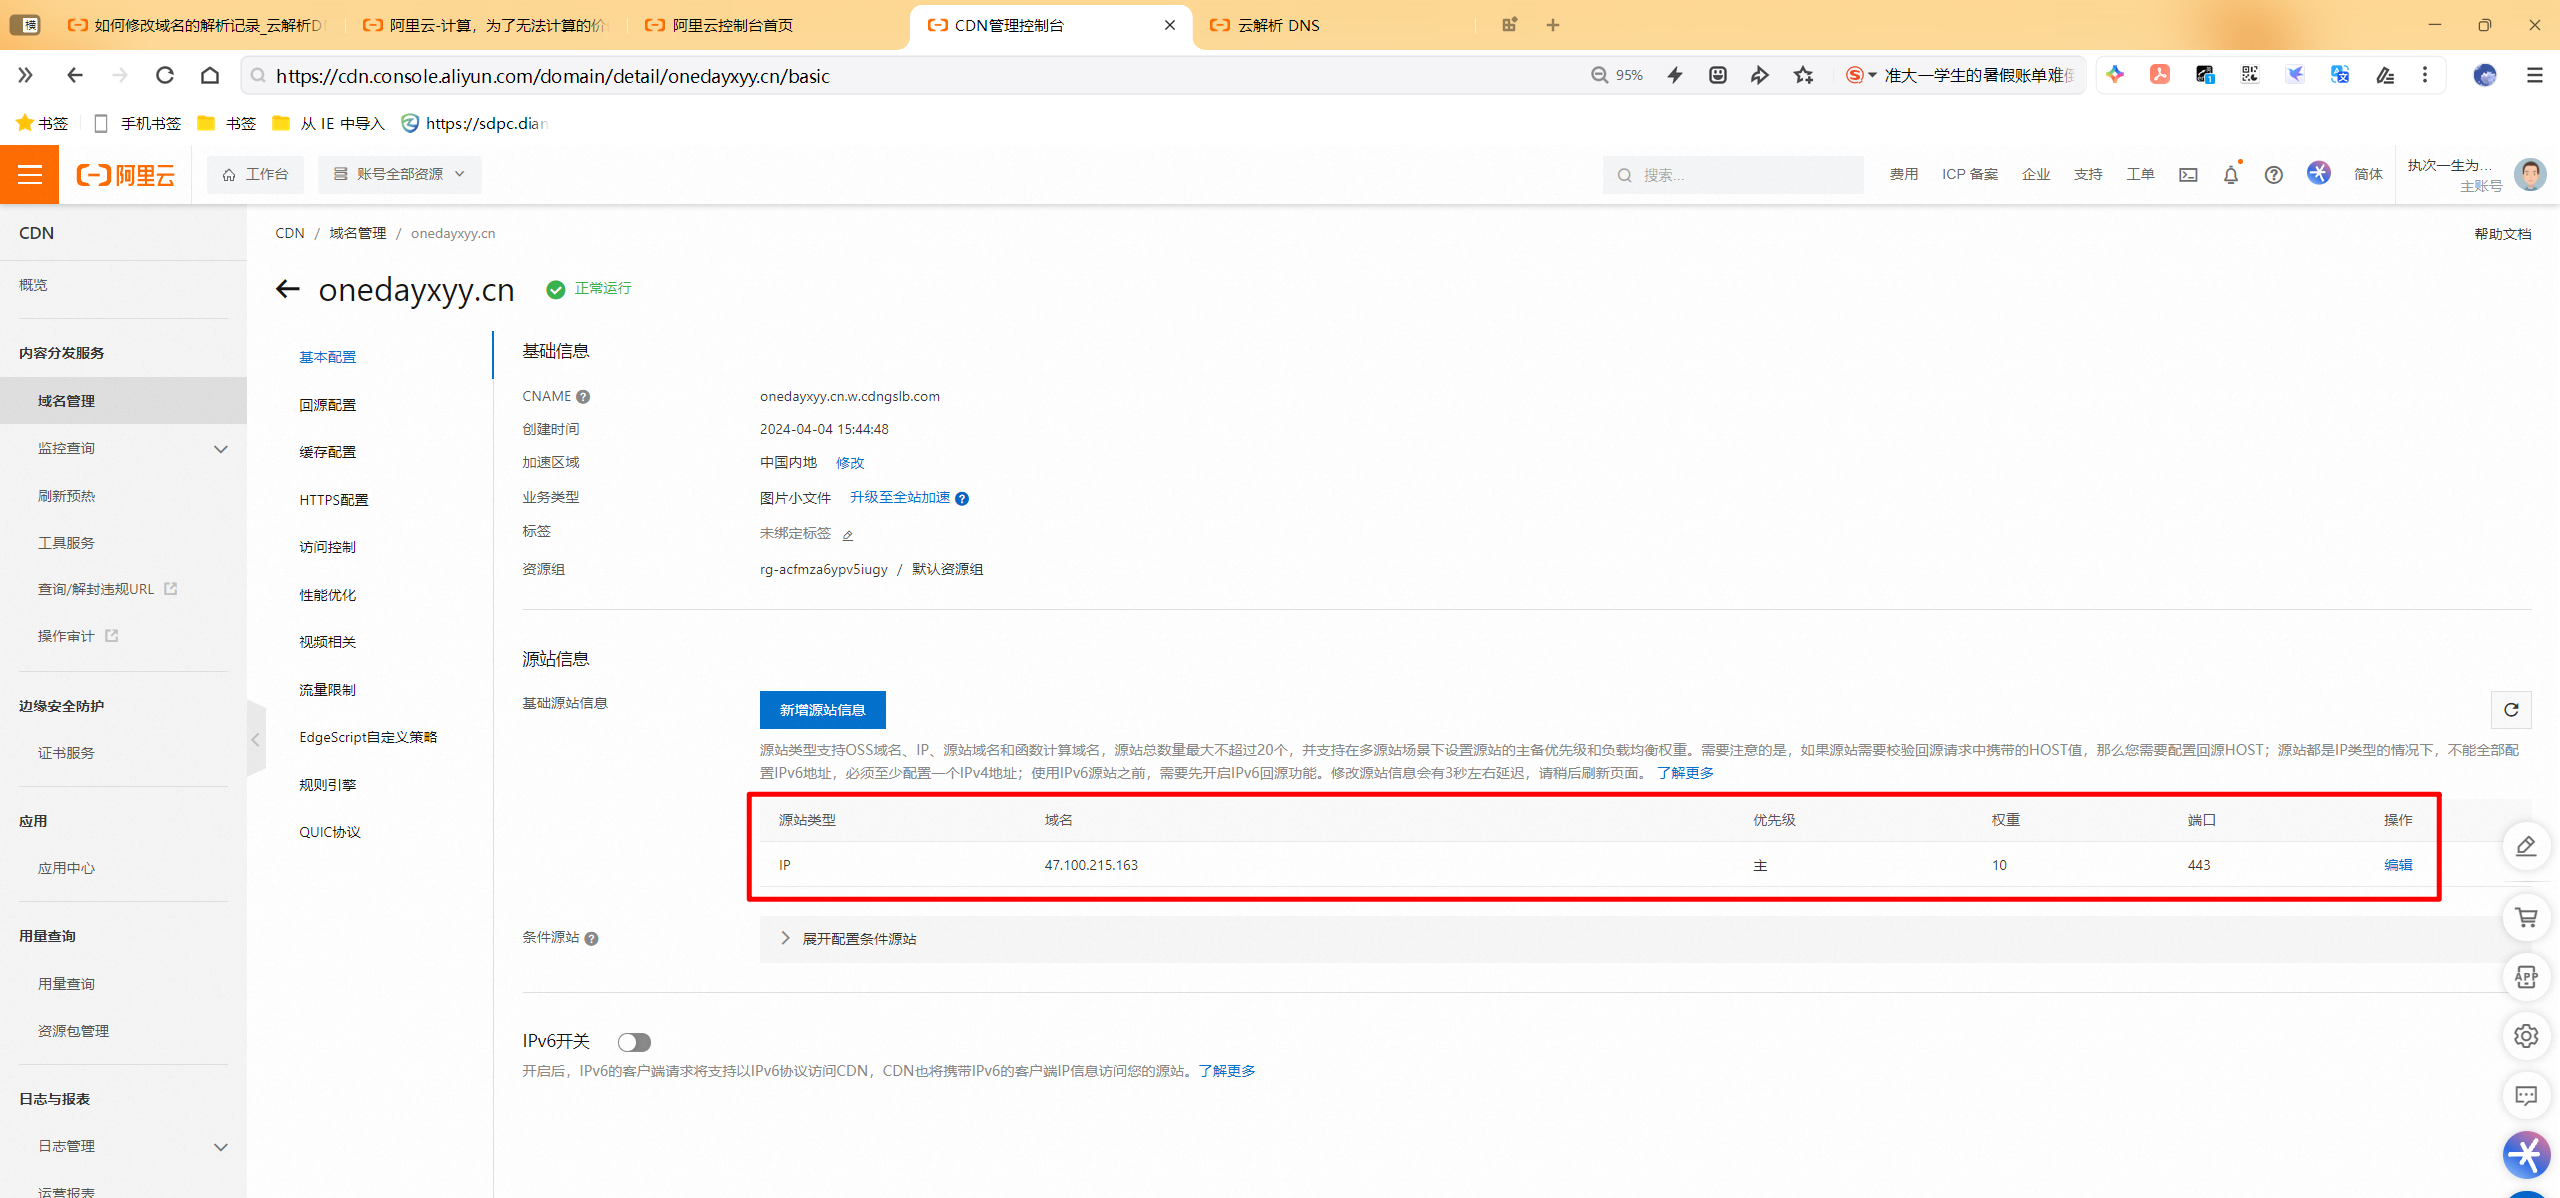
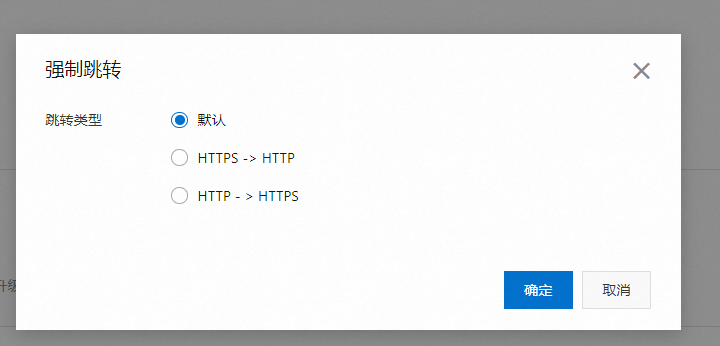
######## cdn是否配置了强制跳转
默认没配置的。但是是配�置了https证书的。
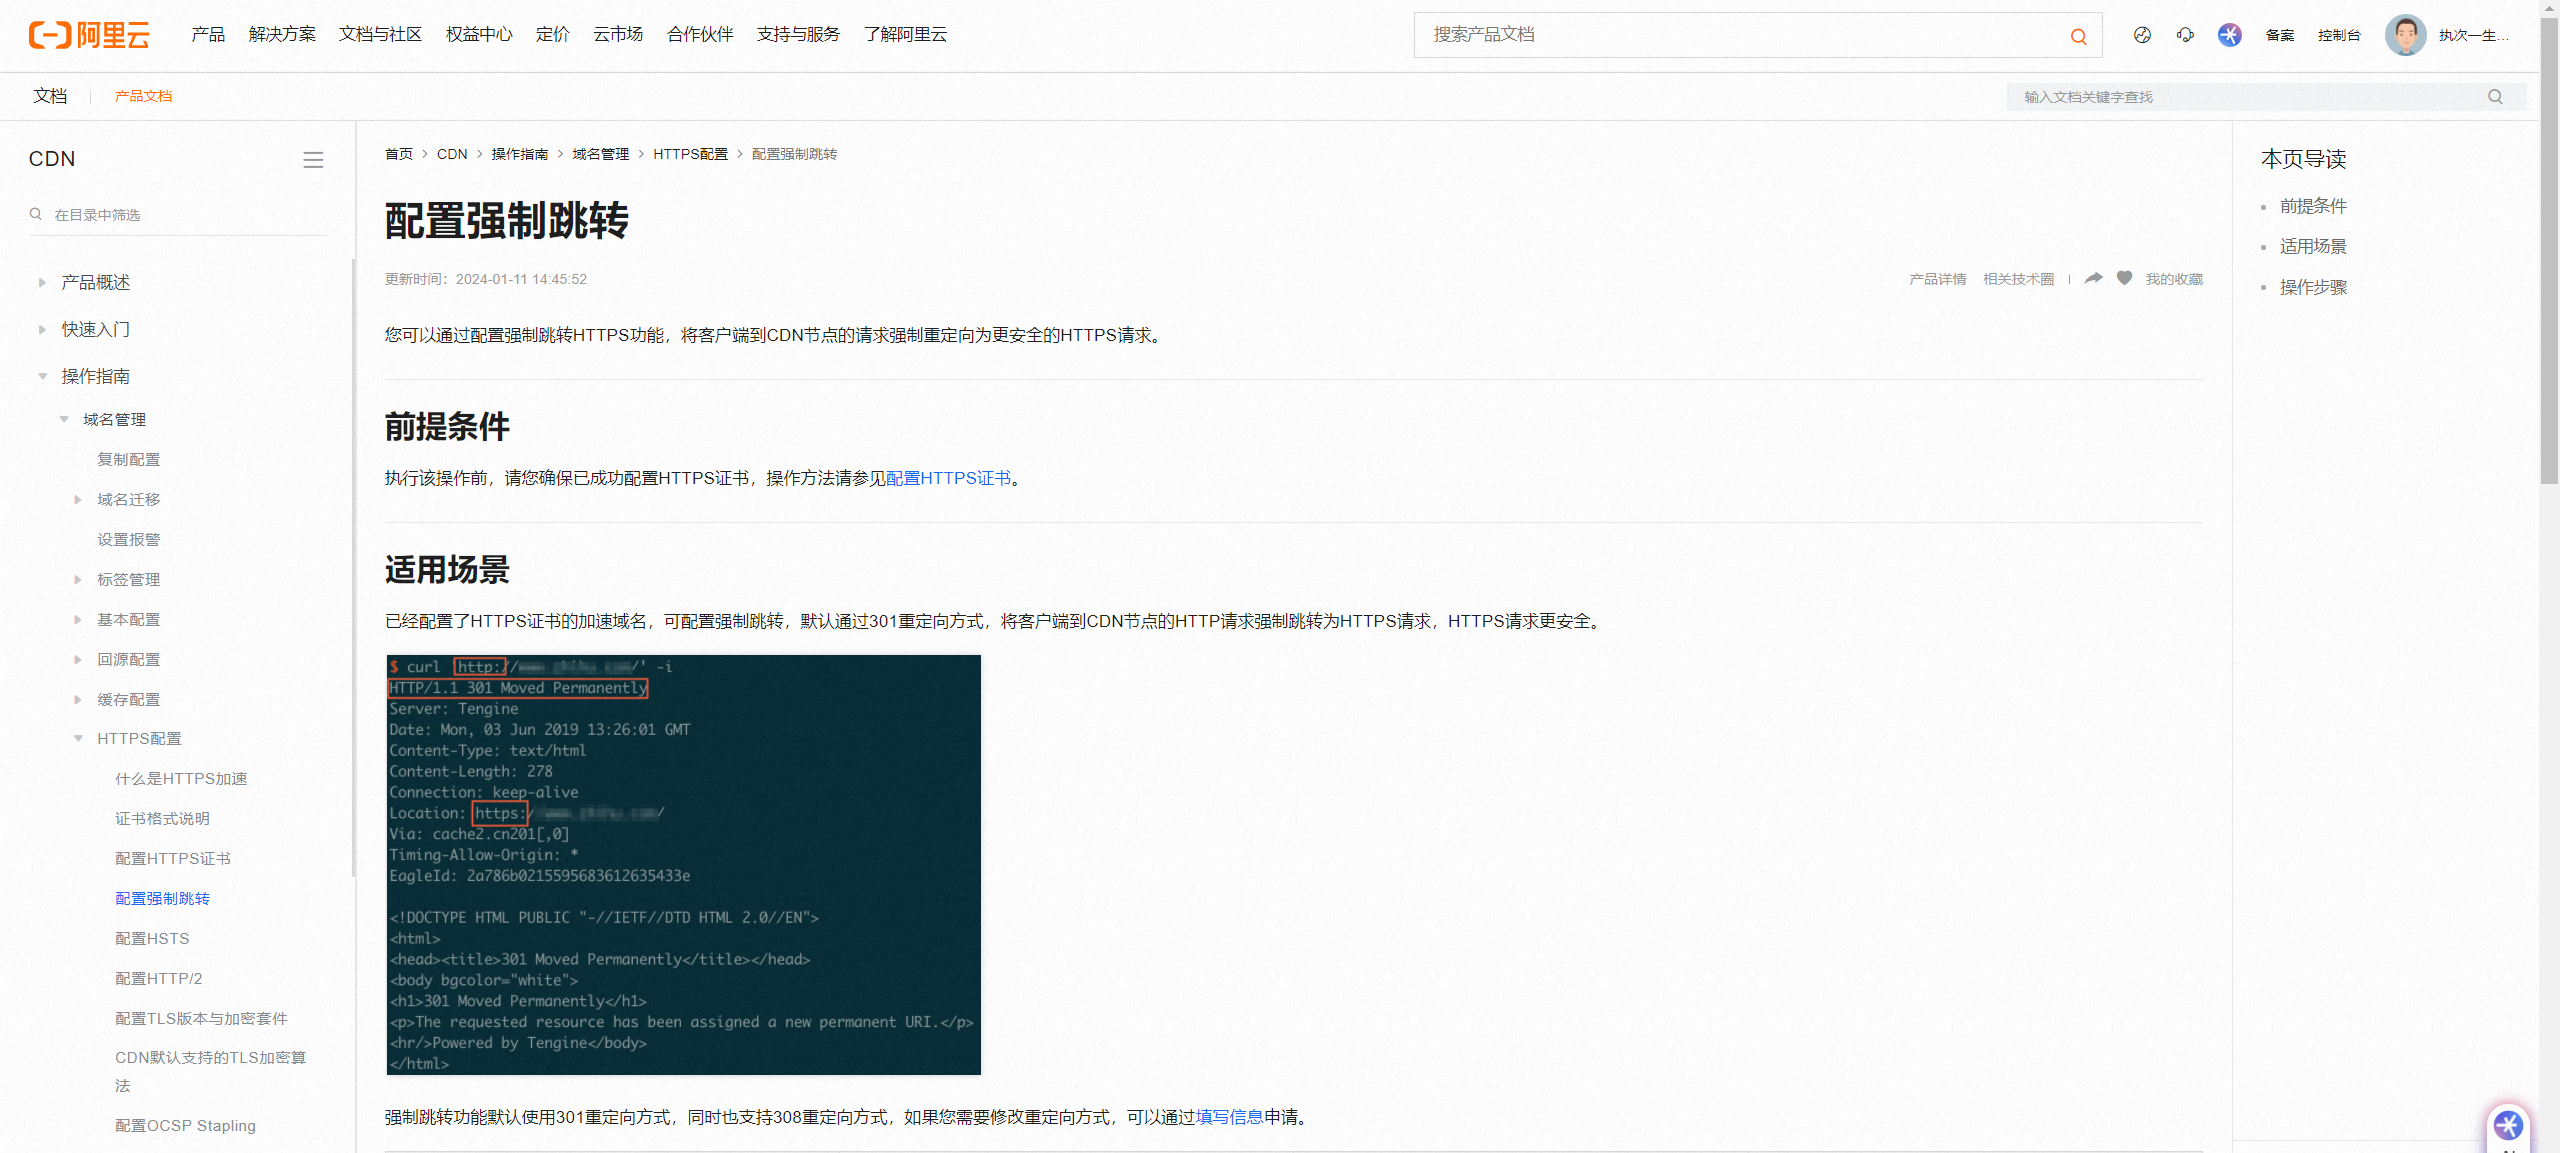
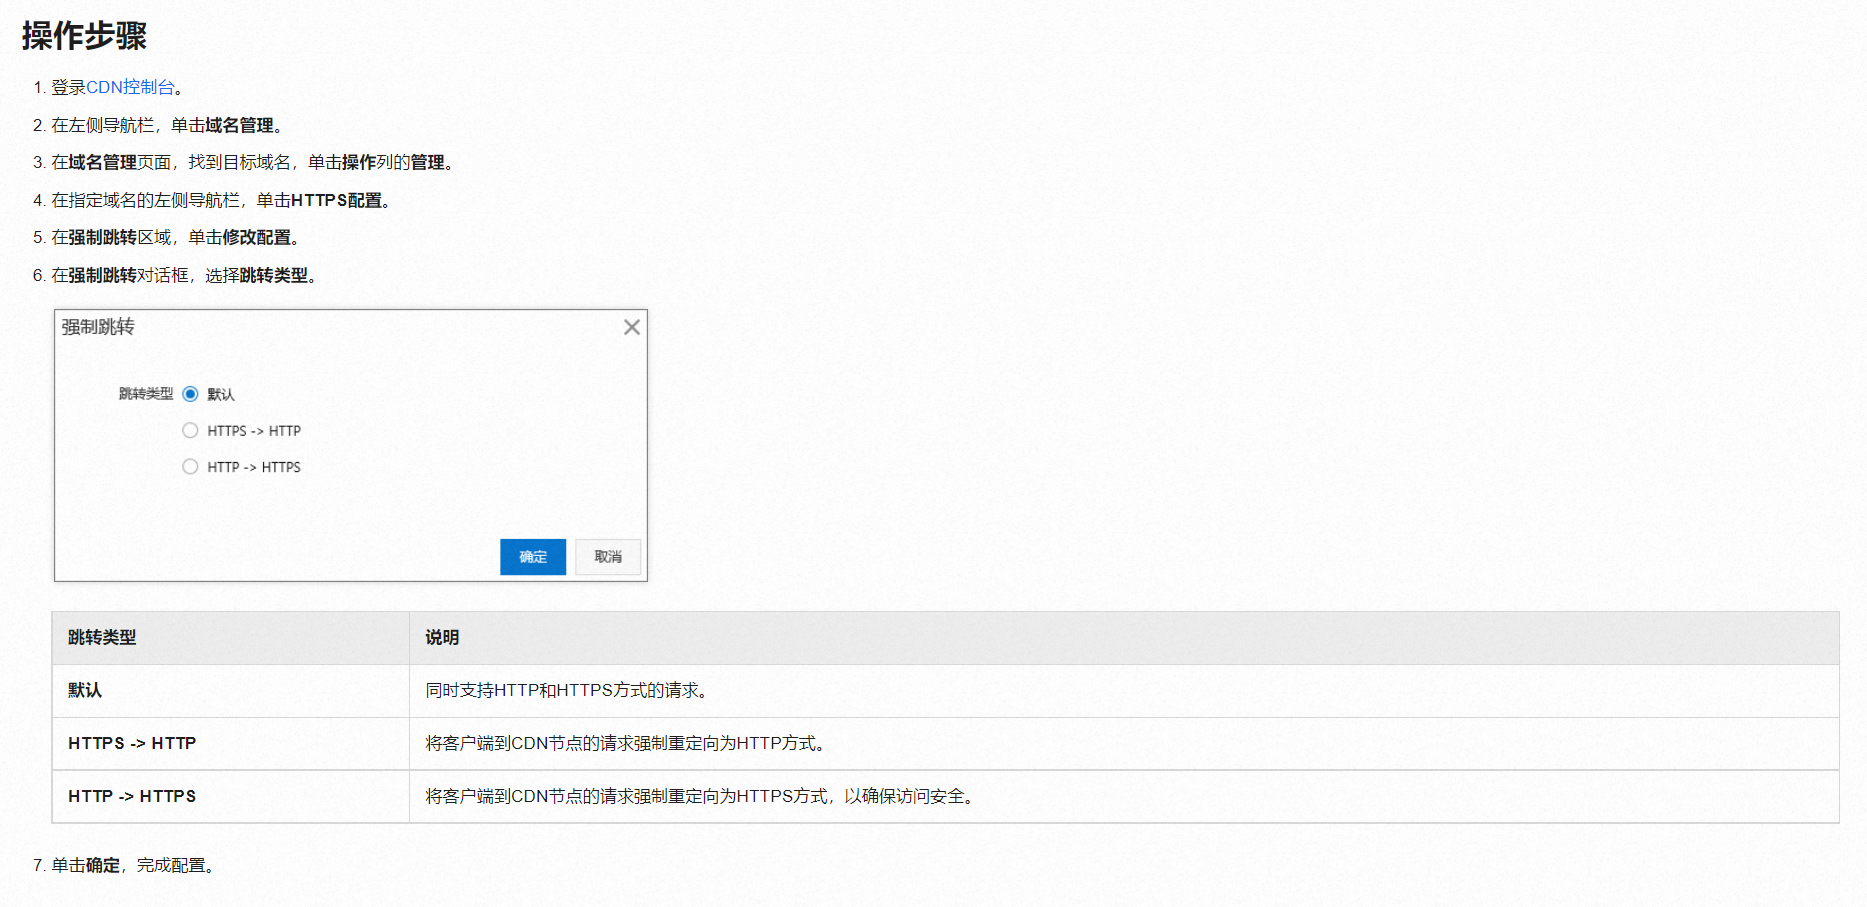
- 参考文档

nginx配置
[root@docusaurus-wiki ~]#cat /etc/nginx/nginx.conf
# For more information on configuration, see:
# * Official English Documentation: http://nginx.org/en/docs/
# * Official Russian Documentation: http://nginx.org/ru/docs/
user root;
worker_processes auto;
error_log /var/log/nginx/error.log;
pid /run/nginx.pid;
# Load dynamic modules. See /usr/share/doc/nginx/README.dynamic.
include /usr/share/nginx/modules/*.conf;
events {
worker_connections 1024;
}
http {
gzip on; # 启用 gzip 压缩
gzip_vary on; # 根据请求�中的 `Accept-Encoding` 响应头决定是否启用 gzip
gzip_proxied any; # 在所有代理请求中启用压缩
gzip_types text/plain text/css application/json application/javascript text/xml application/xml application/xml+rss text/javascript; # 指定哪些类型的响应需要压缩
gzip_comp_level 5; # 压缩等级(范围是 1-9,高级别意味着更好的压缩但会消耗更多 CPU 资源)
gzip_min_length 256; # 只对超过给定长度的响应启用压缩
log_format main '$remote_addr - $remote_user [$time_local] "$request" '
'$status $body_bytes_sent "$http_referer" '
'"$http_user_agent" "$http_x_forwarded_for"';
access_log /var/log/nginx/access.log main;
sendfile on;
tcp_nopush on;
tcp_nodelay on;
keepalive_timeout 65;
types_hash_max_size 4096;
include /etc/nginx/mime.types;
default_type application/octet-stream;
# Load modular configuration files from the /etc/nginx/conf.d directory.
# See http://nginx.org/en/docs/ngx_core_module.html#include
# for more information.
include /etc/nginx/conf.d/*.conf;
charset utf-8;
# Settings for a TLS enabled server.
server {
listen 80;
server_name onedayxyy.cn www.onedayxyy.cn;
#配置https重定向
#return 301 https://$host$request_uri;
}
server {
listen 443 ssl http2;
listen [::]:443 ssl http2;
server_name onedayxyy.cn www.onedayxyy.cn;
root /root/home3.0;
location / {
index index.html index.htm;
}
# diy-index
#location /home2.0 {
# proxy_pass http://47.100.215.163:12445;
# proxy_set_header Host $host;
# proxy_set_header X-Real-IP $remote_addr;
# proxy_set_header X-Forwarded-For $proxy_add_x_forwarded_for;
# proxy_set_header X-Forwarded-Proto $scheme;
#}
# halo blog
#location /halo {
# proxy_pass http://47.100.215.163:8090;
# proxy_set_header Host $host;
# proxy_set_header X-Real-IP $remote_addr;
# proxy_set_header X-Forwarded-For $proxy_add_x_forwarded_for;
# proxy_set_header X-Forwarded-Proto $scheme;
#}
# halo blog -nginx反向代理,gpt代码--13行代码
#location /halo {
# proxy_pass http://127.0.0.1:8090;
# proxy_set_header Host $host;
# proxy_set_header X-Real-IP $remote_addr;
# proxy_set_header X-Forwarded-For $proxy_add_x_forwarded_for;
# proxy_set_header X-Forwarded-Proto $scheme;
# proxy_set_header X-Forwarded-Host $host;
# proxy_set_header X-Forwarded-Port $server_port;
# # Optional: Remove the /halo prefix when forwarding to backend
# rewrite ^/halo/(.*)$ /$1 break;
#}
# 相册
#location /photo {
# proxy_pass http://127.0.0.1:8080;
# proxy_set_header Host $host;
# proxy_set_header X-Real-IP $remote_addr;
# proxy_set_header X-Forwarded-For $proxy_add_x_forwarded_for;
# proxy_set_header X-Forwarded-Proto $scheme;
#}
# 如果你的图片资源是从外部 API 加载的,确保这些 API 允许跨域请求。你可以在 Nginx 中添加 CORS 头
#location /images/ {
# add_header Access-Control-Allow-Origin *;
# try_files $uri $uri/ =404;
#}
location /halo {
return 301 http://47.100.215.163:8090;
}
#相册
location /photo {
return 301 http://47.100.215.163:8080;
}
location /docusaurus {
alias /root/rsync/rsync-docusaurus/build;
index index.html;
}
location /hexoblog {
alias /root/rsync/rsync-hexo/public;
index index.html;
}
location /images {
alias /images;
index index.html;
}
location /imagess {
alias /imagess;
index index.html;
}
location /music {
autoindex on; # 启用目录索引
alias /musics-data;
index index.html; # 默认显示index.html文件,如果没有则列出目录内容
}
location /ruyu-blog-background {
autoindex on; # 启用目录索引
alias /root/ruyu-blog-background;
index index.html; # 默认显示index.html文件,如果没有则列出目录内容
}
location /musics {
alias /root/musics;
index index.html;
}
location /newyear {
alias /root/QianDuanDemo/newyear;
index index.html;
}
ssl_certificate "cert/www.onedayxyy.cn.pem";
ssl_certificate_key "cert/www.onedayxyy.cn.key";
ssl_session_cache shared:SSL:1m;
ssl_session_timeout 10m;
#ssl_ciphers HIGH:!aNULL:!MD5;
#自定义设置使用的TLS协议的类型以及加密套件(以下为配置示例,请您自行评估是否需要配置)
#TLS协议版本越高,HTTPS通信的安全性越高,但是相较于低版本TLS协议,高版本TLS协议对浏览器的兼容性较差。
ssl_ciphers ECDHE-RSA-AES128-GCM-SHA256:ECDHE:ECDH:AES:HIGH:!NULL:!aNULL:!MD5:!ADH:!RC4;
ssl_protocols TLSv1.1 TLSv1.2 TLSv1.3;
ssl_prefer_server_ciphers on;
# Load configuration files for the default server block.
include /etc/nginx/default.d/*.conf;
error_page 404 /404.html;
location = /40x.html {
}
error_page 500 502 503 504 /50x.html;
location = /50x.html {
}
}
}
1.备份 ecs nginx
[root@docusaurus-wiki ~]#cp /etc/nginx/nginx.conf /etc/nginx/nginx.conf-success-`date +%F`
[root@docusaurus-wiki ~]#ll /etc/nginx/nginx.conf-success-2024-07-22
-rw-r--r-- 1 root root 6761 Jul 22 22:14 /etc/nginx/nginx.conf-success-2024-07-22
2.配置ecs nginx
因为我之前为自己域名申请的是单域名证书,因此之前的https证书不覆盖子域名。这里就先配置http就好。(等后续申请了泛域名证书后,再配置https证书)🤣
    # 二级域名反向代理,博客
    server {
        listen 80;
        server_name blog.onedayxyy.cn;

        location / {
            proxy_pass http://47.100.215.163:8080/; # 实际的后台路径
            client_max_body_size 100M;
            proxy_set_header Host $host;
            proxy_set_header X-Real-IP $remote_addr;
            proxy_set_header X-Forwarded-For $proxy_add_x_forwarded_for;
            proxy_set_header X-Forwarded-Proto $scheme;
        }
    }

    # 二级域名反向代理,访问后台
    server {
        listen 80;
        server_name blogadmin.onedayxyy.cn;

        location / {
            proxy_pass http://47.100.215.163:8081/; # 实际的后台路径
            client_max_body_size 100M;
            proxy_set_header Host $host;
            proxy_set_header X-Real-IP $remote_addr;
            proxy_set_header X-Forwarded-For $proxy_add_x_forwarded_for;
            proxy_set_header X-Forwarded-Proto $scheme;
        }
    }

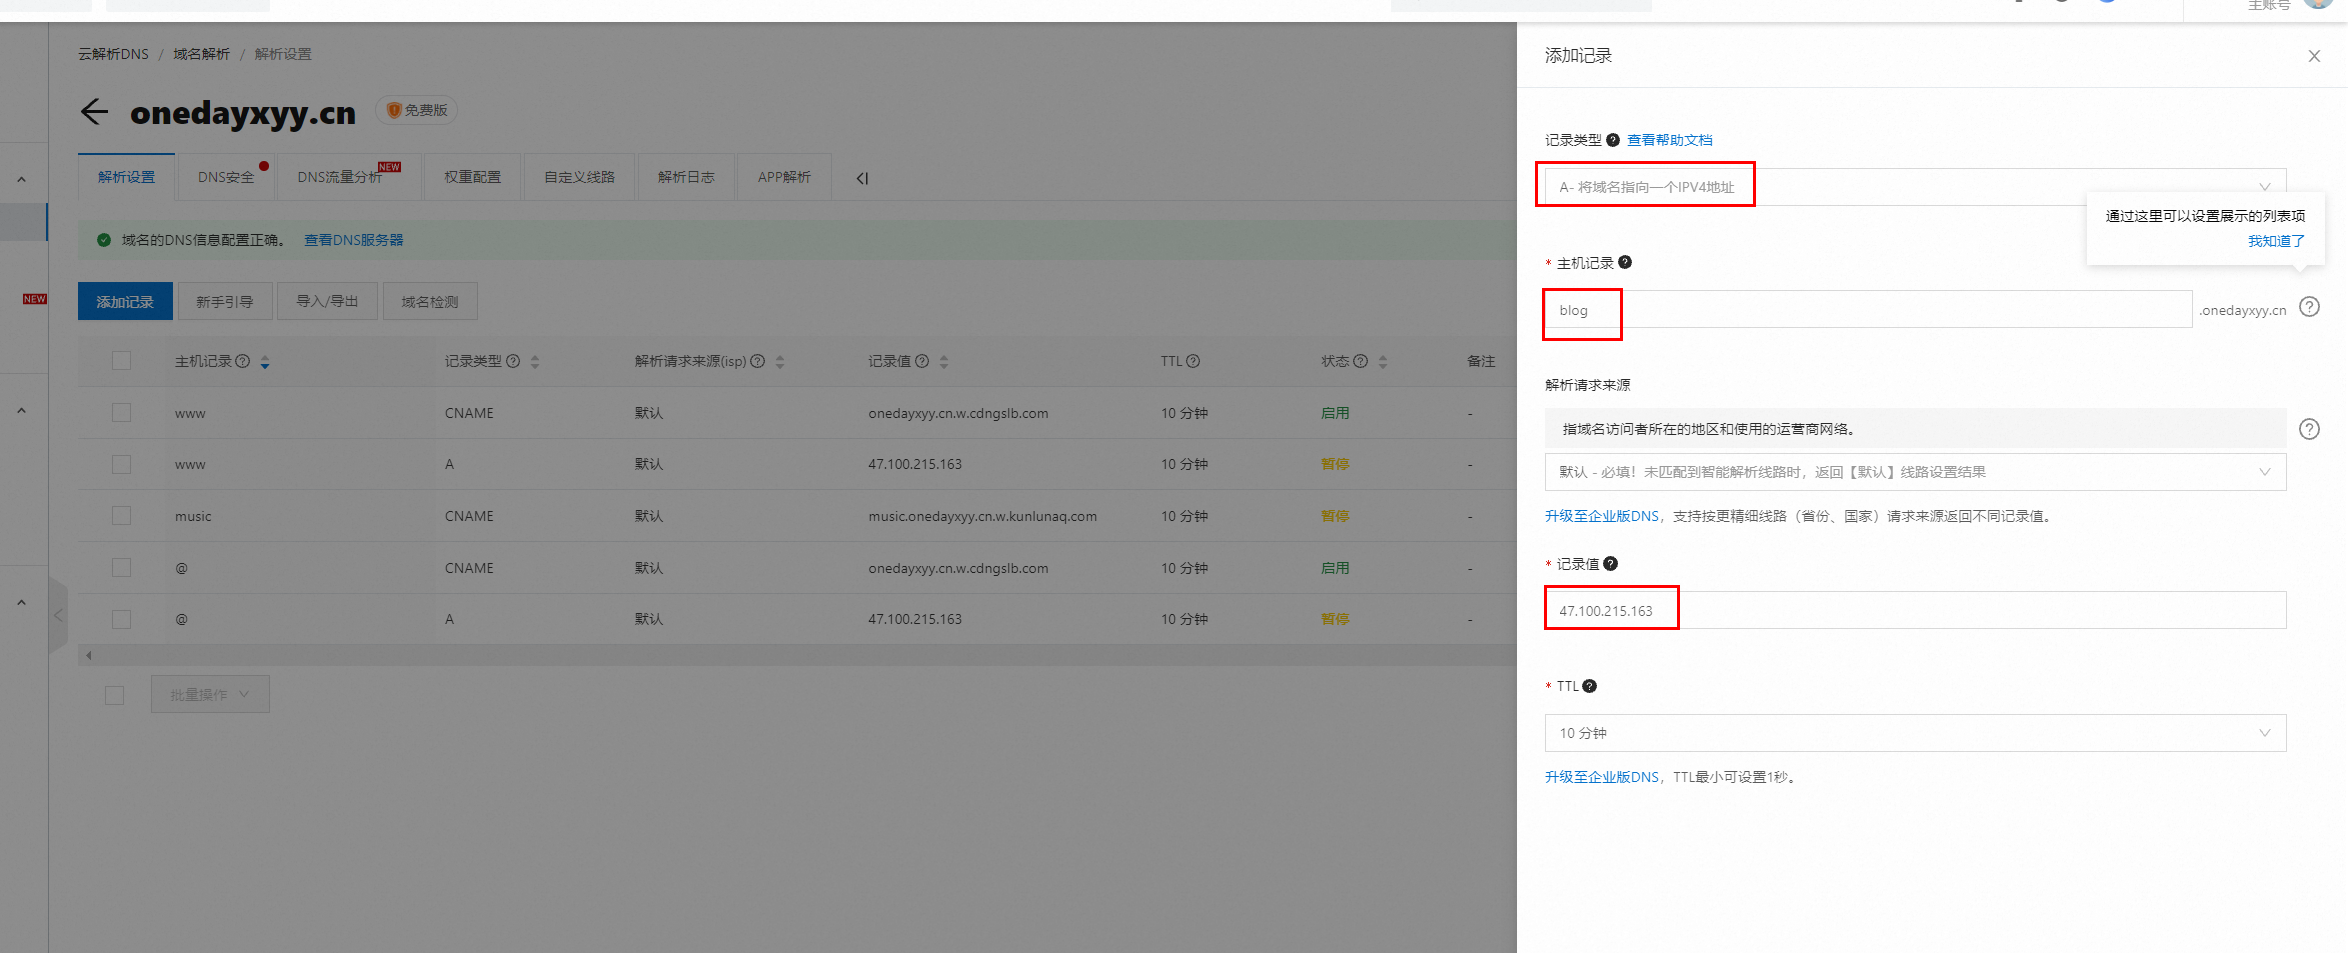
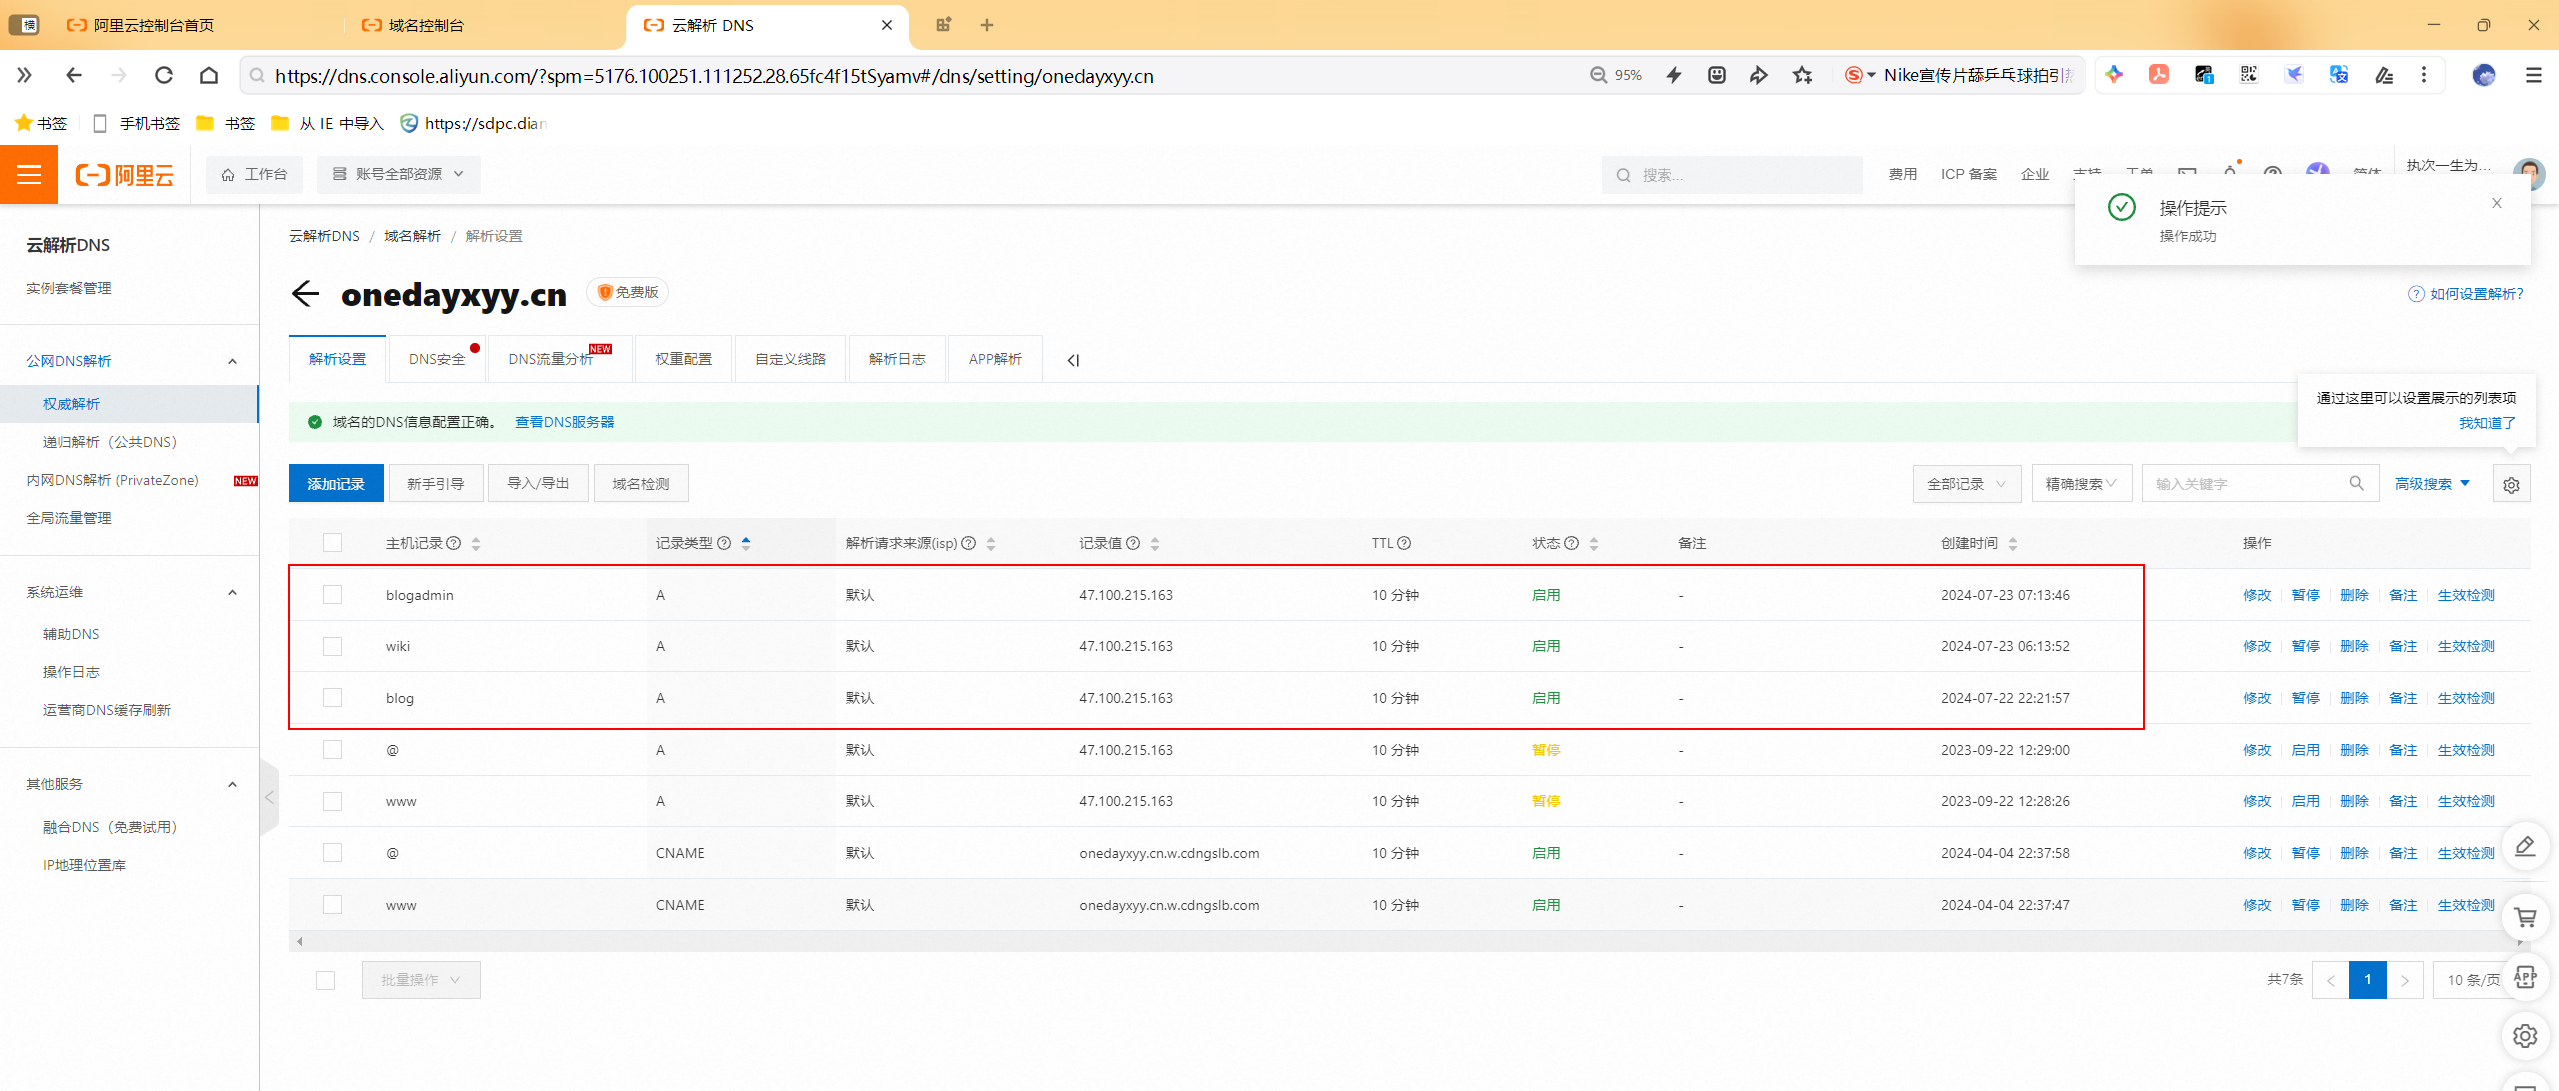
3.在dns上配置解析
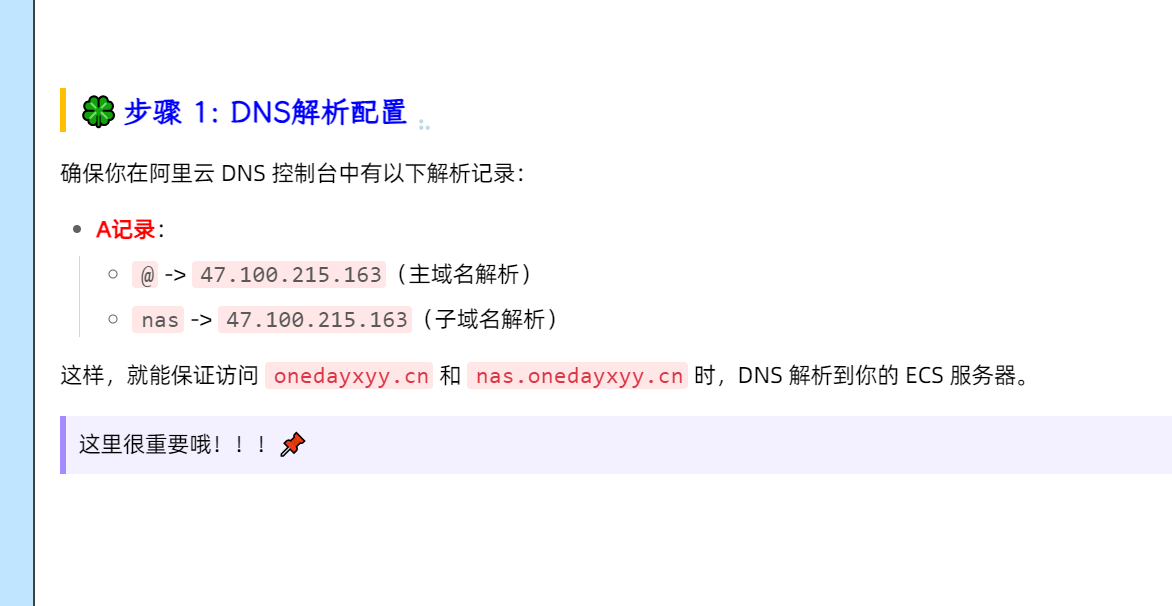
配置后:
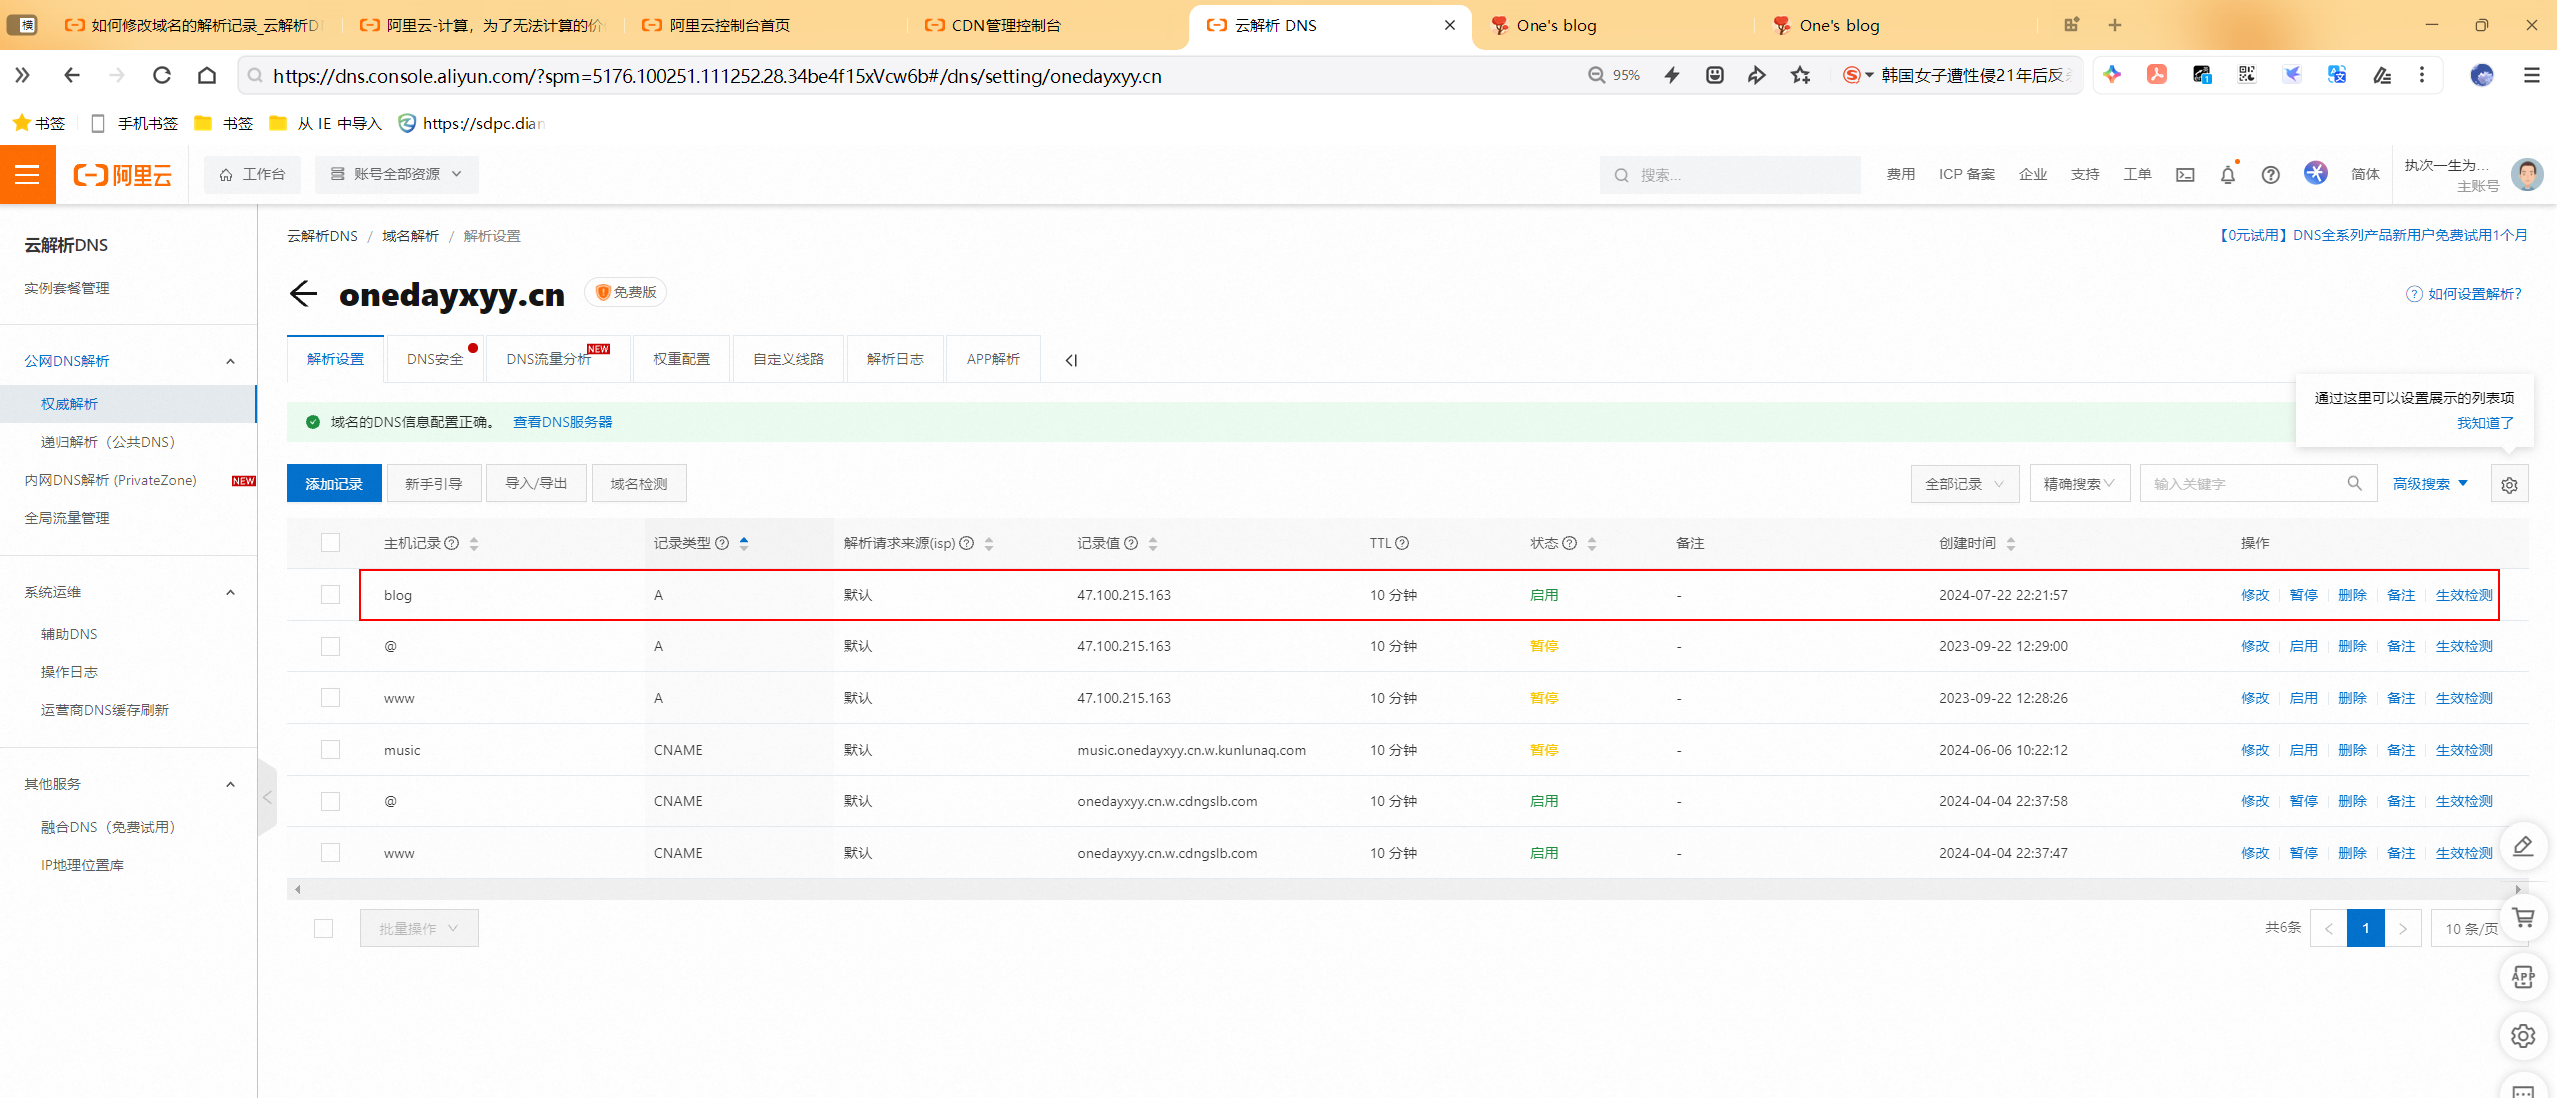
生效检测:
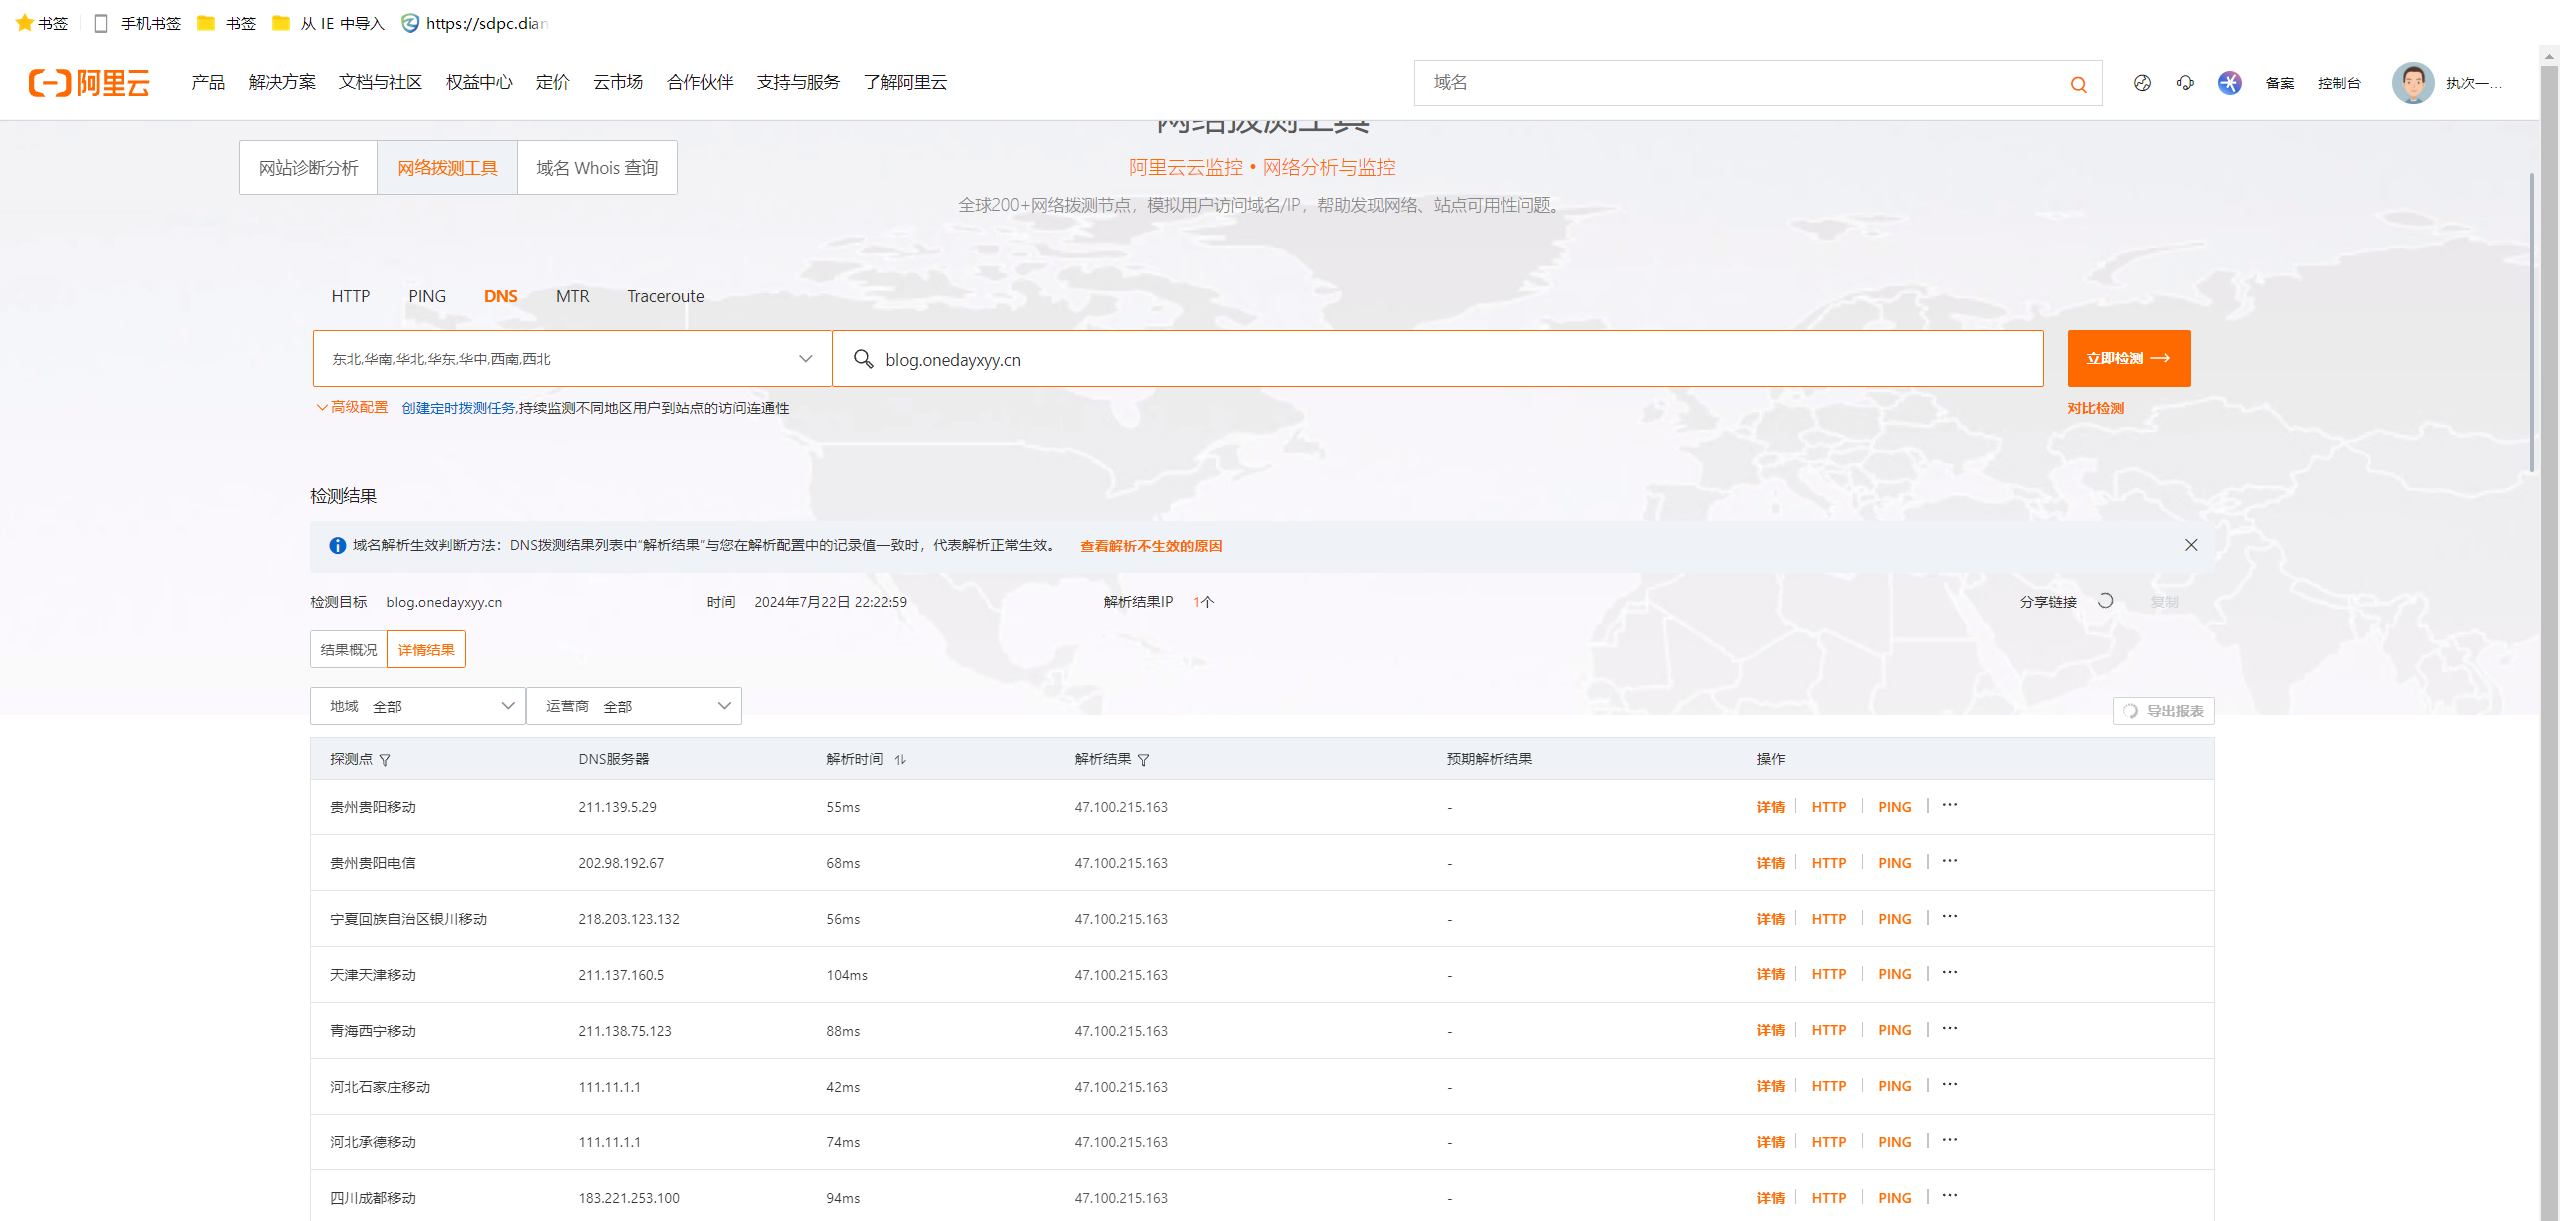
ping测检测:
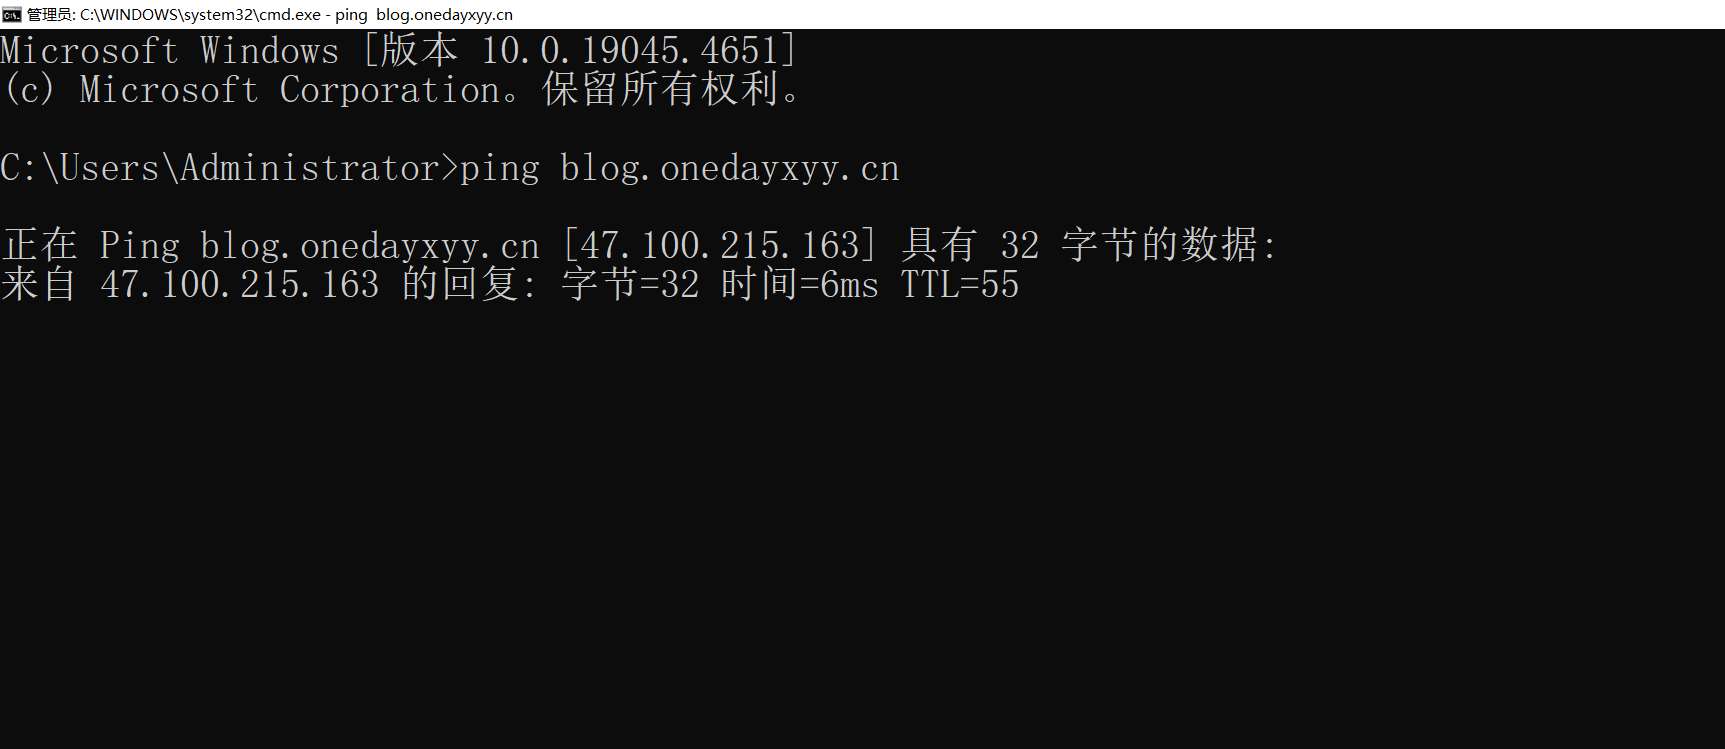
重启ecs上Nginx:
nginx -s reload
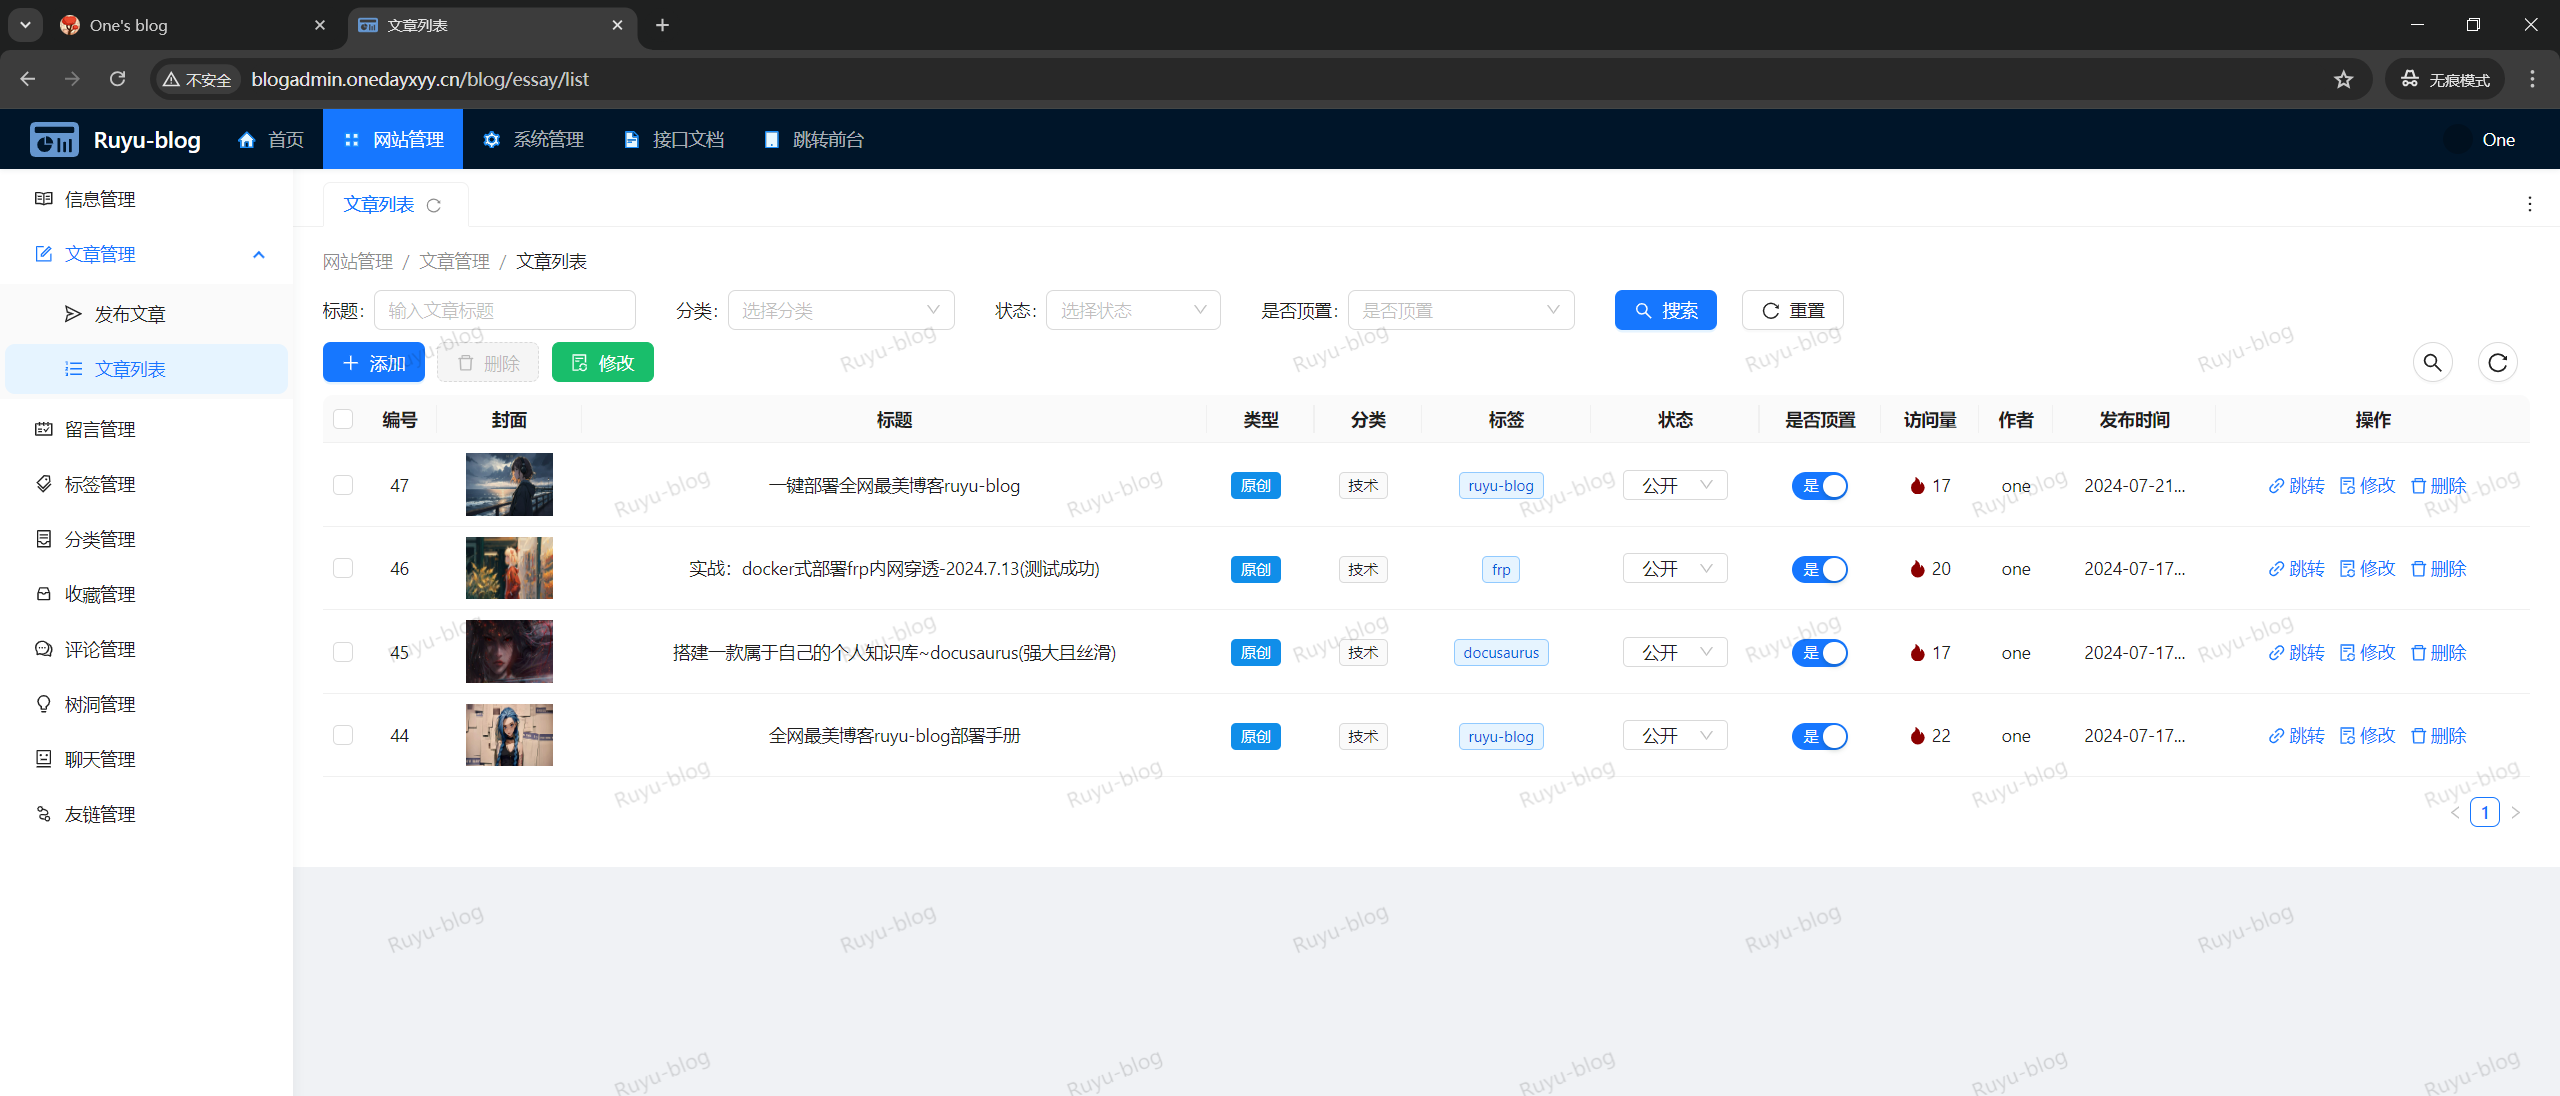
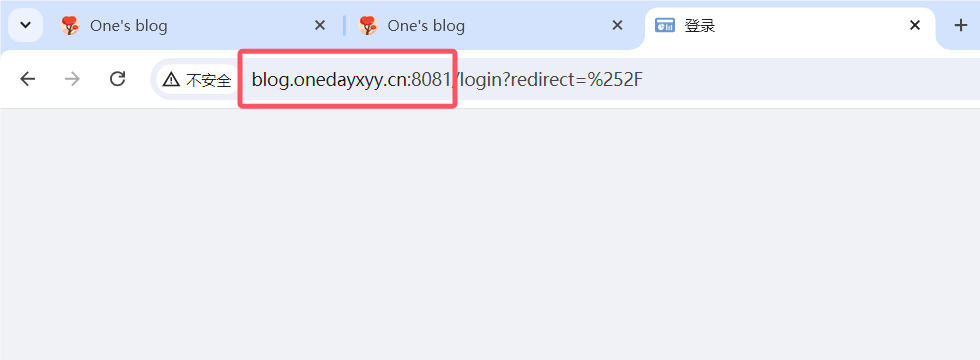
验证:(完美)
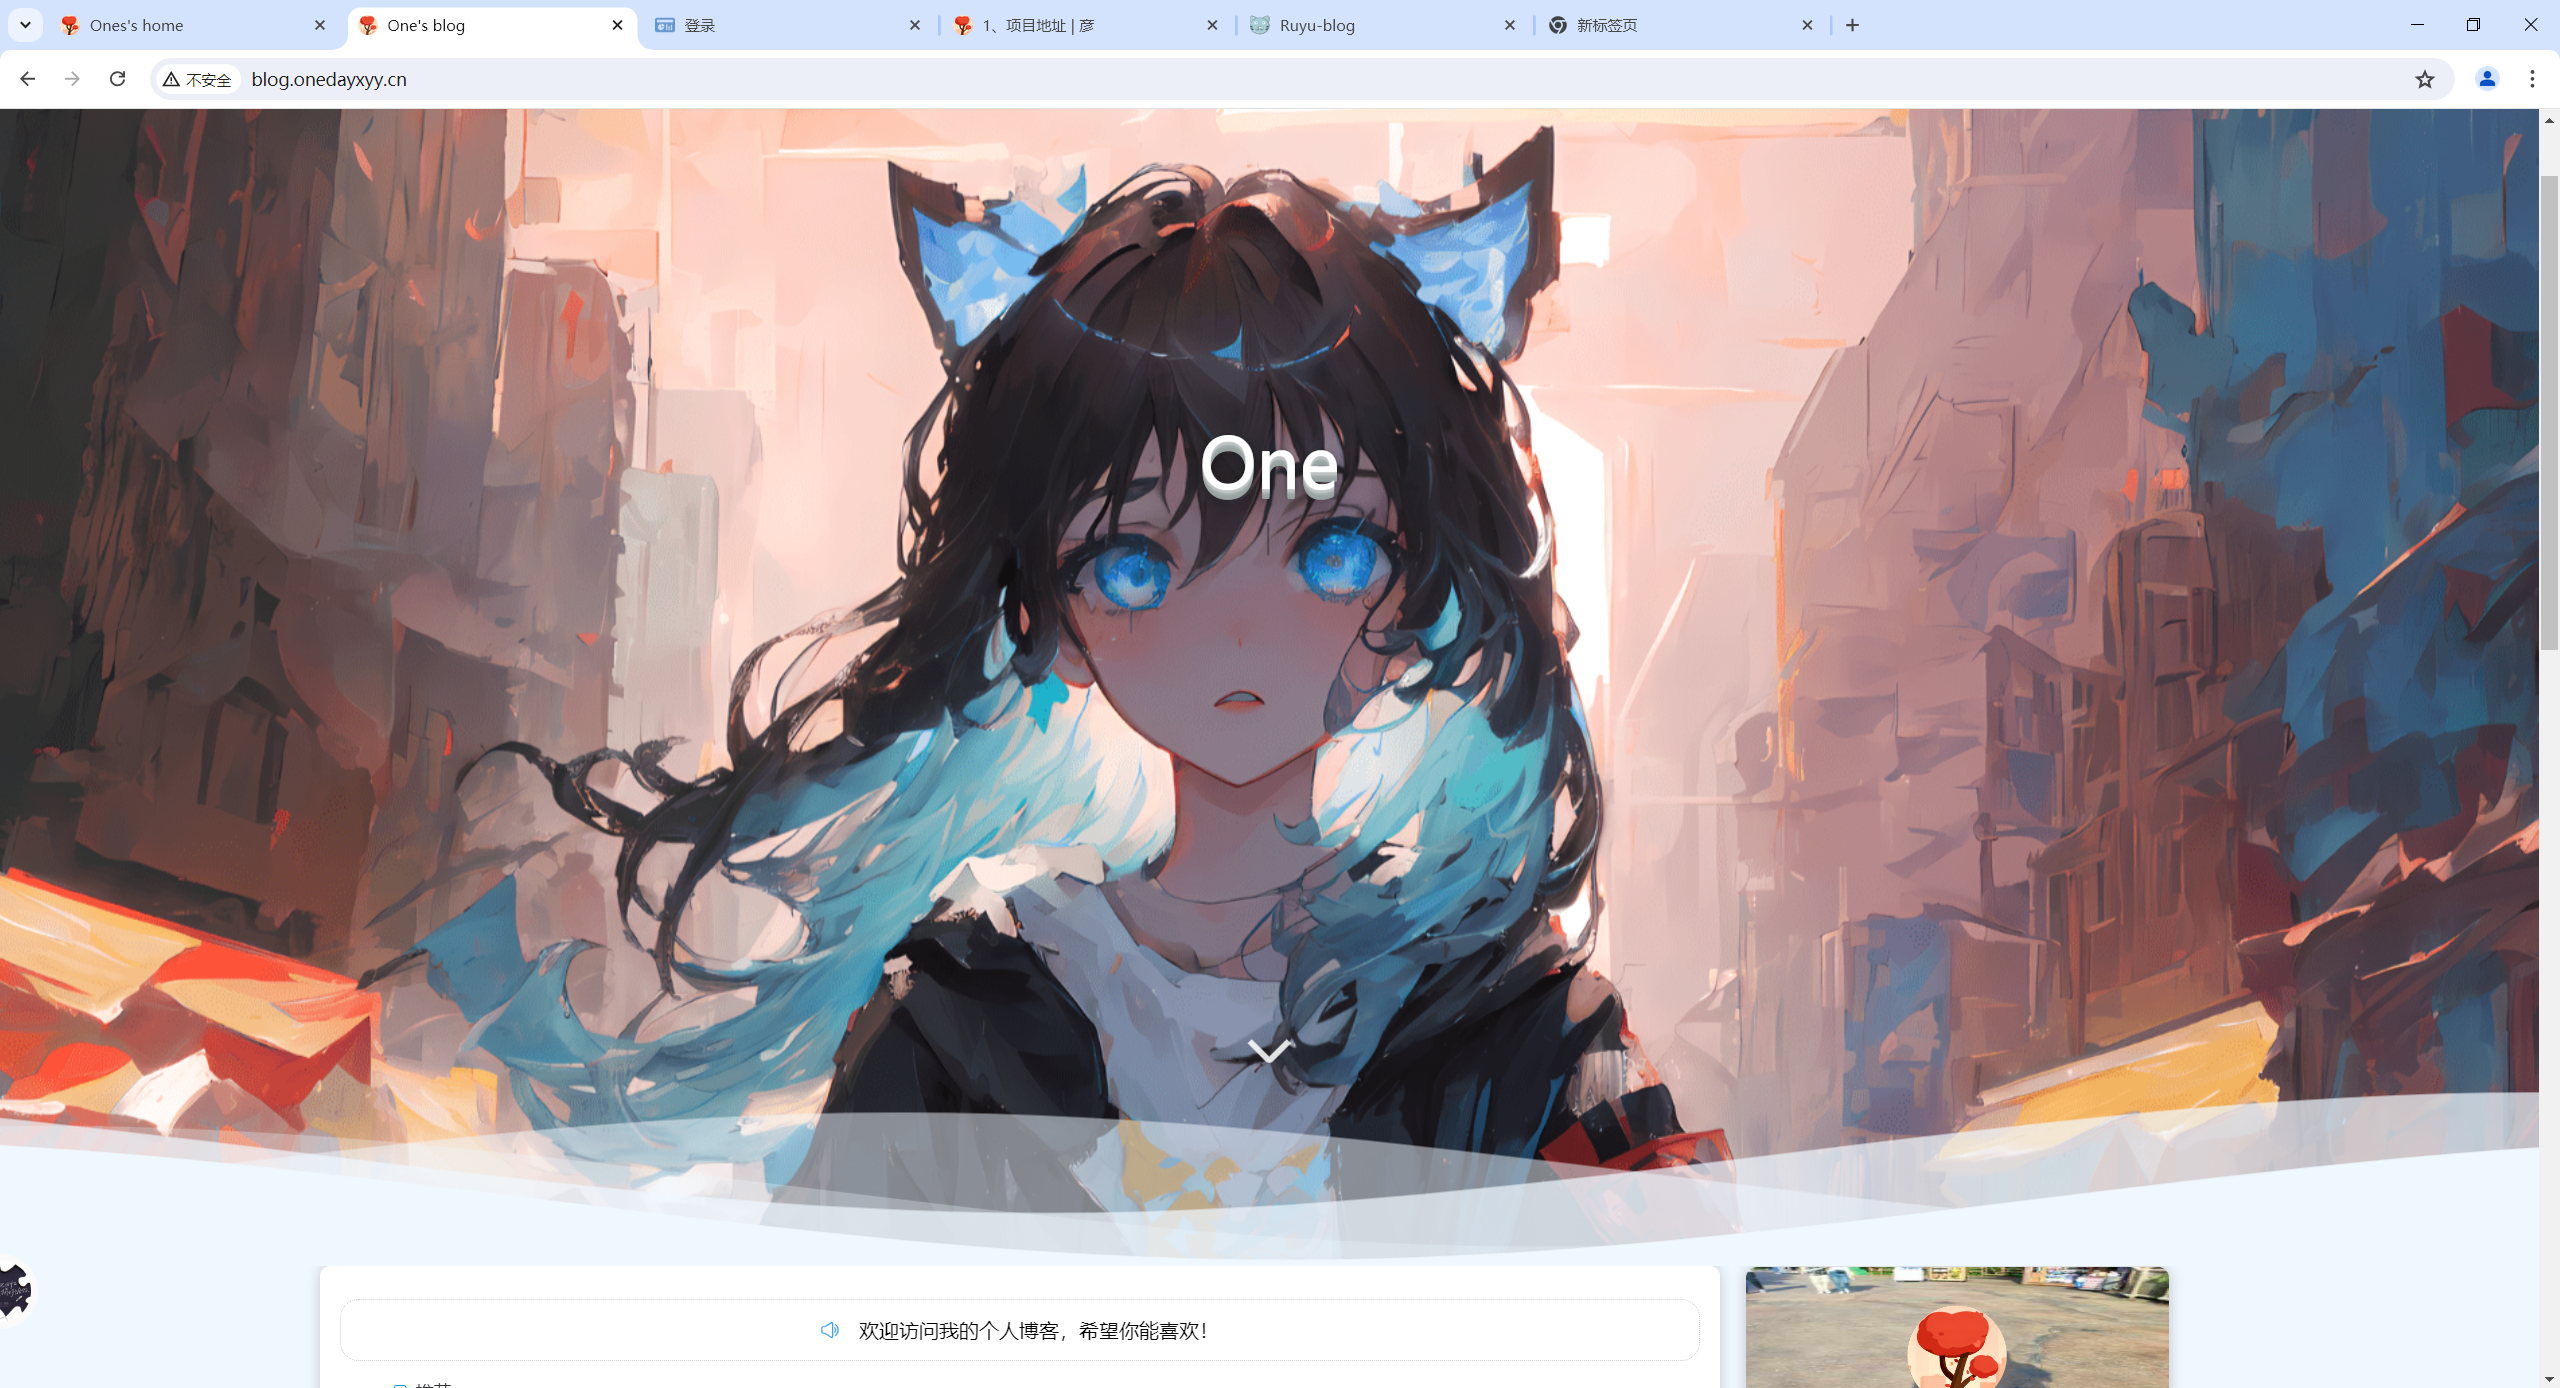
http://blogadmin.onedayxyy.cn/login
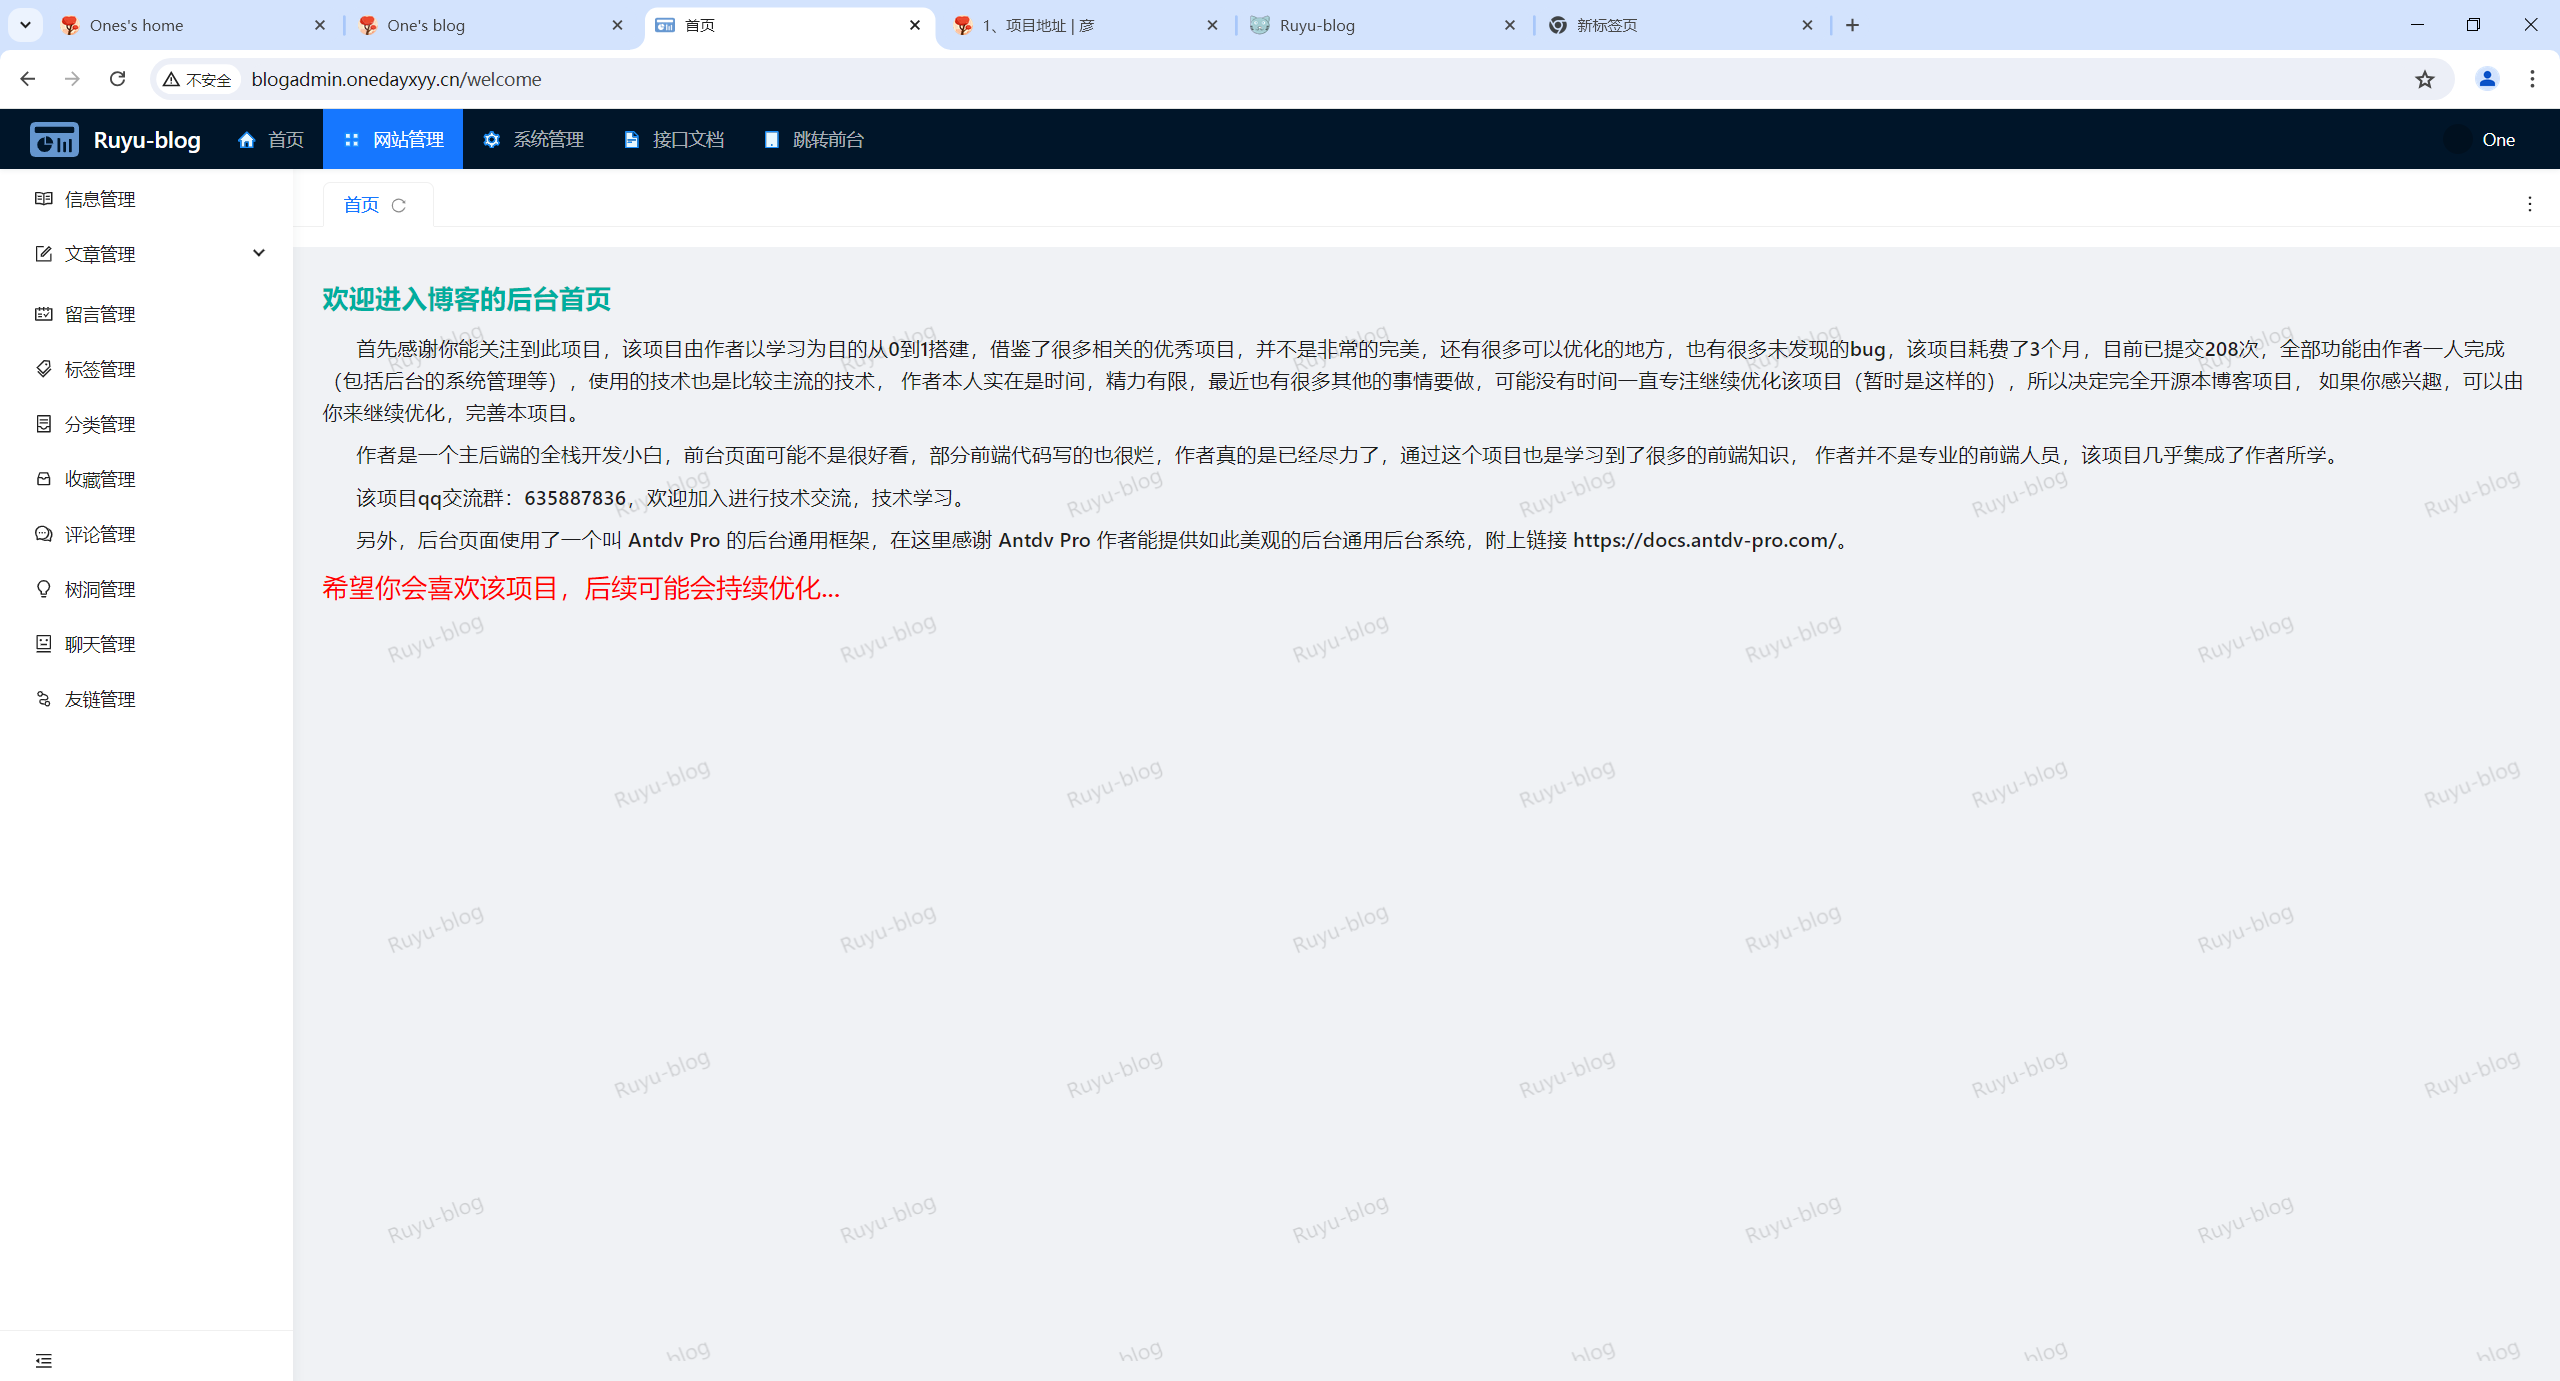
完美。🤣
完整nginx配置
最新:2024年7月23日
[root@docusaurus-wiki ~]#cat /etc/nginx/nginx.conf
# For more information on configuration, see:
#   * Official English Documentation: http://nginx.org/en/docs/
#   * Official Russian Documentation: http://nginx.org/ru/docs/

user root;
worker_processes auto;
error_log /var/log/nginx/error.log;
pid /run/nginx.pid;

# Load dynamic modules. See /usr/share/doc/nginx/README.dynamic.
include /usr/share/nginx/modules/*.conf;

events {
    worker_connections 1024;
}

http {
    gzip on; # 启用 gzip 压缩
    gzip_vary on; # 根据请求中的 `Accept-Encoding` 响应头决定是否启用 gzip
    gzip_proxied any; # 在所有代理请求中启用压缩
    gzip_types text/plain text/css application/json application/javascript text/xml application/xml application/xml+rss text/javascript; # 指定哪些类型的响应需要压缩
    gzip_comp_level 5; # 压缩等级(范围是 1-9,高级别意味着更好的压缩但会消耗更多 CPU 资源)
    gzip_min_length 256; # 只对超过给定长度的响应启用压缩
    log_format  main  '$remote_addr - $remote_user [$time_local] "$request" '
                      '$status $body_bytes_sent "$http_referer" '
                      '"$http_user_agent" "$http_x_forwarded_for"';

    access_log  /var/log/nginx/access.log  main;

    sendfile            on;
    tcp_nopush          on;
    tcp_nodelay         on;
    keepalive_timeout   65;
    types_hash_max_size 4096;

    include             /etc/nginx/mime.types;
    default_type        application/octet-stream;

    # Load modular configuration files from the /etc/nginx/conf.d directory.
    # See http://nginx.org/en/docs/ngx_core_module.html#include
    # for more information.
    include /etc/nginx/conf.d/*.conf;
    charset utf-8;

    # Settings for a TLS enabled server.


    server {
        listen 80;
        server_name onedayxyy.cn www.onedayxyy.cn;

        #配置https重定向
        return 301 https://$host$request_uri;
    }

    # 二级域名反向代理,博客
    server {
        listen 80;
        server_name blog.onedayxyy.cn;

        location / {
            proxy_pass http://47.100.215.163:8080/; # 实际的后台路径
            client_max_body_size 100M;
            proxy_set_header Host $host;
            proxy_set_header X-Real-IP $remote_addr;
            proxy_set_header X-Forwarded-For $proxy_add_x_forwarded_for;
            proxy_set_header X-Forwarded-Proto $scheme;
        }
    }

    # 二级域名反向代理,访问后台
    server {
        listen 80;
        server_name blogadmin.onedayxyy.cn;

        location / {
            proxy_pass http://47.100.215.163:8081/; # 实际的后台路径
            client_max_body_size 100M;
            proxy_set_header Host $host;
            proxy_set_header X-Real-IP $remote_addr;
            proxy_set_header X-Forwarded-For $proxy_add_x_forwarded_for;
            proxy_set_header X-Forwarded-Proto $scheme;
        }
    }


    server {
        listen       443 ssl http2;
        listen       [::]:443 ssl http2;
        server_name onedayxyy.cn www.onedayxyy.cn;

         root /root/home3.0;

         location / {
             index index.html index.htm;
         }


       location /halo {
           return 301 http://47.100.215.163:8090;
       }

       #相册
       location /photo {
           return 301 http://47.100.215.163:8080;
       }


        location /docusaurus {
            alias /root/rsync/rsync-docusaurus/build;
            index index.html;
        }


        location /hexoblog {
            alias /root/rsync/rsync-hexo/public;
            index index.html;
        }


        location /images {
            alias /images;
            index index.html;
        }
        location /imagess {
            alias /imagess;
            index index.html;
        }


        location /music {
            autoindex on; # 启用目录索引
            alias /musics-data;
            index index.html;   # 默认显示index.html文件,如果没有则列出目录内容
        }


        location /ruyu-blog-background {
            autoindex on; # 启用目录索引
            alias /root/ruyu-blog-background;
            index index.html;   # 默认显示index.html文件,如果没有则列出目录内容
        }

        location /musics {
            alias /root/musics;
            index index.html;
        }


        location /newyear {
            alias /root/QianDuanDemo/newyear;
            index index.html;
        }


        ssl_certificate "cert/www.onedayxyy.cn.pem";
        ssl_certificate_key "cert/www.onedayxyy.cn.key";

        ssl_session_cache shared:SSL:1m;
        ssl_session_timeout  10m;
        #ssl_ciphers HIGH:!aNULL:!MD5;
        #自定义设置使用的TLS协议的类型以及加密套件(以下为配置示例,请您自行评估是否需要配置)
        #TLS协议版本越高,HTTPS通信的安全性越高,但是相较于低版本TLS协议,高版本TLS协议对浏览器的兼容性较差。
        ssl_ciphers ECDHE-RSA-AES128-GCM-SHA256:ECDHE:ECDH:AES:HIGH:!NULL:!aNULL:!MD5:!ADH:!RC4;
        ssl_protocols TLSv1.1 TLSv1.2 TLSv1.3;

        ssl_prefer_server_ciphers on;

        # Load configuration files for the default server block.
        include /etc/nginx/default.d/*.conf;

        error_page 404 /404.html;
            location = /40x.html {
        }

        error_page 500 502 503 504 /50x.html;
            location = /50x.html {
        }
    }

}
范例:将云服务器minio切到本地-2024.7.24(已解决)
背景
这里再更新下后端minio存储问题:
因为之前我把存储放到了ecs,这次我直接将存储放回到本地,和其他部署部署在一台机器上
开始部署:
切换过程
在本地起一个mino服务:
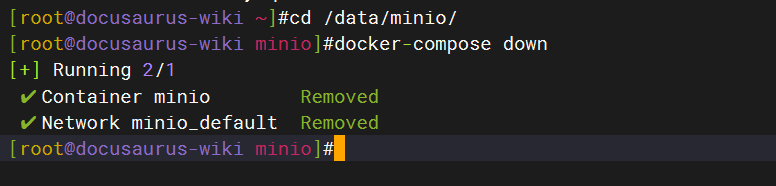
#创建挂载目录
mkdir -p /data/minio

cat > /data/minio/docker-compose.yml <<EOF
version: '3'
services:
  minio:
    image: "minio/minio"
    container_name: minio
    ports:
      - "9000:9000" # api 端口
      - "9001:9001" # 控制台端口
    environment:
      MINIO_ROOT_USER: admin # 管理后台用户名
      MINIO_ROOT_PASSWORD: "[请输入你的密码]" # 管理后台密码,最小8个字符
      MINIO_COMPRESS: "off" # 开启压缩 on 开启 off 关闭
      MINIO_COMPRESS_EXTENSIONS: "" # 扩展名 .pdf,.doc 为空 所有类型均压缩
      MINIO_COMPRESS_MIME_TYPES: "" # mime 类型 application/pdf 为空 所有类型均压缩
    volumes:
      - /data/minio/data:/data/ # 映射当前目录下的data目录至容器内/data目录
      - /data/minio/config:/root/.minio/ # 映射配置目录
    command: server --address ':9000' --console-address ':9001' /data  # 指定容器中的目录 /data
    privileged: true
EOF


cd /data/minio
docker-compose up -d

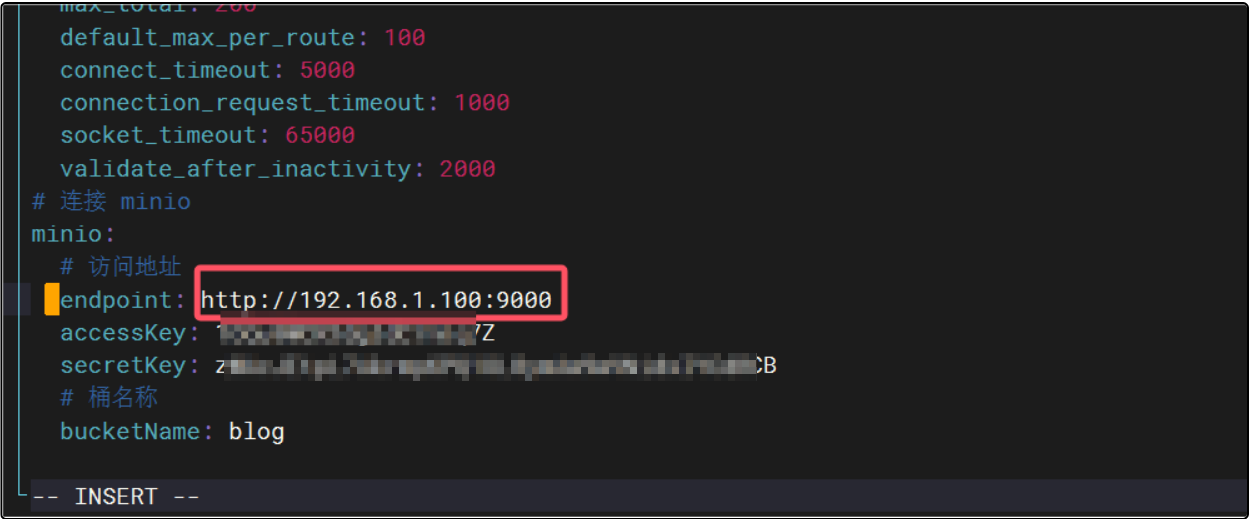
配置minio:
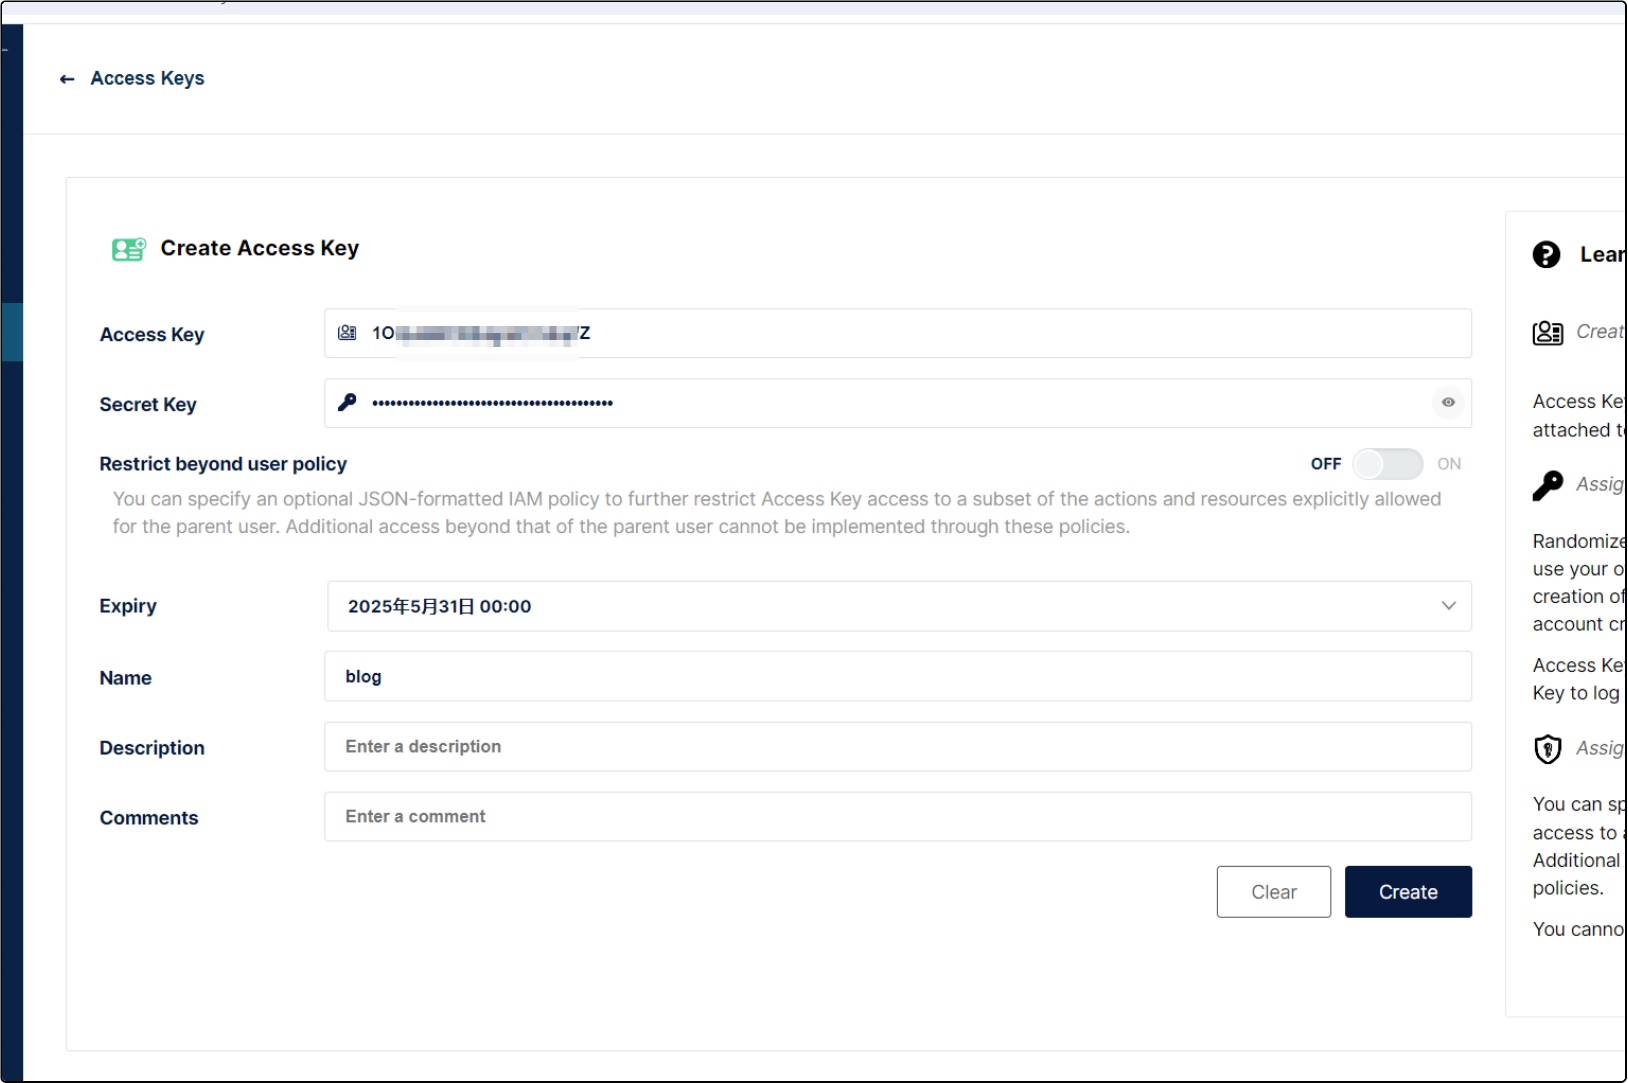
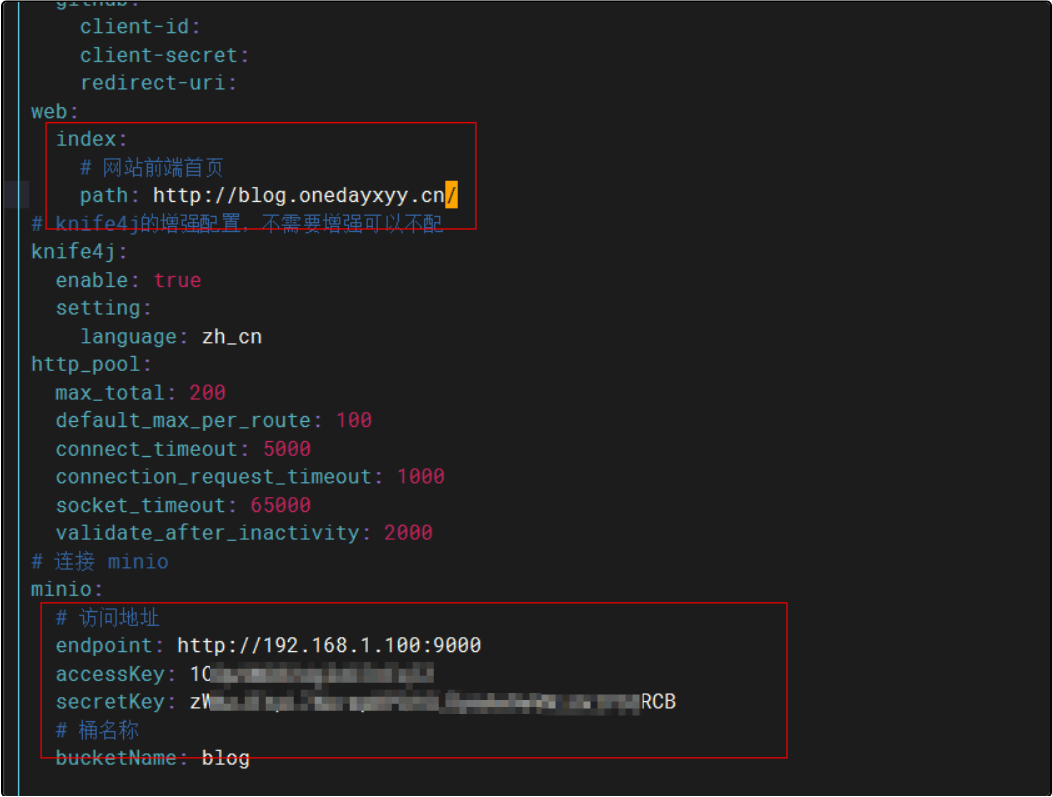
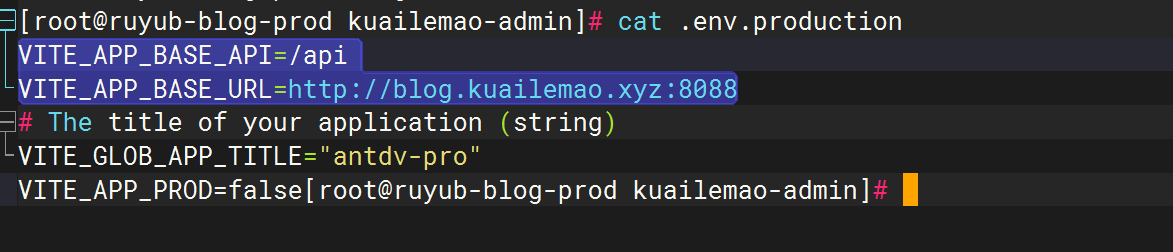
- 将秘钥写到application.yml文件里
vim /root/ruyu-blog/blog-backend/src/main/resources/application.yml

顺便改下这个。
- 现在有个问题,我直接更改后,原来minio里的数据得拿回来哇,不然估计之前的文章的封面会异常的哦,这里做下测试
#直接构建
# 复制项目的jar文件到容器中
#COPY target/blog-backend-0.0.1-SNAPSHOT.jar /app/app.jar
#重新构建jar包
cd /root/ruyu-blog/blog-backend
mvn clean
mvn clean package
#删除老容器和老镜像
docker rm -f ruyu-blog-hd
#docker rmi -f ruyu-blog-hd
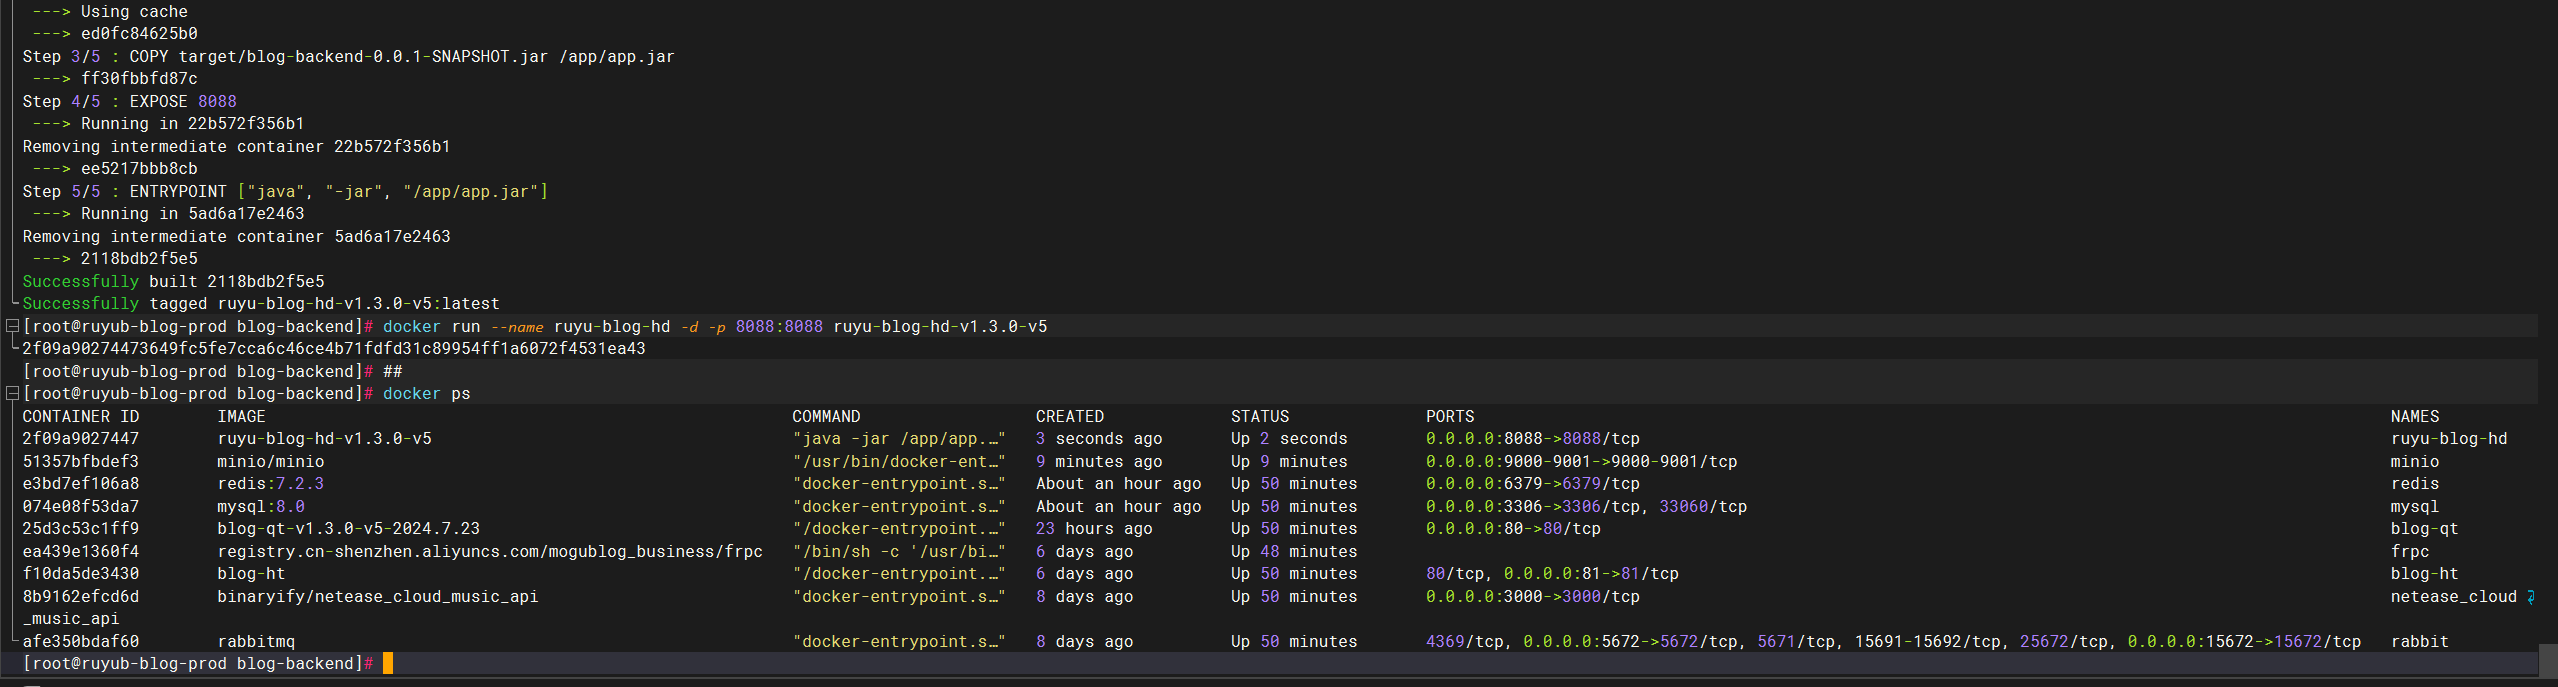
#构建新镜像和启动新容器
docker build . -t ruyu-blog-hd-v1.3.0-v5
docker run --name ruyu-blog-hd -d -p 8088:8088 ruyu-blog-hd-v1.3.0-v5
##
##ruyu-blog-hd-v1.3.0-v3
# ruyu-blog-hd-v1.3.0-v4 更新后端代码--成功,作者更新
验证:
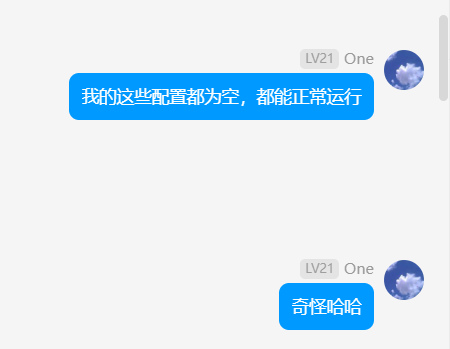
呃呃呃。。。。
为啥都能正常显示哇????
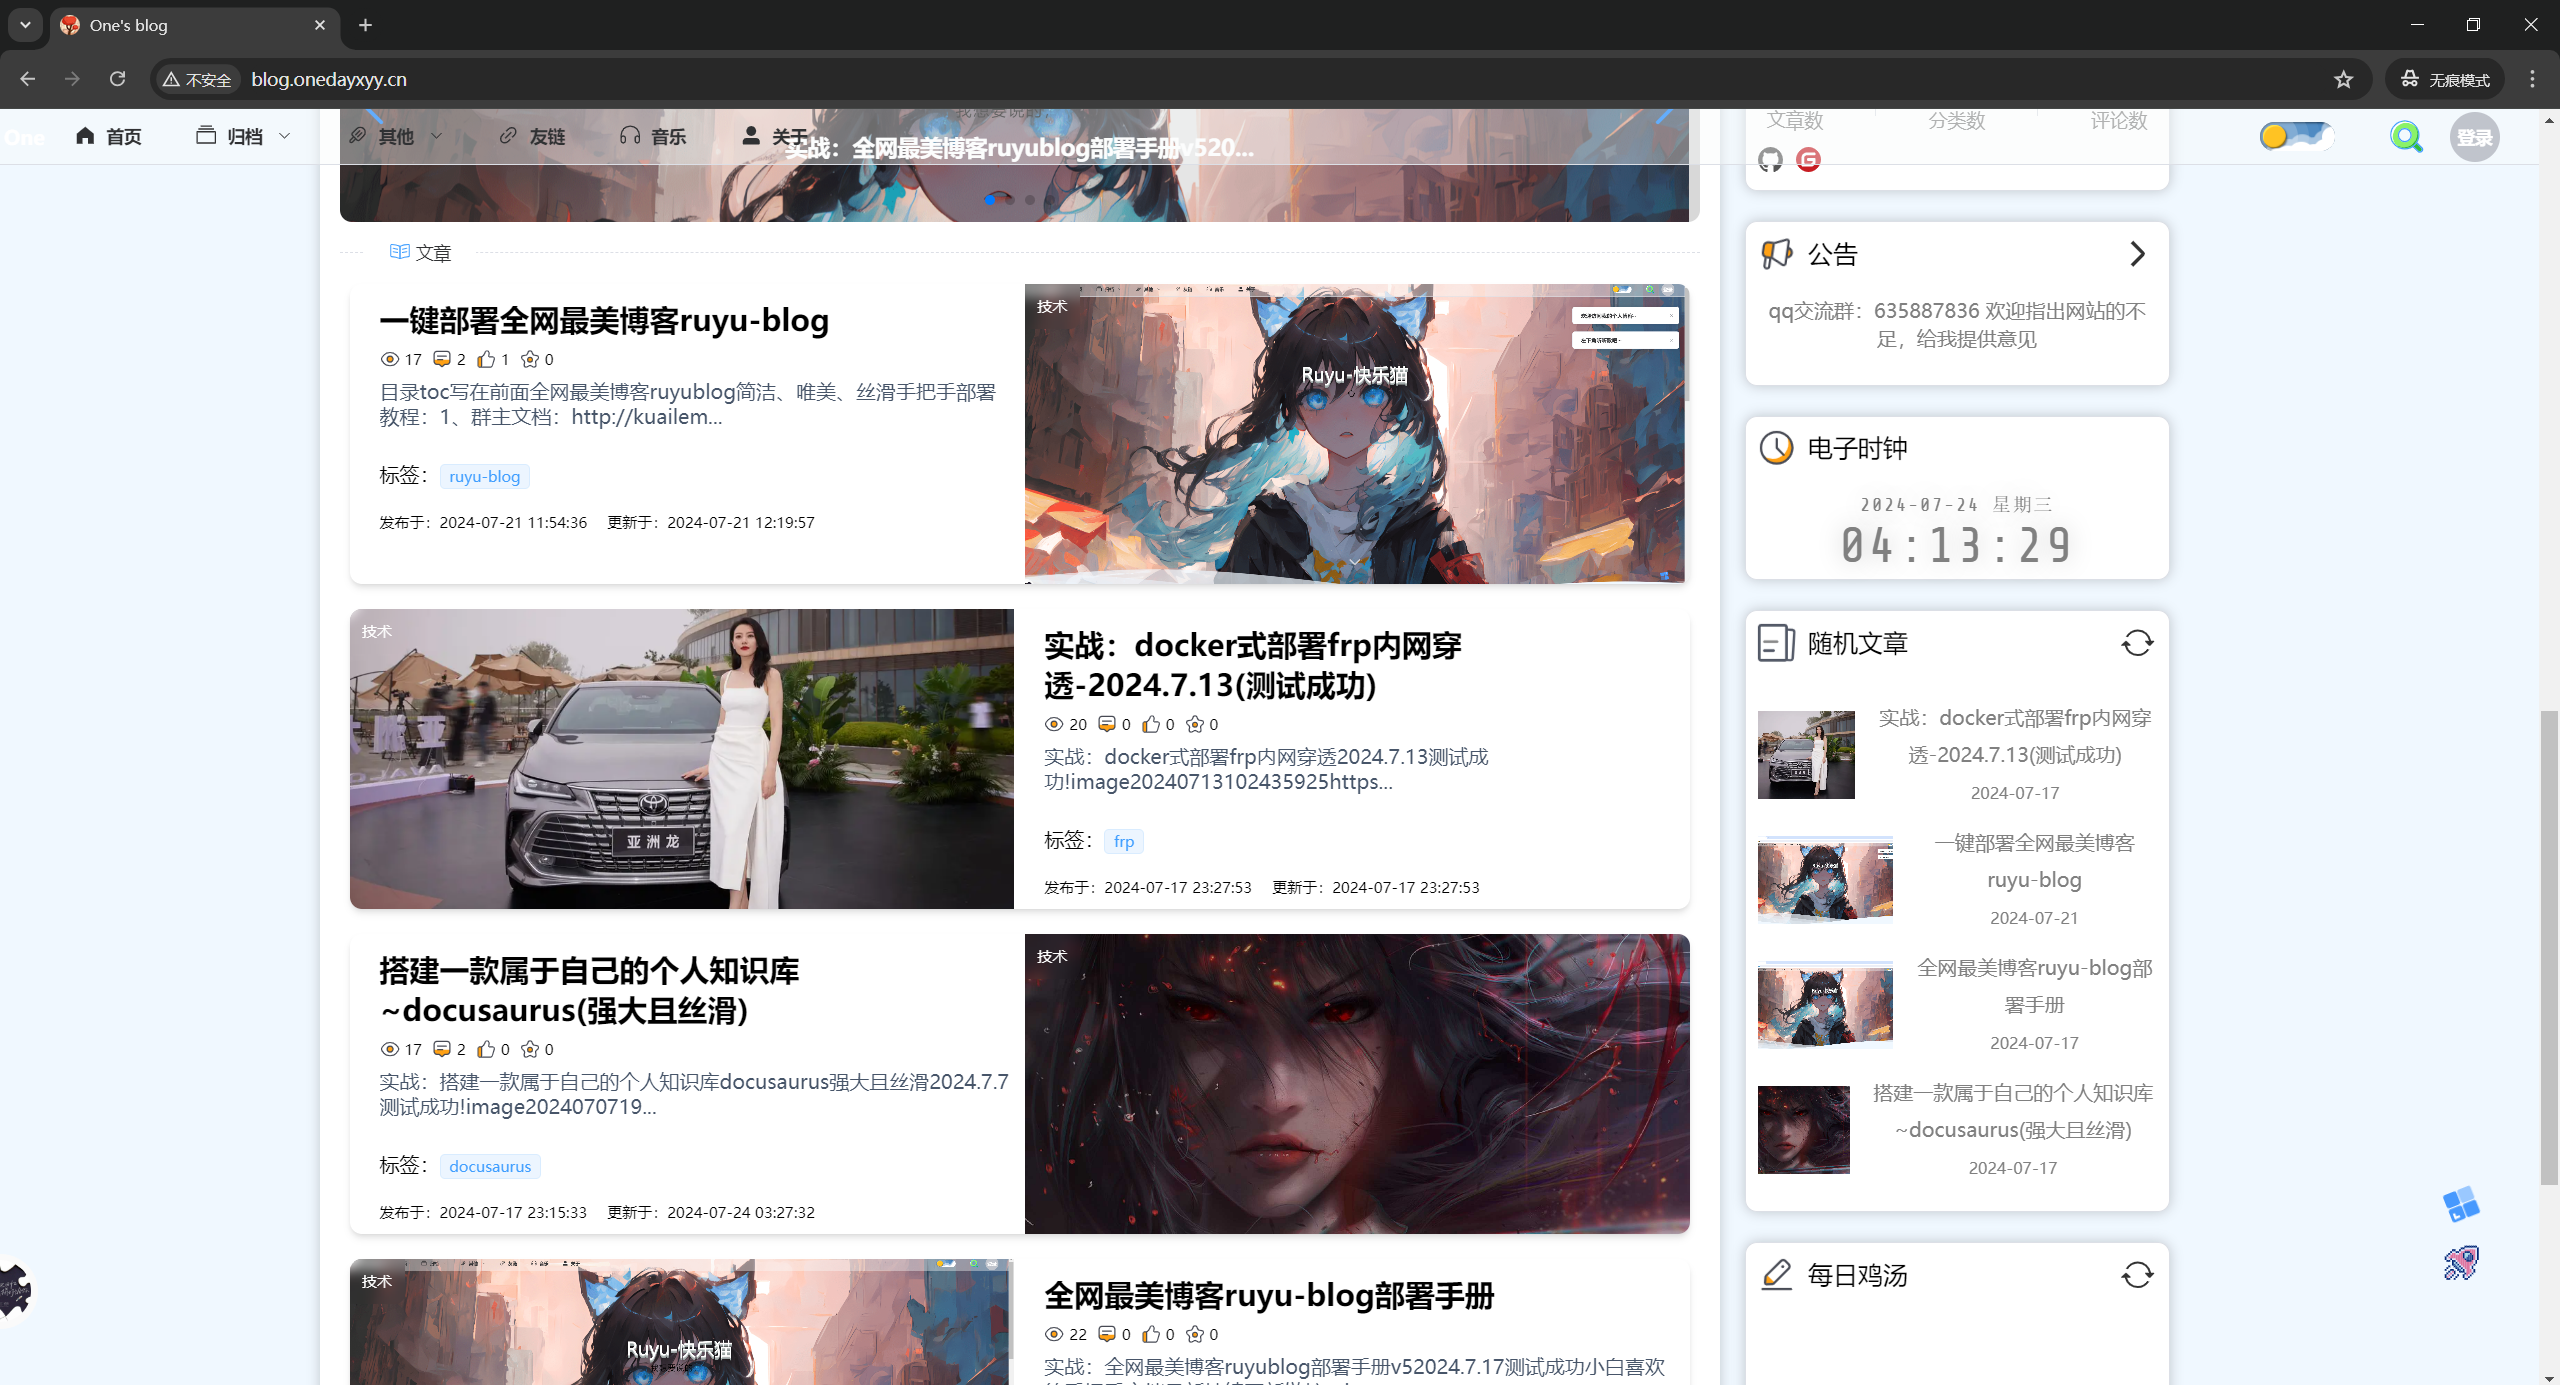
这些正常是合理的:因为我图片存在ecs的nginx上
这些文章封面都是公网可访问的哦:
若果我测试把ecs的minio给关了,那这些内容特定访问不了了。。。。
再次刷新测试:
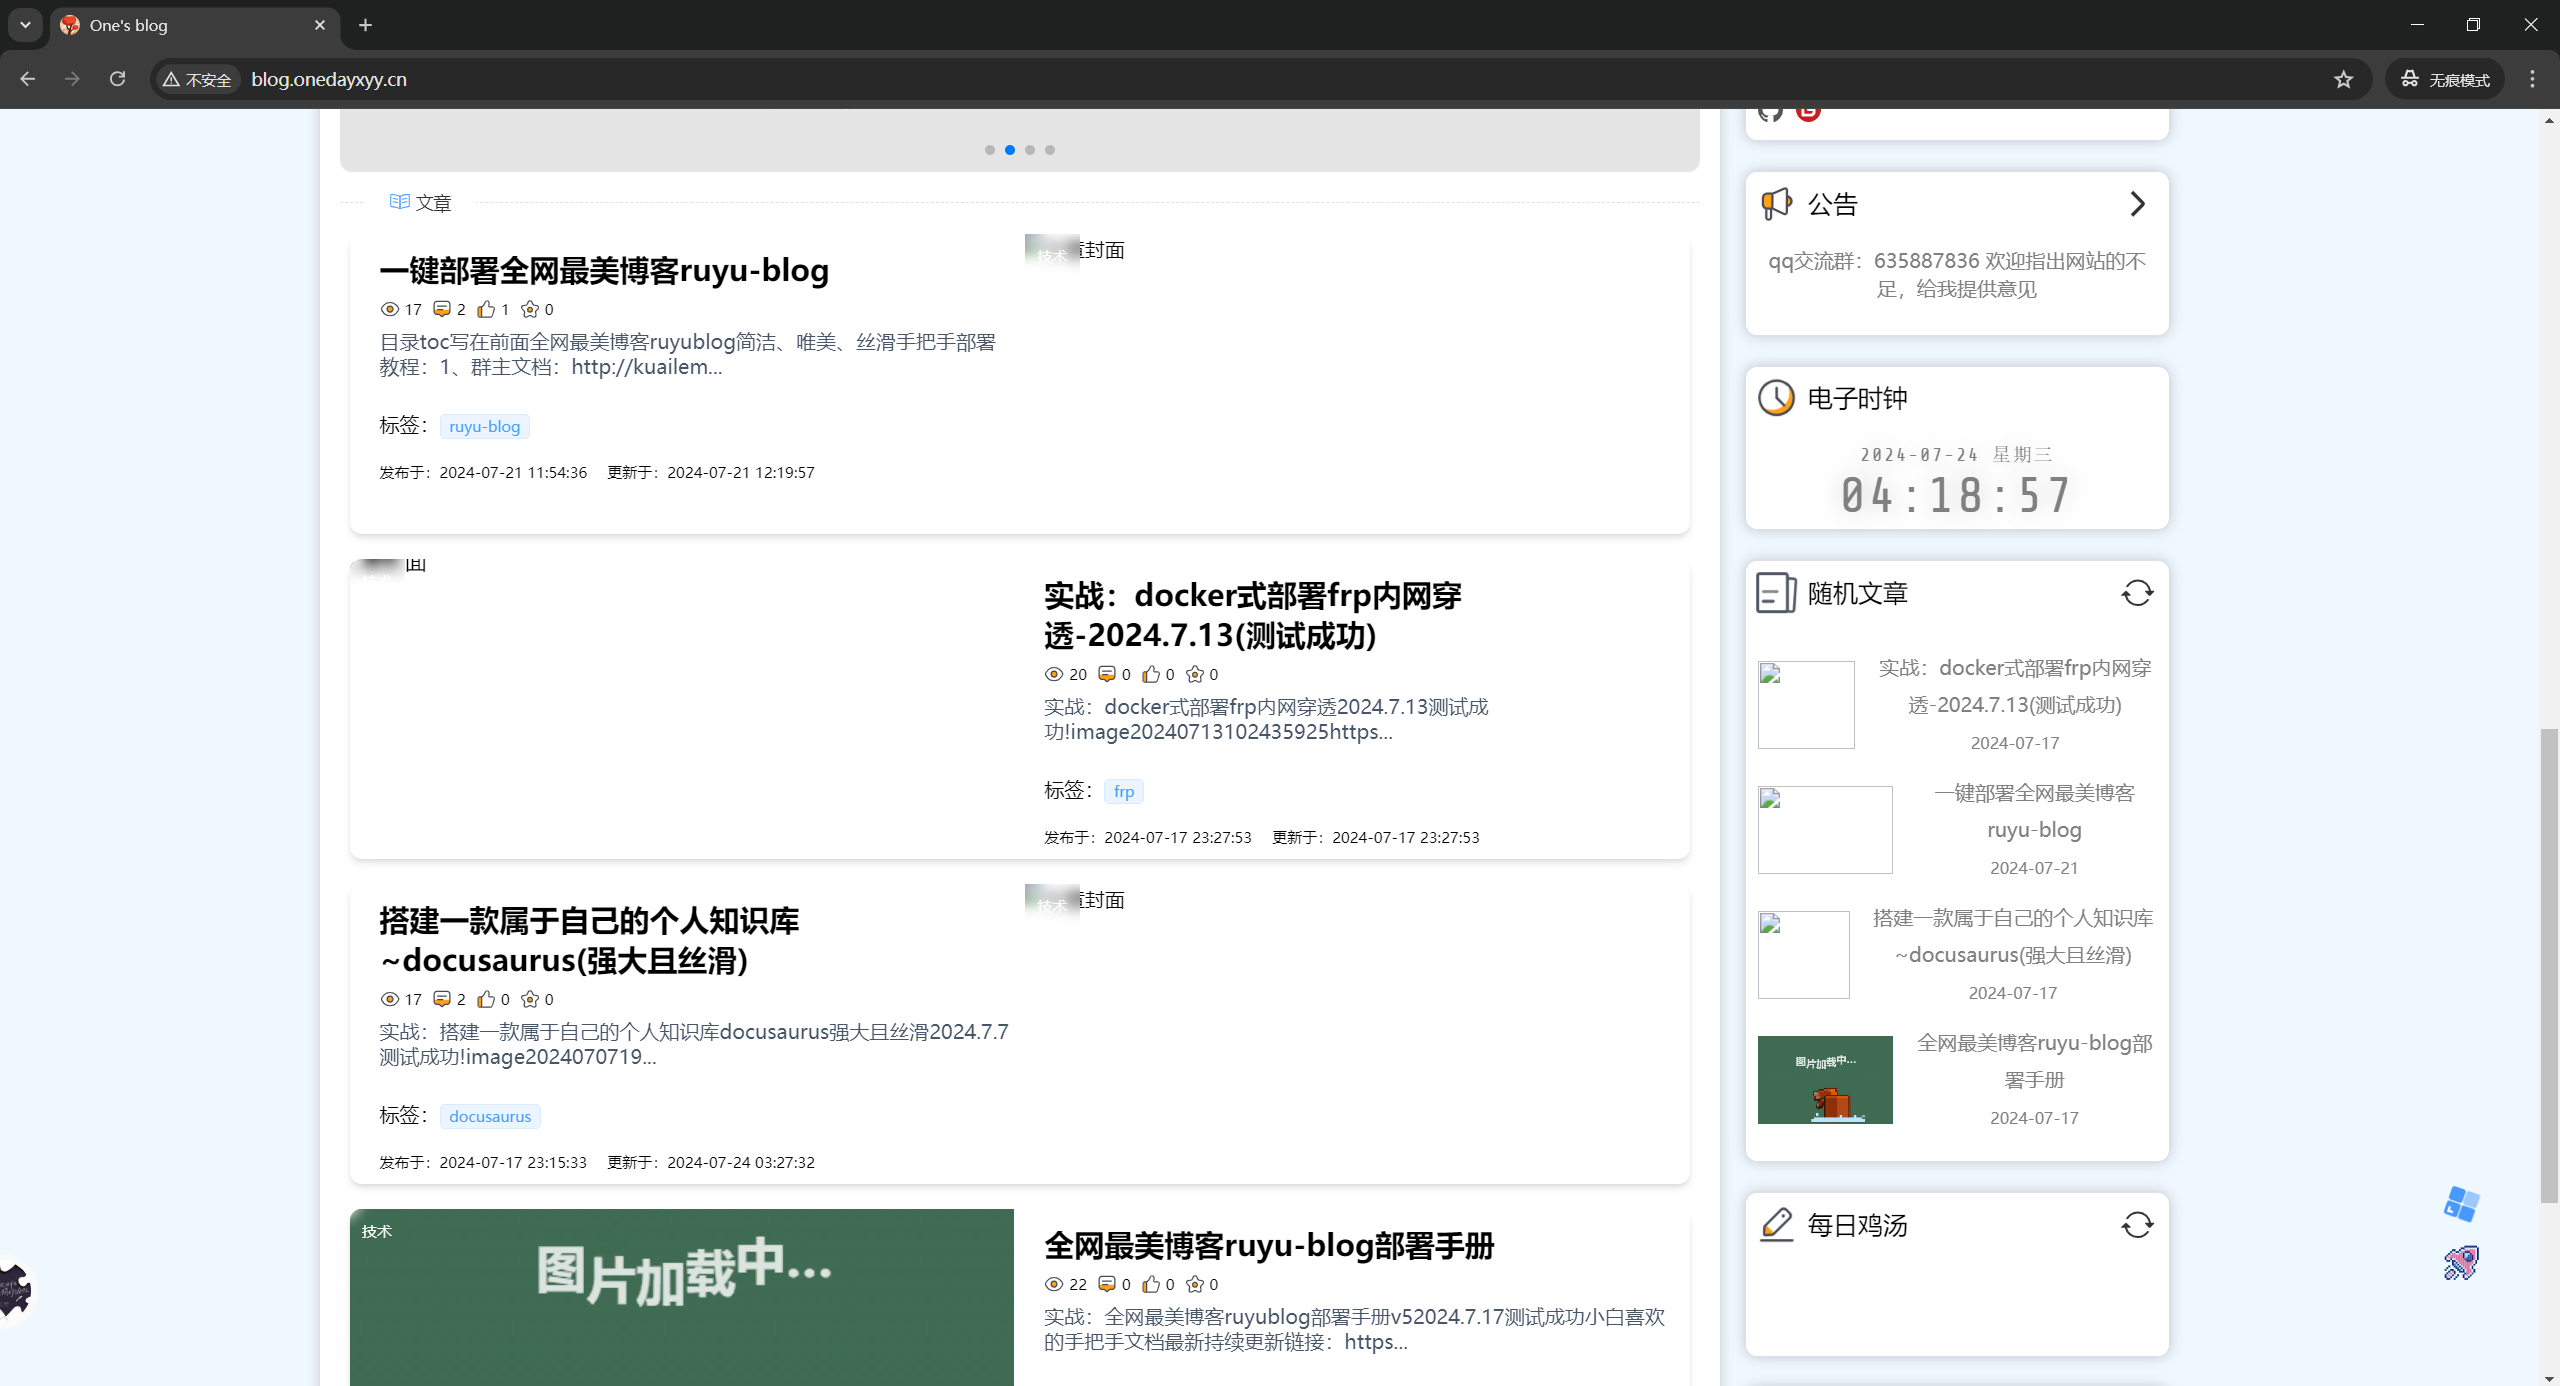
那么问题来了,如何让这些封面都正常显示呢????
并且后面公网ip也是会变的哇……
把域名给配置进去??
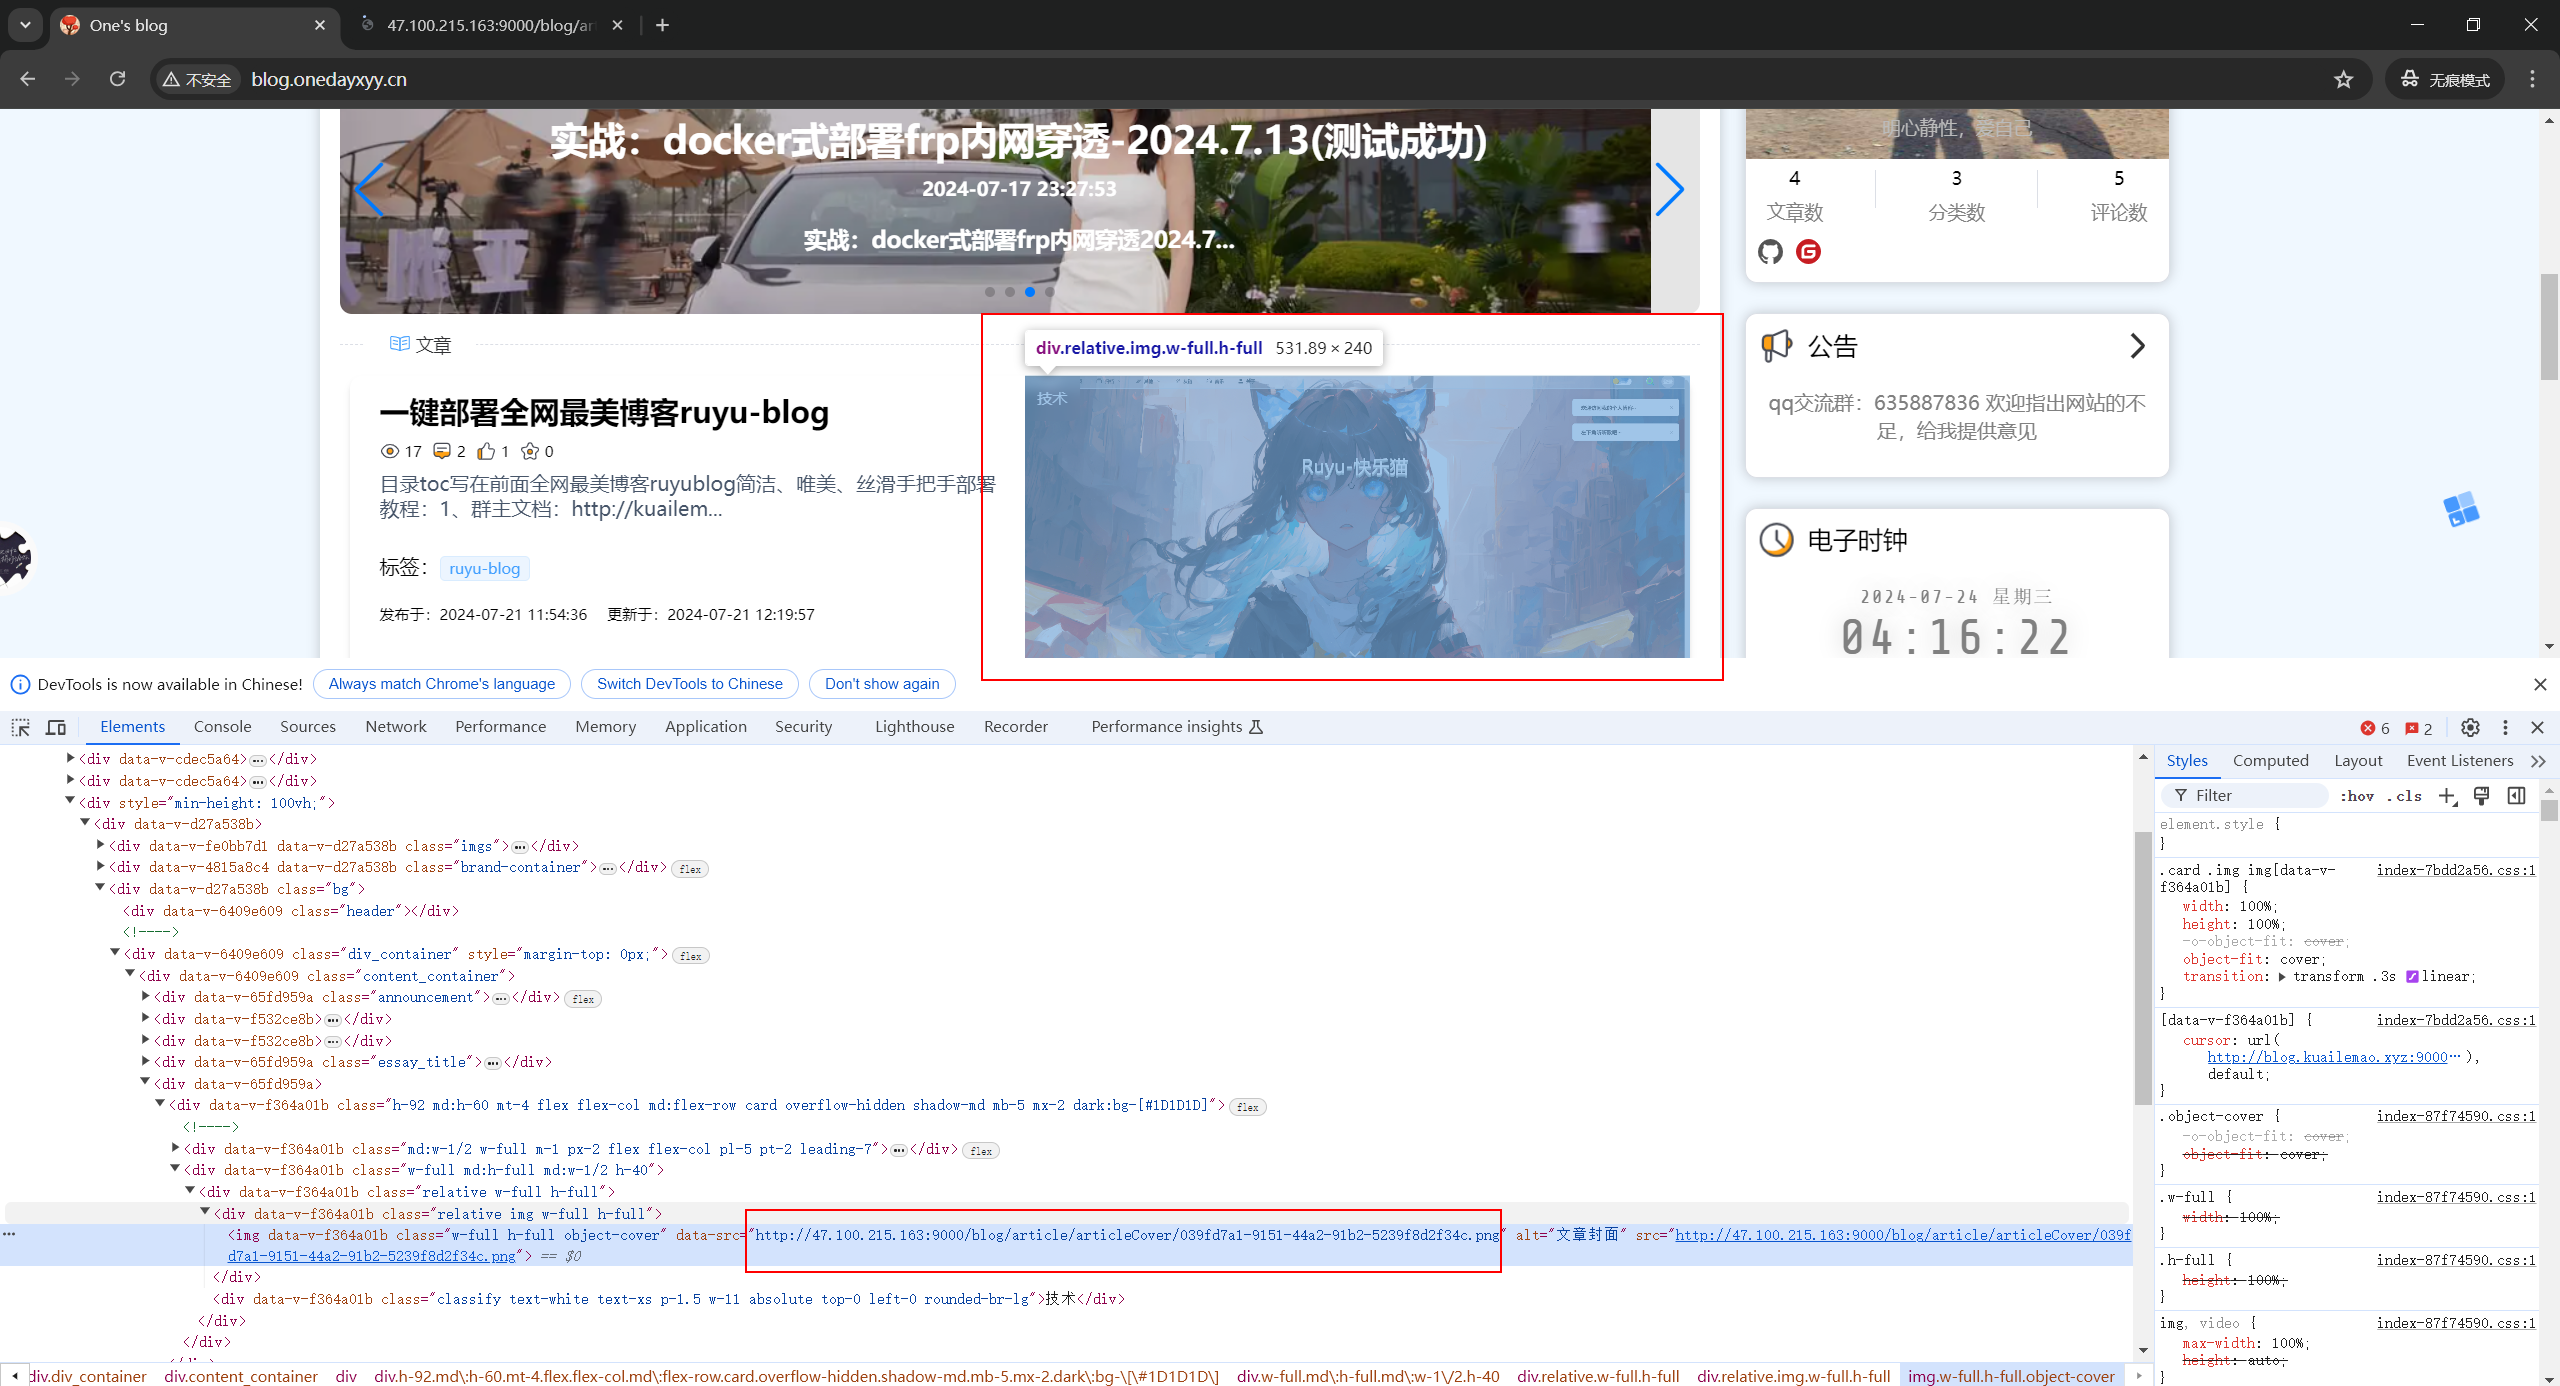
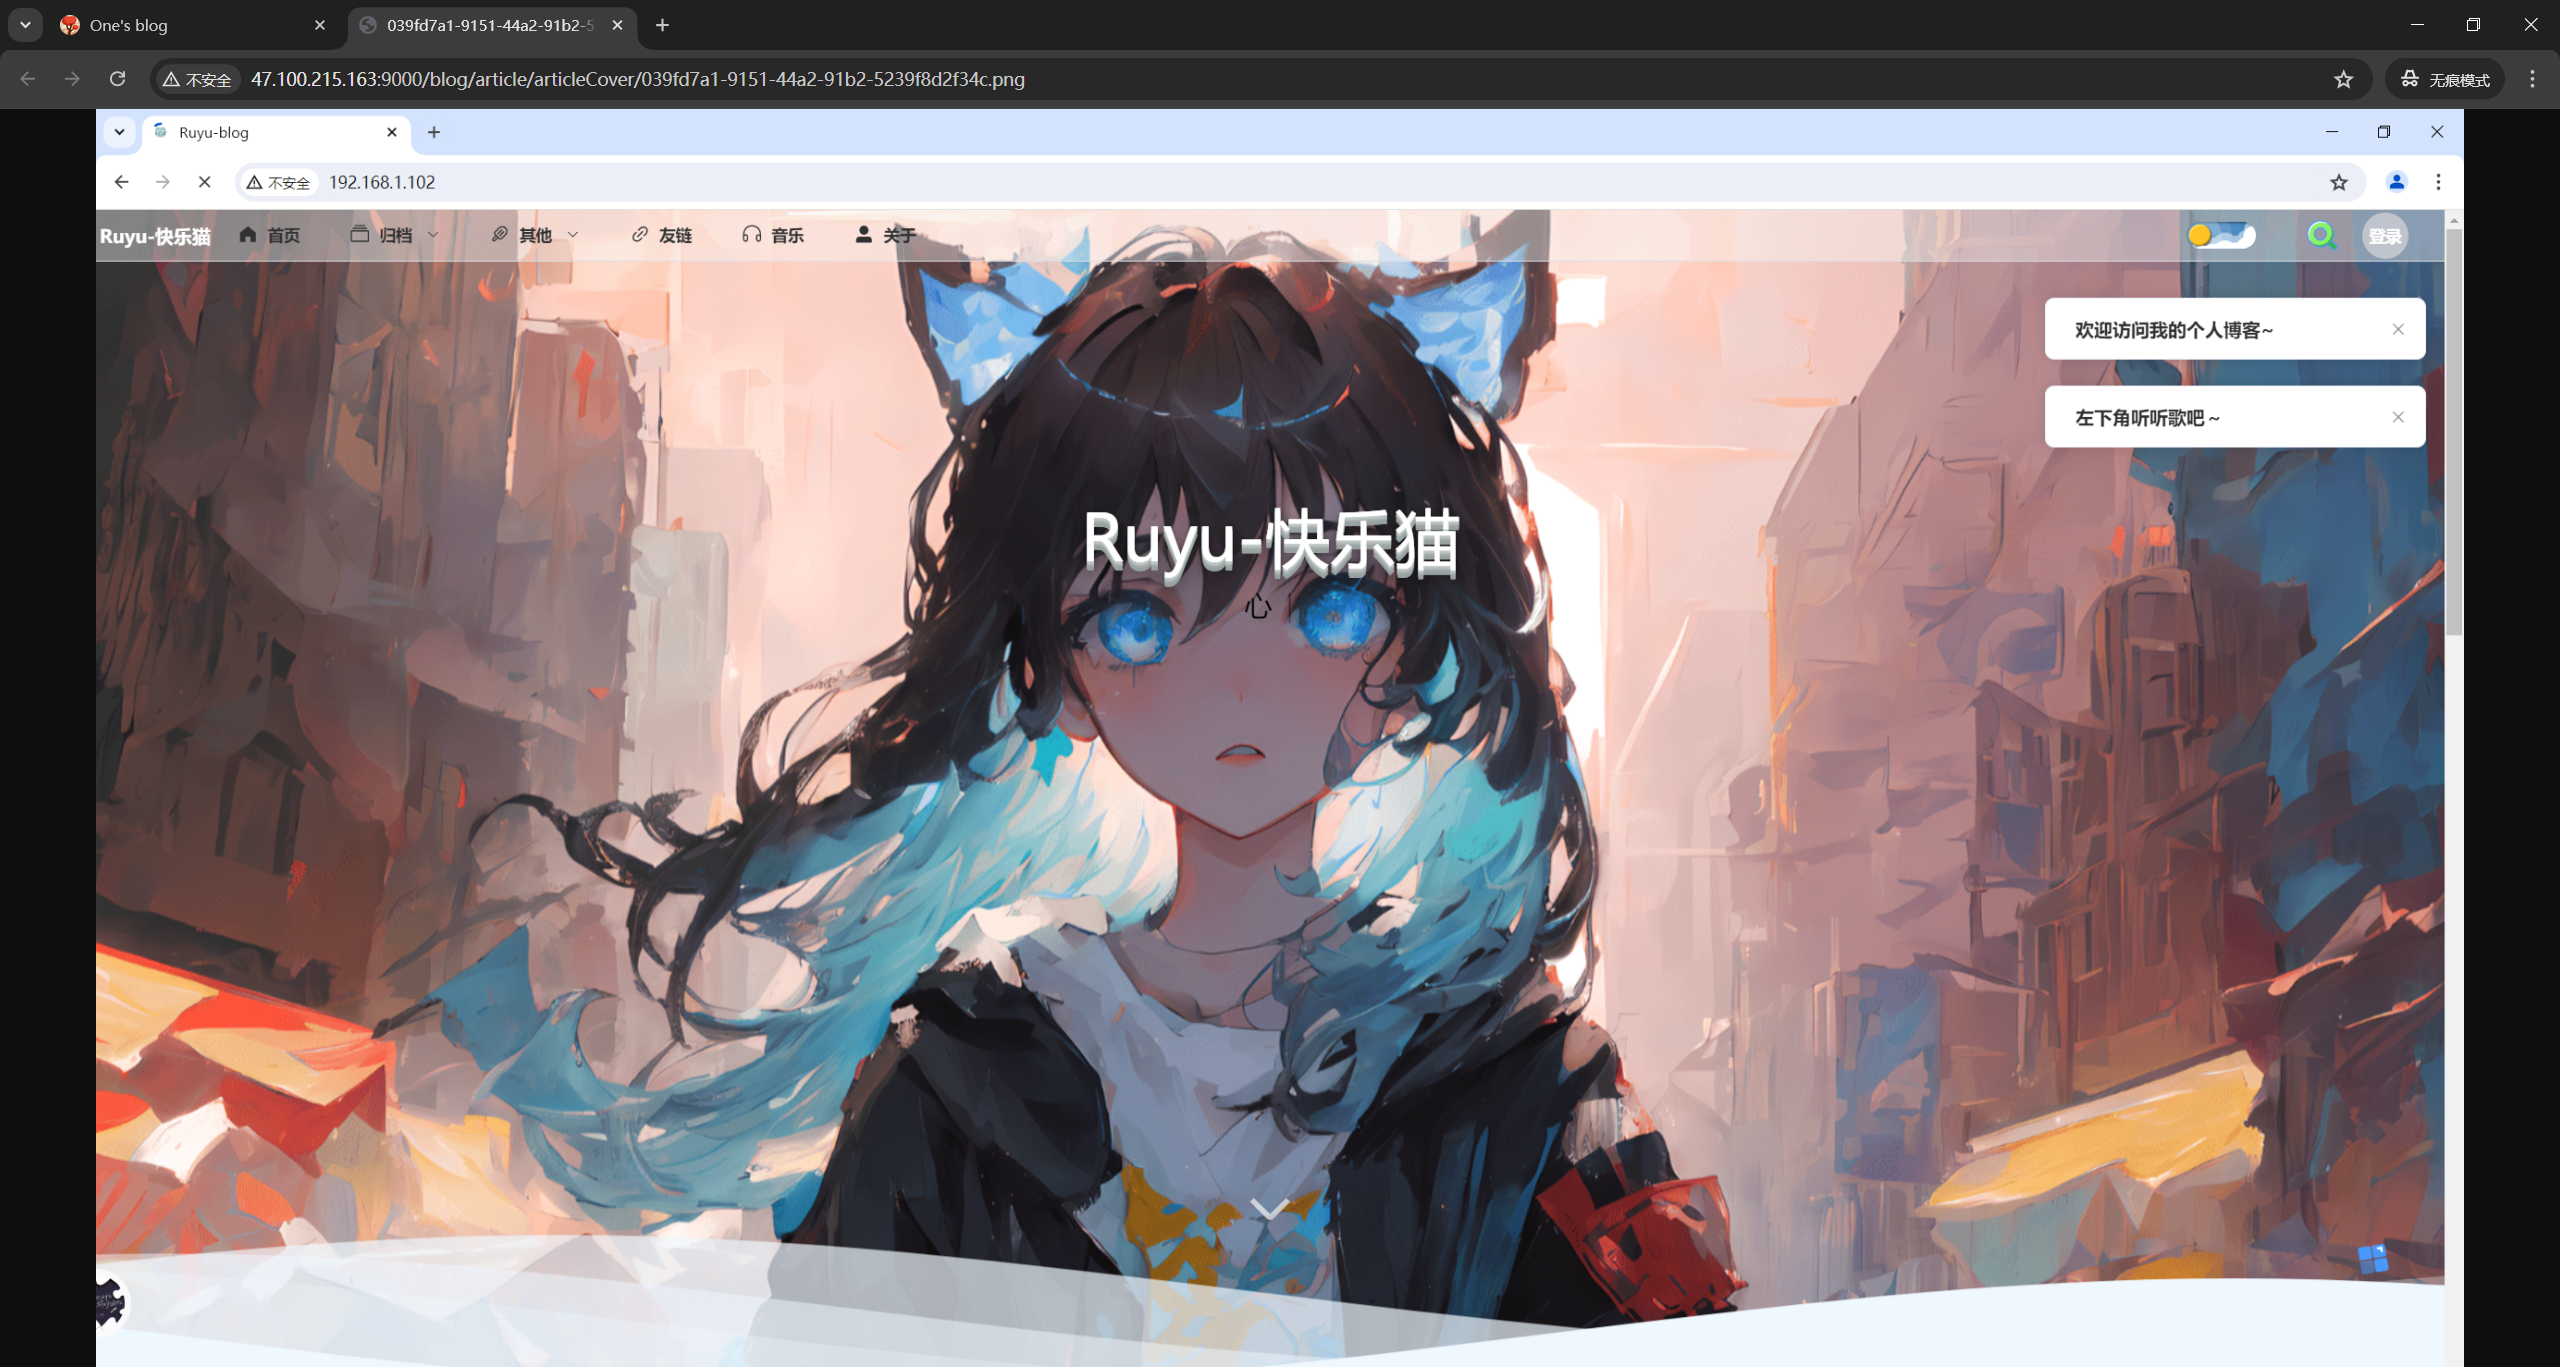
http://47.100.215.163:9000/blog/article/articleCover/039fd7a1-9151-44a2-91b2-5239f8d2f34c.png
==问题:能把博客图床路径设置为我的ecs 的nginx吗????==🤣
这个问题先搁置吧……。。。。。
我使用的是本地minio,除非我保证一直使用192.168.1.10这个ip,不然后面也会发生问题。。。。
和这里有关系的。。。。
这里涉及到此部分知识盲区了。。。。。。。。。
目前测量,将ecs minio切会本地,修改文章封面先手动替换(刚好数量也不多)

都正常了。完美。😘
这样切到本地后,感觉页面加载,调用也更快了。
问题:minio只存放文章图片吗???
到此结束,做个快照。
存在问题
此时,在公网无法访问这些内网地址的……,当然文章页面是无法正常显示的,那么该如何处理呢?
将ip替换为子域名
minio.onedayxyy.cn
现在测试下,我访问昨天配置的子域名,看下啥情况?
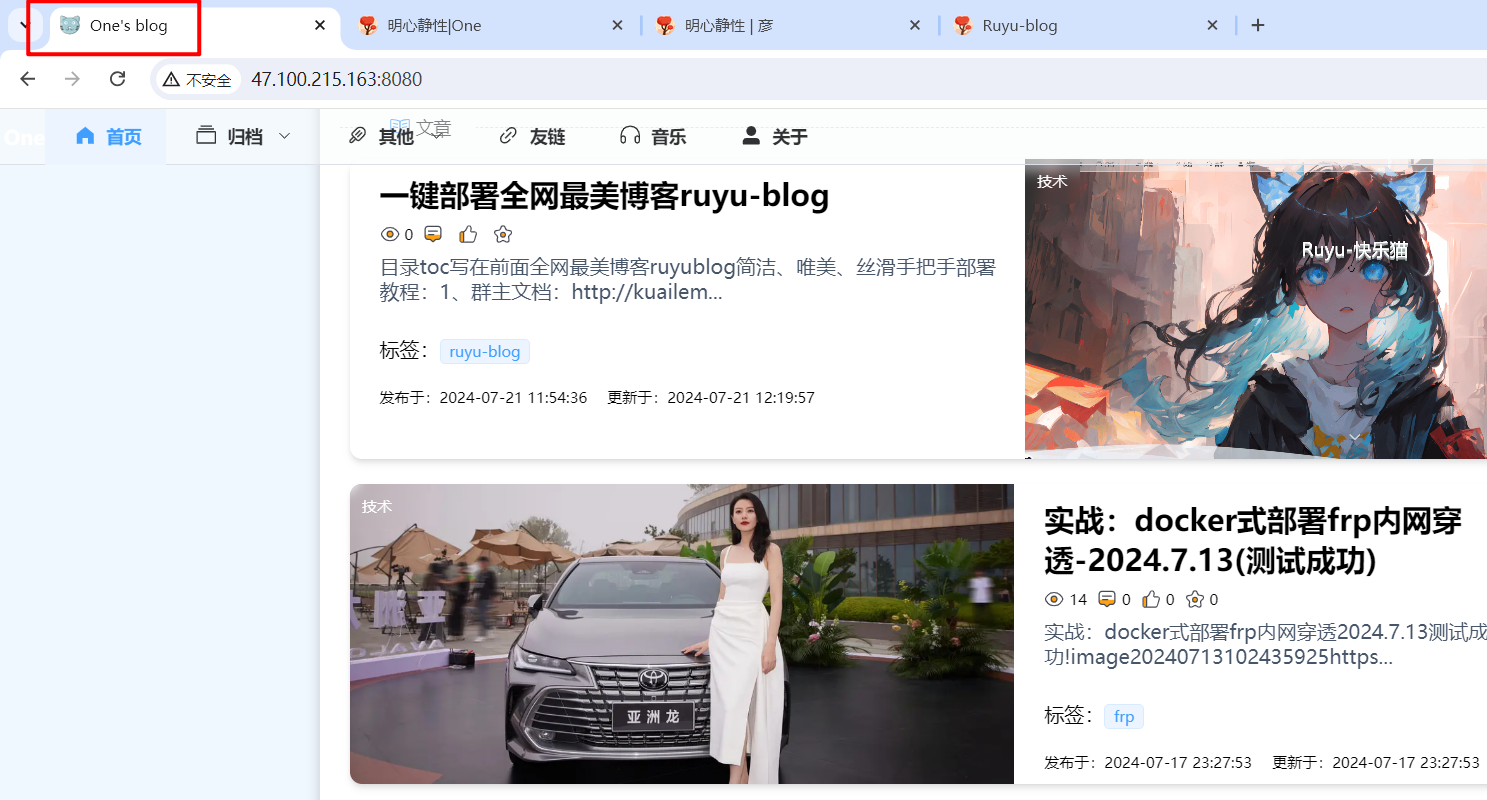
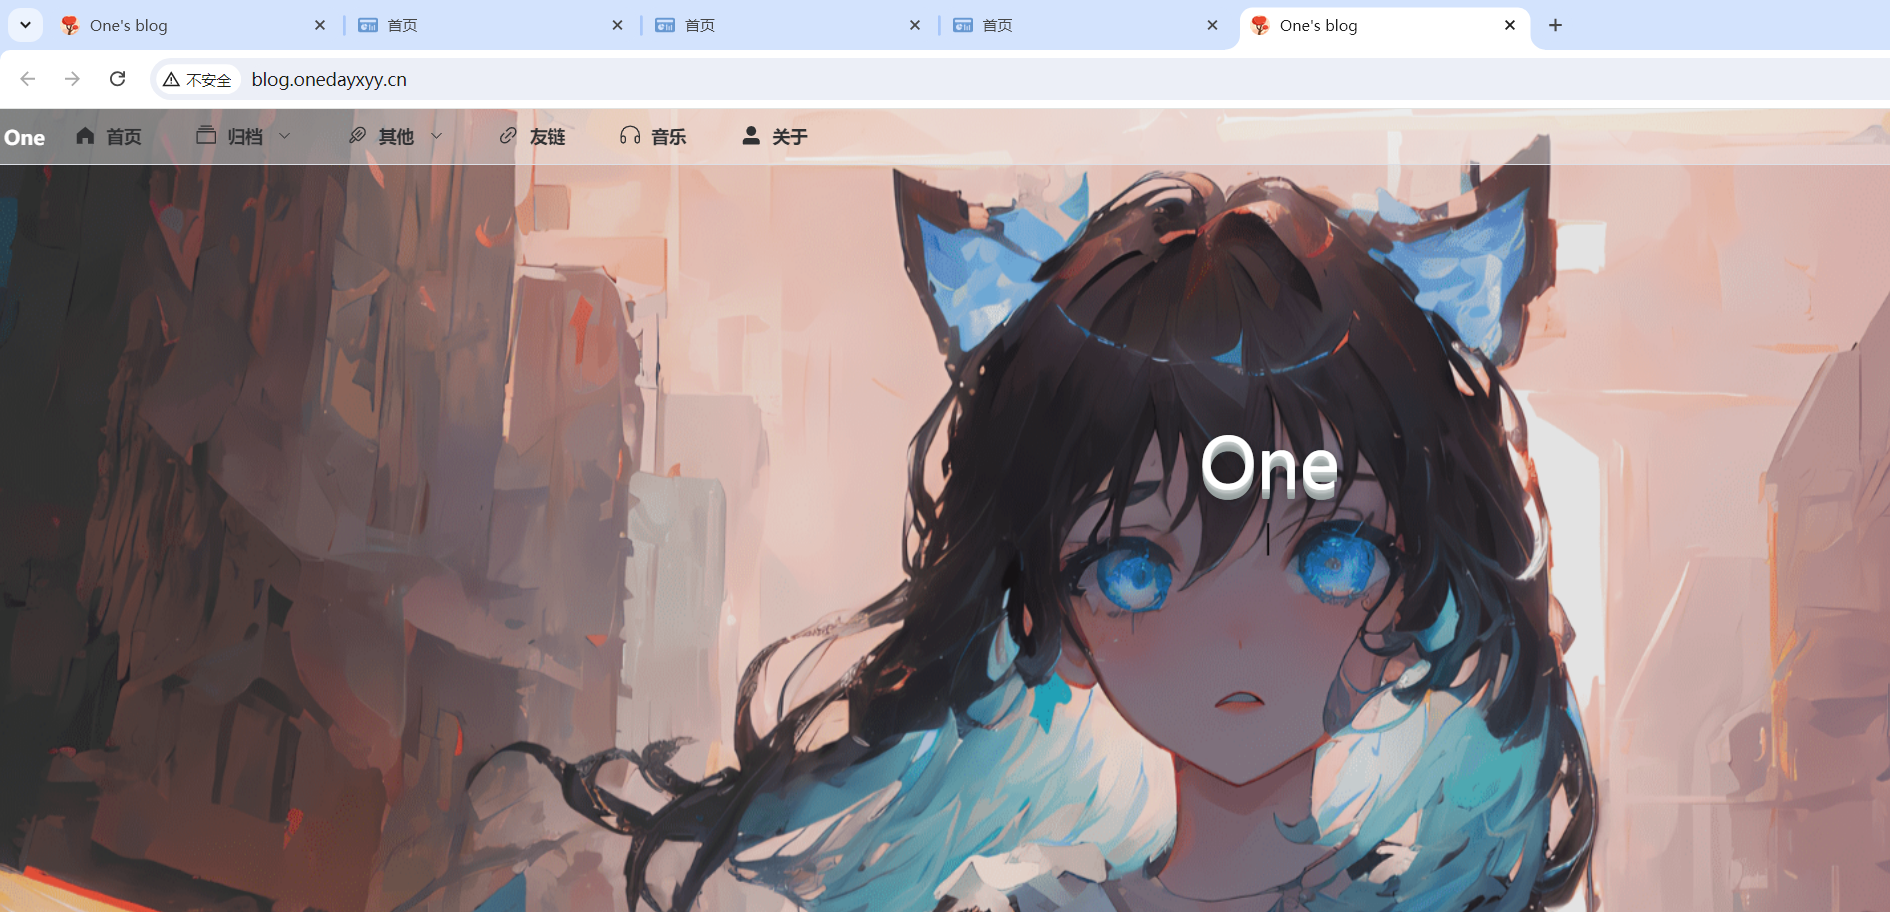
blog.onedayxyy.cn
web访问blog.onedayxyy.cn:8080是否也能正常显示blog??
ping正常:
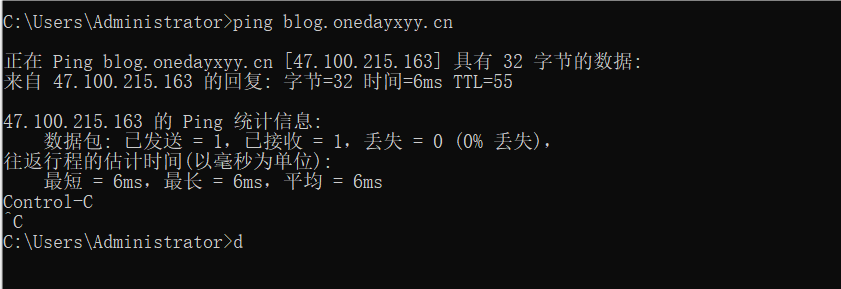
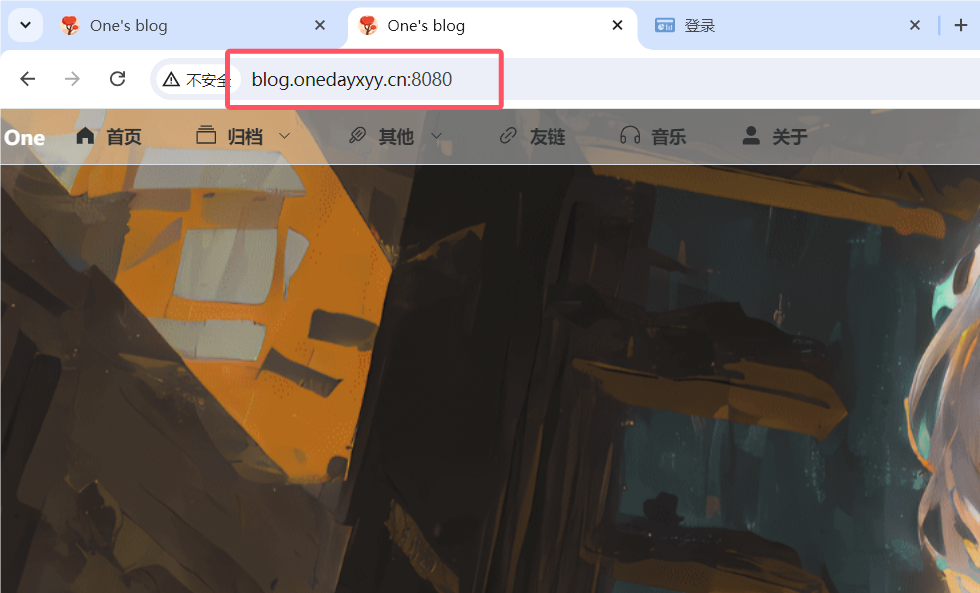
哦哦,这也是可以哦,那么就直接使用blog.onedayxyy.cn子域名了,不用再新创建子域名了。
将minio ip替换为blog.onedayxyy.cn即可了把


minio本身还放在本地nuc上


将本地mini:9000给frp出去;


blog.onedayxyy.cn:9000   ---nuc:9000
开始配置frp:
[ruyu-blog-minio]
type = tcp
local_ip = 127.0.0.1
local_port = 9000
remote_port = 9000

#重启frpc
docker restart frpc
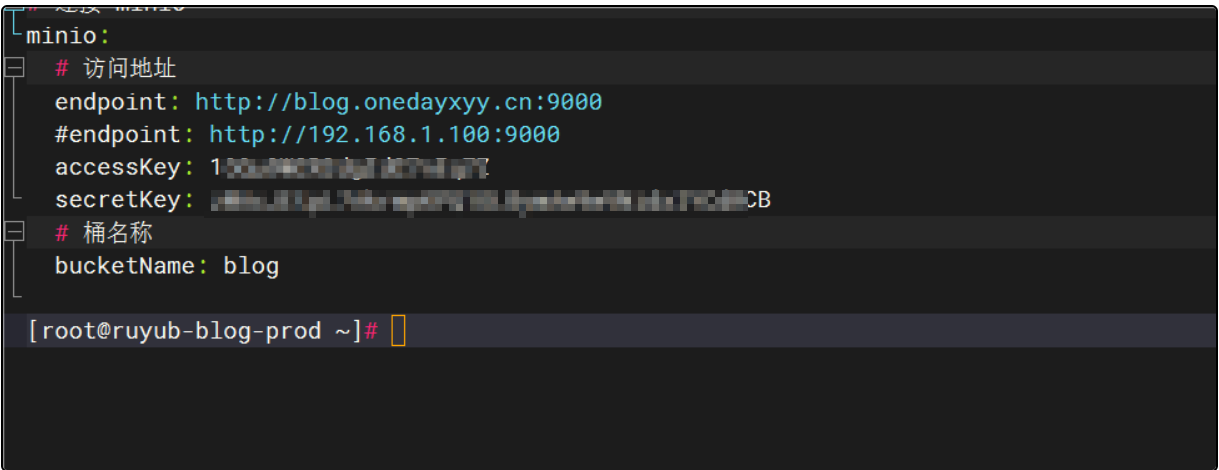
再配置下后端的application文件
vim /root/ruyu-blog/blog-backend/src/main/resources/application.yml
测试:
那我把这里的http://192.168.1.100:9000替换为http://blog.onedayxyy.cn:9000,不知道行不行???
重新构建:
# 复制项目的jar文件到容器中
#COPY target/blog-backend-0.0.1-SNAPSHOT.jar /app/app.jar


#重新构建jar包
cd /root/ruyu-blog/blog-backend
mvn clean
mvn clean package

#删除老容器和老镜像
docker rm -f ruyu-blog-hd
#docker rmi -f ruyu-blog-hd

#构建新镜像和启动新容器
docker build . -t ruyu-blog-hd-v1.3.0-2024.7.24-v6
docker run --name ruyu-blog-hd -d -p 8088:8088 ruyu-blog-hd-v1.3.0-2024.7.24-v6
##

##ruyu-blog-hd-v1.3.0-v3
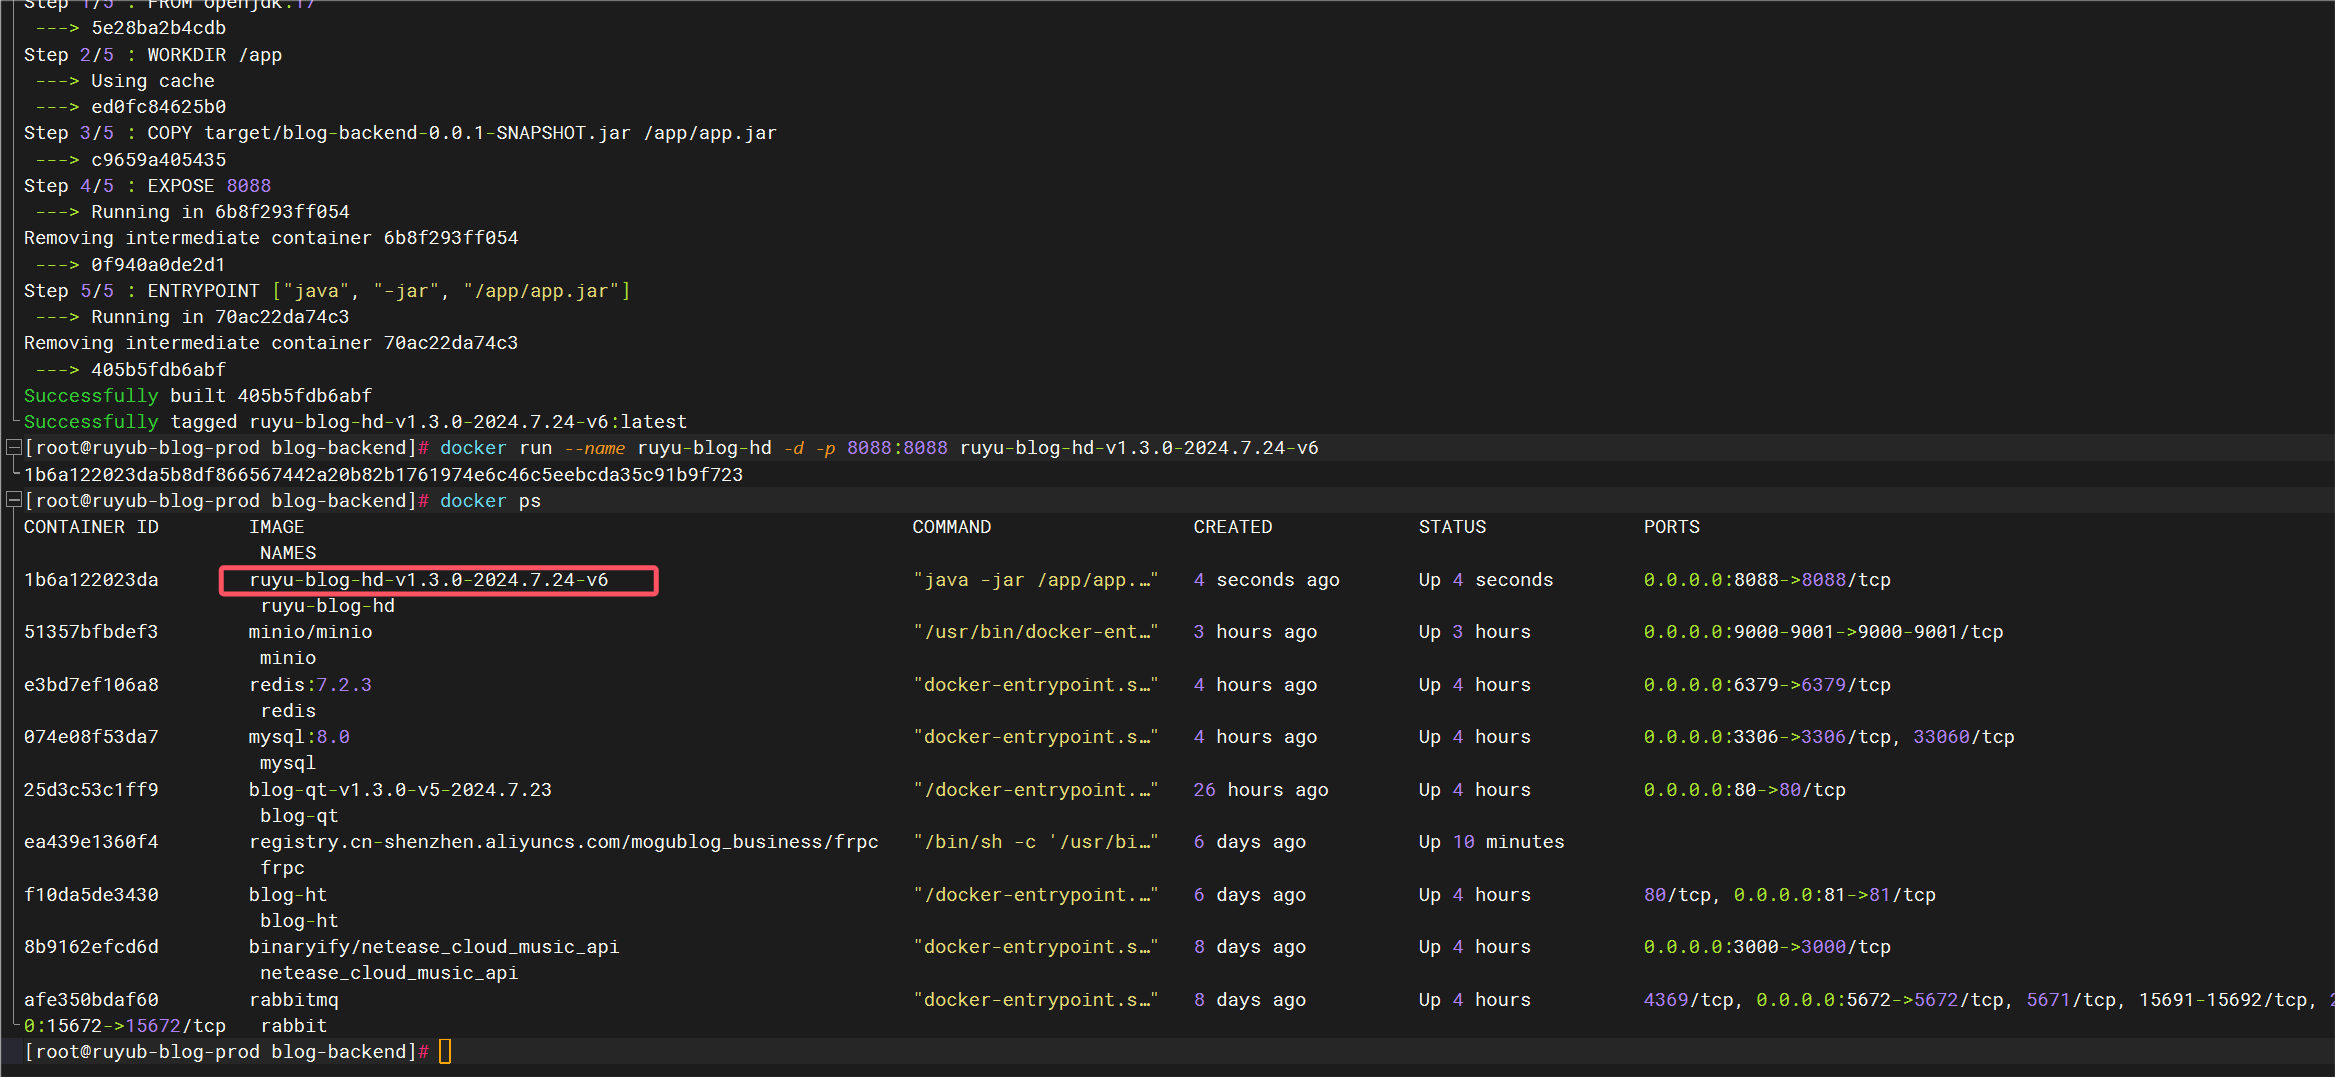
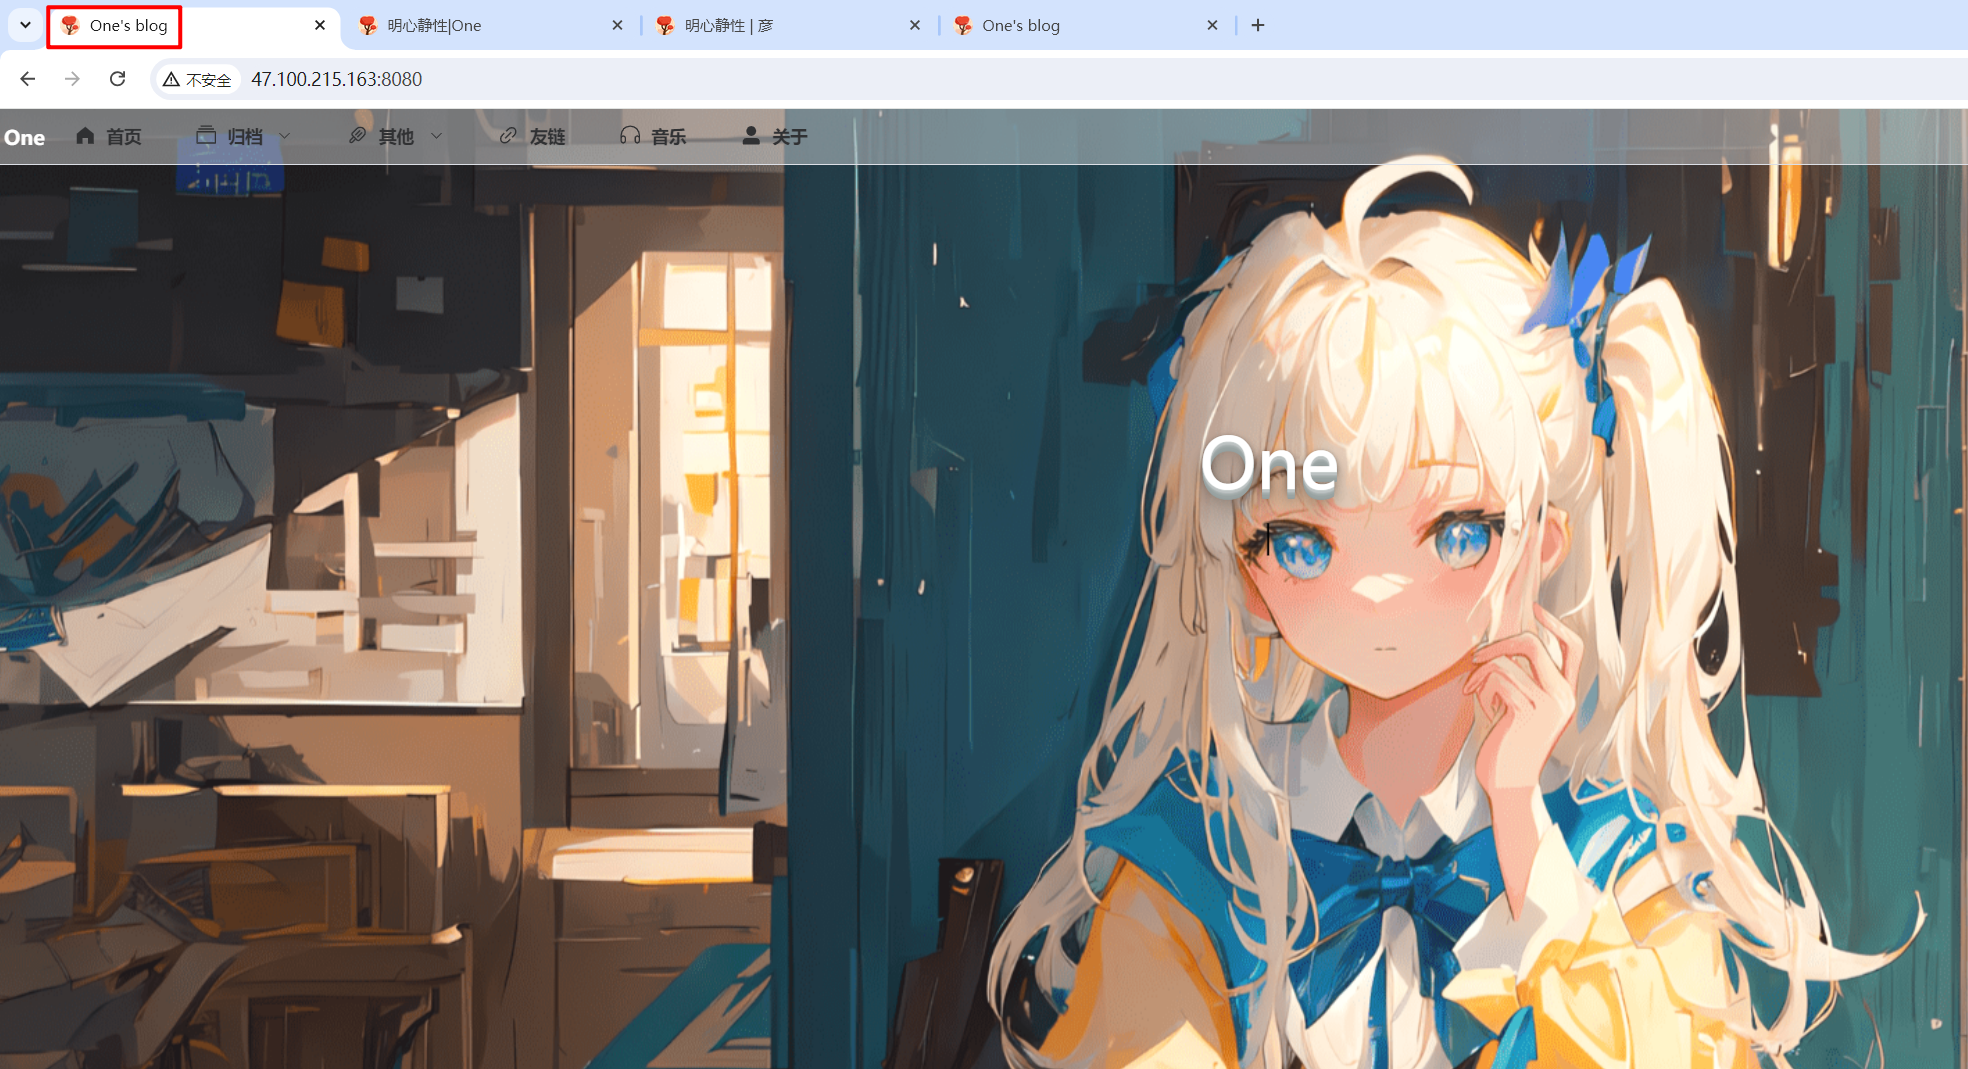
- 验证
nuc本地是可以正常访问的:
公网也是能正常访问的:
完美。
minio上也能看到正常上传的图片:
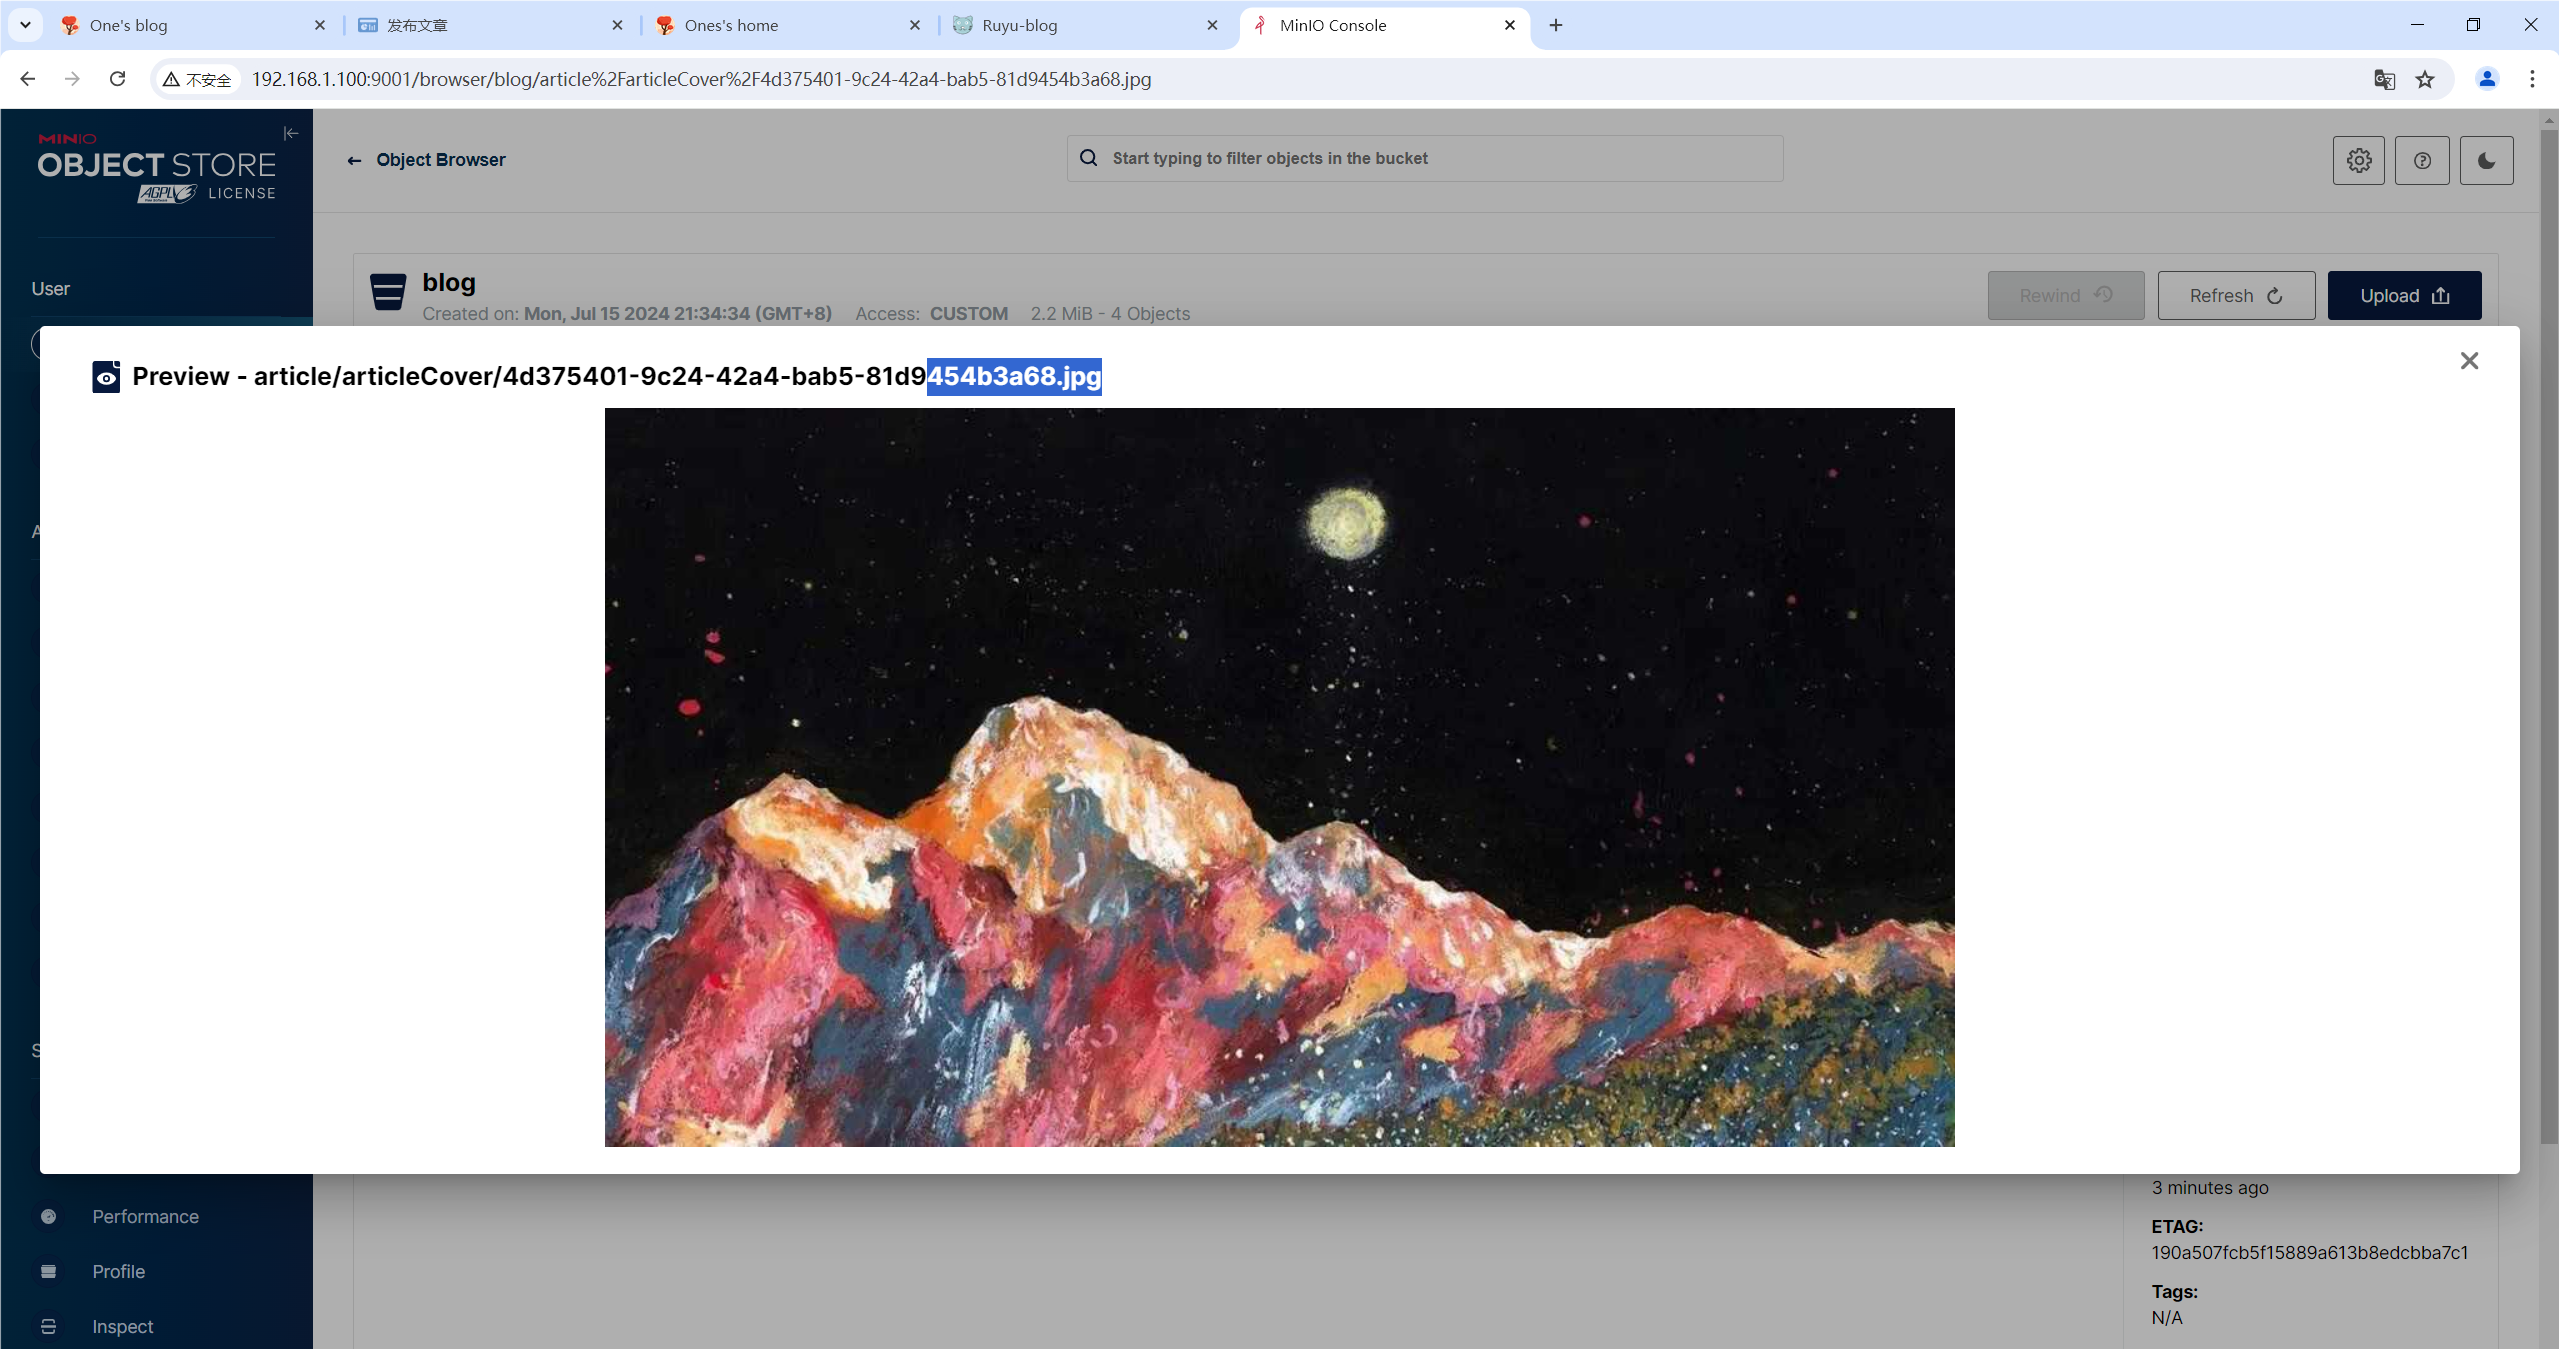
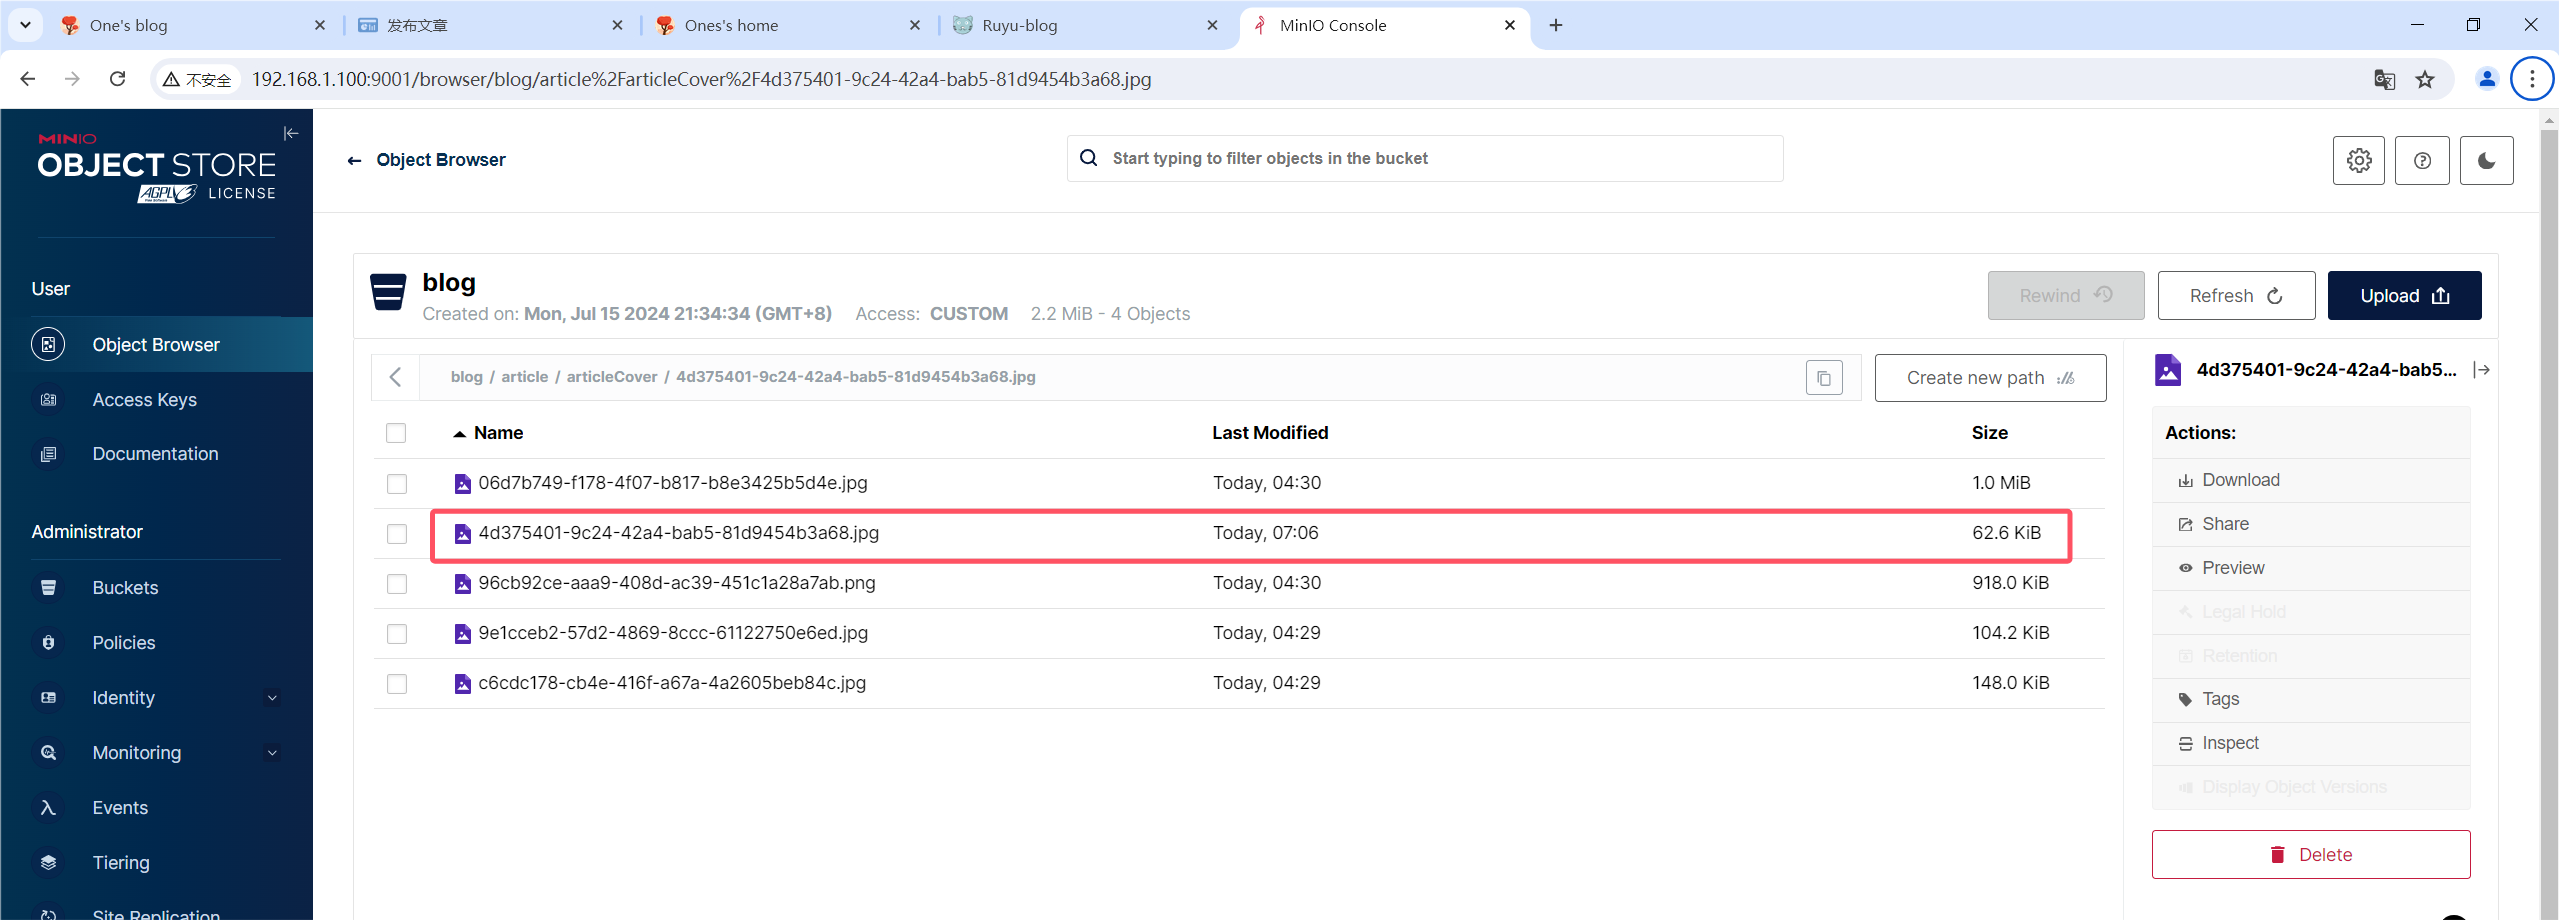
验证
替换剩余文章背景
验证:
完美。
案例:修改前端后台的跳转前台选项为自己url-2024.7.25(已解决)
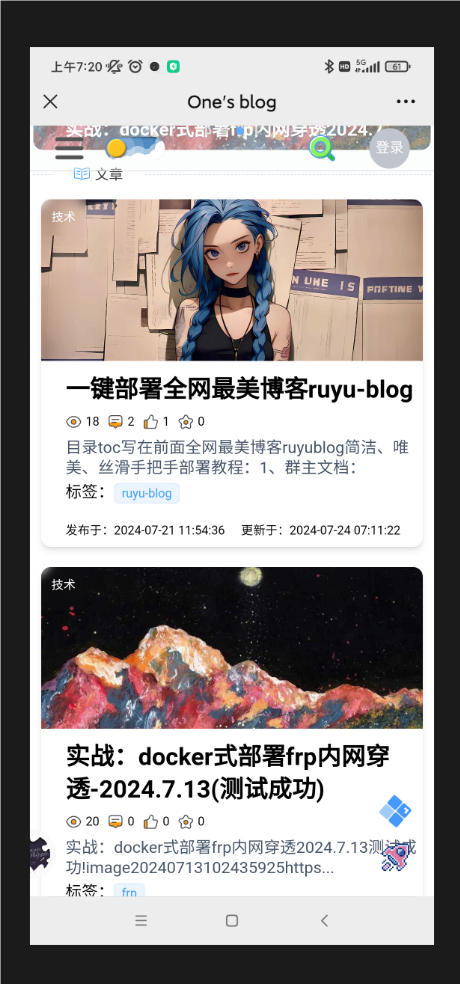
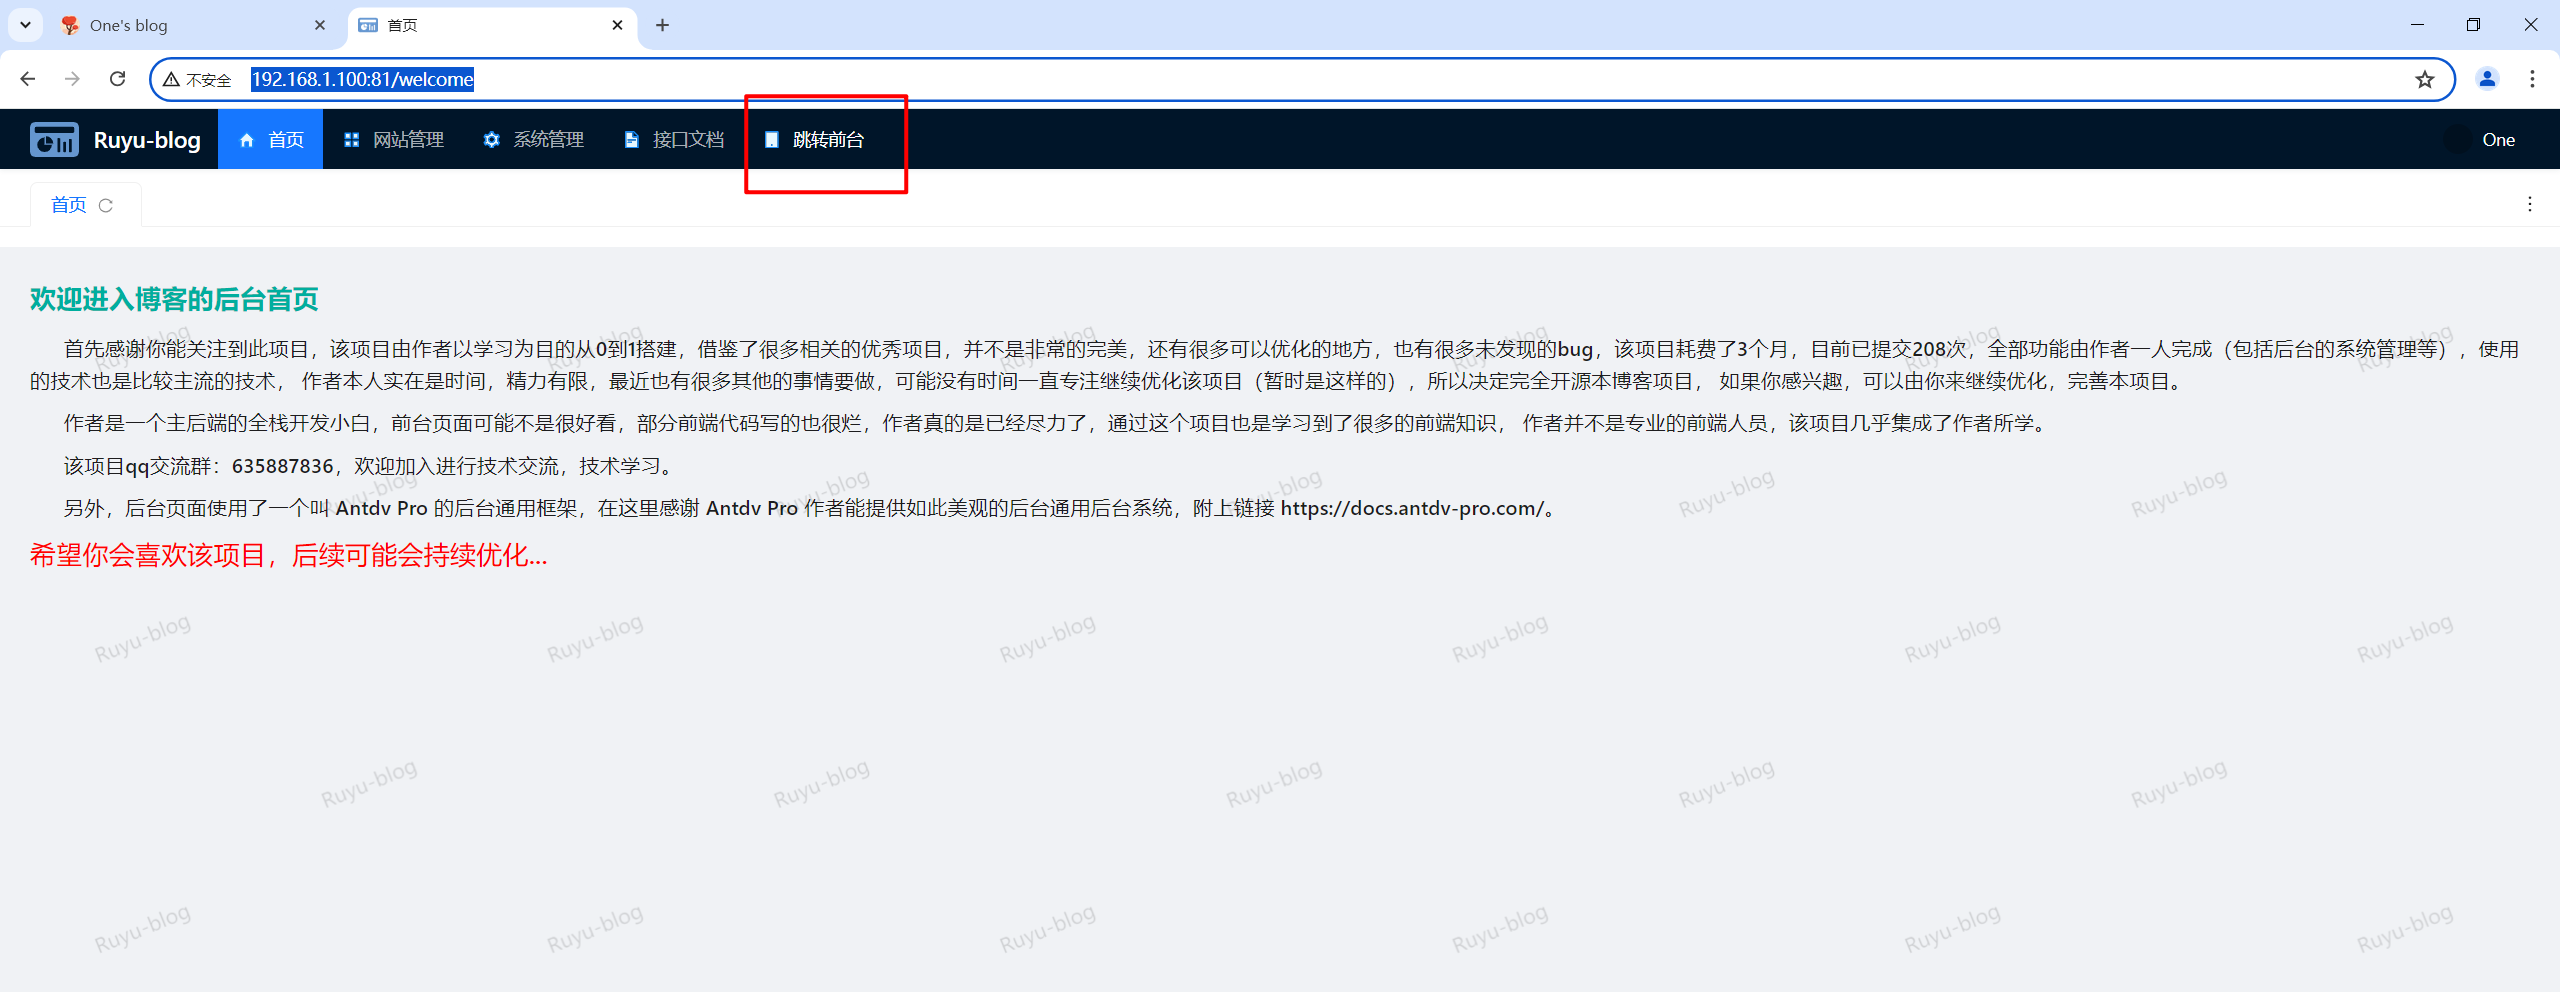
1.存在问题
默认,博客后台这里的跳转前台点击后,直接跳转到作者的地址了:
这里得改下自己的配置。
2.排查过程
在前端目录里搜索跳转前台字段:
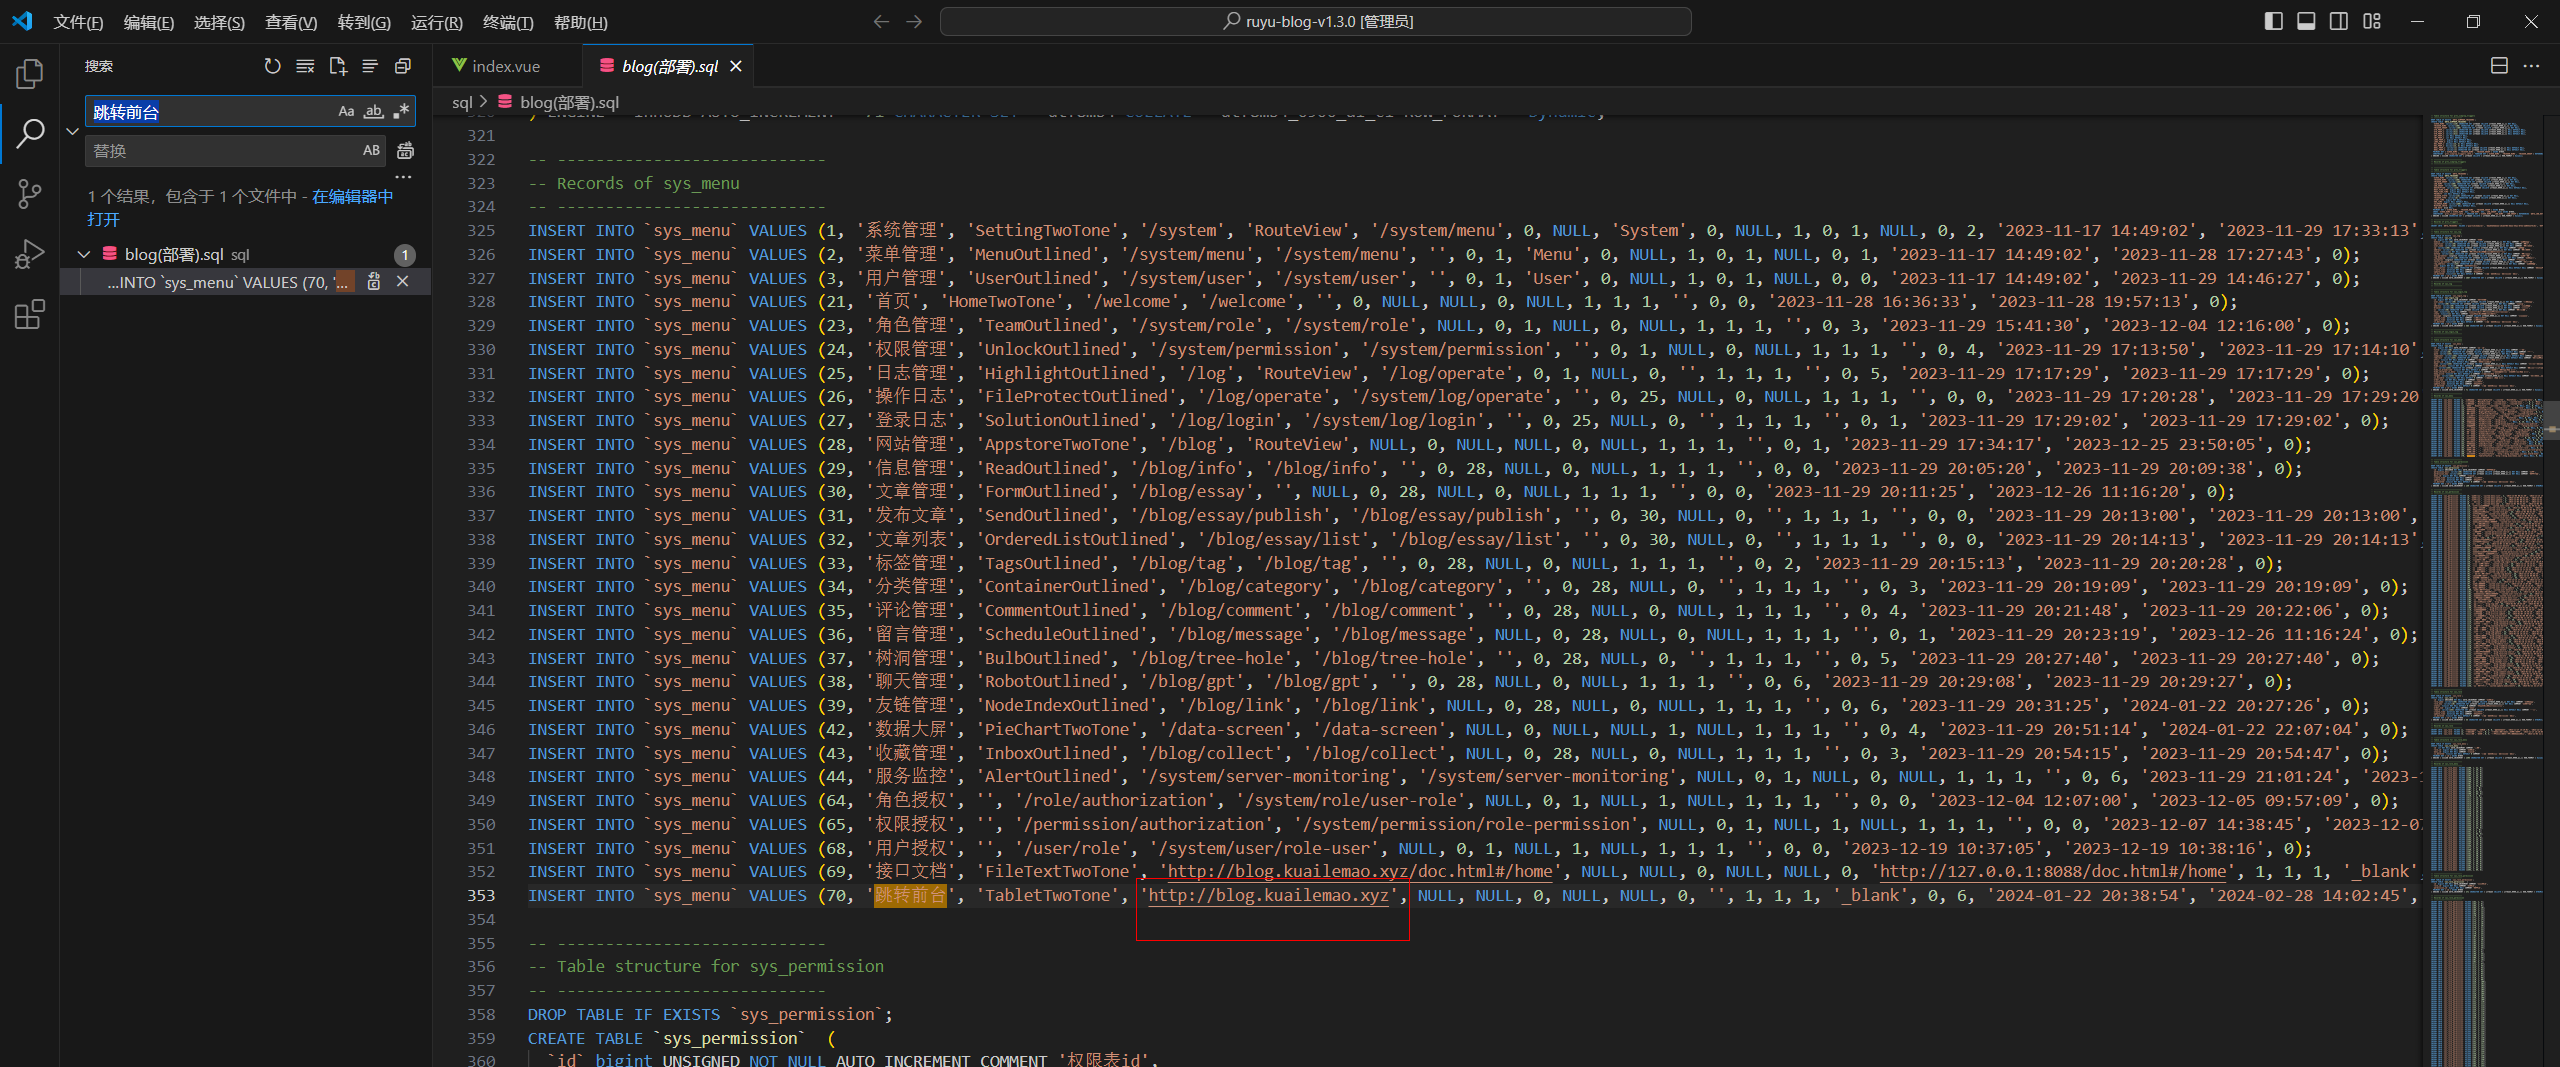
看来得从数据库来更改……
因为我还没配置域名,这里等域名配置后,再配置这里。
3.开始配置
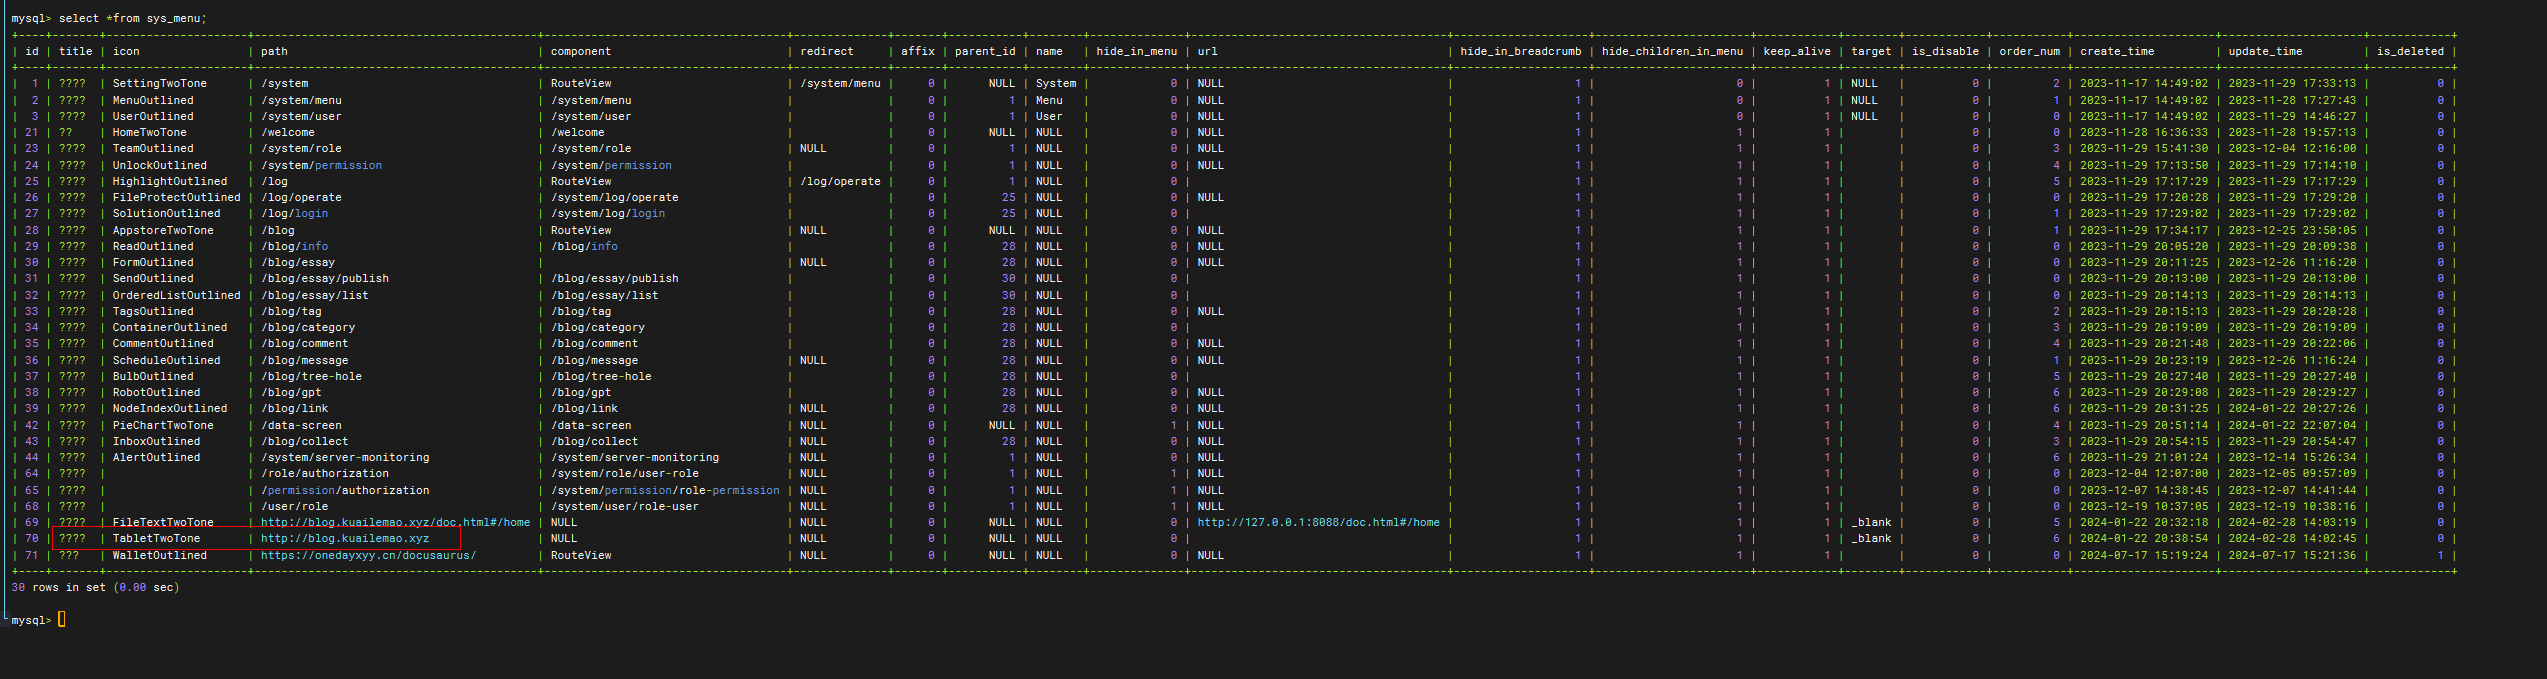
docker exec -it mysql bash
mysql -uroot -p你的mysql密码
use blog;
select *from sys_menu;
UPDATE `sys_menu`
SET
    `path` = 'http://blog.onedayxyy.cn/'
WHERE `id` = 70;
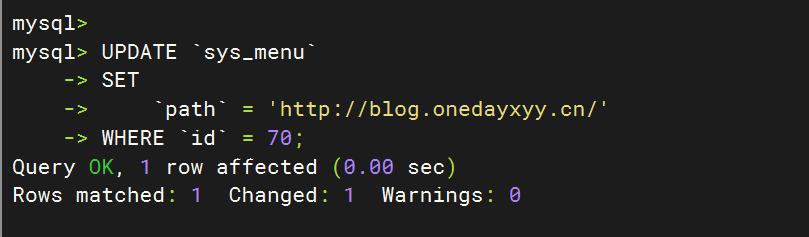
验证:
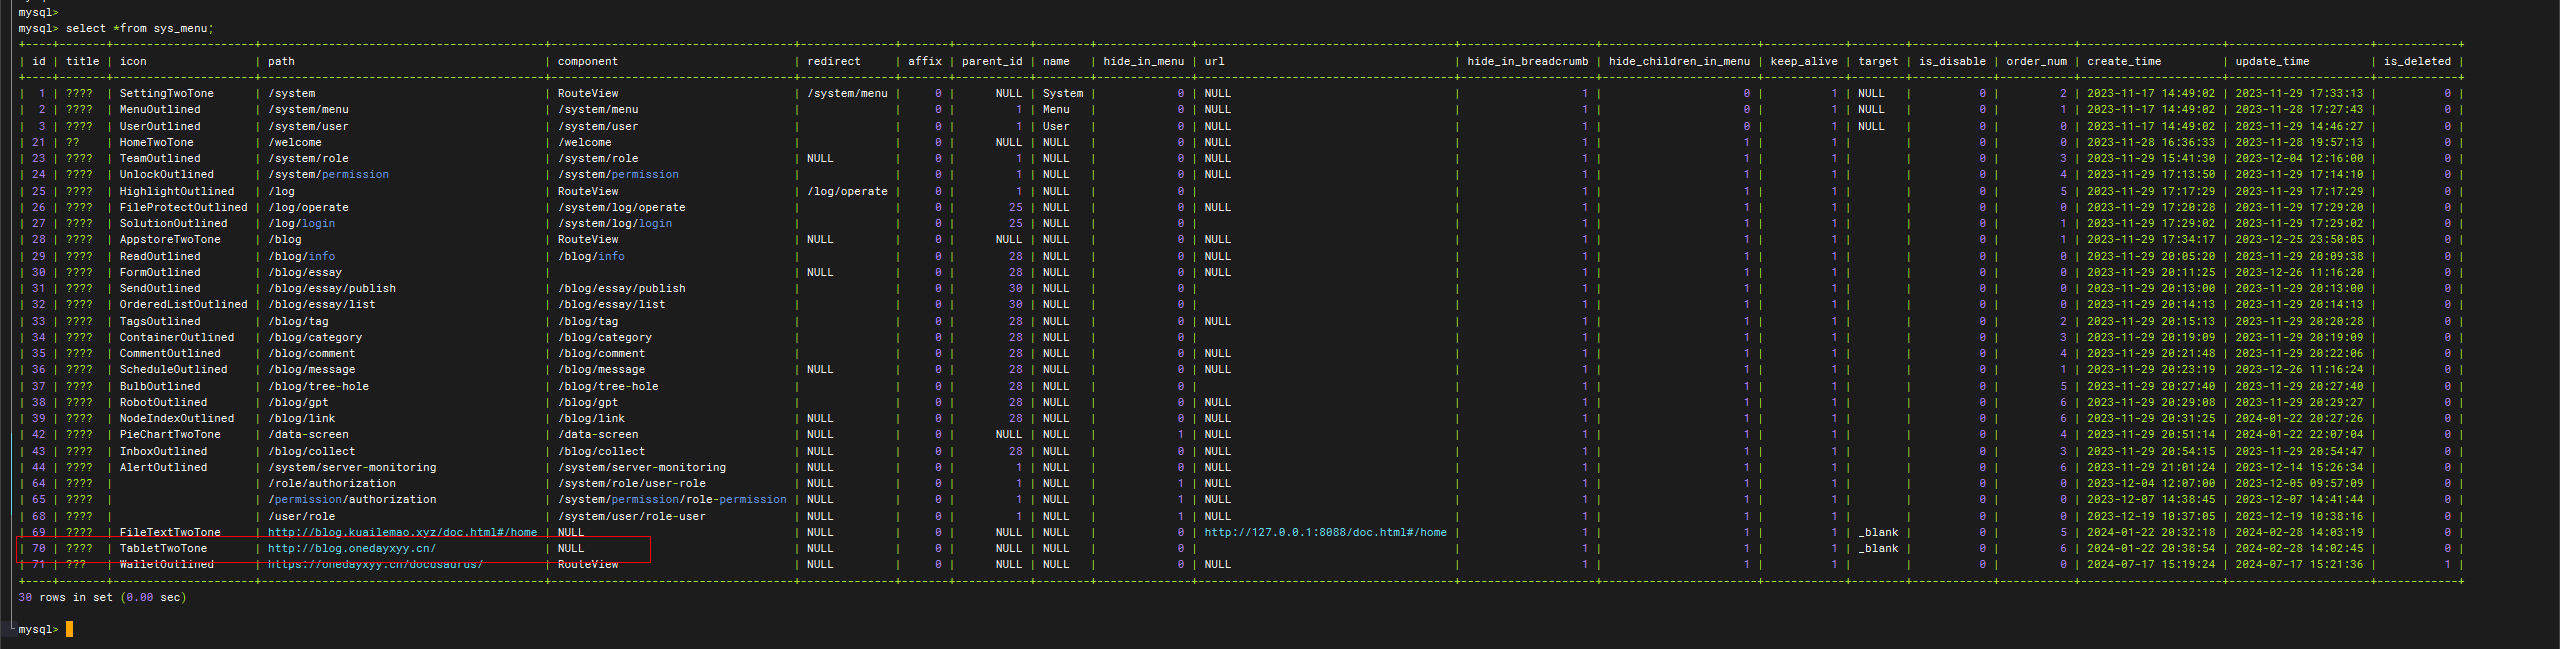
数据库里变过来了。
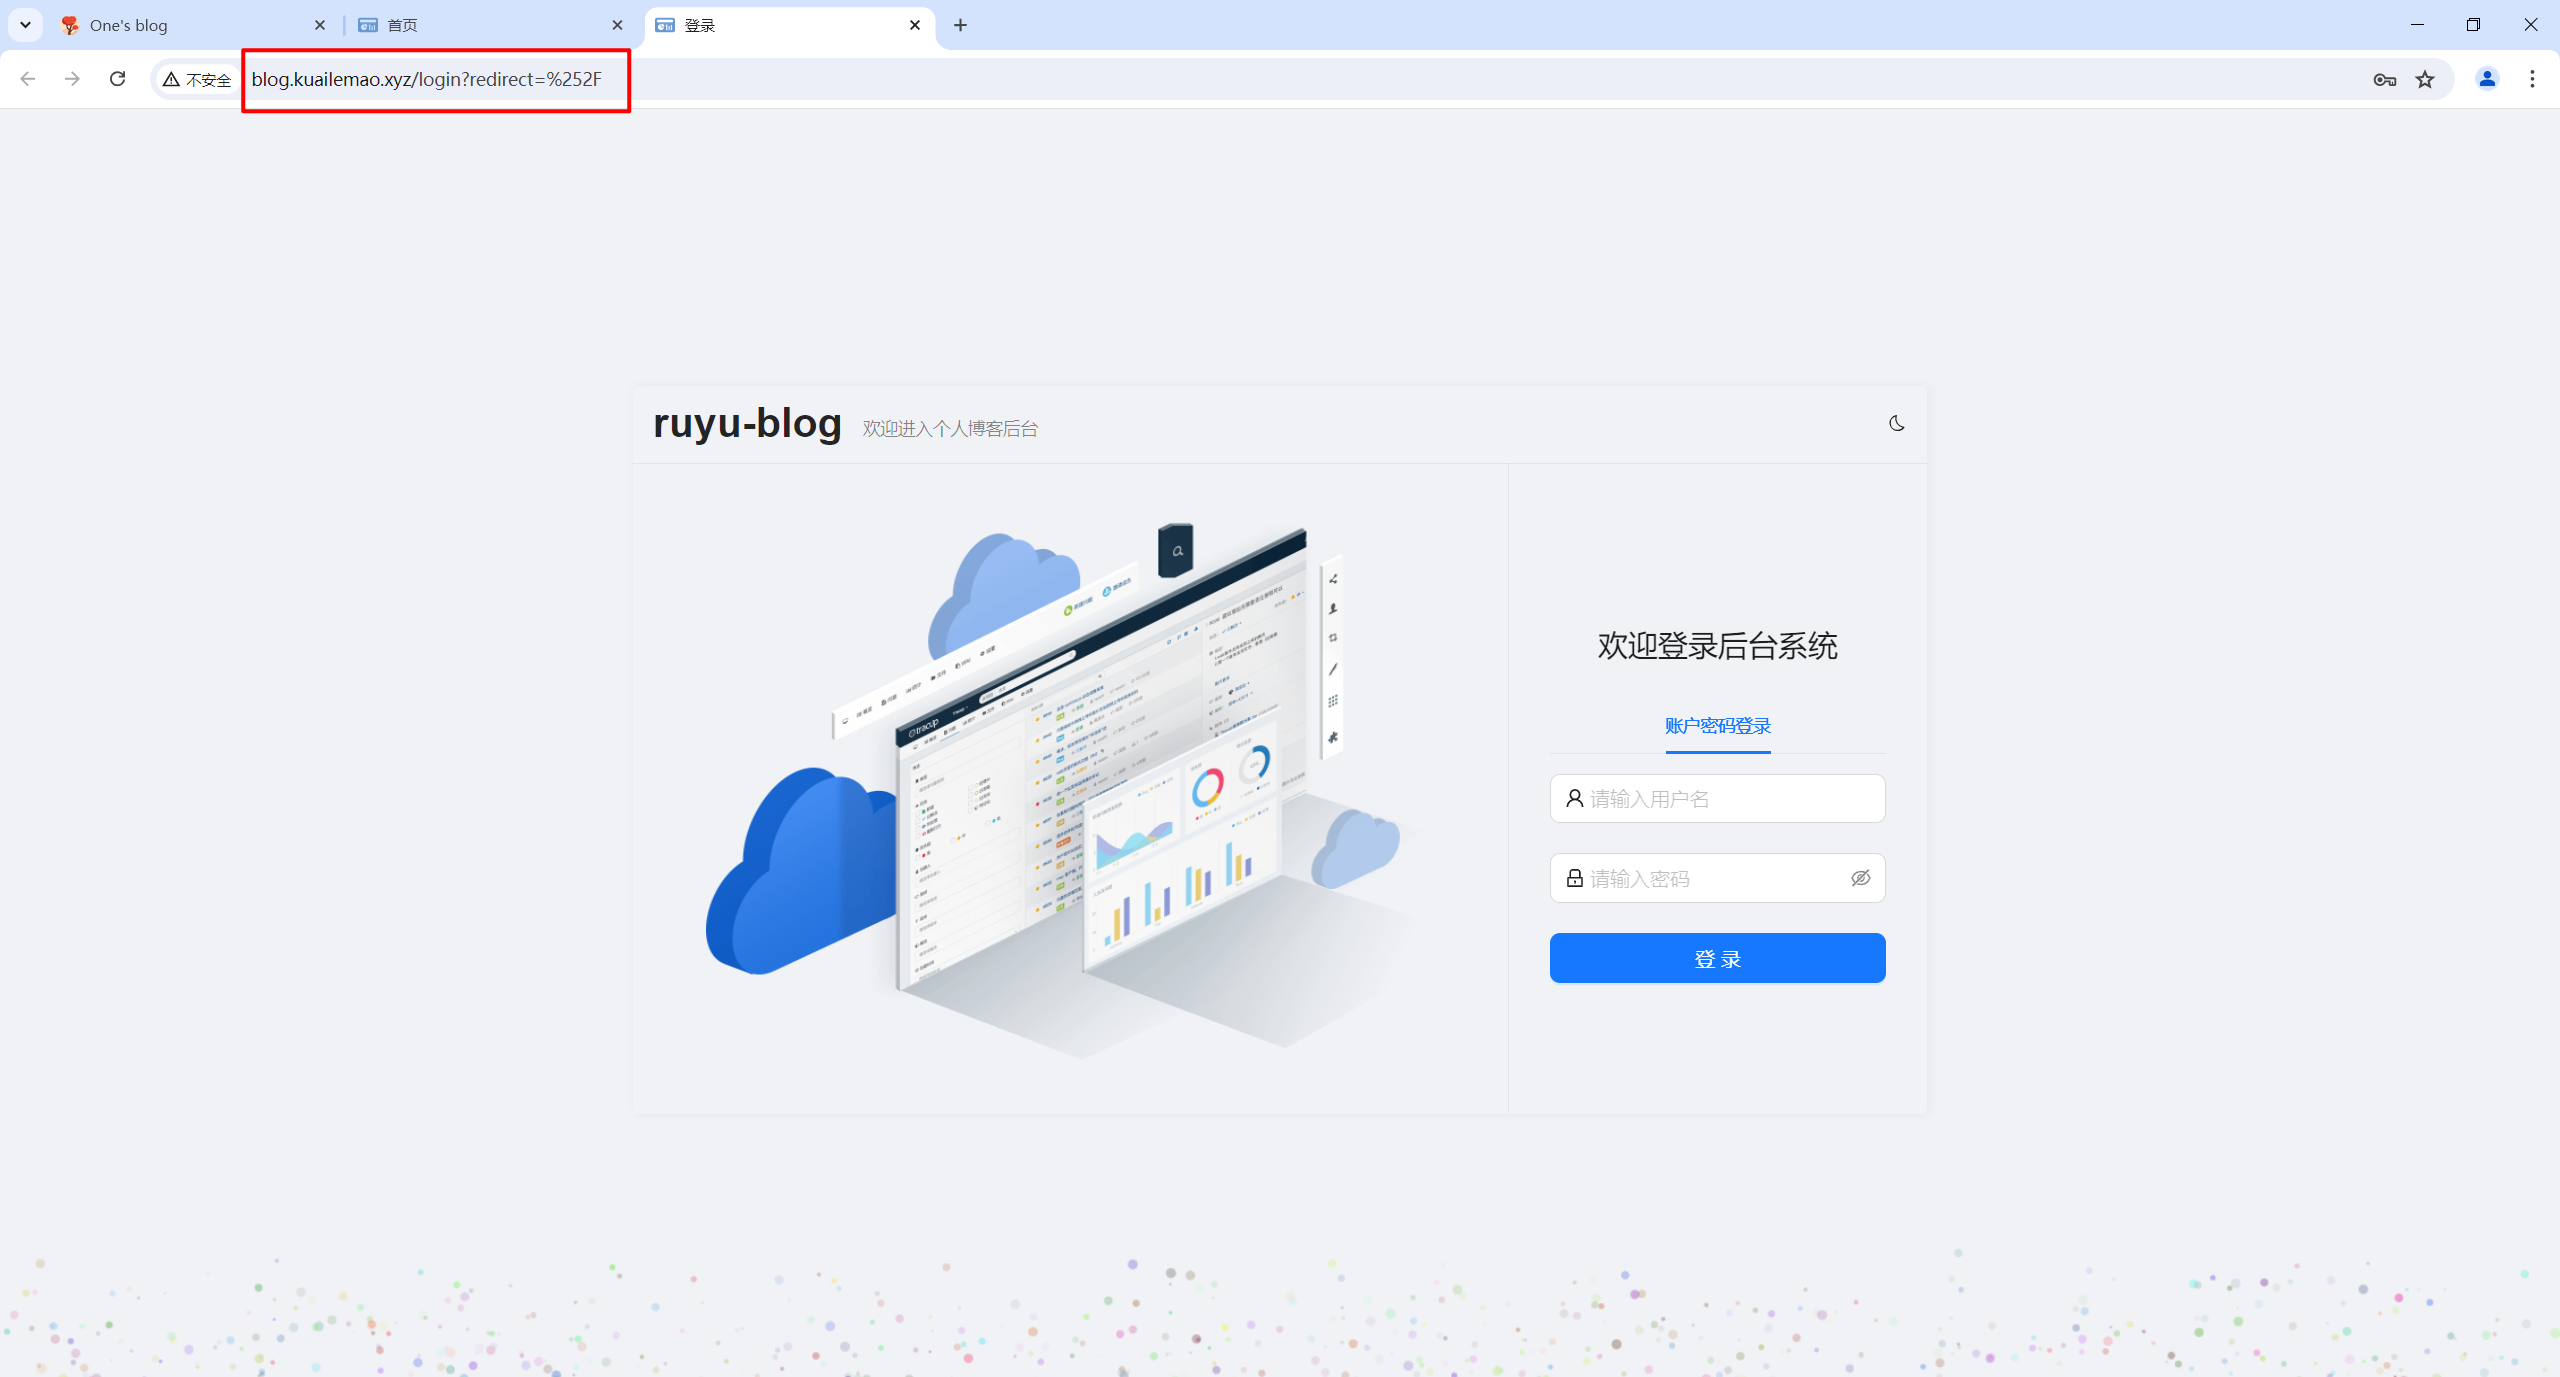
再验证下web:

发现还是会跳转到源作者:。。。

我们重启下mysql:
退出mysql:
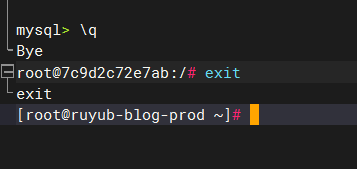
cd /data/mysql/
docker-compose down
docker-compose up -d
4.验证效果
此时就会跳转到前台了:
完美。😘
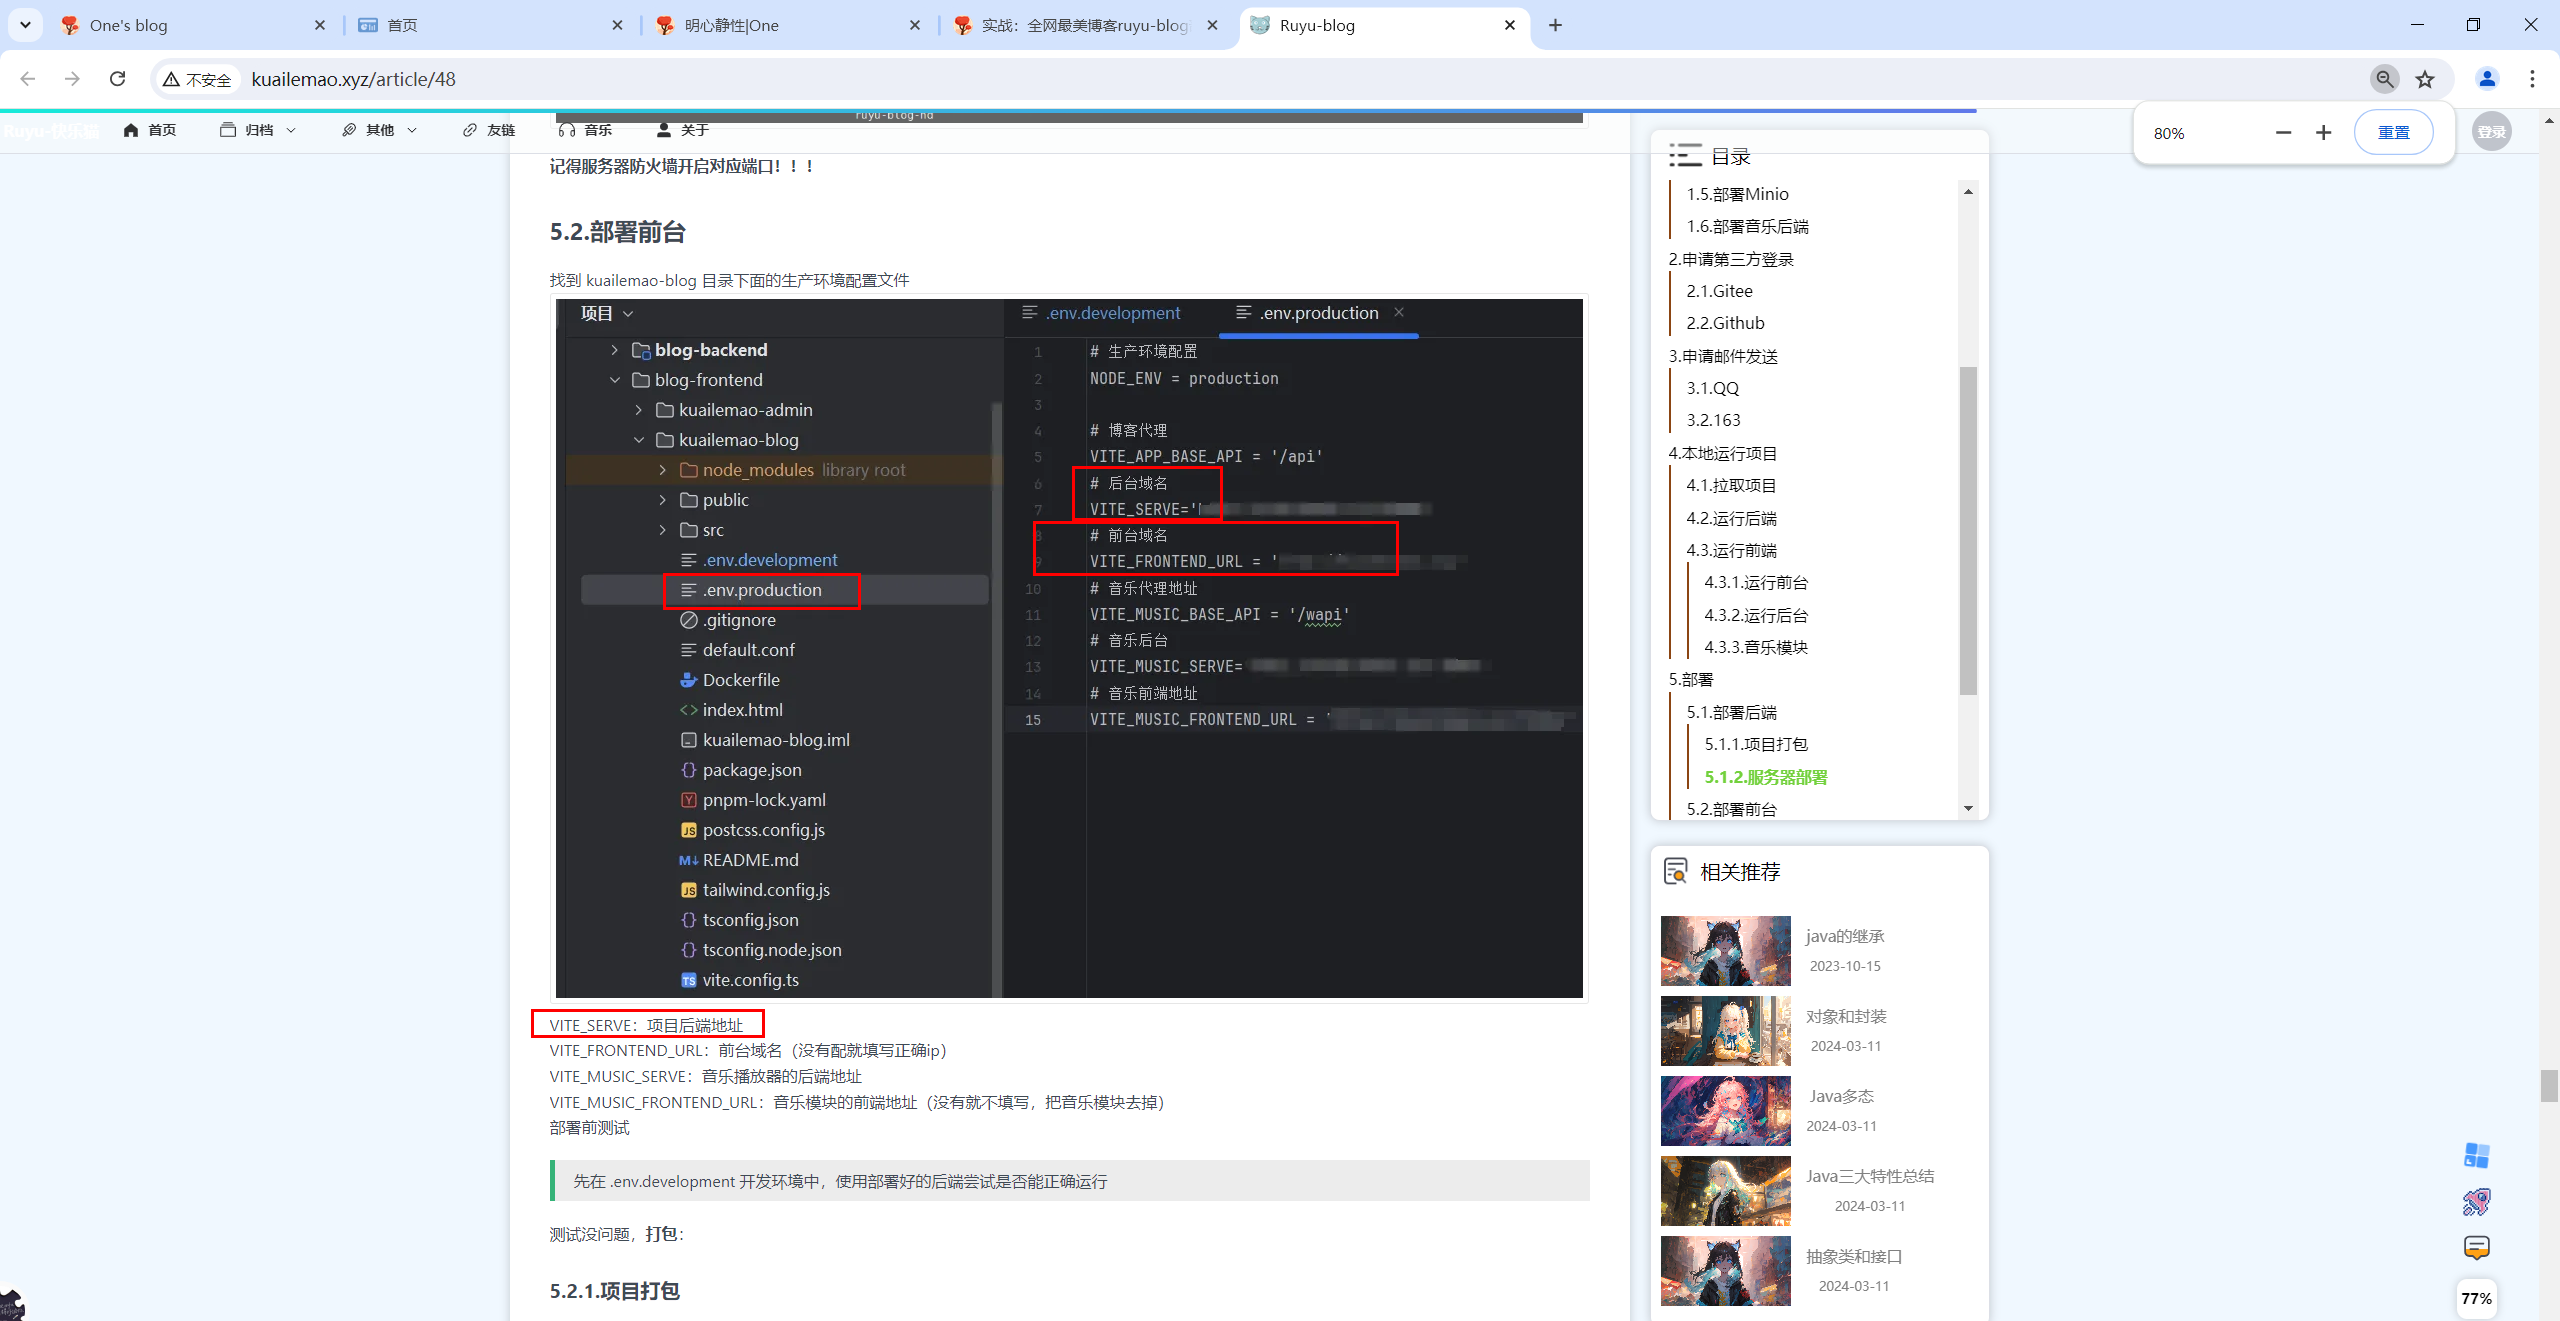
案例:前端项目里.env.development和.env.production的含义
vite的文档中有介绍:
案例:
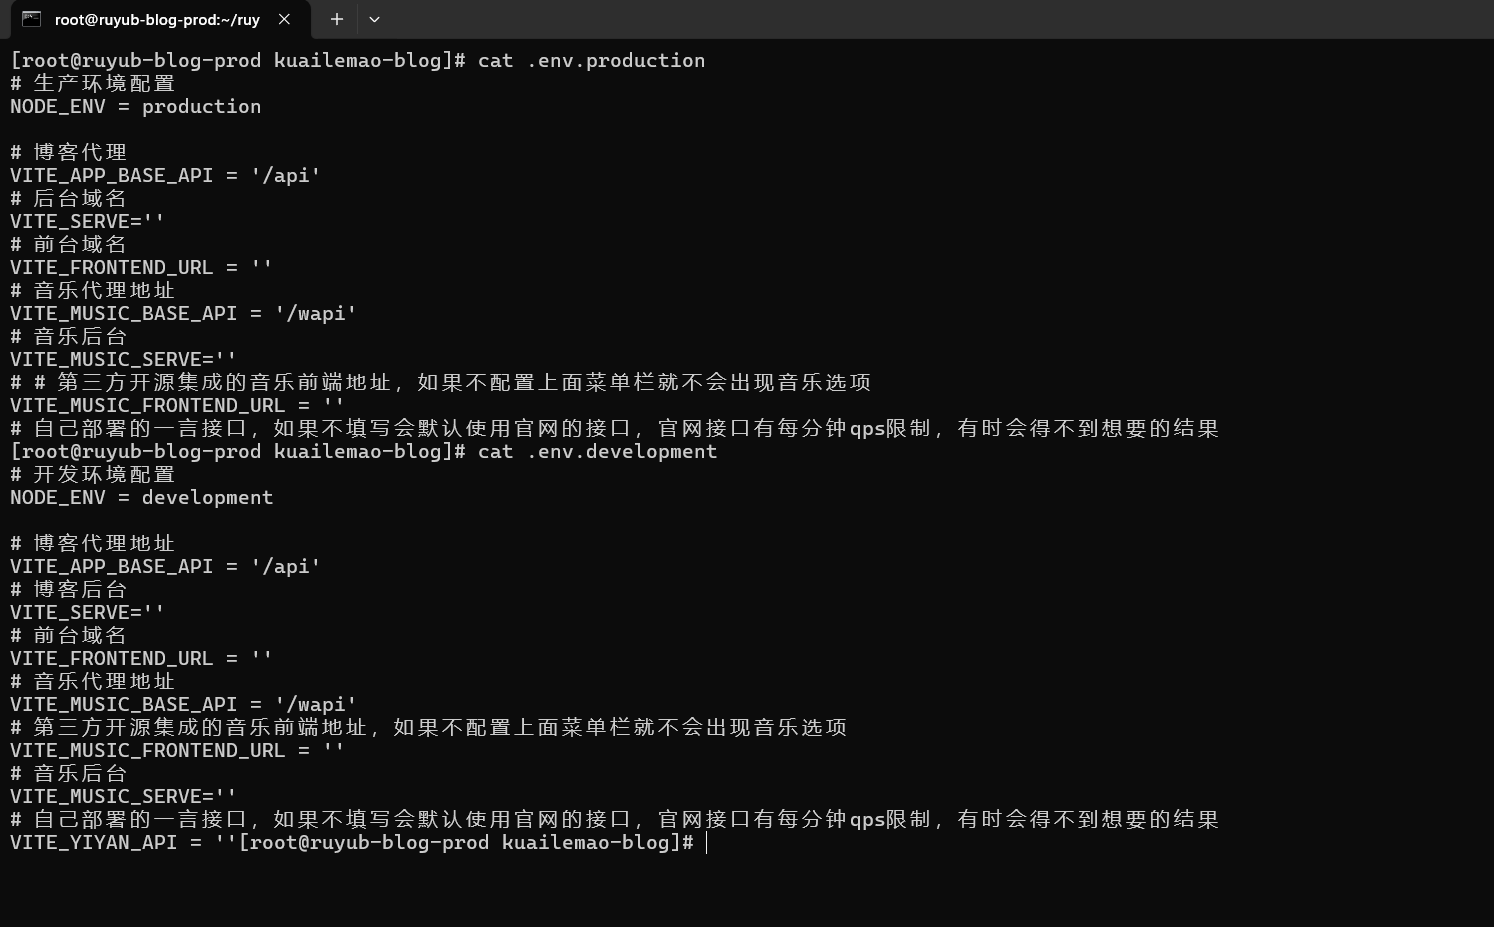
解释:

案例:将ruyublog升级为https-2024.8.6(已解决)
v1-2024.8.2-作者提供的文档
背景

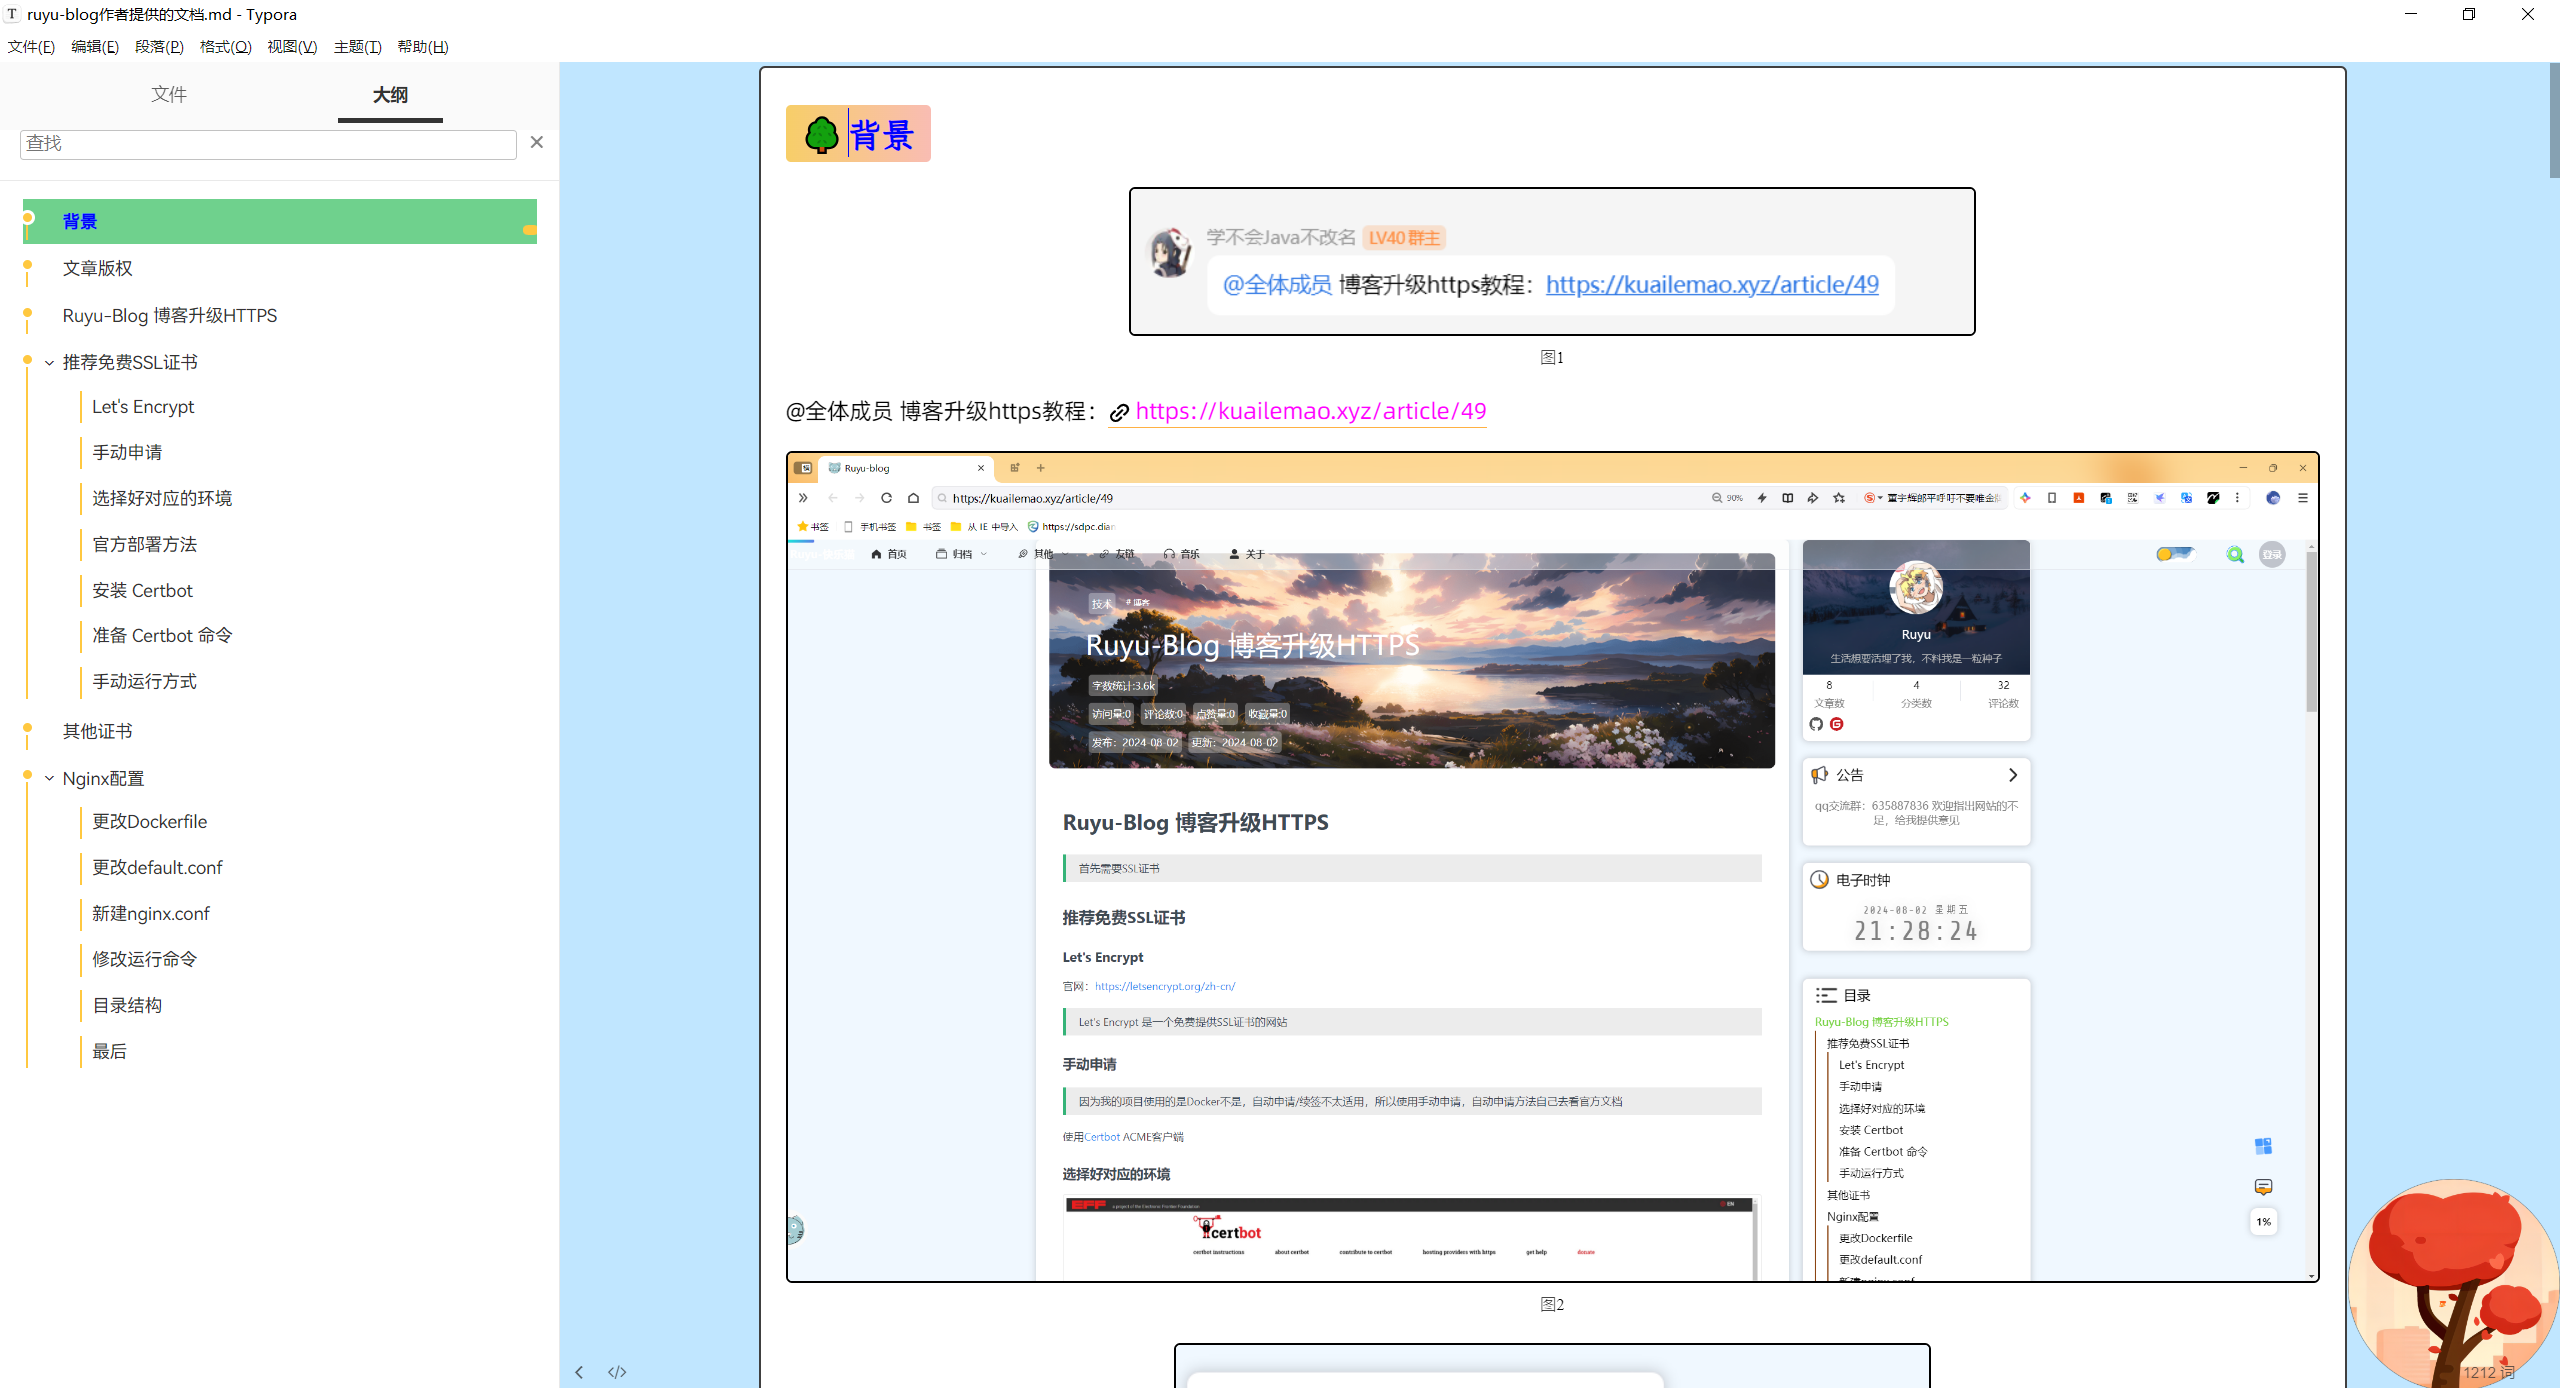
@全体成员 博客升级https教程:https://kuailemao.xyz/article/49

文章版权
https://kuailemao.xyz/article/49
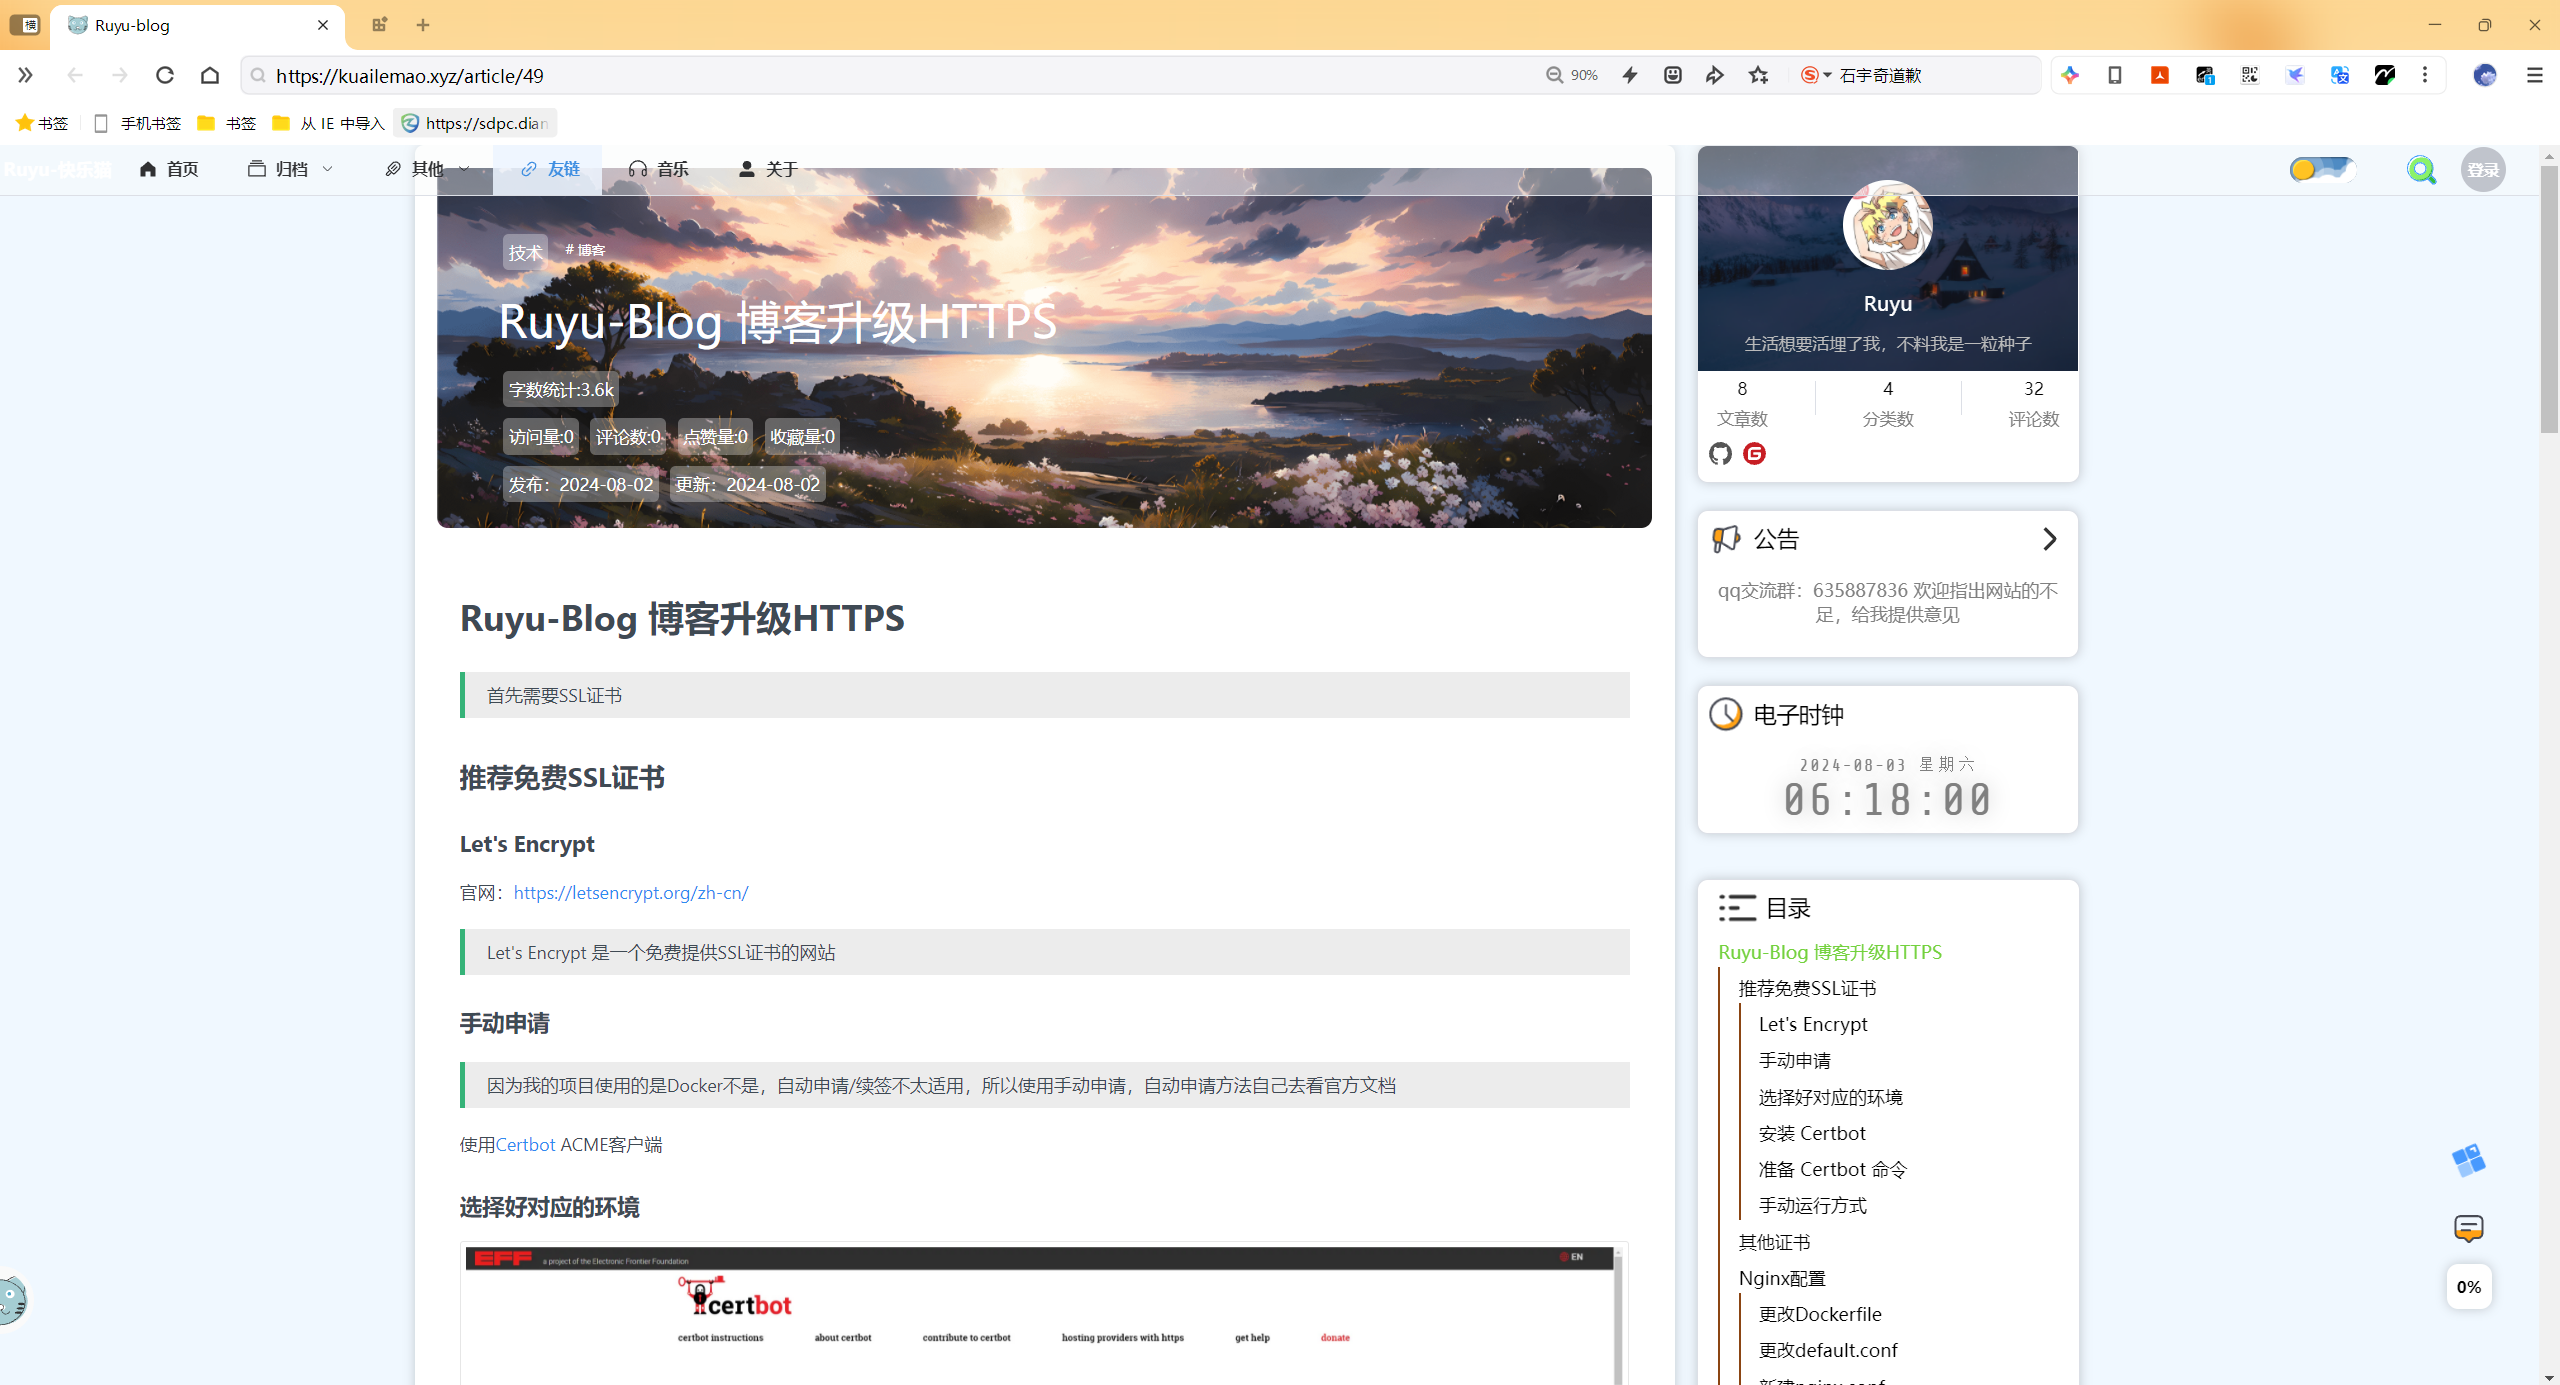
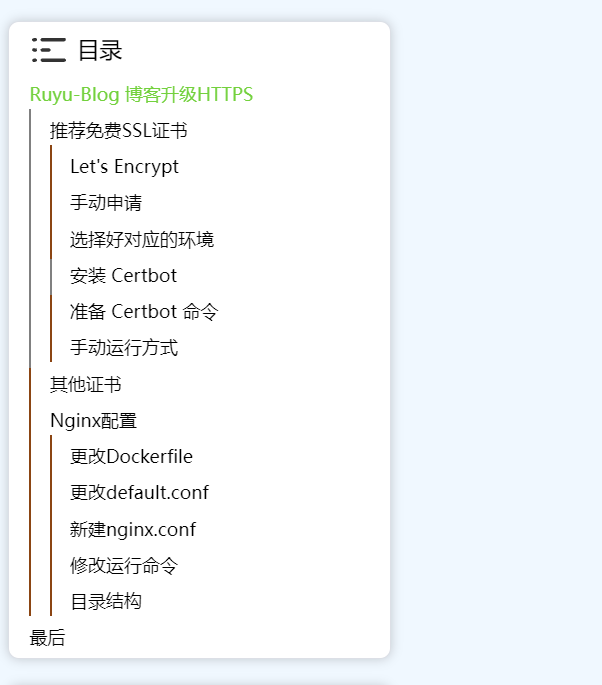
Ruyu-Blog 博客升级HTTPS
首先需要SSL证书。
推荐免费SSL证书
Let's Encrypt
官网:https://letsencrypt.org/zh-cn/
Let's Encrypt 是一个免费提供SSL证书的网站。
手动申请
因为我的项目使用的是Docker不是,自动申请/续签不太适用,所以使用手动申请,自动申请方法自己去看官方文档。
使用Certbot ACME客户端
选择好对应的环境
https://certbot.eff.org/instructions?ws=nginx&os=centosrhel7&tab=standard

官方部署方法
https://certbot.eff.org/instructions?ws=nginx&os=centosrhel7&tab=standard
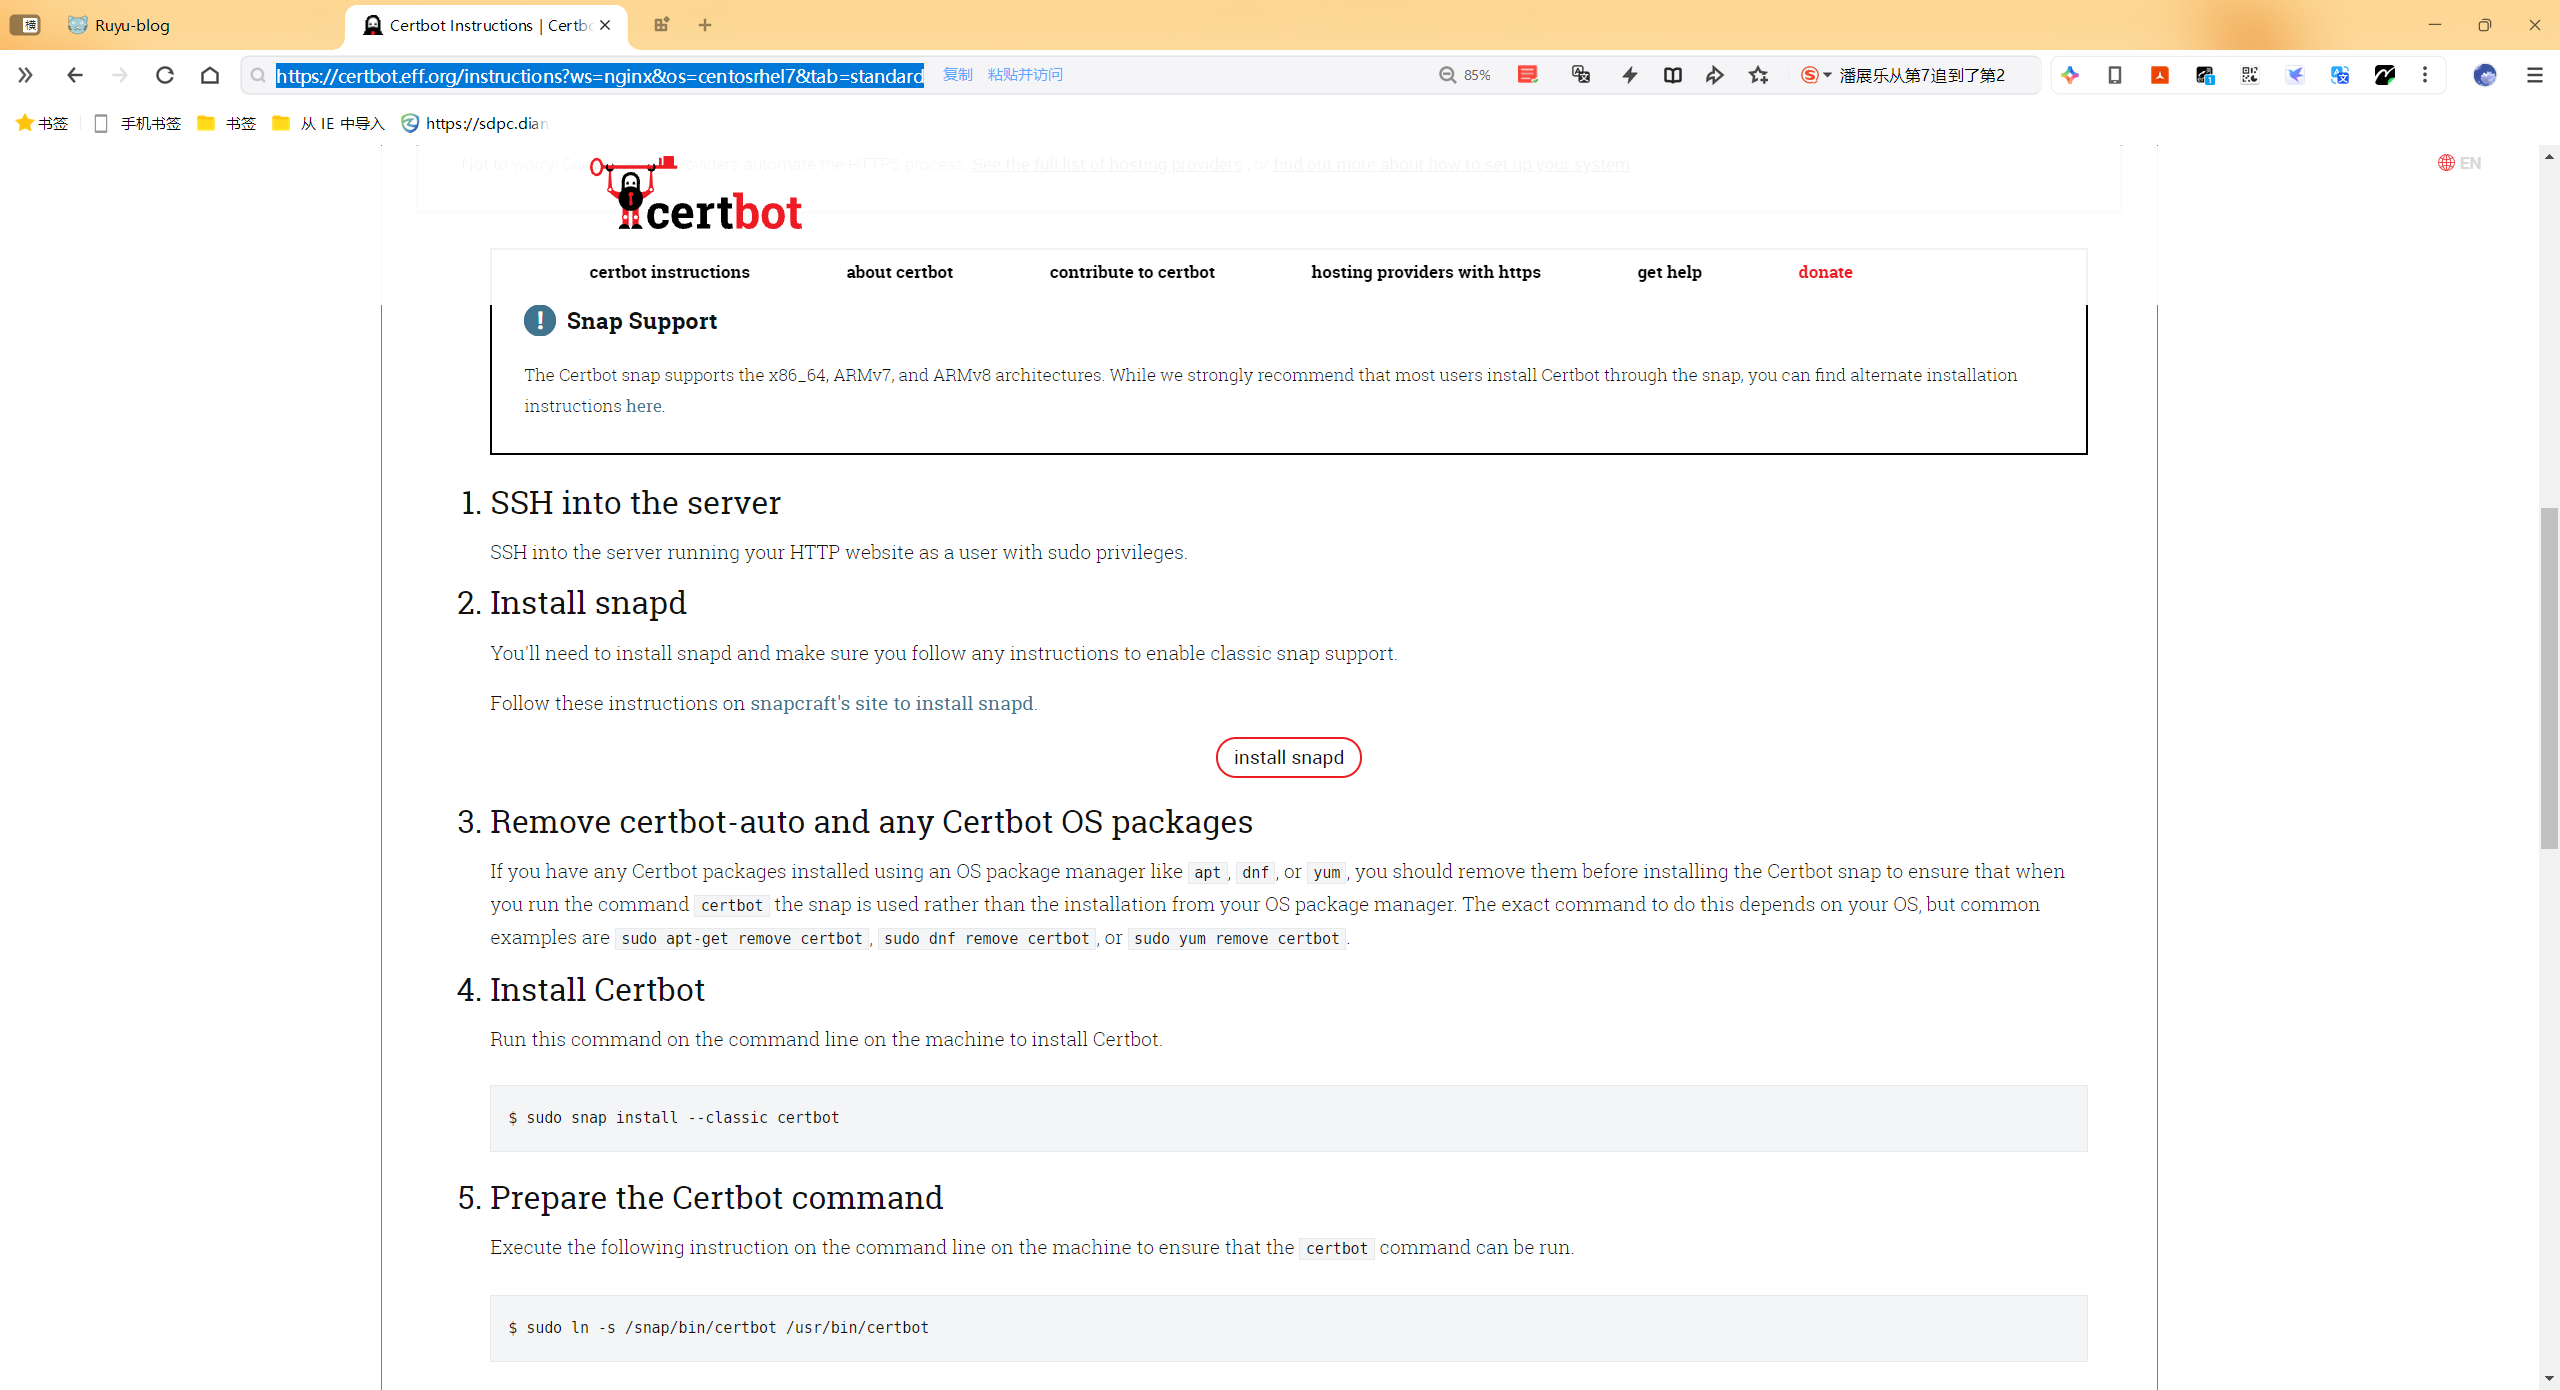
安装 Certbot
sudo snap install --classic certbot
准备 Certbot 命令
sudo ln -s /snap/bin/certbot /usr/bin/certbot
手动运行方式
certbot -d 域名(可以使用*.代表所有二级域名) --manual --config-dir config --work-dir work --logs-dir logs --preferred-challenges dns certonly
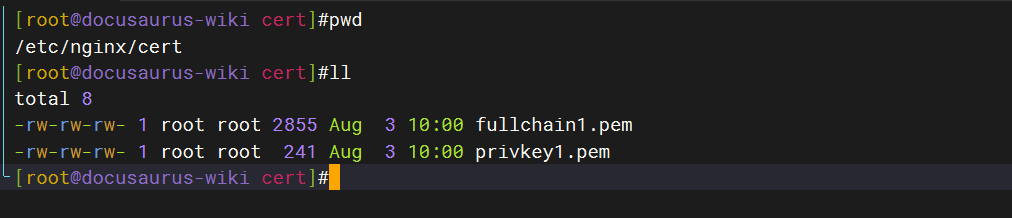
后续根据提示进行邮箱填写、DNS的TXT记录验证、等等……
然后会得到两个关键文件,注意看提示信息的路径。

其他证书
当然你也可以用其他的SSL证书,如腾讯云、阿里云,注意要把证书文件名跟本篇文章教程证书文件名一样,不然容易出问题
Nginx配置
项目目录新建ssl目录,把这两个文件copy进去
mkdir ssl

更改Dockerfile
FROM nginx

MAINTAINER 博客前台

RUN rm /etc/nginx/conf.d/default.conf

COPY default.conf /etc/nginx/conf.d/
COPY ssl/fullchain.pem /etc/nginx/ssl/fullchain.pem
COPY ssl/privkey.pem /etc/nginx/ssl/privkey.pem
COPY nginx.conf /etc/nginx/nginx.conf

COPY dist/ /usr/share/nginx/html/
更改default.conf
   server {
        listen 443 ssl;              # 监听端口

        server_name [主域名];    # 域名

        ssl_certificate    /etc/nginx/ssl/fullchain.pem;
        ssl_certificate_key  /etc/nginx/ssl/privkey.pem;

        location / {
             root   /usr/share/nginx/html;
             index  index.html index.htm;
             try_files $uri $uri/ /index.html =404;
        }

      # 配置代理路径
      location /api/ {
          proxy_pass http://[后端ip+:[端口]]/;        # 转发请求的目标地址
          proxy_set_header Host $host;             # 设置请求头中的Host字段
          proxy_set_header X-Forwarded-For $proxy_add_x_forwarded_for;
                            # 设置HTTP头中的X-Forwarded-For字段,表示客户端真实IP,多个IP用逗号隔开
          proxy_set_header X-Real-IP $remote_addr; # 设置请求头中的X-Real-IP字段,表示客户端真实IP
      }

      # 配置代理路径
      location /wapi/ {
          proxy_pass https://[音乐后端]/;        # 转发请求的目标地址
      }

        # 配置错误页面
        error_page 404 /404.html;           # 404错误页
      location = /404.html {
          internal;                       # 不接受外部访问
          root /usr/share/nginx/html;     # 404错误页文件所在目录
      }
  }

  server {
        listen 443 ssl;
        server_name [后台域名];

        ssl_certificate    /etc/nginx/ssl/fullchain.pem;
        ssl_certificate_key  /etc/nginx/ssl/privkey.pem;


      location / {
          proxy_pass http://[后台地址或者内外ip]:[端口,部署文档是:81]/;
          client_max_body_size 100M;
          proxy_set_header Host $host;
          proxy_set_header X-Real-IP $remote_addr;
          proxy_set_header X-Forwarded-For $proxy_add_x_forwarded_for;
          proxy_set_header X-Forwarded-Proto $scheme;
      }
  }

  # 自己部署的一言接口,用官网的可以删除
  server {
       listen 443 ssl;
       server_name [域名];

       ssl_certificate    /etc/nginx/ssl/fullchain.pem;
       ssl_certificate_key  /etc/nginx/ssl/privkey.pem;


        location / {
           proxy_pass http://[后台地址或者内外ip]:[端口]/;
       }

    }

  server {

    listen 443 ssl;
    server_name [minio域名];

    ssl_certificate    /etc/nginx/ssl/fullchain.pem;
    ssl_certificate_key  /etc/nginx/ssl/privkey.pem;

    location / {

        proxy_pass http://[后台地址或者内外ip]:[端口]/;
        proxy_set_header Host $host;
        proxy_set_header X-Real-IP $remote_addr;
        proxy_set_header X-Forwarded-For $proxy_add_x_forwarded_for;
        proxy_set_header X-Forwarded-Proto $scheme;
      }

    }

  # 音乐模块前台(菜单栏那个),如果没有就删掉
  server {

    listen 443 ssl;
    server_name [音乐模块前台域名];

    ssl_certificate    /etc/nginx/ssl/fullchain.pem;
    ssl_certificate_key  /etc/nginx/ssl/privkey.pem;


     location / {
         proxy_pass http://[后台地址或者内外ip]:[端口]/;
      }

    }

  server {

    listen 443 ssl;
    server_name [音乐后端域名];

    ssl_certificate    /etc/nginx/ssl/fullchain.pem;
    ssl_certificate_key  /etc/nginx/ssl/privkey.pem;

    location / {
        proxy_pass http://[后台地址或者内外ip]:[端口]/;
     }

  }

  # 按照你的需求,要啥就配啥,如一言,跟音乐模块前台不需要的就可删除对应配置
  server {
        listen 80;

        server_name [前台域名] www.[前台域名] [后台域名] [一言接口] [minio域名] [音乐前台]

        return 301 https://$host$request_uri;
    }
新建nginx.conf
vim default.conf
user  nginx;
worker_processes  auto;

error_log  /var/log/nginx/error.log notice;
pid        /var/run/nginx.pid;


events {
    worker_connections  1024;
}


http {
    include       /etc/nginx/mime.types;
    default_type  application/octet-stream;

    log_format  main  '$remote_addr - $remote_user [$time_local] "$request" '
                      '$status $body_bytes_sent "$http_referer" '
                      '"$http_user_agent" "$http_x_forwarded_for"';

    access_log  /var/log/nginx/access.log  main;

    sendfile        on;
    #tcp_nopush     on;

    keepalive_timeout  65;

     ssl_session_timeout 5m;
     ssl_ciphers ECDHE-RSA-AES128-GCM-SHA256:ECDHE:ECDH:AES:HIGH:!NULL:!aNULL:!MD5:!ADH:!RC4;
     ssl_protocols TLSv1 TLSv1.1 TLSv1.2;
     ssl_prefer_server_ciphers on;


    include /etc/nginx/conf.d/*.conf;
}
修改运行命令
多加一个 443端口
docker run --name blog-qt -d -p 80:80 -p 443:443 blog-qt
目录结构
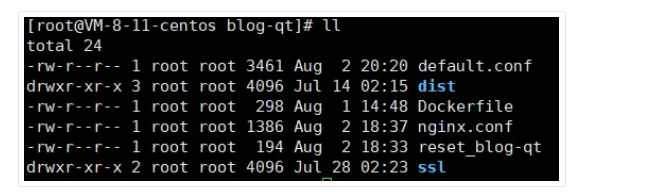
reset_blog-qt 文件可以无视,这是我自己的脚本文件.
最后
最后按照部署文档重新 build 重新 run 就可以跑起来了,注意 run 命令使用上面的 注意: 网站升级为https后,如果网站还有http的东西,就会报不安全错误,所有http链接的相关图�片将无法加载,需要把相关的请求接口跟图片路径也该为https的,所以上面也配了https的一言跟音乐后端接口等等,相关图片只能自己去数据库把http改为https了
v2-自己frp环境(成功测试)
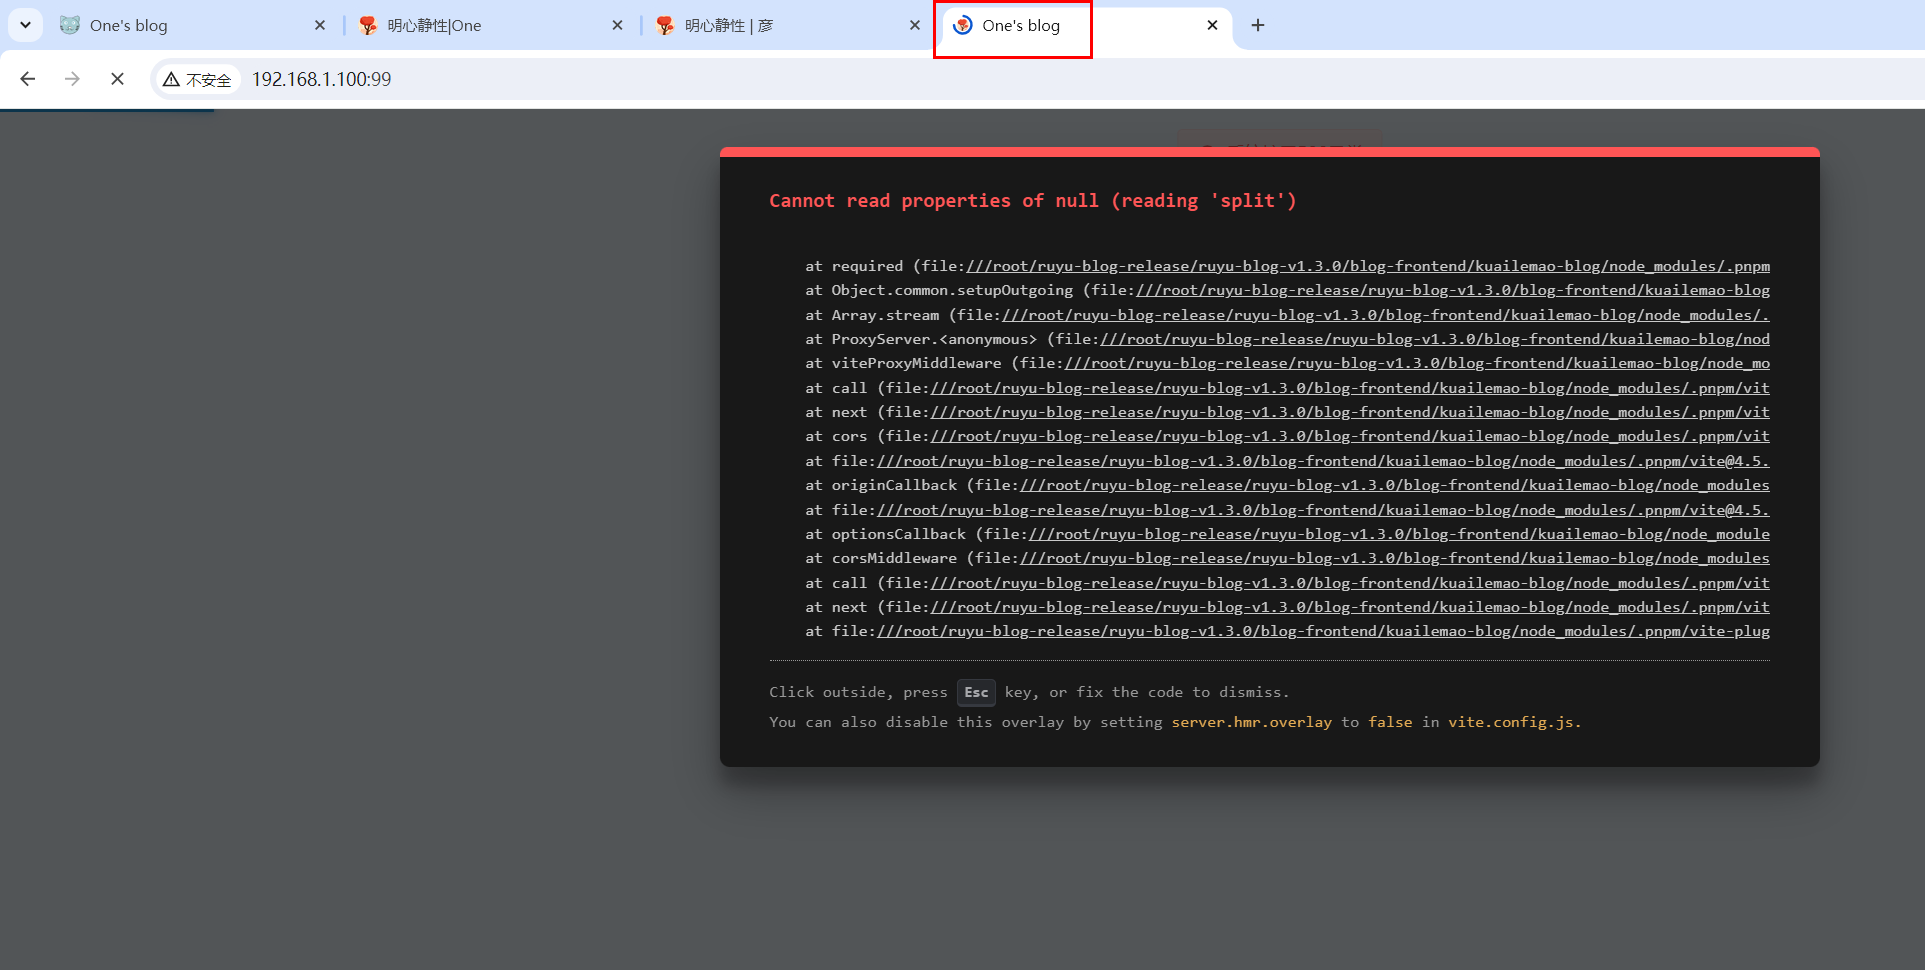
问题
这个文档作者是吧ruyu-blog部署在云服务器的,然后针对这个情况出的https升级方案。
存在的问题(关键问题)😂
我的ruyu-blog环境是:
讲本地nuc小机frp出去的,这个ngix相关证书就比较难搞了;。。。。。
那么该如何配置呢??;
背景
@全体成员 博客升级https教程:https://kuailemao.xyz/article/49
Ruyu-Blog 博客升级HTTPS
首先需要SSL证书。
讨论
方案1:ruyu-blog直接部署在ecs上(blog-qt/blog-ht自己有nginx容器的)
方案2:ruyu-blog部署在本地nuc上
ecs:nginx(单独配置的nginx)
nuc:ruyu-blog环境
个人估计,方法应该差不多:。。。。。但是还是有出入。。。。
实际配置
(1)保持本地nuc里的ruyu-blog配置不变
(2)在ecs给nginx配置https证书即可
再次把这2个证书对ecs里的来证书进行替换,测试:
重启nginx:
nginx -s reload
这里我贴一下自己ecs里的nginx配置:
以下nginx.conf配置是生产力可用的配置,亲测有效!2024年8月4日
自己ecs已安装好nginx服务:
nginx.conf配置文件:
cat /etc/nginx/nginx.conf
user root;
worker_processes auto;
error_log /var/log/nginx/error.log;
pid /run/nginx.pid;

# Load dynamic modules. See /usr/share/doc/nginx/README.dynamic.
include /usr/share/nginx/modules/*.conf;

events {
    worker_connections 1024;
}

http {
    gzip on; # 启用 gzip 压缩
    gzip_vary on; # 根据请求中的 `Accept-Encoding` 响应头决定是否启用 gzip
    gzip_proxied any; # 在所有代理请求中启用压缩
    gzip_types text/plain text/css application/json application/javascript text/xml application/xml application/xml+rss text/javascript; # 指定哪些类型的响应需要压缩
    gzip_comp_level 5; # 压缩等级(范围是 1-9,高级别意味着更好的压缩但会消耗更多 CPU 资源)
    gzip_min_length 256; # 只对超过给定长度的响应启用压缩
    log_format  main  '$remote_addr - $remote_user [$time_local] "$request" '
                      '$status $body_bytes_sent "$http_referer" '
                      '"$http_user_agent" "$http_x_forwarded_for"';

    access_log  /var/log/nginx/access.log  main;

    sendfile            on;
    tcp_nopush          on;
    tcp_nodelay         on;
    keepalive_timeout   65;
    types_hash_max_size 4096;

    include             /etc/nginx/mime.types;
    default_type        application/octet-stream;

    # Load modular configuration files from the /etc/nginx/conf.d directory.
    # See http://nginx.org/en/docs/ngx_core_module.html#include
    # for more information.
    include /etc/nginx/conf.d/*.conf;
    charset utf-8;

    # Settings for a TLS enabled server.

}
ssl证书位置:
[root@docusaurus-wiki cert]#pwd
/etc/nginx/cert
[root@docusaurus-wiki cert]#ll
total 8
-rw-rw-rw- 1 root root 2855 Aug  3 10:00 fullchain1.pem
-rw-rw-rw- 1 root root  241 Aug  3 10:00 privkey1.pem
[root@docusaurus-wiki cert]#
conf.d目录下:
[root@docusaurus-wiki conf.d]#pwd
/etc/nginx/conf.d
[root@docusaurus-wiki conf.d]#ll
total 28
-rw-r--r-- 1 root root 5252 Aug  3 14:57 blog.conf
-rw-r--r-- 1 root root 2498 Aug  3 14:15 home.conf
-rw-r--r-- 1 root root 1749 Aug  3 10:27 moments.conf
-rw-r--r-- 1 root root 1370 Aug  3 10:26 music.conf
-rw-r--r-- 1 root root 1745 Aug  3 10:23 photo.conf
-rw-r--r-- 1 root root 1404 Aug  3 09:11 wiki.conf
[root@docusaurus-wiki conf.d]#
主域名配置文件:
[root@docusaurus-wiki conf.d]#cat home.conf
    server {
        listen 80;
        server_name onedayxyy.cn www.onedayxyy.cn;

        #配置https重定向
        return 301 https://$host$request_uri;
    }


    server {
        listen       443 ssl http2;
        listen       [::]:443 ssl http2;
        server_name onedayxyy.cn www.onedayxyy.cn;

         root /root/home3.0;

         location / {
             index index.html index.htm;
         }

    # ……删除部分敏感信息
        ssl_certificate "cert/fullchain1.pem";
        ssl_certificate_key "cert/privkey1.pem";

        ssl_session_cache shared:SSL:1m;
        ssl_session_timeout  10m;
        #ssl_ciphers HIGH:!aNULL:!MD5;
        #自定义设置使用的TLS协议的类型以及加密套件(以下为配置示例,请您自行评估是否需要配置)
        #TLS协议版本越高,HTTPS通信的安全性越高,但是相较于低版本TLS协议,高版本TLS协议对浏览器的兼容性较差。
        ssl_ciphers ECDHE-RSA-AES128-GCM-SHA256:ECDHE:ECDH:AES:HIGH:!NULL:!aNULL:!MD5:!ADH:!RC4;
        ssl_protocols TLSv1.1 TLSv1.2 TLSv1.3;

        ssl_prefer_server_ciphers on;

        # Load configuration files for the default server block.
        include /etc/nginx/default.d/*.conf;

        error_page 404 /404.html;
            location = /40x.html {
        }

        error_page 500 502 503 504 /50x.html;
            location = /50x.html {
        }
    }
blog.conf配置文件:
[root@docusaurus-wiki conf.d]#cat blog.conf
    server {
        listen 80;
        server_name  blog.onedayxyy.cn;

        #配置https重定向
        return 301 https://$host$request_uri;
    }


    server {
        listen       443 ssl http2;
        listen       [::]:443 ssl http2;
        server_name blog.onedayxyy.cn;

        #root /root/home3.0;

        #location / {
        #    index index.html index.htm;
        #}


        location / {
            proxy_pass http://47.100.215.163:8080/; # 实际的后台路径
            client_max_body_size 100M;
            proxy_set_header Host $host;
            proxy_set_header X-Real-IP $remote_addr;
            proxy_set_header X-Forwarded-For $proxy_add_x_forwarded_for;
            proxy_set_header X-Forwarded-Proto $scheme;
        }

        ssl_certificate "cert/fullchain1.pem";
        ssl_certificate_key "cert/privkey1.pem";

        ssl_session_cache shared:SSL:1m;
        ssl_session_timeout  10m;
        #ssl_ciphers HIGH:!aNULL:!MD5;
        #自定义设置使用的TLS协议的类型以及加密套件(以下为配置示例,请您自行评估是否需要配置)
        #TLS协议版本越高,HTTPS通信的安全性越高,但是相较于低版本TLS协议,高版本TLS协议对浏览器的兼容性较差。
        ssl_ciphers ECDHE-RSA-AES128-GCM-SHA256:ECDHE:ECDH:AES:HIGH:!NULL:!aNULL:!MD5:!ADH:!RC4;
        ssl_protocols TLSv1.1 TLSv1.2 TLSv1.3;

        ssl_prefer_server_ciphers on;

        # Load configuration files for the default server block.
        include /etc/nginx/default.d/*.conf;

        error_page 404 /404.html;
            location = /40x.html {
        }

        error_page 500 502 503 504 /50x.html;
            location = /50x.html {
        }
    }


    server {
        listen 80;
        server_name  blogadmin.onedayxyy.cn;

        #配置https重定向
        return 301 https://$host$request_uri;
    }


    server {
        listen       443 ssl http2;
        listen       [::]:443 ssl http2;
        server_name blogadmin.onedayxyy.cn;

        #root /root/home3.0;

        #location / {
        #    index index.html index.htm;
        #}


        location / {
            proxy_pass http://47.100.215.163:8081/; # 实际的后台路径
            client_max_body_size 100M;
            proxy_set_header Host $host;
            proxy_set_header X-Real-IP $remote_addr;
            proxy_set_header X-Forwarded-For $proxy_add_x_forwarded_for;
            proxy_set_header X-Forwarded-Proto $scheme;
        }

        ssl_certificate "cert/fullchain1.pem";
        ssl_certificate_key "cert/privkey1.pem";

        ssl_session_cache shared:SSL:1m;
        ssl_session_timeout  10m;
        #ssl_ciphers HIGH:!aNULL:!MD5;
        #自定义设置使用的TLS协议的类型以及加密套件(以下为配置示例,请您自行评估是否需要配置)
        #TLS协议版本越高,HTTPS通信的安全性越高,但是相较于低版本TLS协议,高版本TLS协议对浏览器的兼容性较差。
        ssl_ciphers ECDHE-RSA-AES128-GCM-SHA256:ECDHE:ECDH:AES:HIGH:!NULL:!aNULL:!MD5:!ADH:!RC4;
        ssl_protocols TLSv1.1 TLSv1.2 TLSv1.3;

        ssl_prefer_server_ciphers on;

        # Load configuration files for the default server block.
        include /etc/nginx/default.d/*.conf;

        error_page 404 /404.html;
            location = /40x.html {
        }

        error_page 500 502 503 504 /50x.html;
            location = /50x.html {
        }
    }


    server {
        listen 80;
        server_name  minio.onedayxyy.cn;

        #配置https重定向
        return 301 https://$host$request_uri;
    }


    server {
        listen       443 ssl http2;
        listen       [::]:443 ssl http2;
        server_name minio.onedayxyy.cn;

        #root /root/home3.0;

        #location / {
        #    index index.html index.htm;
        #}


        location / {
            proxy_pass http://47.100.215.163:9000/; # 实际的后台路径
            client_max_body_size 100M;
            proxy_set_header Host $host;
            proxy_set_header X-Real-IP $remote_addr;
            proxy_set_header X-Forwarded-For $proxy_add_x_forwarded_for;
            proxy_set_header X-Forwarded-Proto $scheme;
        }

        ssl_certificate "cert/fullchain1.pem";
        ssl_certificate_key "cert/privkey1.pem";

        ssl_session_cache shared:SSL:1m;
        ssl_session_timeout  10m;
        #ssl_ciphers HIGH:!aNULL:!MD5;
        #自定义设置使用的TLS协议的类型以及加密套件(以下为配置示例,请您自行评估是否需要配置)
        #TLS协议版本越高,HTTPS通信的安全性越高,但是相较于低版本TLS协议,高版本TLS协议对浏览器的兼容性较差。
        ssl_ciphers ECDHE-RSA-AES128-GCM-SHA256:ECDHE:ECDH:AES:HIGH:!NULL:!aNULL:!MD5:!ADH:!RC4;
        ssl_protocols TLSv1.1 TLSv1.2 TLSv1.3;

        ssl_prefer_server_ciphers on;

        # Load configuration files for the default server block.
        include /etc/nginx/default.d/*.conf;

        error_page 404 /404.html;
            location = /40x.html {
        }

        error_page 500 502 503 504 /50x.html;
            location = /50x.html {
        }
    }
测试(完美)
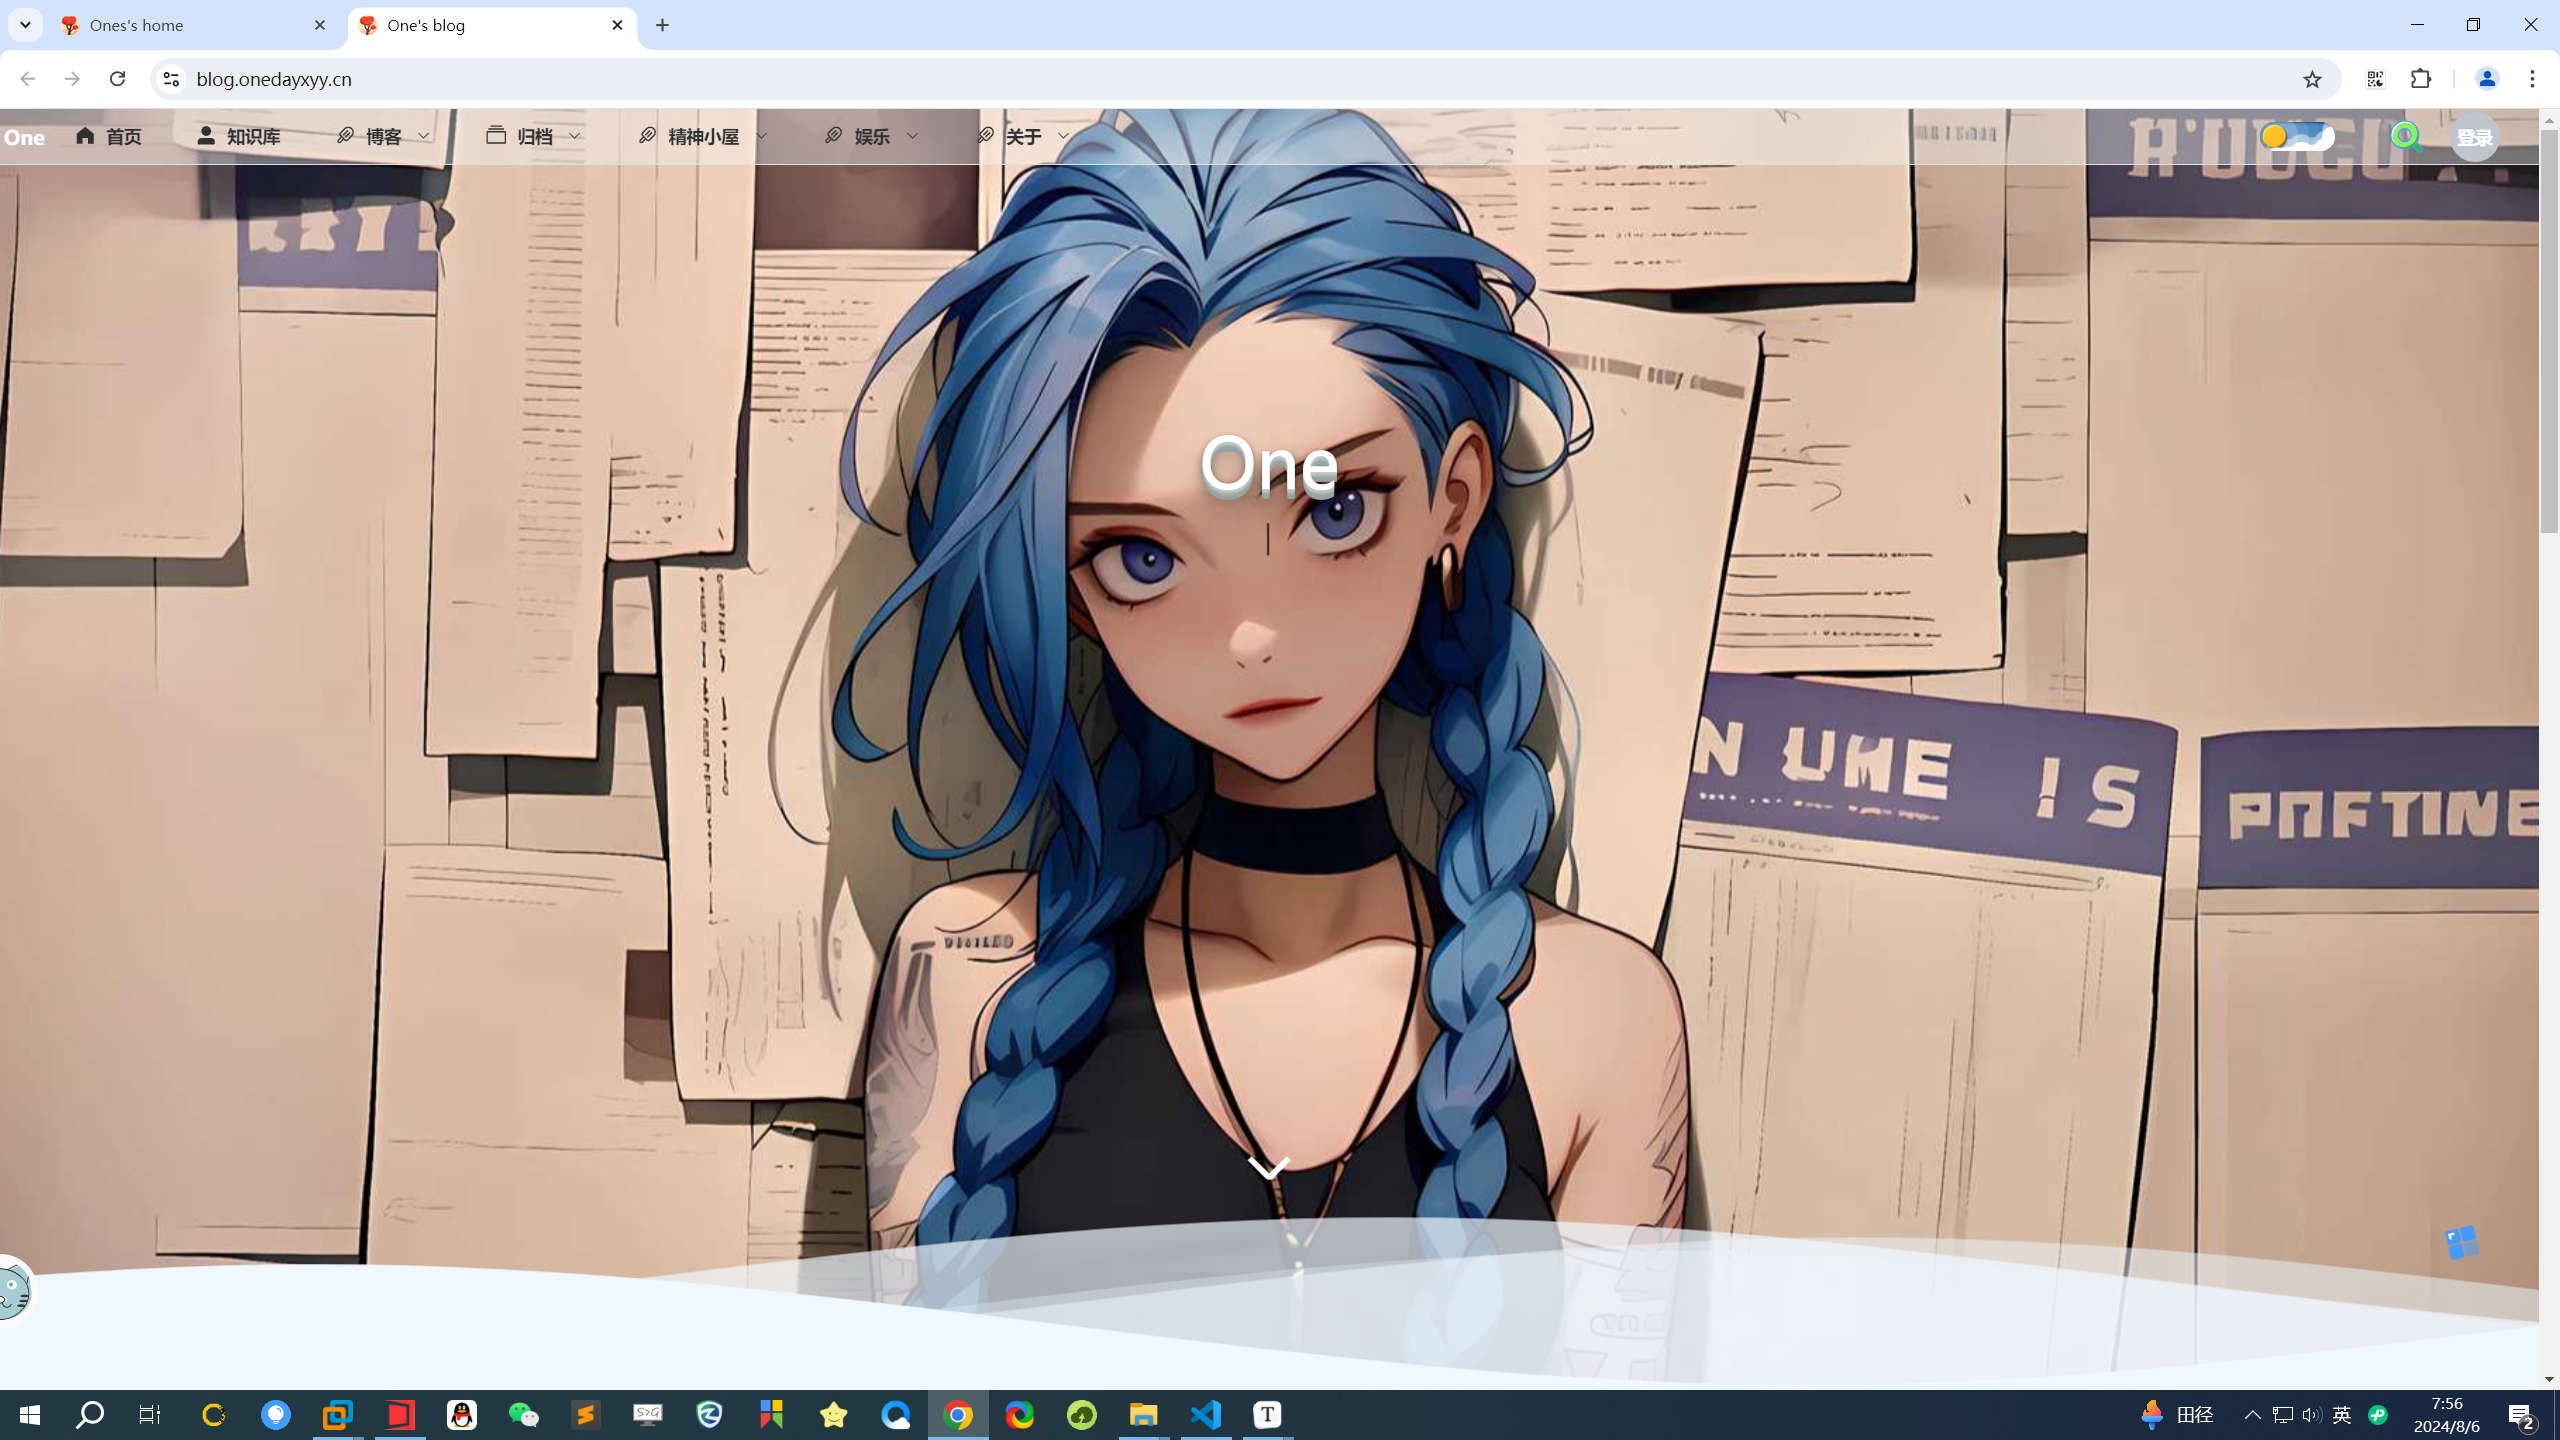
注意
您在修改完mysql密码后,对应的后端application.yml里内容变了,因此需要重新打包镜像的哦,特别注意下。