2、Longhorn存储
Longhorn存储

目录
[TOC]
1、Longhorn
前面我们学习了本地存储、NFS共享存储,除了这些存储类型之外,还有一个块存储,同样为 Kubernetes 提供块存储的方案有很多,比如 Ceph RBD,今天我们为大家介绍的是 Rancher 开源的一款 Kubernetes 的云原生分布式块存储方案 - Longhorn。
使用 Longhorn,可以:
- 使用 Longhorn 卷作为 Kubernetes 集群中分布式有状态应用程序的持久存储
- 将你的块存储分区为 Longhorn 卷,以便你可以在有或没有云提供商的情况下使用 Kubernetes 卷
- 跨多个节点和数据中心复制块存储以提高可用性
- 将备份数据存储在 NFS 或 AWS S3 等外部存储中
- 创建跨集群灾难恢复卷,以便可以从第二个 Kubernetes 集群中的备份中快速恢复主 Kubernetes 集群中的数据
- 调度一个卷的快照,并将备份调度到 NFS 或 S3 兼容的二级存储
- 从备份还原卷
- 不中断持久卷的情况下升级 Longhorn
Longhorn 还带有独立的 UI,可以使用 Helm、kubectl 或 Rancher 应用程序目录进行安装。
2、架构
Longhorn 为每个卷创建一个专用的存储控制器,并在多个节点上存储的多个副本之间同步复制该卷。Longhorn 在整体上分为两层:数据平面和控制平面,Longhorn Engine 是存储控制器,对应数据平面,Longhorn Manager 对应控制平面。
Longhorn Manager 会以 DaemonSet 的形式在 Longhorn 集群中的每个节点上运行,它负责在 Kubernetes 集群中创建和管理卷,并处理来自 UI 或 Kubernetes 卷插件的 API 调用,它是遵循 Kubernetes 控制器模式。
Longhorn Manager 通过与 Kubernetes APIServer 通信来创建新的 Longhorn volume CRD,然后 Longhorn Manager 会一直 Watch APIServer 的响应,当它看到发现创建了一个新的 Longhorn volume CRD 时,Longhorn Manager 就会去创建一个新的对应卷。当 Longhorn Manager 被要求创�建一个卷时,它会在卷所连接的节点上创建一个 Longhorn Engine 实例,并在每个将放置副本的节点上创建一个副本,副本应放置在不同的主机上以确保最大可用性。副本的多条数据路径确保了 Longhorn 卷的高可用性,即使某个副本或引擎出现问题,也不会影响所有副本或 Pod 对卷的访问。
Longhorn Engine 始终与使用 Longhorn 卷的 Pod 在同一节点中运行,它在存储在多个节点上的多个副本之间同步复制卷。
如下图所示,描述了 Longhorn 卷、Longhorn Engine、副本实例和磁盘之间的读/写数据流:
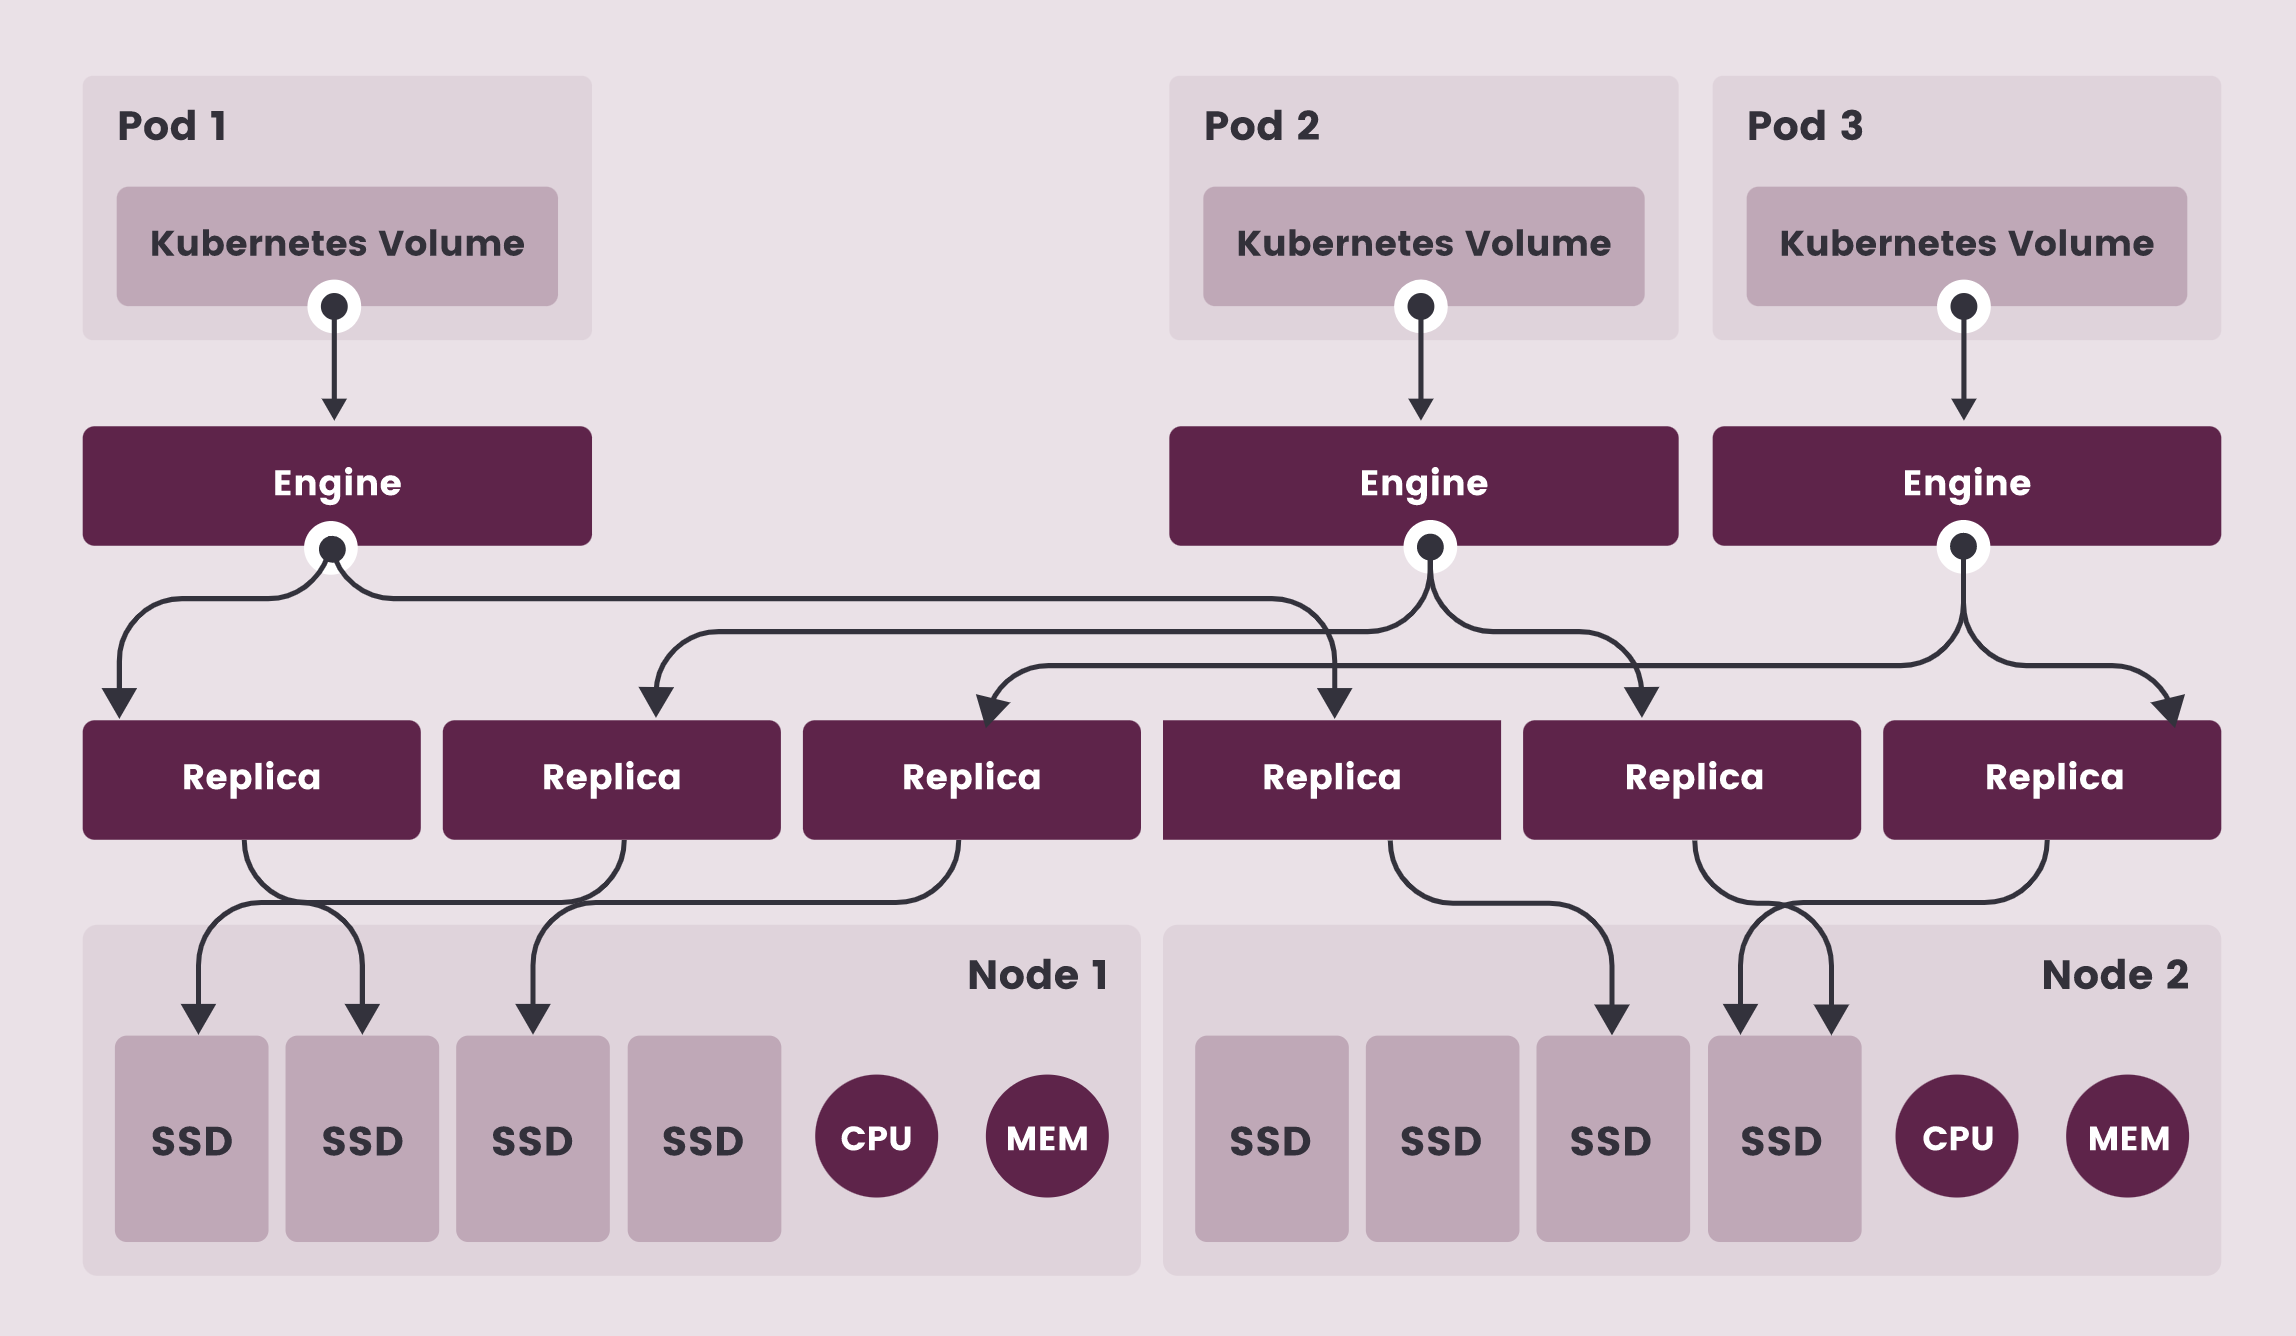
- 上图中有3个 Longhorn 卷实例
- 每个卷都有一个专用控制器,称为 Longhorn Engine,并作为 Linux 进程运行
- 每个 Longhorn 卷有两个副本,每个副本也是一个 Linux 进程
- 图中的箭头表示卷、控制器实例、副本实例和磁盘之间的读/写数据流
- 通过为每个卷创建单独的 Longhorn Engine,如果一个控制器发生故障,其他卷的功能不会受到影响

在 Longhorn 中,每个 Engine 只需要服务一个卷,简化了存储控制器的设计,由于控制器软件的故障域与单个卷隔离,因此控制器崩溃只会影响一个卷。由于 Longhorn Engine 足够简单和轻便,因此我们可以创建多达 100000 个独立的 Engine,Kubernetes 去调度这些独立的 Engine,从一组共享的磁盘中提取资源,并与 Longhorn 合作形成一个弹性的分布式块存储系统。
因为每个卷都有自己的控制器,所以每个卷的控制器和副本实例也可以升级,而不会导致 IO 操作明显中断。Longhorn 可以创建一个长时间运行的 job 任务来协调所有卷的升级,而不会中断系统的运行。
Longhorn 是通过 CSI 驱动在 Kubernetes 中管理的,CSI 驱动通过调用 Longhorn 来创建卷,为 Kubernetes 工作负载创建持久性数据,CSI 插件可以让我们创建、删除、附加、分离、挂载卷,并对卷进行快照操作,Kubernetes 集群内部使用 CSI 接口与Longhorn CSI 驱动进行通信,而 Longhorn CSI 驱动是通过使用 Longhorn API 与 Longhorn Manager 进行通信。
此外 Longhorn 还提供一个 UI 界面程序,通过 Longhorn API 与 Longhorn Manager 进行交互,通过 Longhorn UI 可以管理快照、备份、节点和磁盘等,此外,集群工作节点的空间使用情况还可以通过 Longhorn UI 查看。
3、安装
💘 实战:Longhorn安装(测试成功)-2022.8.4
实验环境
实验环境:
1、win10,vmwrokstation虚机;
2、k8s集群:3台centos7.6 1810虚机,1个master节点,2个node节点
   k8s version:v1.22.2
   containerd://1.5.5
实验软件
链接:https://pan.baidu.com/s/1Ou2WCWmsqOFUSLmOZ2orVQ?pwd=lda8
提取码:lda8
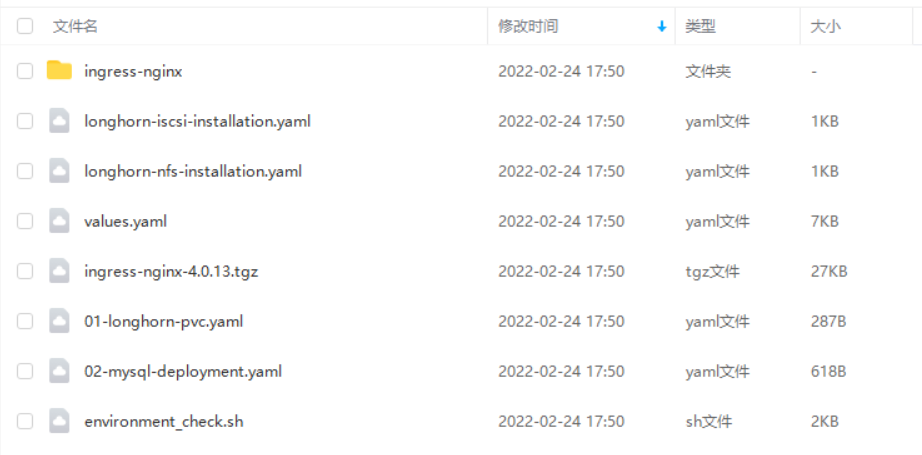
2022.2.23-46.Longhorn存储-实验代码
前言
要在 Kubernetes 集群上安装 Longhorn,需要集群的每个节点都必须满足以下要求:
- 与 Kubernetes 兼容的容器运行时(Docker v1.13+、containerd v1.3.7+ 等)
- Kubernetes v1.18+
- 安装
open-iscsi,并且iscsid守护程序在所有节点上运行,这是必要的,因为 Longhorn 依赖主机上的iscsiadm为 Kubernetes 提供持久卷 - RWX 支持需要每个节点上都安装 NFSv4 客户端
- 宿主机文件系统支持
file extents功能来存储数据,目前我们支持:ext4 与 XFS - bash、curl、findmnt、grep、awk、blkid、lsblk 等工具必须安装
Mount propagation必须启用:它允许将一个容器挂载的卷与同一 pod 中的其他容器共享,甚至可以与同一节点上的其他 pod 共享- Longhorn workloads 必须能够以 root 身份运行才能正确部署和操作 Longhorn。
1.依赖
(1)验证环境
为了验证这些环境要求,Longhorn 官方提供了一个脚本来帮助我们进行检查,执行该脚本需要在本地安装 jq 工具,执行下面的命令即可运行脚本:(这个可以在后续安装完成后测试)
[root@master1 Longhorn]#yum install -y jq

➜ curl -sSfL https://raw.githubusercontent.com/longhorn/longhorn/v1.2.3/scripts/environment_check.sh | bash
daemonset.apps/longhorn-environment-check created
waiting for pods to become ready (0/2)
waiting for pods to become ready (0/2)
all pods ready (2/2)

  MountPropagation is enabled!

cleaning up...
daemonset.apps "longhorn-environment-check" deleted
clean up complete
如果没有检查通过会给出相关的提示信息。
(2)安装open-iscsi
- yum方式安装open-iscsi
要安装 open-iscsi,可以直接使用下面的命令即可:
# apt-get install open-iscsi  # Debian 和 Ubuntu 系统命令
➜ yum install -y iscsi-initiator-utils
- yaml方式安装open-iscsi(本次使用这个方式)
或者可以使用yaml文件部署:
Longhorn 官方还为我们还提供了一个 iscsi 安装程序,可以更轻松地自动安装 open-iscsi:
➜ kubectl apply -f https://raw.githubusercontent.com/longhorn/longhorn/v1.2.3/deploy/prerequisite/longhorn-iscsi-installation.yaml
部署完成后,运行以下命令来检查安装程序的 pod 状态:
➜ kubectl get pod | grep longhorn-iscsi-installation #注意下:这里只有node节点上会有,master节点上是没的。
longhorn-iscsi-installation-49hd7   1/1     Running   0          21m
longhorn-iscsi-installation-pzb7r   1/1     Running   0          39m
也可以通过以下命令查看日志,查看安装结果:
➜ kubectl logs longhorn-iscsi-installation-pzb7r -c iscsi-installation
...
Installed:
  iscsi-initiator-utils.x86_64 0:6.2.0.874-7.amzn2

Dependency Installed:
  iscsi-initiator-utils-iscsiuio.x86_64 0:6.2.0.874-7.amzn2

Complete!
Created symlink from /etc/systemd/system/multi-user.target.wants/iscsid.service to /usr/lib/systemd/system/iscsid.service.
iscsi install successfully
(3)安装NFSv4 客户端
同样要安装 NFSv4 客户端,可以直接使用下面的命令一键安装:
# apt-get install nfs-common  #  Debian 和 Ubuntu 系统命令
➜ yum install nfs-utils
- 或者可以使用yaml文件部署:(本次使用这个方式)
同样 Longhorn 官方也提供了一个 nfs 客户端安装程序,可以更轻松地自动安装 nfs-client:
➜ kubectl apply -f https://raw.githubusercontent.com/longhorn/longhorn/v1.2.3/deploy/prerequisite/longhorn-nfs-installation.yaml
部署完成后,运行以下命令来检查安装程序的 pod 状态:
➜ kubectl get pod | grep longhorn-nfs-installation #注意下:这里只有node节点上会有,master节点上是没的。
NAME                                  READY   STATUS    RESTARTS   AGE
longhorn-nfs-installation-t2v9v   1/1     Running   0          143m
longhorn-nfs-installation-7nphm   1/1     Running   0          143m
也可以通过以下命令查看日志,��查看安装结果:
➜ kubectl logs longhorn-nfs-installation-t2v9v -c nfs-installation
...
nfs install successfully
相关依赖环境准备好过后就可以开始安装 Longhorn 了。
注意事项
如果使用yaml文件在k8s节点上安装上面iscsi-initiator-utils和nfs-utils软件时,使用这个yaml文件部署还是非常方便的,因为节点数越多使用这个效果就越明显。
记得要改下这2个yaml里镜像仓库地址
image: registry.aliyun.comcs/k8sxio/pause:3.5

完成,继续进行下一步。
2.部署
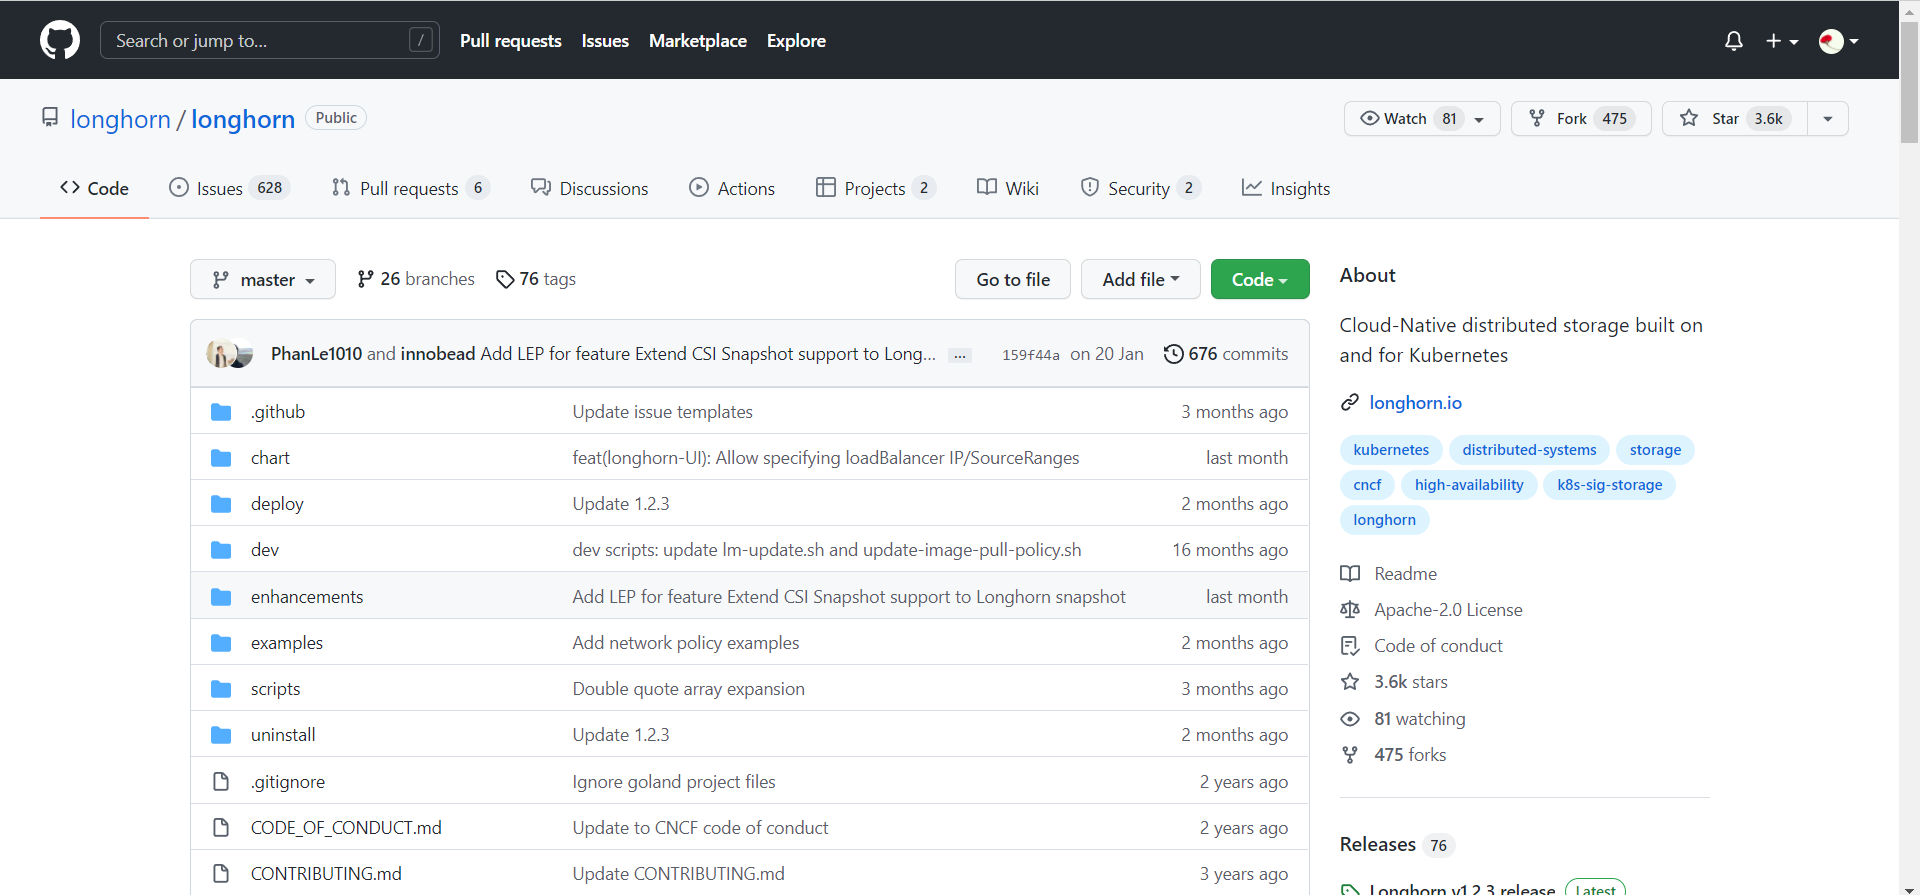
- loghorn github地址
https://github.com/longhorn/longhorn
官方支持使用 Rancher Catalog 应用、kubectl 与 helm 三种方式来进行安装,同样这里我们选择使用 helm 进行安装。
(1)添加 longhorn 的 chart 仓库
首先添加 longhorn 的 chart 仓库:
[root@master1 ~]#helm repo add longhorn https://charts.longhorn.io
[root@master1 ~]#helm repo update
(2)获取默认的 values 文件
然后可以根据自己的实际场景定制 values 文件,可以通过下面的命令获取默认的 values 文件:
➜ curl -Lo values.yaml https://raw.githubusercontent.com/longhorn/charts/master/charts/longhorn/values.yaml
然后可以修改 values 文件中的配置。
longhorn 推荐单独挂盘作为存储使用,这里作为测试直接使用默认的 /var/lib/longhorn 目录。
- 我这里直接下载原value.yaml文件然后进行编辑:
#wget https://raw.githubusercontent.com/longhorn/charts/master/charts/longhorn/values.yaml
特别注意:一下yaml文件是上次实验时的全部配置,小伙伴在用helm安装时,一定要在自己下载的helm包里修改相应配置即可:
需要修改的4处配置如下:
……
persistence:
defaultClass: true
defaultFsType: ext4
defaultClassReplicaCount: 2 #修改点1:这里修改为2,因为我们是2个node节点
……
ingress: #修改点2:这里添加ingress配置信息
## Set to true to enable ingress record generation
enabled: true
## Add ingressClassName to the Ingress
## Can replace the kubernetes.io/ingress.class annotation on v1.18+
ingressClassName: nginx
host: longhorn.k8s.local
path: /
……
annotations:
nginx.ingress.kubernetes.io/proxy-body-size: 10000m #修改点3:添加nginx的annotations信息
# kubernetes.io/ingress.class: nginx
# kubernetes.io/tls-acme: true
……
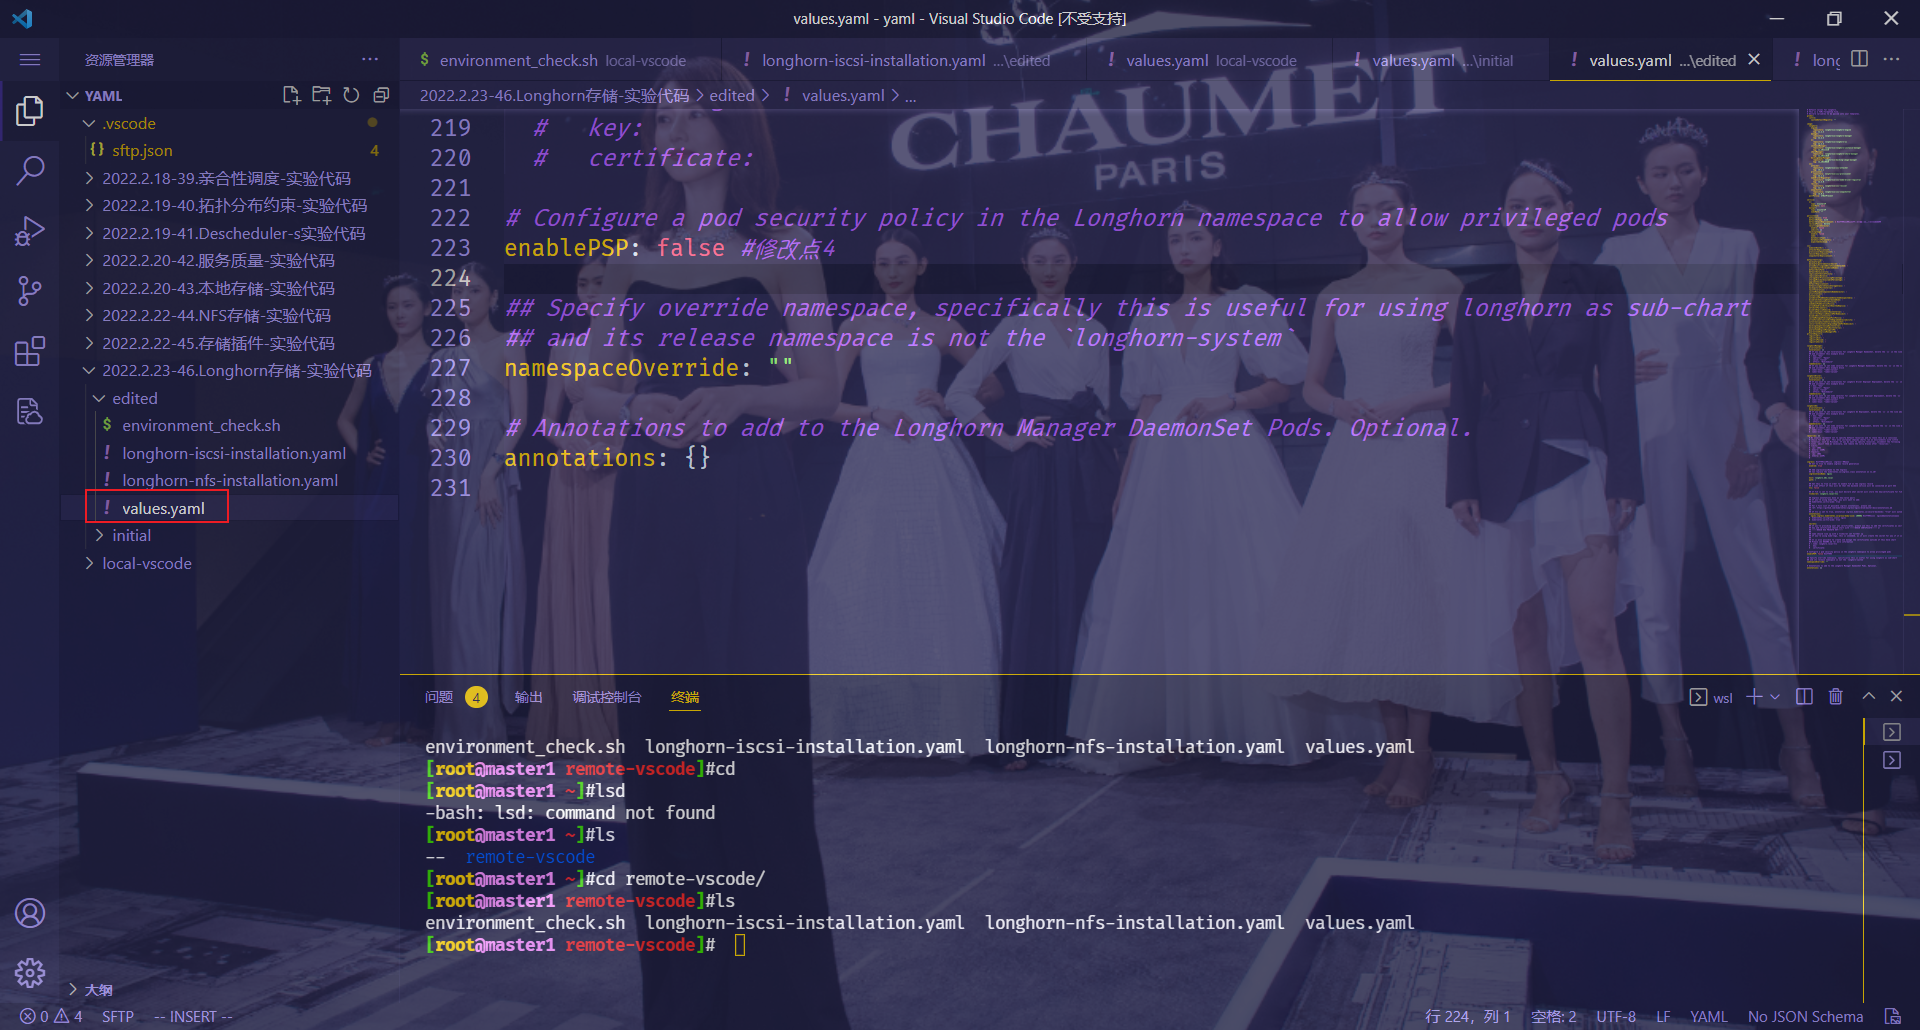
# Configure a pod security policy in the Longhorn namespace to allow privileged pods
enablePSP: false #修改点4
……
全部配置:
# Default values for longhorn.
# This is a YAML-formatted file.
# Declare variables to be passed into your templates.
global:
  cattle:
    systemDefaultRegistry: ""

image:
  longhorn:
    engine:
      repository: longhornio/longhorn-engine
      tag: v1.2.3
    manager:
      repository: longhornio/longhorn-manager
      tag: v1.2.3
    ui:
      repository: longhornio/longhorn-ui
      tag: v1.2.3
    instanceManager:
      repository: longhornio/longhorn-instance-manager
      tag: v1_20211210
    shareManager:
      repository: longhornio/longhorn-share-manager
      tag: v1_20211020
    backingImageManager:
      repository: longhornio/backing-image-manager
      tag: v2_20210820
  csi:
    attacher:
      repository: longhornio/csi-attacher
      tag: v3.2.1
    provisioner:
      repository: longhornio/csi-provisioner
      tag: v2.1.2
    nodeDriverRegistrar:
      repository: longhornio/csi-node-driver-registrar
      tag: v2.3.0
    resizer:
      repository: longhornio/csi-resizer
      tag: v1.2.0
    snapshotter:
      repository: longhornio/csi-snapshotter
      tag: v3.0.3
  pullPolicy: IfNotPresent

service:
  ui:
    type: ClusterIP
    nodePort: null
  manager:
    type: ClusterIP
    nodePort: ""

persistence:
  defaultClass: true
  defaultFsType: ext4
  defaultClassReplicaCount: 2 #修改点1:这里修改为2,因为我们是2个node节点
  reclaimPolicy: Delete
  recurringJobSelector:
    enable: false
    jobList: []
  backingImage:
    enable: false
    name: ~
    dataSourceType: ~
    dataSourceParameters: ~
    expectedChecksum: ~

csi:
  kubeletRootDir: ~
  attacherReplicaCount: ~
  provisionerReplicaCount: ~
  resizerReplicaCount: ~
  snapshotterReplicaCount: ~

defaultSettings:
  backupTarget: ~
  backupTargetCredentialSecret: ~
  allowRecurringJobWhileVolumeDetached: ~
  createDefaultDiskLabeledNodes: ~
  defaultDataPath: ~
  defaultDataLocality: ~
  replicaSoftAntiAffinity: ~
  replicaAutoBalance: ~
  storageOverProvisioningPercentage: ~
  storageMinimalAvailablePercentage: ~
  upgradeChecker: ~
  defaultReplicaCount: ~
  defaultLonghornStaticStorageClass: ~
  backupstorePollInterval: ~
  taintToleration: ~
  systemManagedComponentsNodeSelector: ~
  priorityClass: ~
  autoSalvage: ~
  autoDeletePodWhenVolumeDetachedUnexpectedly: ~
  disableSchedulingOnCordonedNode: ~
  replicaZoneSoftAntiAffinity: ~
  nodeDownPodDeletionPolicy: ~
  allowNodeDrainWithLastHealthyReplica: ~
  mkfsExt4Parameters: ~
  disableReplicaRebuild: ~
  replicaReplenishmentWaitInterval: ~
  concurrentReplicaRebuildPerNodeLimit: ~
  disableRevisionCounter: ~
  systemManagedPodsImagePullPolicy: ~
  allowVolumeCreationWithDegradedAvailability: ~
  autoCleanupSystemGeneratedSnapshot: ~
  concurrentAutomaticEngineUpgradePerNodeLimit: ~
  backingImageCleanupWaitInterval: ~
  backingImageRecoveryWaitInterval: ~
  guaranteedEngineManagerCPU: ~
  guaranteedReplicaManagerCPU: ~
privateRegistry:
  registryUrl: ~
  registryUser: ~
  registryPasswd: ~
  registrySecret: ~

longhornManager:
  priorityClass: ~
  tolerations: []
  ## If you want to set tolerations for Longhorn Manager DaemonSet, delete the `[]` in the line above
  ## and uncomment this example block
  # - key: "key"
  #   operator: "Equal"
  #   value: "value"
  #   effect: "NoSchedule"
  nodeSelector: {}
  ## If you want to set node selector for Longhorn Manager DaemonSet, delete the `{}` in the line above
  ## and uncomment this example block
  #  label-key1: "label-value1"
  #  label-key2: "label-value2"

longhornDriver:
  priorityClass: ~
  tolerations: []
  ## If you want to set tolerations for Longhorn Driver Deployer Deployment, delete the `[]` in the line above
  ## and uncomment this example block
  # - key: "key"
  #   operator: "Equal"
  #   value: "value"
  #   effect: "NoSchedule"
  nodeSelector: {}
  ## If you want to set node selector for Longhorn Driver Deployer Deployment, delete the `{}` in the line above
  ## and uncomment this example block
  #  label-key1: "label-value1"
  #  label-key2: "label-value2"

longhornUI:
  priorityClass: ~
  tolerations: []
  ## If you want to set tolerations for Longhorn UI Deployment, delete the `[]` in the line above
  ## and uncomment this example block
  # - key: "key"
  #   operator: "Equal"
  #   value: "value"
  #   effect: "NoSchedule"
  nodeSelector: {}
  ## If you want to set node selector for Longhorn UI Deployment, delete the `{}` in the line above
  ## and uncomment this example block
  #  label-key1: "label-value1"
  #  label-key2: "label-value2"

resources: {}
  # We usually recommend not to specify default resources and to leave this as a conscious
  # choice for the user. This also increases chances charts run on environments with little
  # resources, such as Minikube. If you do want to specify resources, uncomment the following
  # lines, adjust them as necessary, and remove the curly braces after 'resources:'.
  # limits:
  #  cpu: 100m
  #  memory: 128Mi
  # requests:
  #  cpu: 100m
  #  memory: 128Mi
  #

ingress: #修改点2:这里添加ingress配置信息
  ## Set to true to enable ingress record generation
  enabled: true

  ## Add ingressClassName to the Ingress
  ## Can replace the kubernetes.io/ingress.class annotation on v1.18+
  ingressClassName: nginx

  host: longhorn.k8s.local
  path: /

  ## Set this to true in order to enable TLS on the ingress record
  ## A side effect of this will be that the backend service will be connected at port 443
  tls: false

  ## If TLS is set to true, you must declare what secret will store the key/certificate for TLS
  tlsSecret: longhorn.local-tls

  ## Ingress annotations done as key:value pairs
  ## If you're using kube-lego, you will want to add:
  ## kubernetes.io/tls-acme: true
  ##
  ## For a full list of possible ingress annotations, please see
  ## ref: https://github.com/kubernetes/ingress-nginx/blob/master/docs/annotations.md
  ##
  ## If tls is set to true, annotation ingress.kubernetes.io/secure-backends: "true" will automatically be set
  annotations:
    nginx.ingress.kubernetes.io/proxy-body-size: 10000m #修改点3:添加nginx的annotations信息
  #  kubernetes.io/ingress.class: nginx
  #  kubernetes.io/tls-acme: true

  secrets:
  ## If you're providing your own certificates, please use this to add the certificates as secrets
  ## key and certificate should start with -----BEGIN CERTIFICATE----- or
  ## -----BEGIN RSA PRIVATE KEY-----
  ##
  ## name should line up with a tlsSecret set further up
  ## If you're using kube-lego, this is unneeded, as it will create the secret for you if it is not set
  ##
  ## It is also possible to create and manage the certificates outside of this helm chart
  ## Please see README.md for more information
  # - name: longhorn.local-tls
  #   key:
  #   certificate:

# Configure a pod security policy in the Longhorn namespace to allow privileged pods
enablePSP: false #修改点4

## Specify override namespace, specifically this is useful for using longhorn as sub-chart
## and its release namespace is not the `longhorn-system`
namespaceOverride: ""

# Annotations to add to the Longhorn Manager DaemonSet Pods. Optional.
annotations: {}
注意:
因为老师这里用到了Ingress nginx,so我要重新部署下这个ingress nginx,然后才开始安装longhorn,尽可能地和老师的步骤保持一致。
具体如何安装ingress-nginx,请看我的另一篇文章:https://blog.csdn.net/weixin_39246554/article/details/122283914

使用一个案例测试ingress-nginx安装成功后,我们继续进行下一步。
(3)安装
然后执行下面的命令一键安装 Longhorn:
➜ helm upgrade --install longhorn longhorn/longhorn --namespace longhorn-system --create-namespace -f values.yaml
NAME: longhorn
LAST DEPLOYED: Sun Feb 20 16:14:05 2022
NAMESPACE: longhorn-system
STATUS: deployed
REVISION: 1
TEST SUITE: None
NOTES:
Longhorn is now installed on the cluster!

Please wait a few minutes for other Longhorn components such as CSI deployments, Engine Images, and Instance Managers to be initialized.

Visit our documentation at https://longhorn.io/docs/
记得做一下ingress nginx的域名解析
#在自己pc笔记本上做下域名解析:C:\WINDOWS\System32\drivers\etc\hosts
172.29.9.51 longhorn.k8s.local
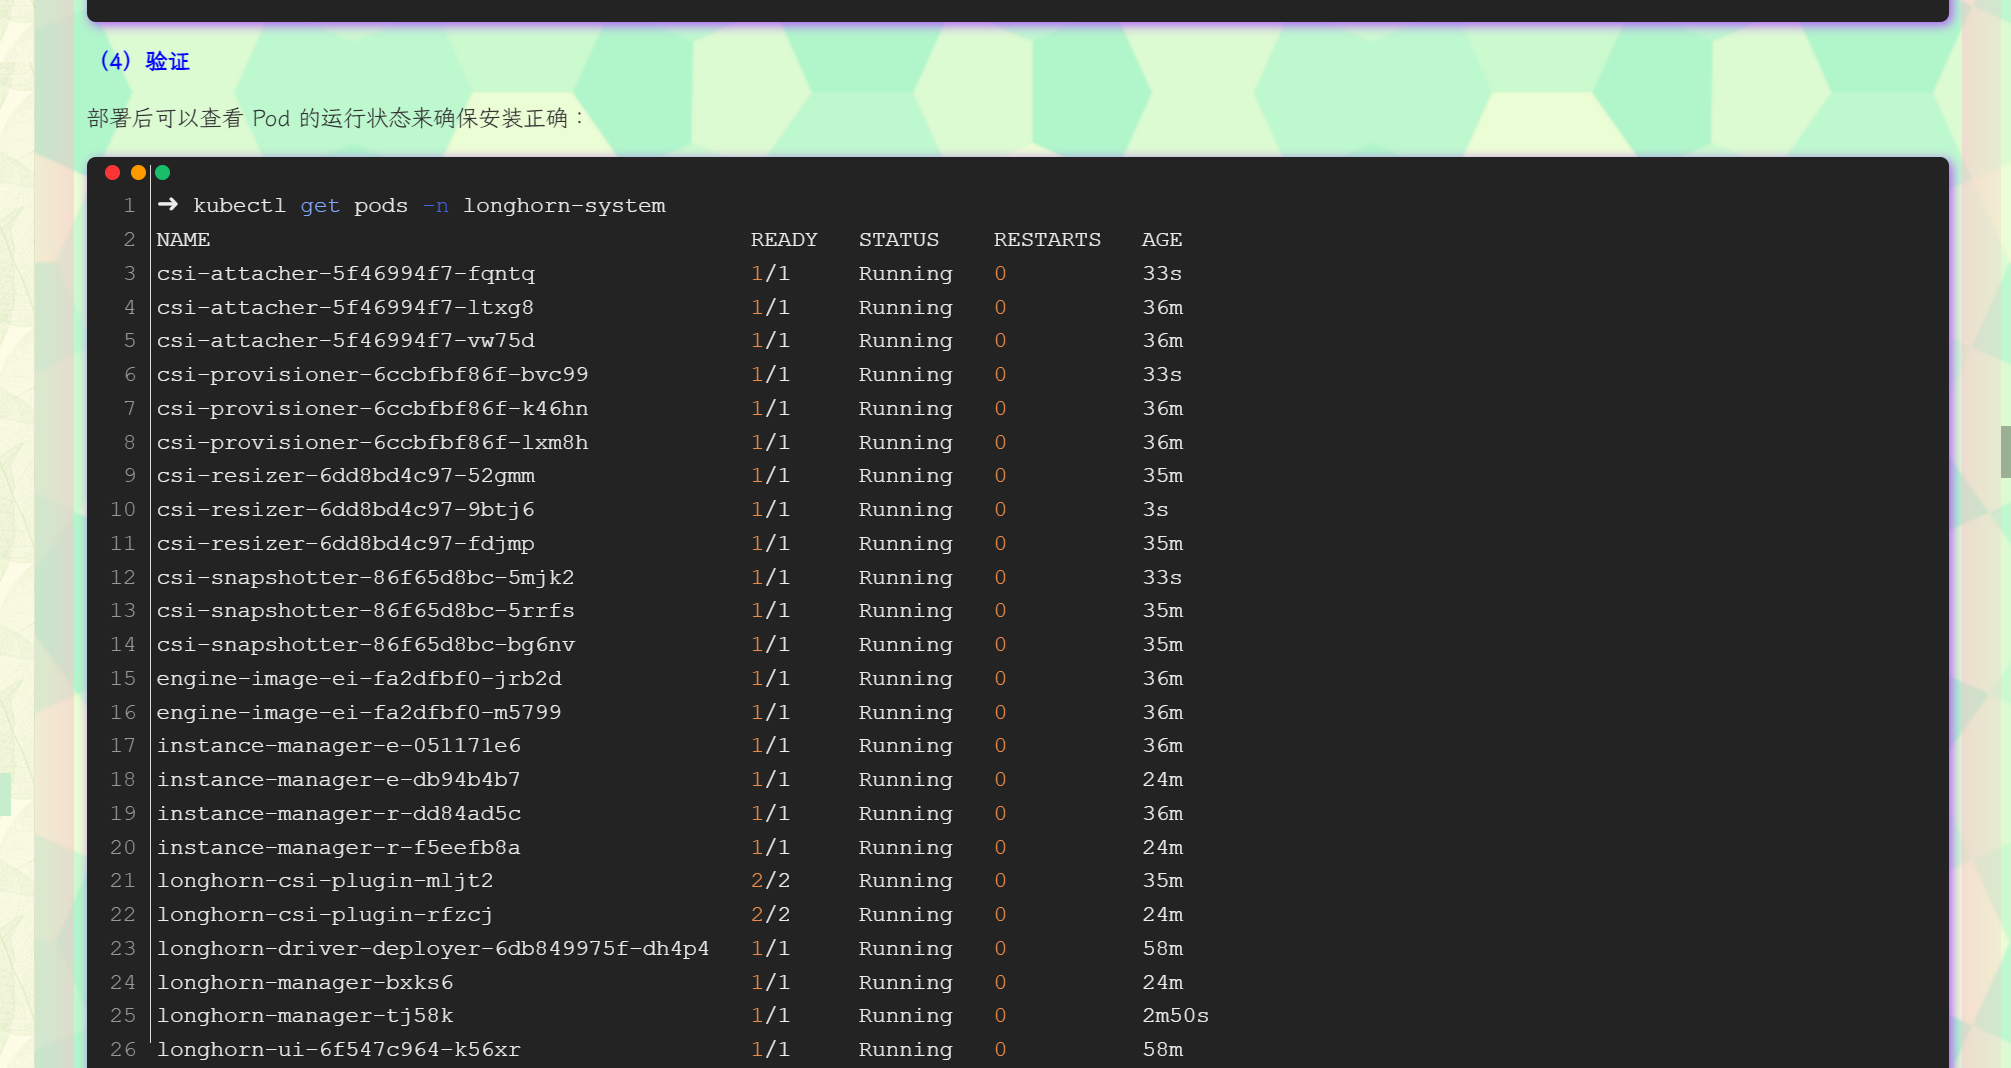
(4)验证
部署后可以查看 Pod 的运行状态来确保安装正确:
➜ kubectl get pods -n longhorn-system
NAME                                        READY   STATUS    RESTARTS   AGE
csi-attacher-5f46994f7-fqntq                1/1     Running   0          33s
csi-attacher-5f46994f7-ltxg8                1/1     Running   0          36m
csi-attacher-5f46994f7-vw75d                1/1     Running   0          36m
csi-provisioner-6ccbfbf86f-bvc99            1/1     Running   0          33s
csi-provisioner-6ccbfbf86f-k46hn            1/1     Running   0          36m
csi-provisioner-6ccbfbf86f-lxm8h            1/1     Running   0          36m
csi-resizer-6dd8bd4c97-52gmm                1/1     Running   0          35m
csi-resizer-6dd8bd4c97-9btj6                1/1     Running   0          3s
csi-resizer-6dd8bd4c97-fdjmp                1/1     Running   0          35m
csi-snapshotter-86f65d8bc-5mjk2             1/1     Running   0          33s
csi-snapshotter-86f65d8bc-5rrfs             1/1     Running   0          35m
csi-snapshotter-86f65d8bc-bg6nv             1/1     Running   0          35m
engine-image-ei-fa2dfbf0-jrb2d              1/1     Running   0          36m
engine-image-ei-fa2dfbf0-m5799              1/1     Running   0          36m
instance-manager-e-051171e6                 1/1     Running   0          36m
instance-manager-e-db94b4b7                 1/1     Running   0          24m
instance-manager-r-dd84ad5c                 1/1     Running   0          36m
instance-manager-r-f5eefb8a                 1/1     Running   0          24m
longhorn-csi-plugin-mljt2                   2/2     Running   0          35m
longhorn-csi-plugin-rfzcj                   2/2     Running   0          24m
longhorn-driver-deployer-6db849975f-dh4p4   1/1     Running   0          58m
longhorn-manager-bxks6                      1/1     Running   0          24m
longhorn-manager-tj58k                      1/1     Running   0          2m50s
longhorn-ui-6f547c964-k56xr                 1/1     Running   0          58m
- 由于上面安装的时候我们添加了 Ingress 支持,所以可以通过配置的域名去访问 Longhorn UI:
➜ kubectl get ingress  -n longhorn-system
NAME               CLASS   HOSTS                ADDRESS         PORTS   AGE
longhorn-ingress   nginx   longhorn.k8s.local   172.29.9.51   80      4m11s
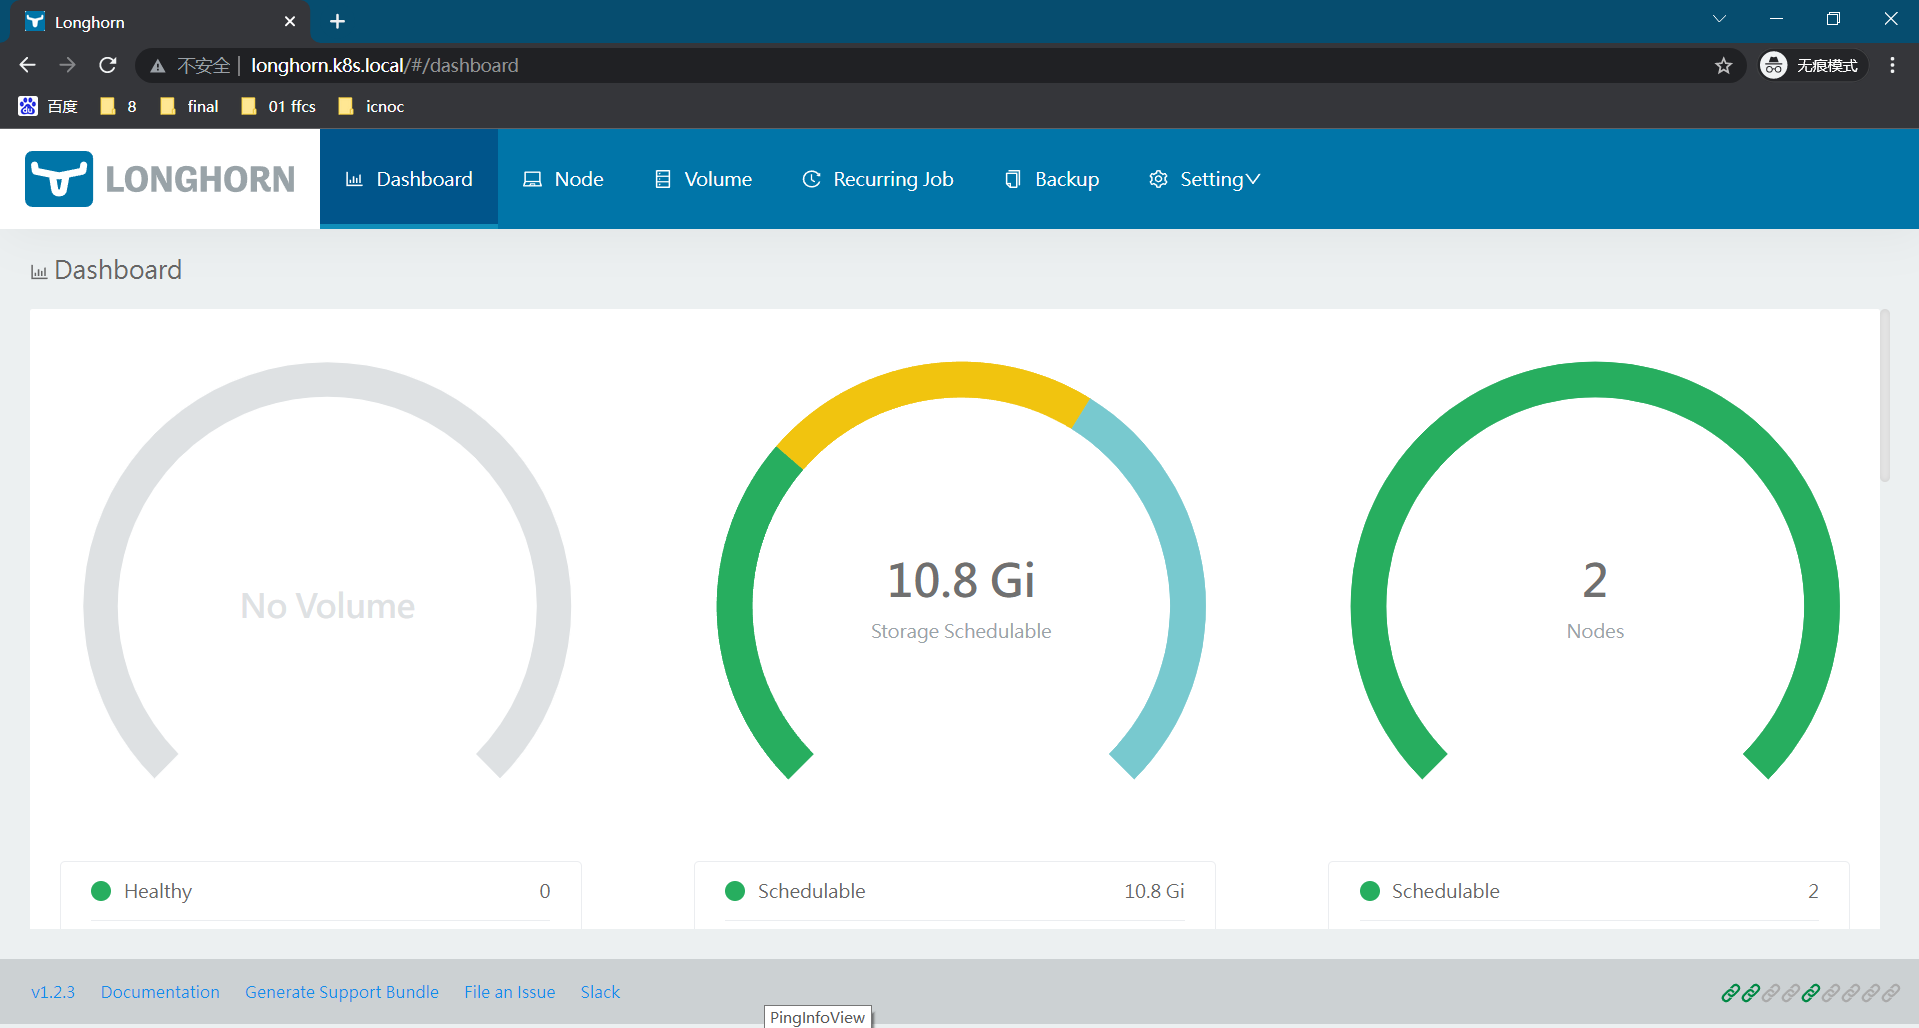
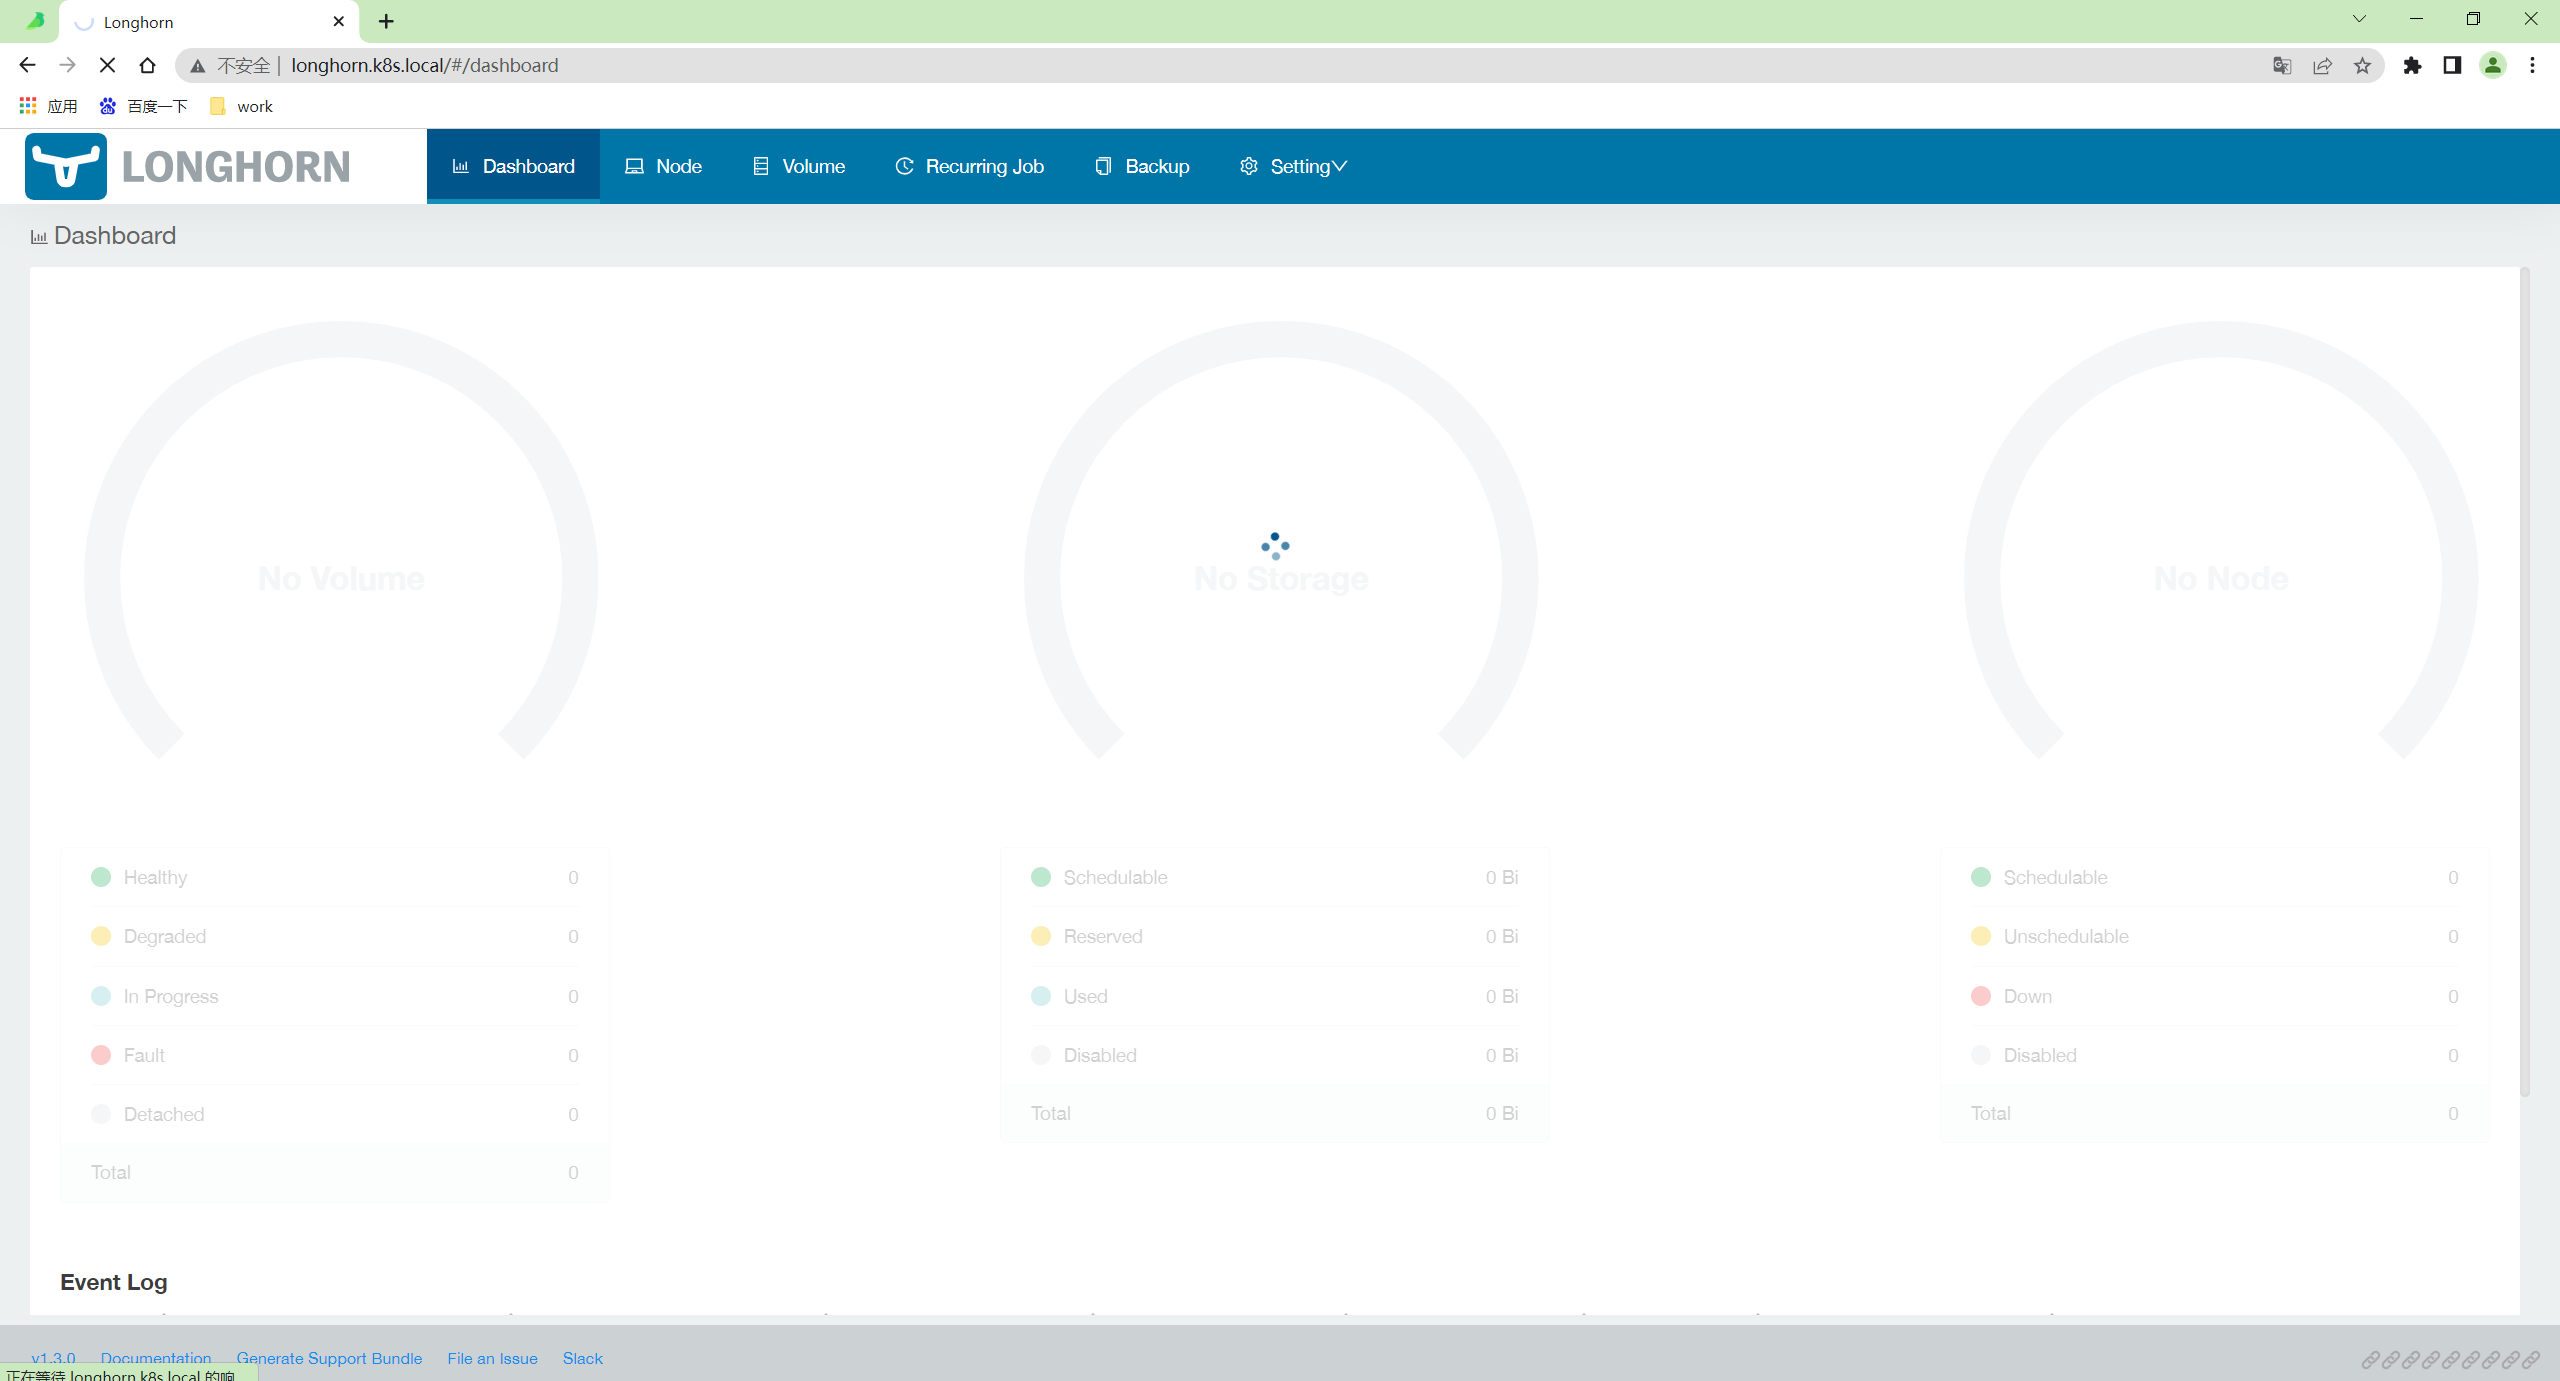
这里我们使用的 ingress-nginx 这个控制器,安装完成后在浏览器中直接访问 http://longhorn.k8s.local 即可:
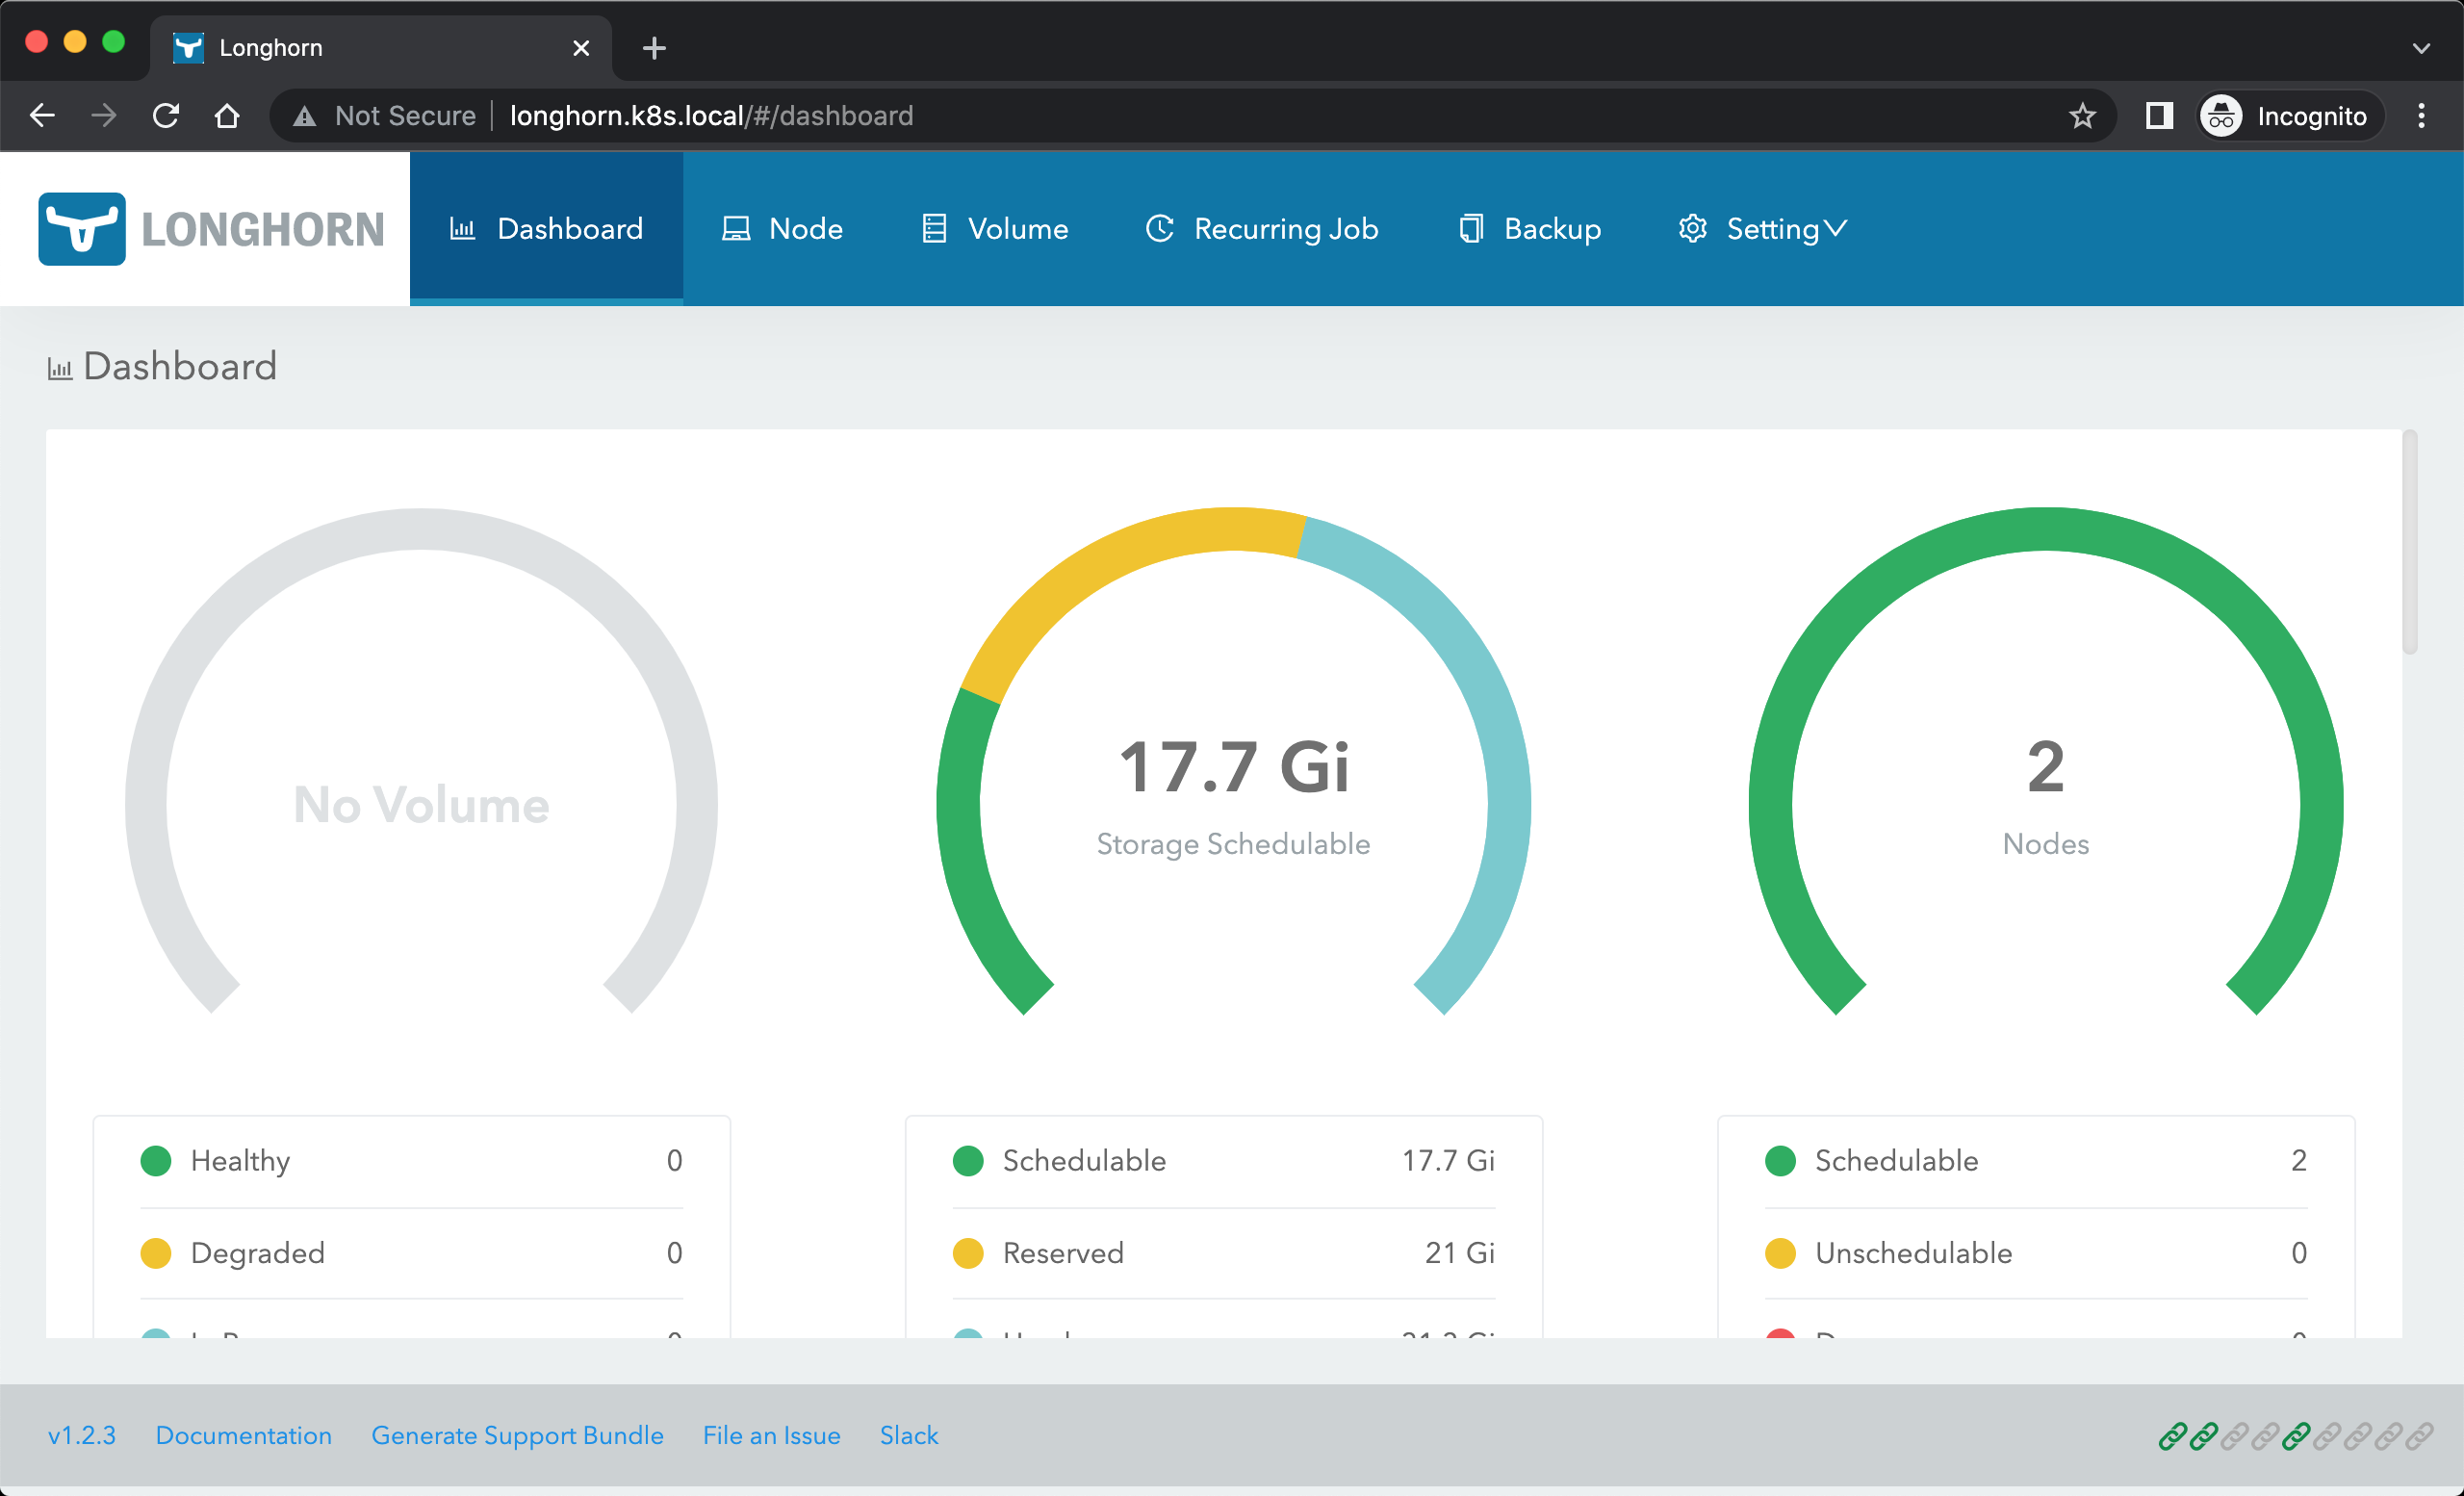
Longhorn UI 界面中展示了当前存储系统的状态,也可以在页面中进行其他相关配置。
- 此外还会创建一个默认的 StorageClass 对象:
[root@master1 ~]#kubectl get sc longhorn
NAME                 PROVISIONER          RECLAIMPOLICY   VOLUMEBINDINGMODE   ALLOWVOLUMEEXPANSION   AGE
longhorn (default)   driver.longhorn.io   Delete          Immediate           true                   19h
[root@master1 ~]#kubectl get sc longhorn -oyaml
allowVolumeExpansion: true
apiVersion: storage.k8s.io/v1
kind: StorageClass
metadata:
  annotations:
    longhorn.io/last-applied-configmap: |
      kind: StorageClass
      apiVersion: storage.k8s.io/v1
      metadata:
        name: longhorn
        annotations:
          storageclass.kubernetes.io/is-default-class: "true"
      provisioner: driver.longhorn.io
      allowVolumeExpansion: true
      reclaimPolicy: "Delete"
      volumeBindingMode: Immediate
      parameters:
        numberOfReplicas: "2"
        staleReplicaTimeout: "30"
        fromBackup: ""
        fsType: "ext4"
    storageclass.kubernetes.io/is-default-class: "true"
  creationTimestamp: "2022-02-23T14:02:29Z"
  name: longhorn
  resourceVersion: "1515618"
  uid: ab7eaf7a-d178-45f3-826a-8fec4e4e5149
parameters:
  fromBackup: ""
  fsType: ext4
  numberOfReplicas: "2"
  staleReplicaTimeout: "30"
provisioner: driver.longhorn.io
reclaimPolicy: Delete
volumeBindingMode: Immediate
[root@master1 ~]#
- 自己安装过后效果如下:
3.测试
- 下面我们来测试使用 longhorn 提供一个存储卷,由于提供了默认的 StorageClass,所以直接创建 PVC 即可,创建一个如下所示的 PVC:
#vim 01-longhorn-pvc.yaml
#01-longhorn-pvc.yaml
apiVersion: v1
kind: PersistentVolumeClaim
metadata:
  name: mysql-pvc
spec:
  storageClassName: longhorn #当然你也可以不指定,因为之前指定了默认的storageclasss。
  accessModes:
    - ReadWriteOnce
  resources:
    requests:
      storage: 1Gi
- 然后部署一个 mysql 应用来使用上面的 PVC 进行数据持久化:
#02-mysql-deployment.yaml
apiVersion: apps/v1
kind: Deployment
metadata:
  name: mysql
spec:
  selector:
    matchLabels:
      app: mysql
  strategy:
    type: Recreate
  template:
    metadata:
      labels:
        app: mysql
    spec:
      containers:
      - image: mysql:5.6
        name: mysql
        env:
        - name: MYSQL_ROOT_PASSWORD
          value: password
        ports:
        - containerPort: 3306
          name: mysql
        volumeMounts:
        - name: data
          mountPath: /var/lib/mysql
      volumes:
      - name: data
        persistentVolumeClaim:
          claimName: mysql-pvc
- 直接创建上面的资源对象
$ kubectl apply -f 01-longhorn-pvc.yaml
persistentvolumeclaim/mysql-pvc created
hg@LAPTOP-G8TUFE0T:/mnt/c/Users/hg/Desktop/yaml/2022.2.23-46.Longhorn存储-实验代码/edited
$ kubectl apply -f 02-mysql-deployment.yaml
deployment.apps/mysql created
- 验证
#查看pod和pvc信息
[root@master1 ~]#kubectl get po -owide
NAME                     READY   STATUS    RESTARTS   AGE    IP             NODE    NOMINATED NODE   READINESS GATES
mysql-6879698bd4-nmlrg   1/1     Running   0          105s   10.244.2.244   node2   <none>           <none>
[root@master1 ~]#kubectl get pvc mysql-pvc
NAME        STATUS   VOLUME                                     CAPACITY   ACCESS MODES   STORAGECLASS   AGE
mysql-pvc   Bound    pvc-52031b79-4905-47be-b8fc-09629c25de1f   1Gi        RWO            longhorn       117s


#查看pv信息
[root@master1 ~]#kubectl get pv pvc-52031b79-4905-47be-b8fc-09629c25de1f
NAME                                       CAPACITY   ACCESS MODES   RECLAIM POLICY   STATUS   CLAIM               STORAGECLASS   REASON   AGE
pvc-52031b79-4905-47be-b8fc-09629c25de1f   1Gi        RWO            Delete           Bound    default/mysql-pvc   longhorn                3m
[root@master1 ~]#kubectl get pv pvc-52031b79-4905-47be-b8fc-09629c25de1f -oyaml
……
  csi:
    driver: driver.longhorn.io
    fsType: ext4
    volumeAttributes:
      fromBackup: ""
      fsType: ext4
      numberOfReplicas: "2"
      staleReplicaTimeout: "30"
      storage.kubernetes.io/csiProvisionerIdentity: 1645625127582-8081-driver.longhorn.io
    volumeHandle: pvc-52031b79-4905-47be-b8fc-09629c25de1f
  persistentVolumeReclaimPolicy: Delete
  storageClassName: longhorn
  volumeMode: Filesystem
status:
  phase: Bound

#进入pod测试mysql应用
[root@master1 ~]#kubectl exec -it mysql-6879698bd4-nmlrg -- mysql -uroot -ppassword
Warning: Using a password on the command line interface can be insecure.
Welcome to the MySQL monitor.  Commands end with ; or \g.
Your MySQL connection id is 1
Server version: 5.6.51 MySQL Community Server (GPL)

Copyright (c) 2000, 2021, Oracle and/or its affiliates. All rights reserved.

Oracle is a registered trademark of Oracle Corporation and/or its
affiliates. Other names may be trademarks of their respective
owners.

Type 'help;' or '\h' for help. Type '\c' to clear the current input statement.

mysql> show databases;
+---------------------+
| Database            |
+---------------------+
| information_schema  |
| #mysql50#lost+found |
| mysql               |
| performance_schema  |
+---------------------+
4 rows in set (0.05 sec)

mysql> create database longhorn;
Query OK, 1 row affected (0.00 sec)

mysql> show databases;
+---------------------+
| Database            |
+---------------------+
| information_schema  |
| longhorn            |
| #mysql50#lost+found |
| mysql               |
| performance_schema  |
+---------------------+
5 rows in set (0.00 sec)

mysql> exit
Bye
[root@master1 ~]#
- 应用启动成功后我们可以去节点上查看数据来验证是否成功:
[root@master1 ~]#kubectl get po -owide
NAME                     READY   STATUS    RESTARTS   AGE     IP             NODE    NOMINATED NODE   READINESS GATES
mysql-6879698bd4-nmlrg   1/1     Running   0          6m54s   10.244.2.244   node2   <none>           <none>
[root@master1 ~]#ssh node2
Last login: Wed Feb 23 22:11:35 2022 from master1
[root@node2 ~]#ls /var/lib/longhorn/
engine-binaries  longhorn-disk.cfg  replicas
[root@node2 ~]#ls /var/lib/longhorn/replicas/
pvc-52031b79-4905-47be-b8fc-09629c25de1f-863b6d00
[root@node2 ~]#ls /var/lib/longhorn/replicas/pvc-52031b79-4905-47be-b8fc-09629c25de1f-863b6d00/
revision.counter  volume-head-000.img  volume-head-000.img.meta  volume.meta
需要注意的是 longhorn 是分布式块存储,与分布式文件系统不同,不能超过 pv 设置的存储大小(上例中为1G)。
类似于vmware里的厚纸杯延迟置0;
- 刚才我们在数据库中创建了一个名为
longhorn的数据库,然后我们重建 Pod 再次查看数据是否依然存在:
[root@master1 ~]#kubectl get po
NAME                     READY   STATUS    RESTARTS   AGE
mysql-6879698bd4-nmlrg   1/1     Running   0          8m39s
[root@master1 ~]#kubectl delete po mysql-6879698bd4-nmlrg
pod "mysql-6879698bd4-nmlrg" deleted
[root@master1 ~]#kubectl get po
NAME                     READY   STATUS    RESTARTS   AGE
mysql-6879698bd4-jj4jm   1/1     Running   0          6s
[root@master1 ~]#kubectl exec -it mysql-6879698bd4-jj4jm  -- mysql -uroot -ppassword
Warning: Using a password on the command line interface can be insecure.
Welcome to the MySQL monitor.  Commands end with ; or \g.
Your MySQL connection id is 1
Server version: 5.6.51 MySQL Community Server (GPL)

Copyright (c) 2000, 2021, Oracle and/or its affiliates. All rights reserved.

Oracle is a registered trademark of Oracle Corporation and/or its
affiliates. Other names may be trademarks of their respective
owners.

Type 'help;' or '\h' for help. Type '\c' to clear the current input statement.

mysql> show databases;
+---------------------+
| Database            |
+---------------------+
| information_schema  |
| longhorn            |
| #mysql50#lost+found |
| mysql               |
| performance_schema  |
+---------------------+
5 rows in set (0.02 sec)

mysql>
可以看到前面创建的数据库依然存在,证明我们的数据持久化成功了。
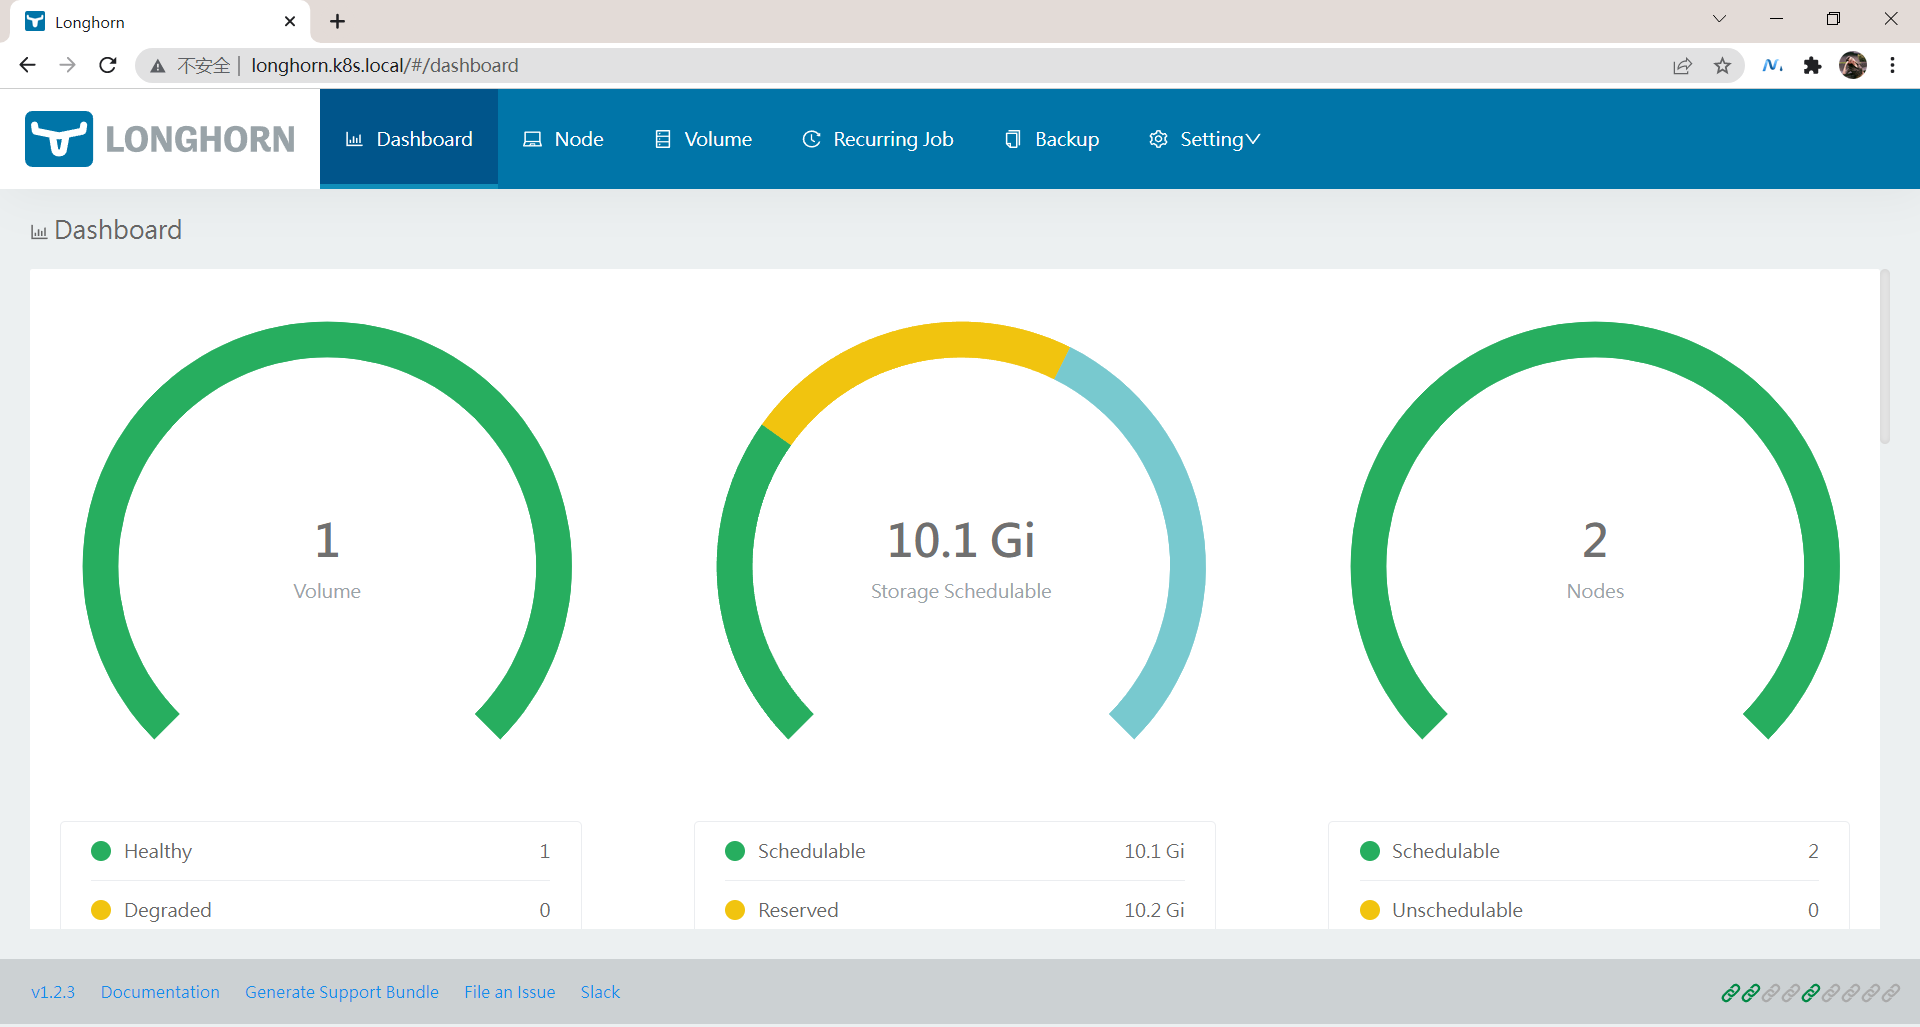
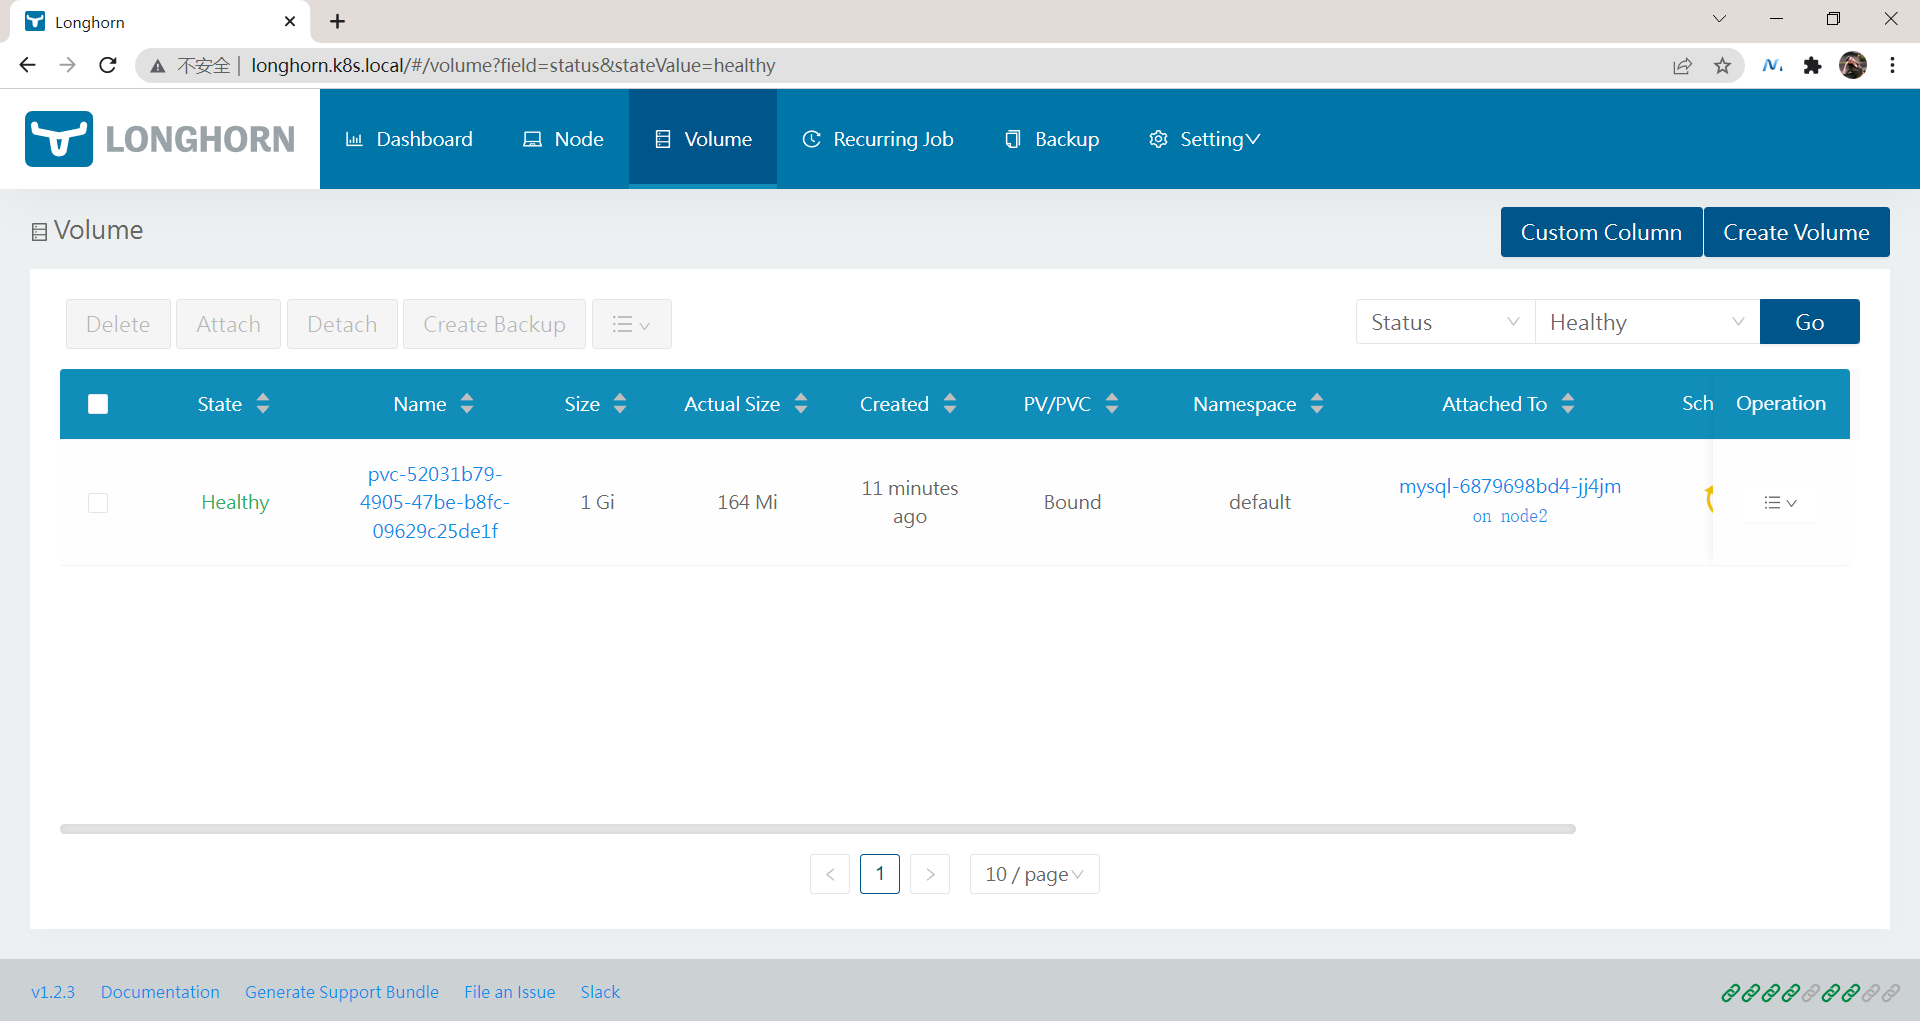
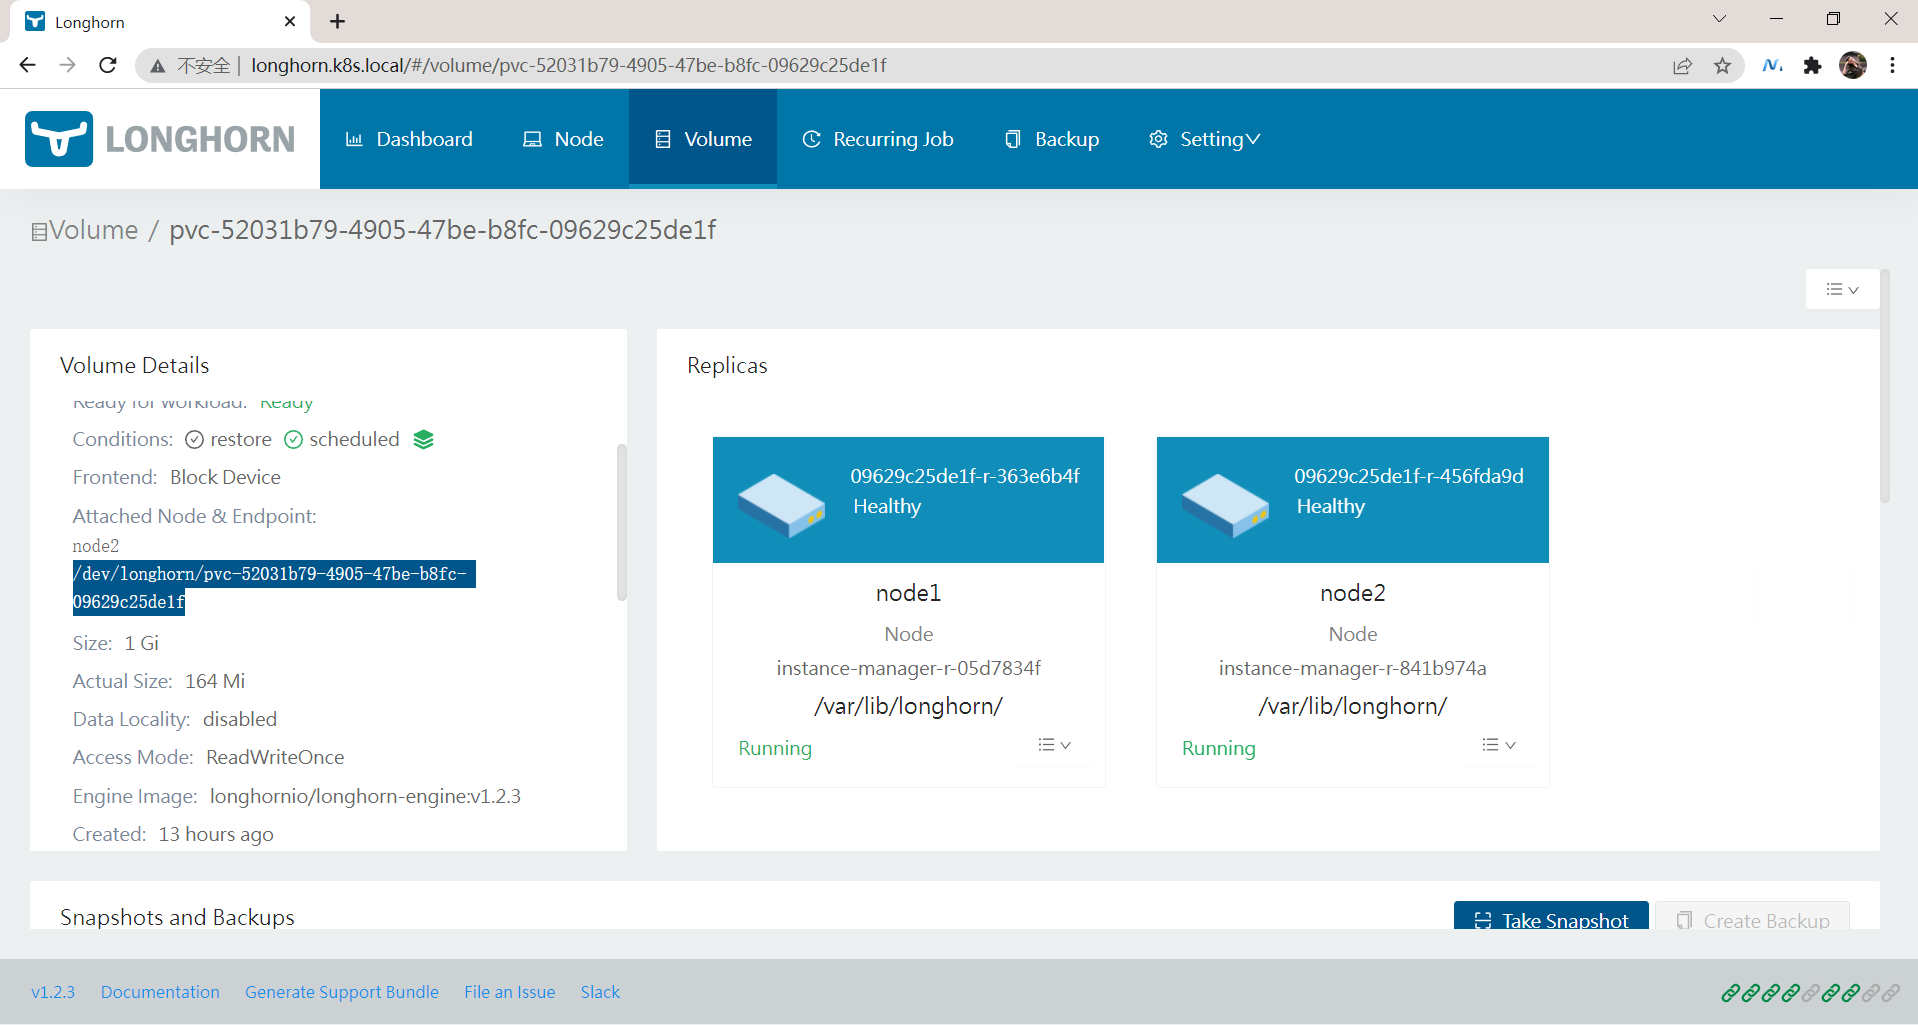
- 在 Longhorn UI 界面中也可以看到数据卷的信息:
实验结束,完美。😘
注意事项
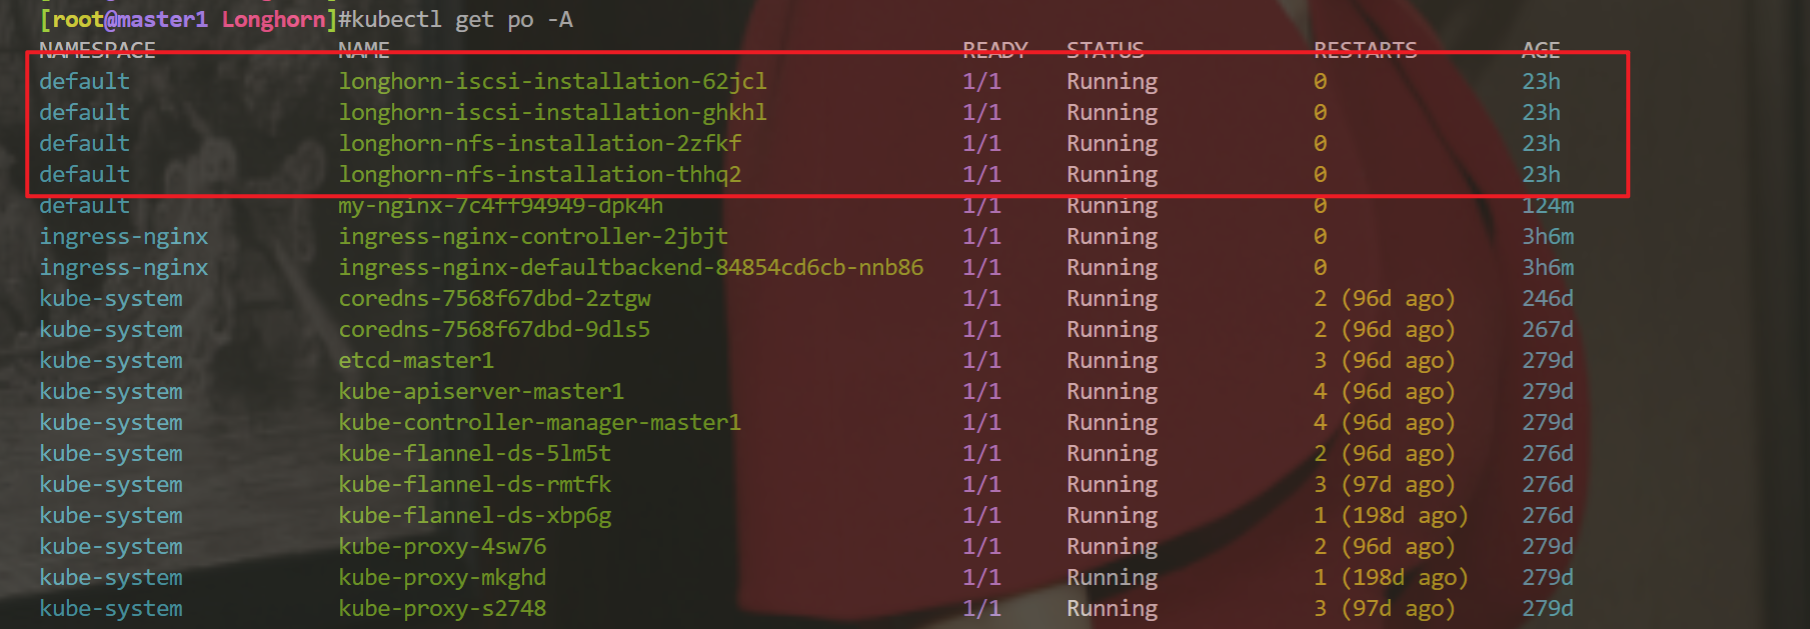
问题:使用yaml文件安装了2个服务后,服务怎么是没启动的呢-2022.8.7(已解决)
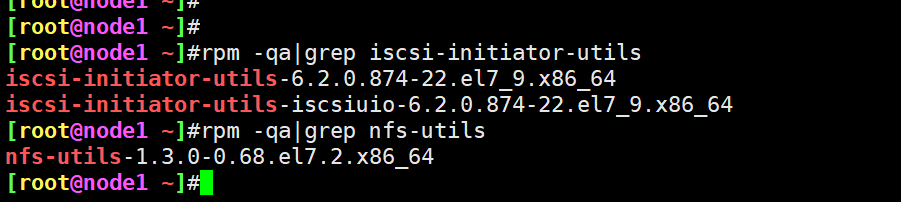
- 问题现象:使用yaml文件安装了这2个服务包后,这个服务怎么是没启动的呢??

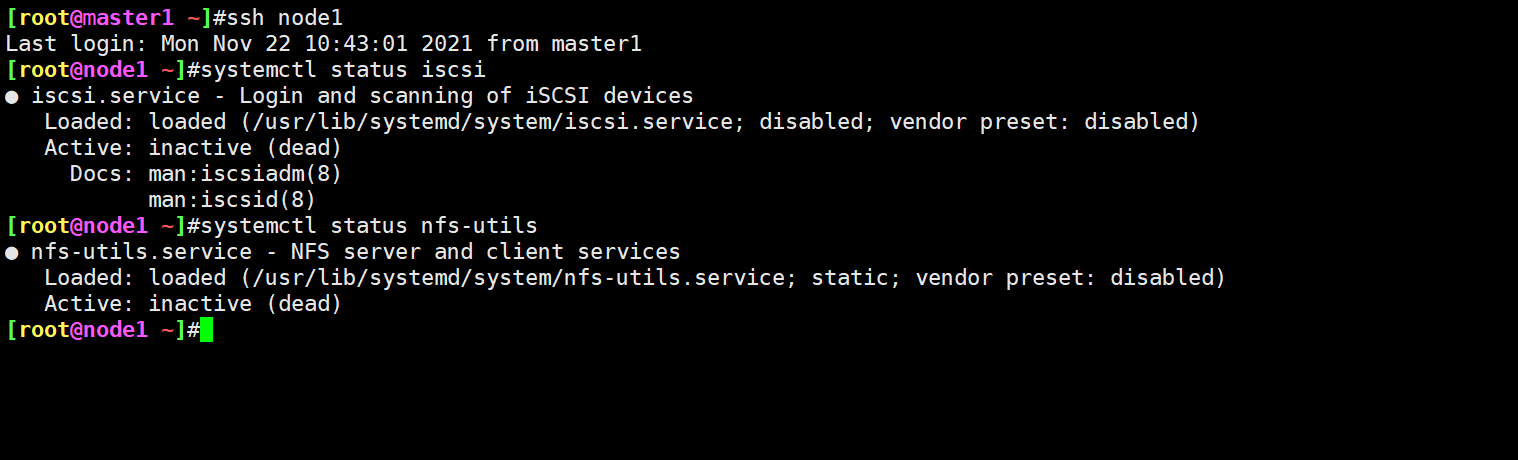

该不会是这个原因吧……
启动服务:
systemctl enable rpcbind --now
systemctl enable nfs --now
systemctl enable iscsi --now

systemctl status rpcbind
systemctl status nfs
systemctl status iscsid
测试后,还是不行……。。。
- 研究这2个yaml文件

&cmd
OS=$(grep "ID_LIKE" /etc/os-release | cut -d '=' -f 2);

if [[ "${OS}" == *"debian"* ]]; then sudo apt-get update -q -y && sudo apt-get install -q -y open-iscsi && sudo systemctl -q enable iscsid && sudo systemctl start iscsid;
elif [[ "${OS}" == *"suse"* ]]; then sudo zypper --gpg-auto-import-keys -q refresh && sudo zypper --gpg-auto-import-keys -q install -y open-iscsi && sudo systemctl -q enable iscsid && sudo systemctl start iscsid;
else sudo yum makecache -q -y && sudo yum --setopt=tsflags=noscripts install -q -y iscsi-initiator-utils && echo "InitiatorName=$(/sbin/iscsi-iname)" > /etc/iscsi/initiatorname.iscsi && sudo systemctl -q enable iscsid && sudo systemctl start iscsid; fi && if [ $? -eq 0 ]; then
echo "iscsi install successfully"; else echo "iscsi install failed error code $?"; fi
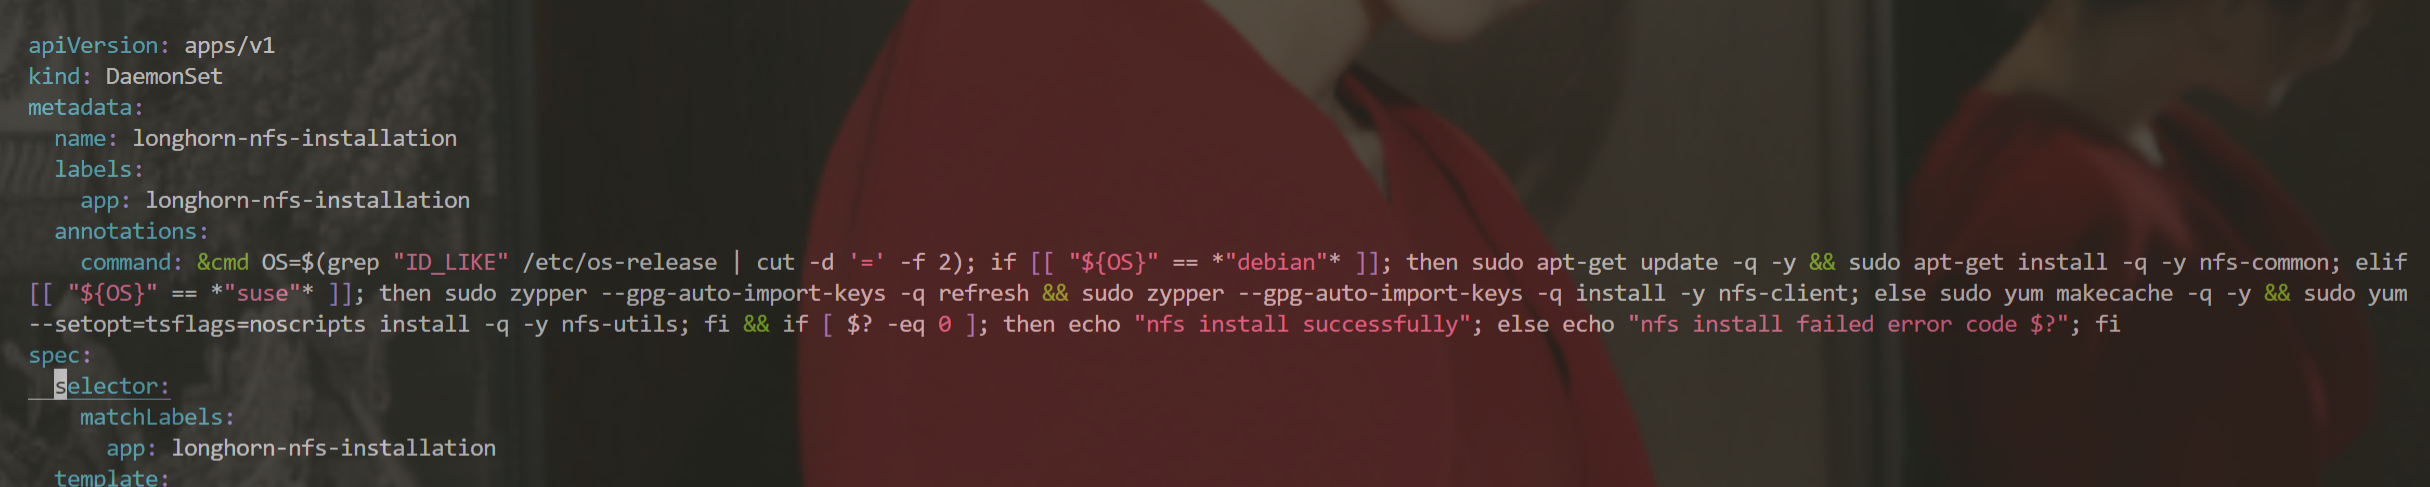
&cmd
OS=$(grep "ID_LIKE" /etc/os-release | cut -d '=' -f 2);

if [[ "${OS}" == *"debian"* ]]; then sudo apt-get update -q -y && sudo apt-get install -q -y nfs-common;
elif
[[ "${OS}" == *"suse"* ]]; then sudo zypper --gpg-auto-import-keys -q refresh && sudo zypper --gpg-auto-import-keys -q install -y nfs-client;
else sudo yum makecache -q -y && sudo yum
--setopt=tsflags=noscripts install -q -y nfs-utils;
fi && if [ $? -eq 0 ]; then echo "nfs install successfully"; else echo "nfs install failed error code $?"; fi
按理说,这个yaml部署后,那2个服务是可以正常启动的呀??……
额额,可能是自己那个服务名称写错了……。。。。
- 总结
systemctl enable rpcbind --now
systemctl enable nfs --now #从官方给的yaml文件看出,貌似nfs服务只要安装好就行,不用去特意启动的

systemctl enable iscsid --now


systemctl status rpcbind
systemctl status nfs
systemctl status iscsid
问题:Longhorn安装一直失败?(已解决)-2022.8.7(已解决)
1.故障现象
故障环境:
实验环境:
1、win10,vmwrokstation虚机;
2、k8s集群:3台centos7.6 1810虚机,1个master节点,2个node节点
   k8s version:v1.22.2
   containerd://1.5.5
Q:之前安装longhorn都没问题来着,这次安装怎么报错呢?……
报错现象:


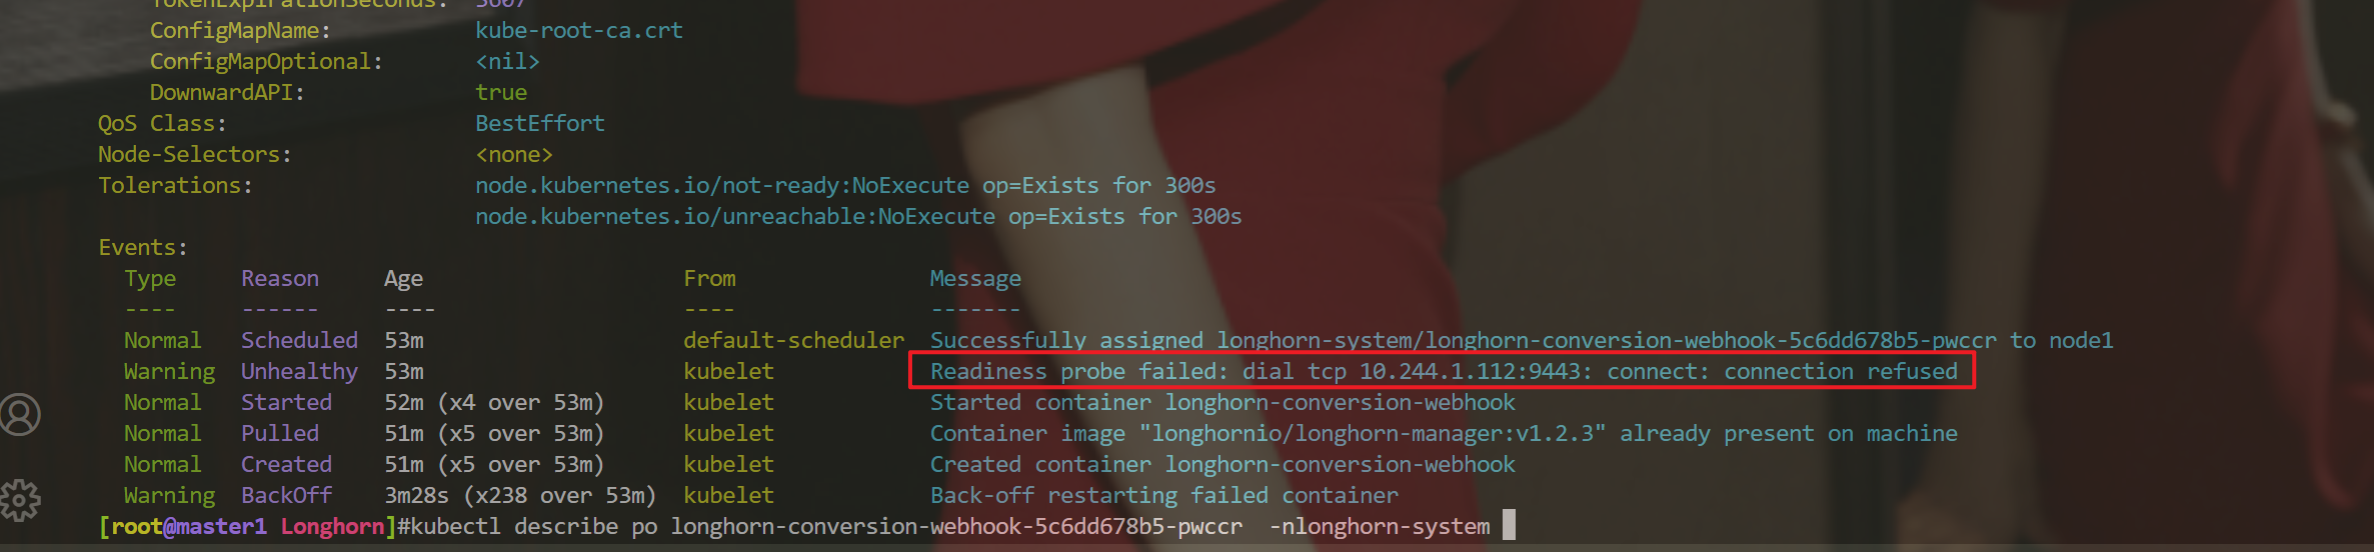
2.排查过程
- 冲突了??

这个也不是hostnetwork的问题呀……
- 那我把这个健康检查给停掉行不行?
但是这个values.yaml文件里没什么关于健康检查的配置呀……
- 好像找到问题了……
好像也不是这个问题吧……
- 哎,再进一步排查:

还是报错:……
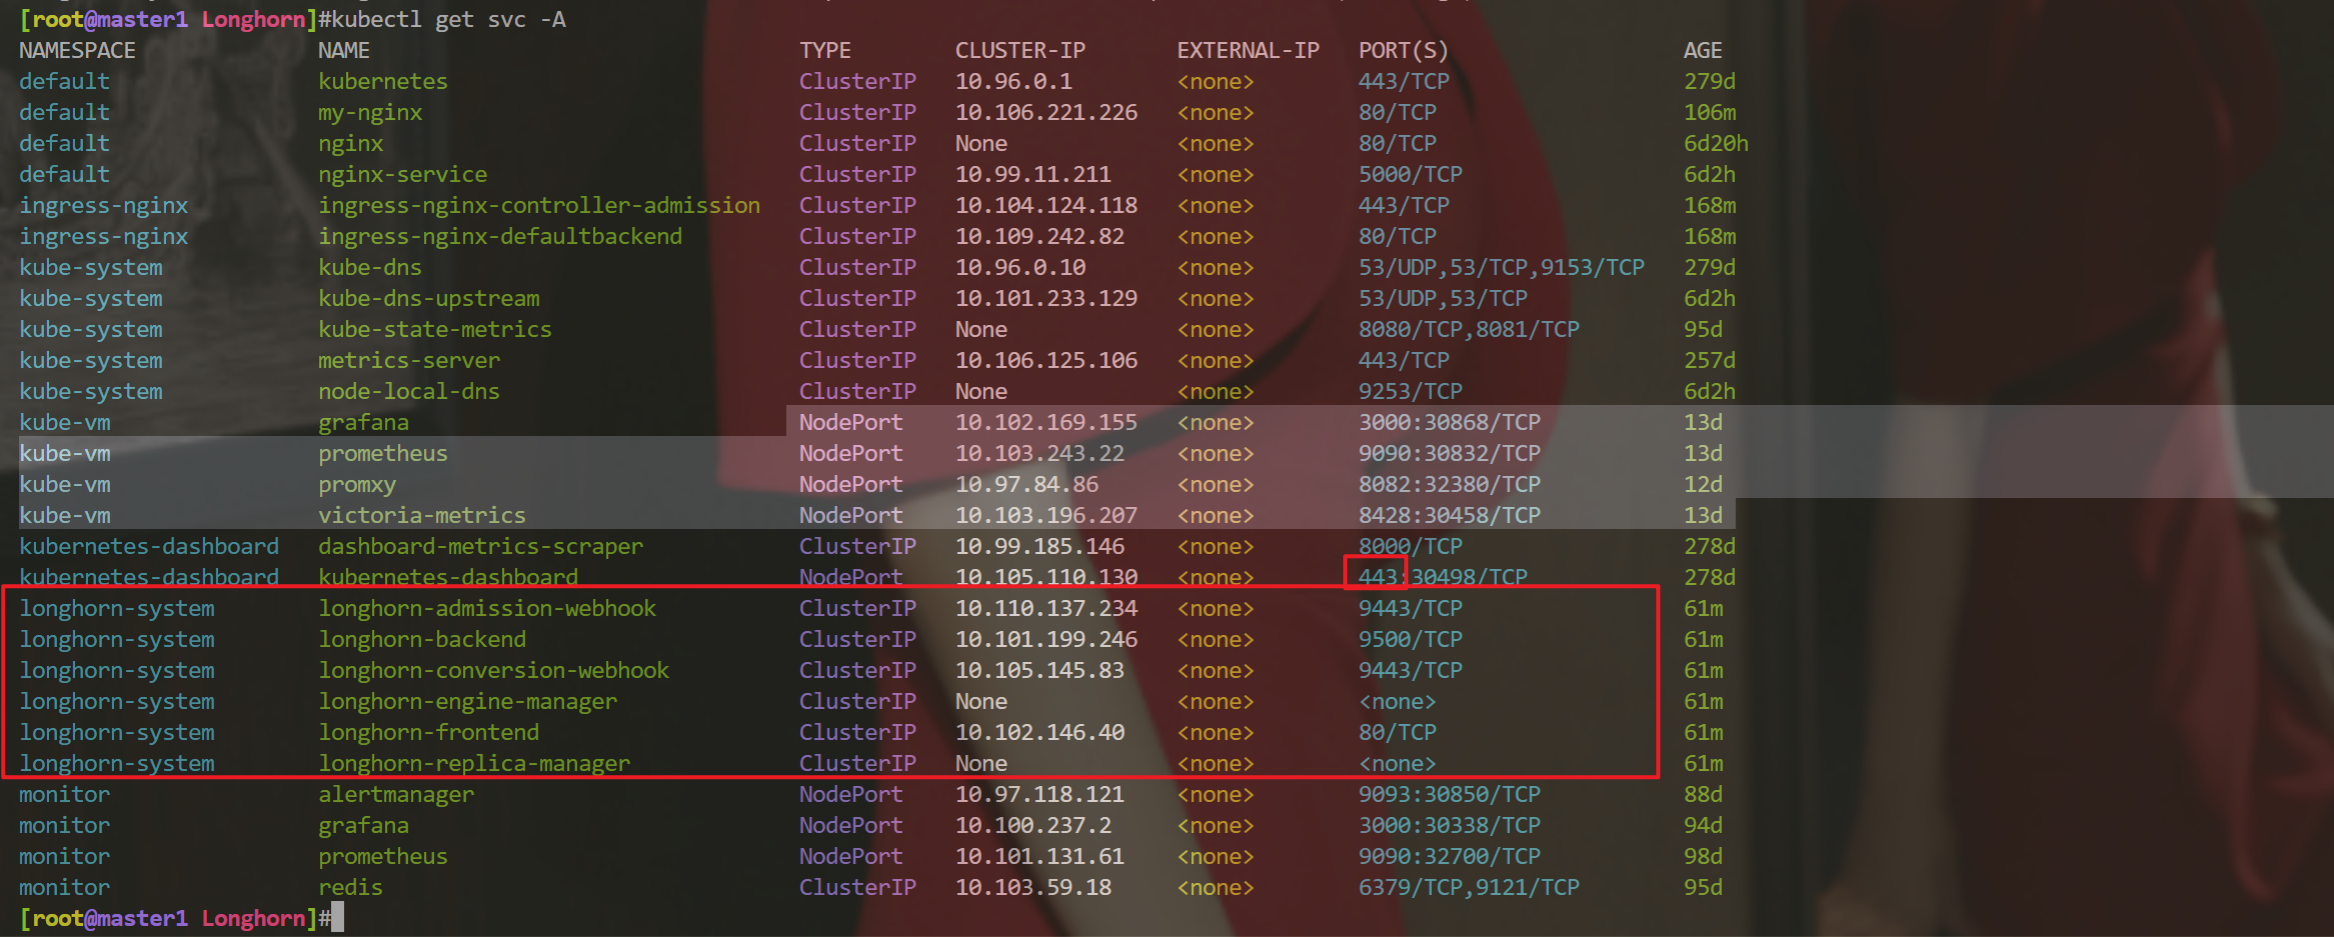
- 这里为啥这么多csi呢?
- 奇怪:
使用yaml文件安装了这2个服务包后,这个服务怎么是没启动的呢??
该不会是这个原因吧……
启动服务:
systemctl enable rpcbind --now
systemctl enable nfs --now
systemctl enable iscsi --now

systemctl status rpcbind
systemctl status nfs
systemctl status iscsid
测试后,还是不行……。。。
3.解决办法
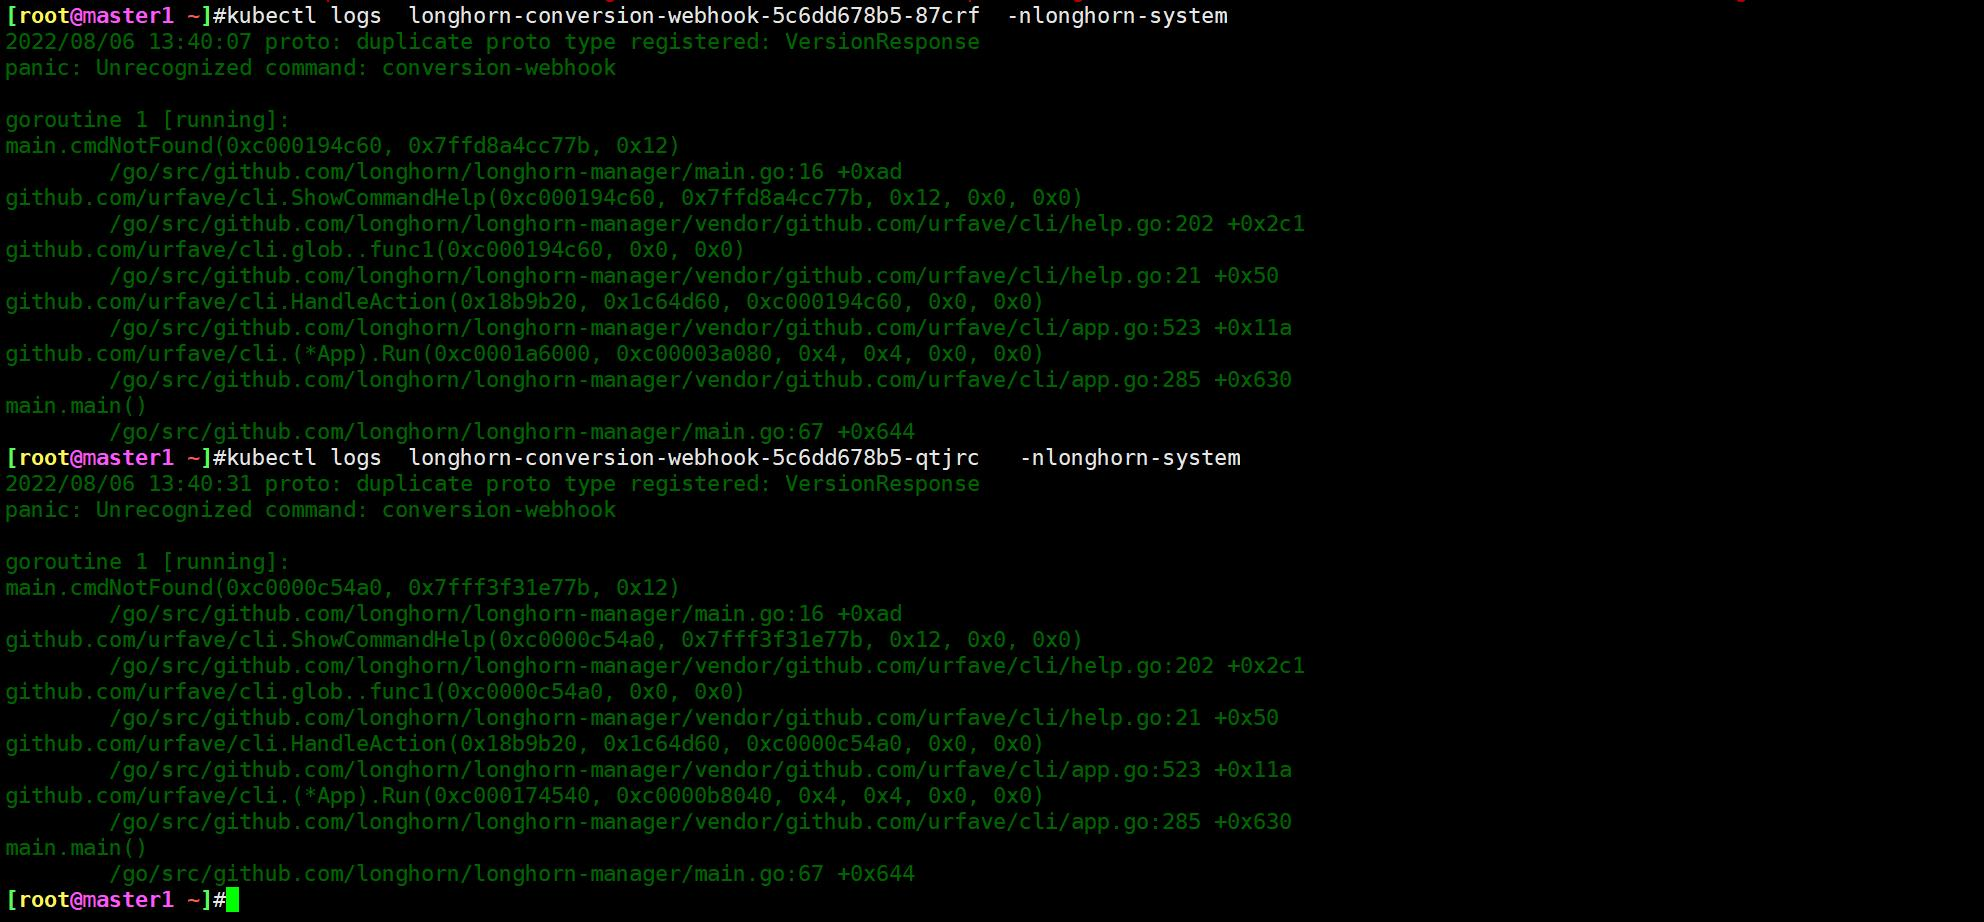
最后,是看了这2个报错pod的日志,才发现了问题……

自己将longhorn用helm卸载干净,然后在下载好的longhorn/longhorn的values.yaml文件里修改了之前的4点内容,然后再次用helm安装,就一切正常了:
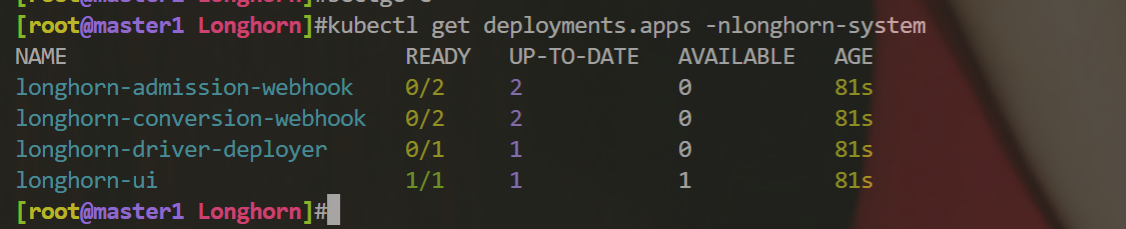
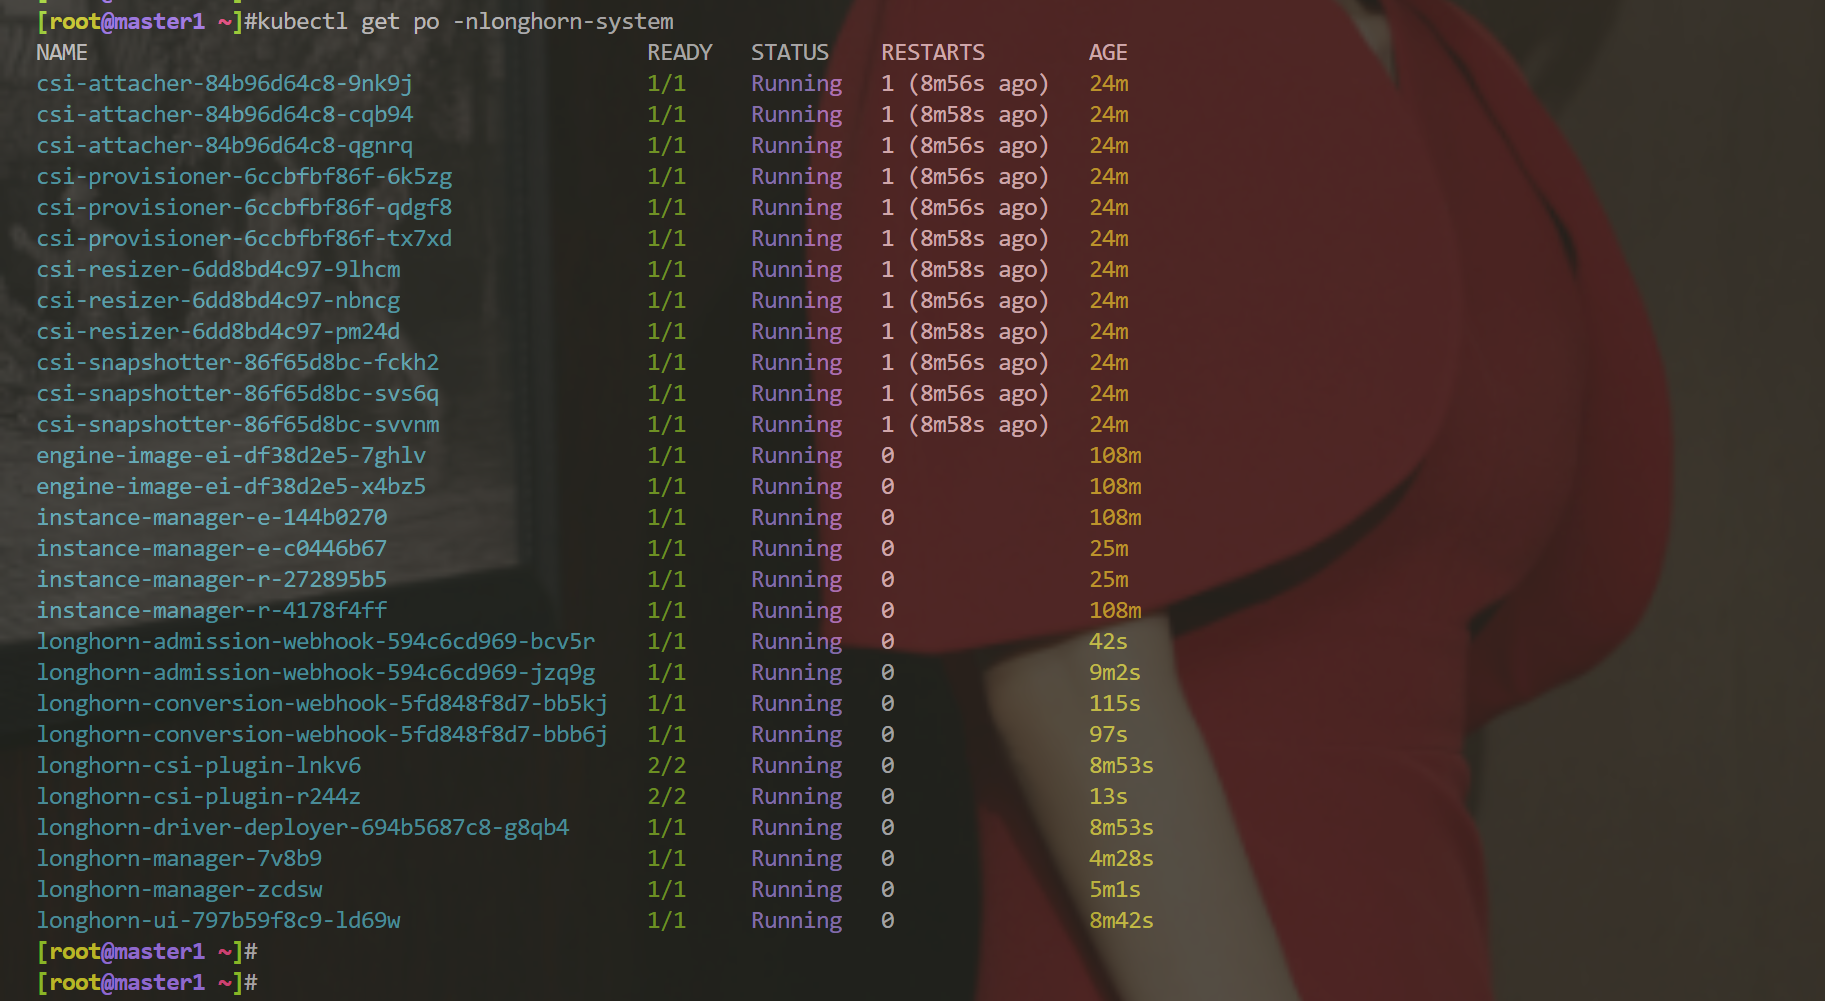
安装过程如果遇到有问题的个别pod,我们删除后,后面就可以正常启动了:

另外,这个longhorn的安装组件有点多,我们耐心等待一会儿就好:(因为要拉取镜像的哦)

安装完成如下:

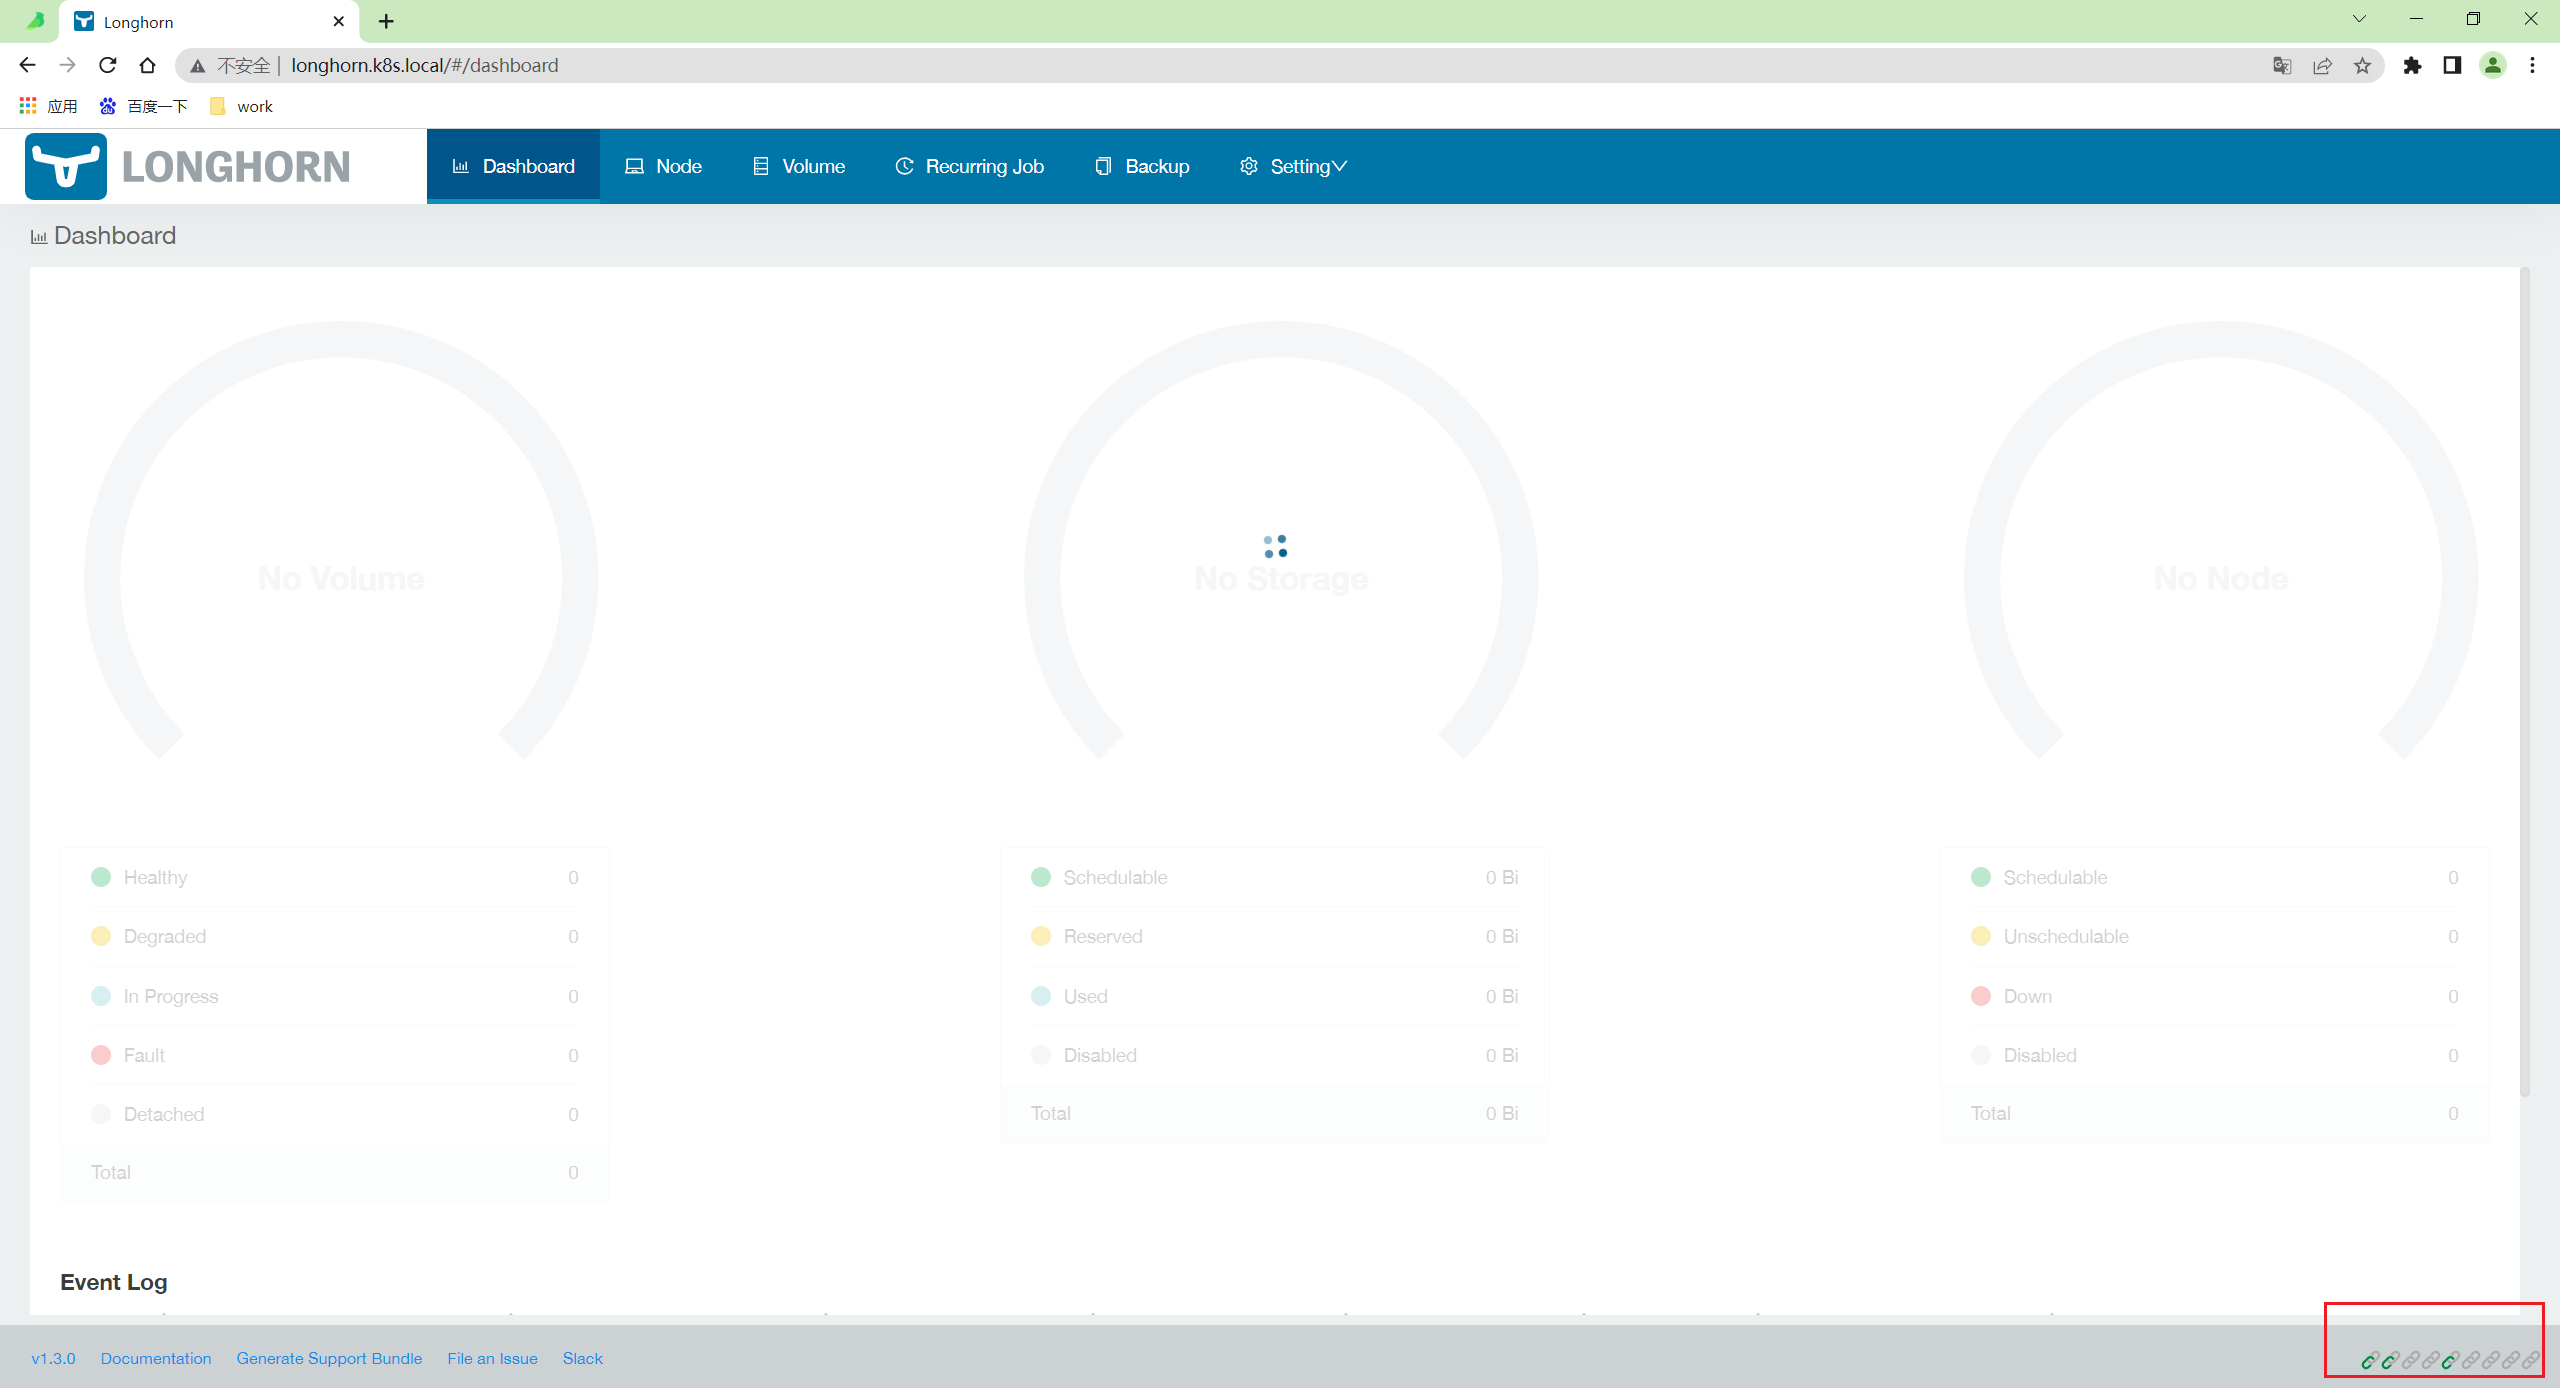
但此时,我们发现web界面打开一直在转圈:
重建ui这个pod后,还是老样子:
[root@master1 longhorn]#kubectl logs -f longhorn-ui-797b59f8c9-6b8dz -nlonghorn-system
nginx: [warn] duplicate MIME type "text/html" in /var/config/nginx/nginx.conf:7
[root@master1 longhorn]#kubectl delete po longhorn-ui-797b59f8c9-6b8dz   -nlonghorn-system --force --grace-period=0
warning: Immediate deletion does not wait for confirmation that the running resource has been terminated. The resource may continue to run on the cluster indefinitely.
pod "longhorn-ui-797b59f8c9-6b8dz" force deleted
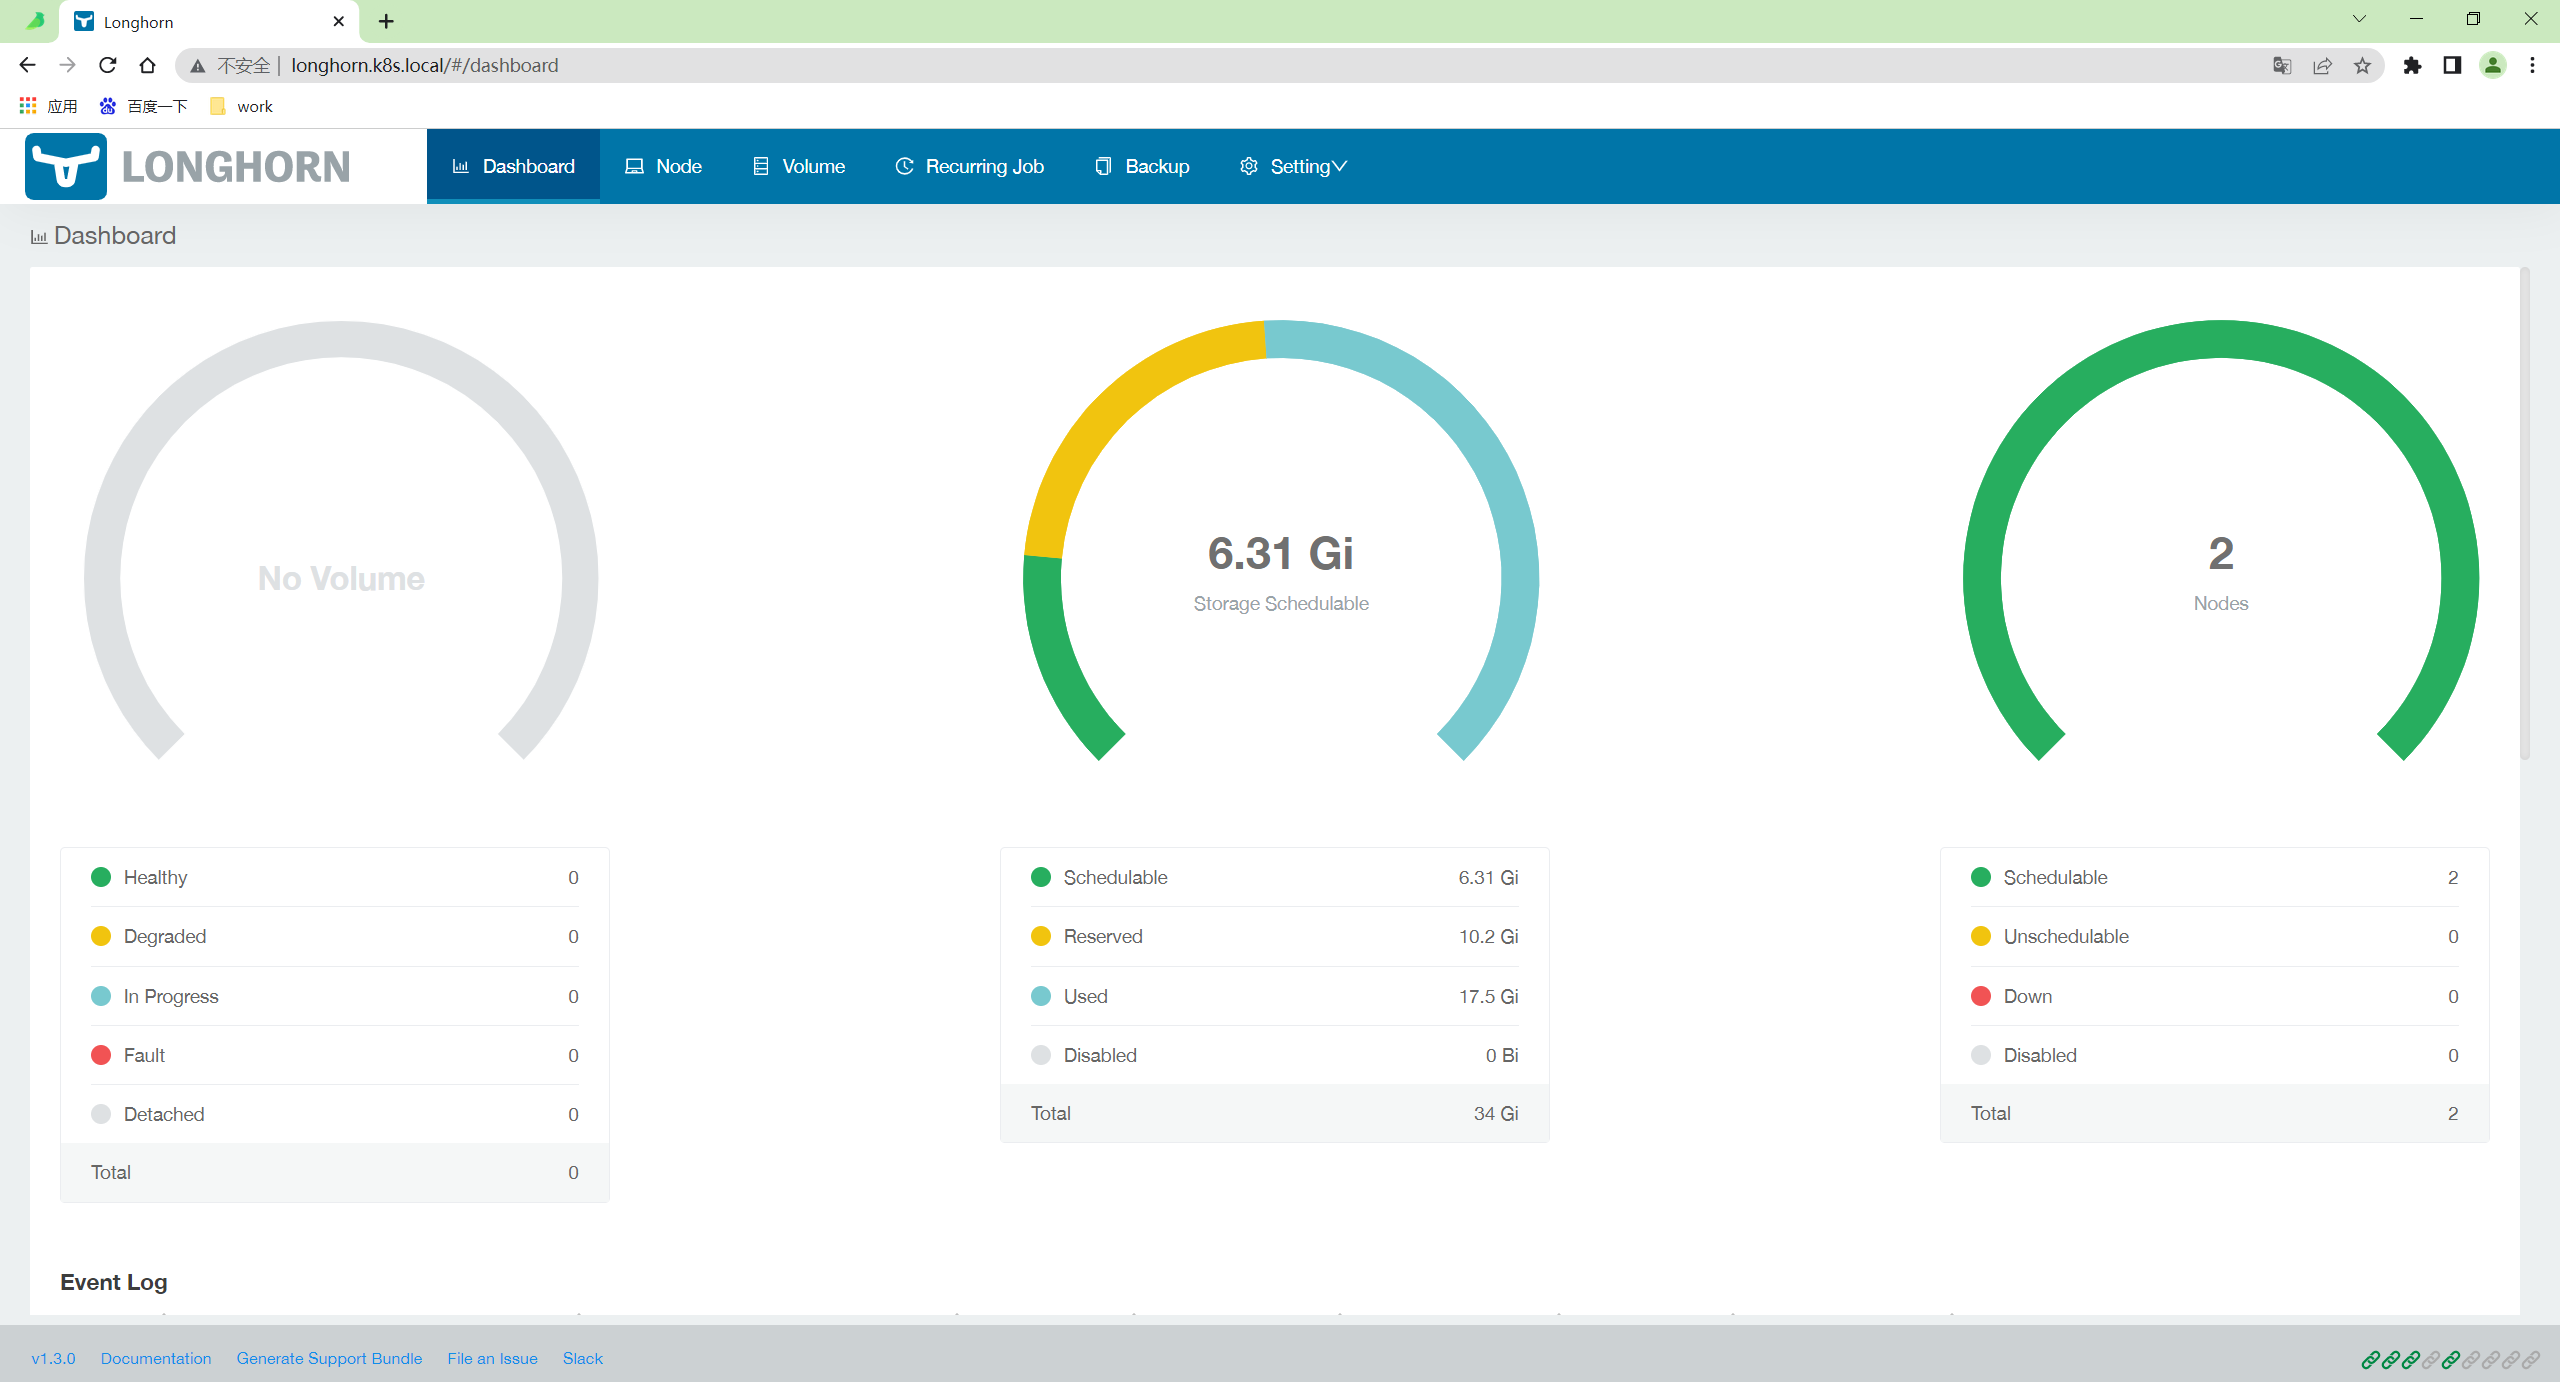
估计的多等一会儿就好:
还是对该存储的底层知识不是很熟悉,不然此时删除重建一些关键pod,应该就没问题了的……
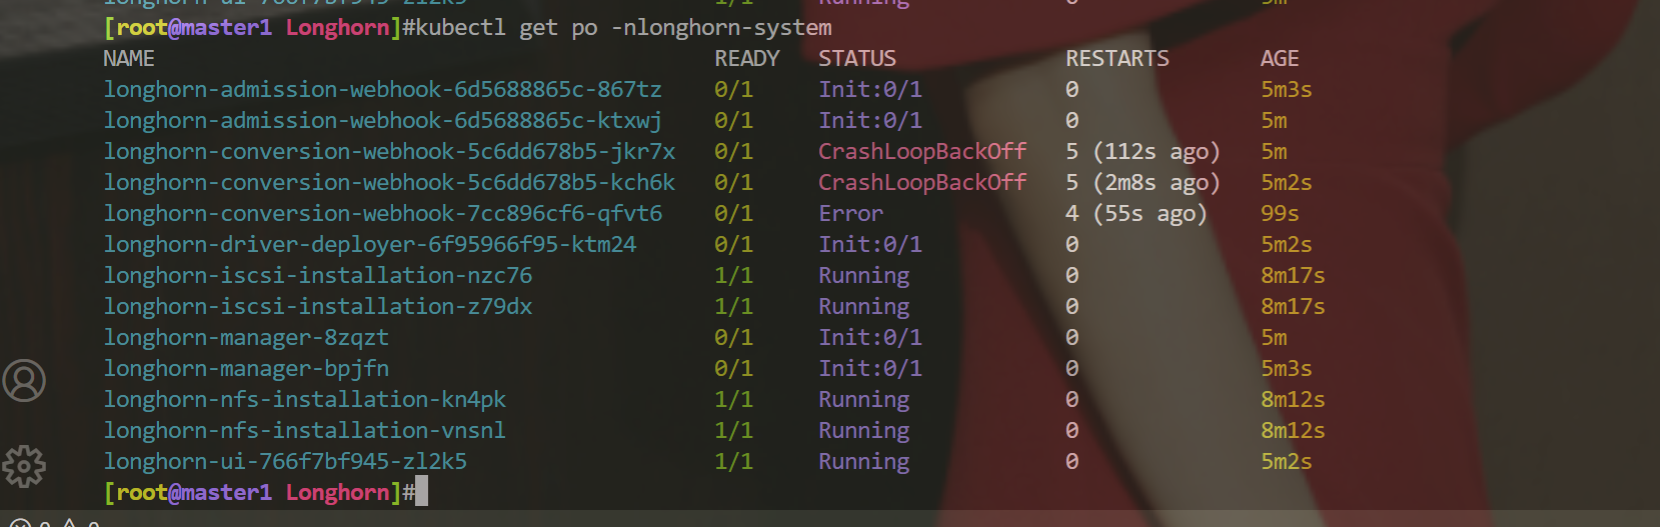
- 终于好了
这些pod好像有一些前后启动关系的……
要一直来回删除那些处于init的pod才行……
也是无语呀……

- 以后,没什么原因就不要删除longhorn环境了吧……
已经做好快照了。哈哈
4、备份恢复
Longhorn 提供了备份恢复功能,要使用这个功能我们需要给卷创建一个 snapshot 快照,快照是 Kubernetes Volume 在任何指定时间点的状态。
📍 案例演示:longhorn备份恢复(成功测试)
实验环境
实验环境:
1、win10,vmwrokstation虚机;
2、k8s集群:3台centos7.6 1810虚机,1个master节点,2个node节点
   k8s version:v1.22.2
   containerd://1.5.5
实验软件
链接:https://pan.baidu.com/s/15jonSS_pK60GWnjzfqQafA?pwd=l8rj
提取码:l8rj
2022.2.25-47.Longhorn备份恢复-实验代码
1️⃣ 手动快照
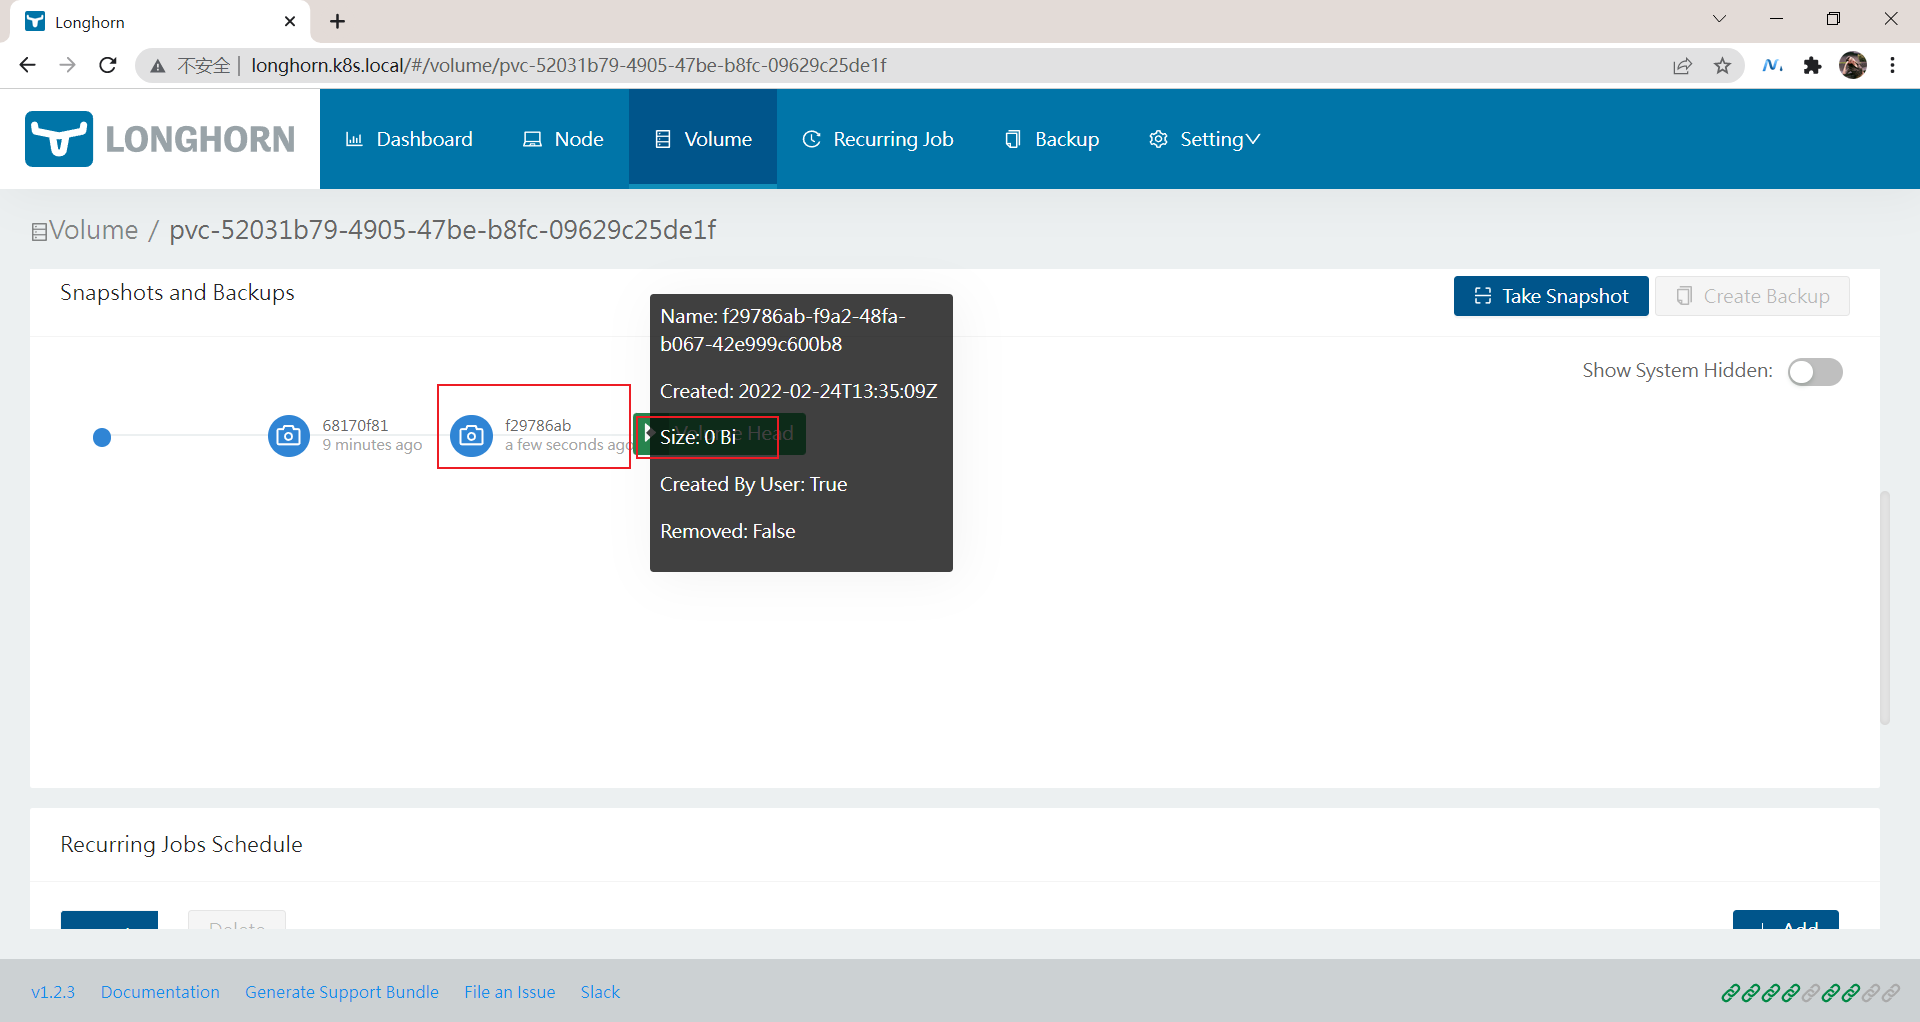
🍀 在 Longhorn UI 的 Volume 页面中点击要创建快照的卷,进入卷的详细信息页面,点击下方的 Take Snapshot 按钮即可创建快照了。
创建快照后,将在卷头(Volume Head)之前的快照列表中可以看到它,比如这里我们会前面测试使用的 mysql 卷创建一个快照:

同样在节点的数据目录下面也可以看到创建的快照数据:(随便进一个节点就好)
[root@master1 ~]#ssh node2
[root@node2 ~]#tree /var/lib/longhorn/replicas/pvc-52031b79-4905-47be-b8fc-09629c25de1f-863b6d00/
/var/lib/longhorn/replicas/pvc-52031b79-4905-47be-b8fc-09629c25de1f-863b6d00/
|-- revision.counter
|-- volume-head-001.img #是个二进制文件
|-- volume-head-001.img.meta
|-- volume-snap-68170f81-72c9-4a7e-b359-520938a49af3.img
|-- volume-snap-68170f81-72c9-4a7e-b359-520938a49af3.img.meta
`-- volume.meta

0 directories, 6 files
其中的 volume-snap-xxx 后面的数据和页面上的快照名称是一致的,比如页面中我们刚刚创建的快照名称为 68170f81-72c9-4a7e-b359-520938a49af3,其中的 img 文件是镜像文件,而 img.meta 是保持当前快照的元信息:
[root@node2 ~]#cat /var/lib/longhorn/replicas/pvc-52031b79-4905-47be-b8fc-09629c25de1f-863b6d00/volume-snap-68170f81-72c9-4a7e-b359-520938a49af3.img.meta
{"Name":"volume-head-000.img","Parent":"","Removed":false,"UserCreated":true,"Created":"2022-02-24T13:26:33Z","Labels":null}
元信息里面包含父级的文件镜像,这其实表面快照是增量的快照。
2️⃣ 周期性快照和备份
🍀 此外除了手动创建快照之外,从 Longhorn UI 上还可以进行周期性快照和备份,同样在卷的详细页面可以进行配置,在 Recurring Jobs Schedule 区域点击 Add 按钮即可创建一个定时的快照。
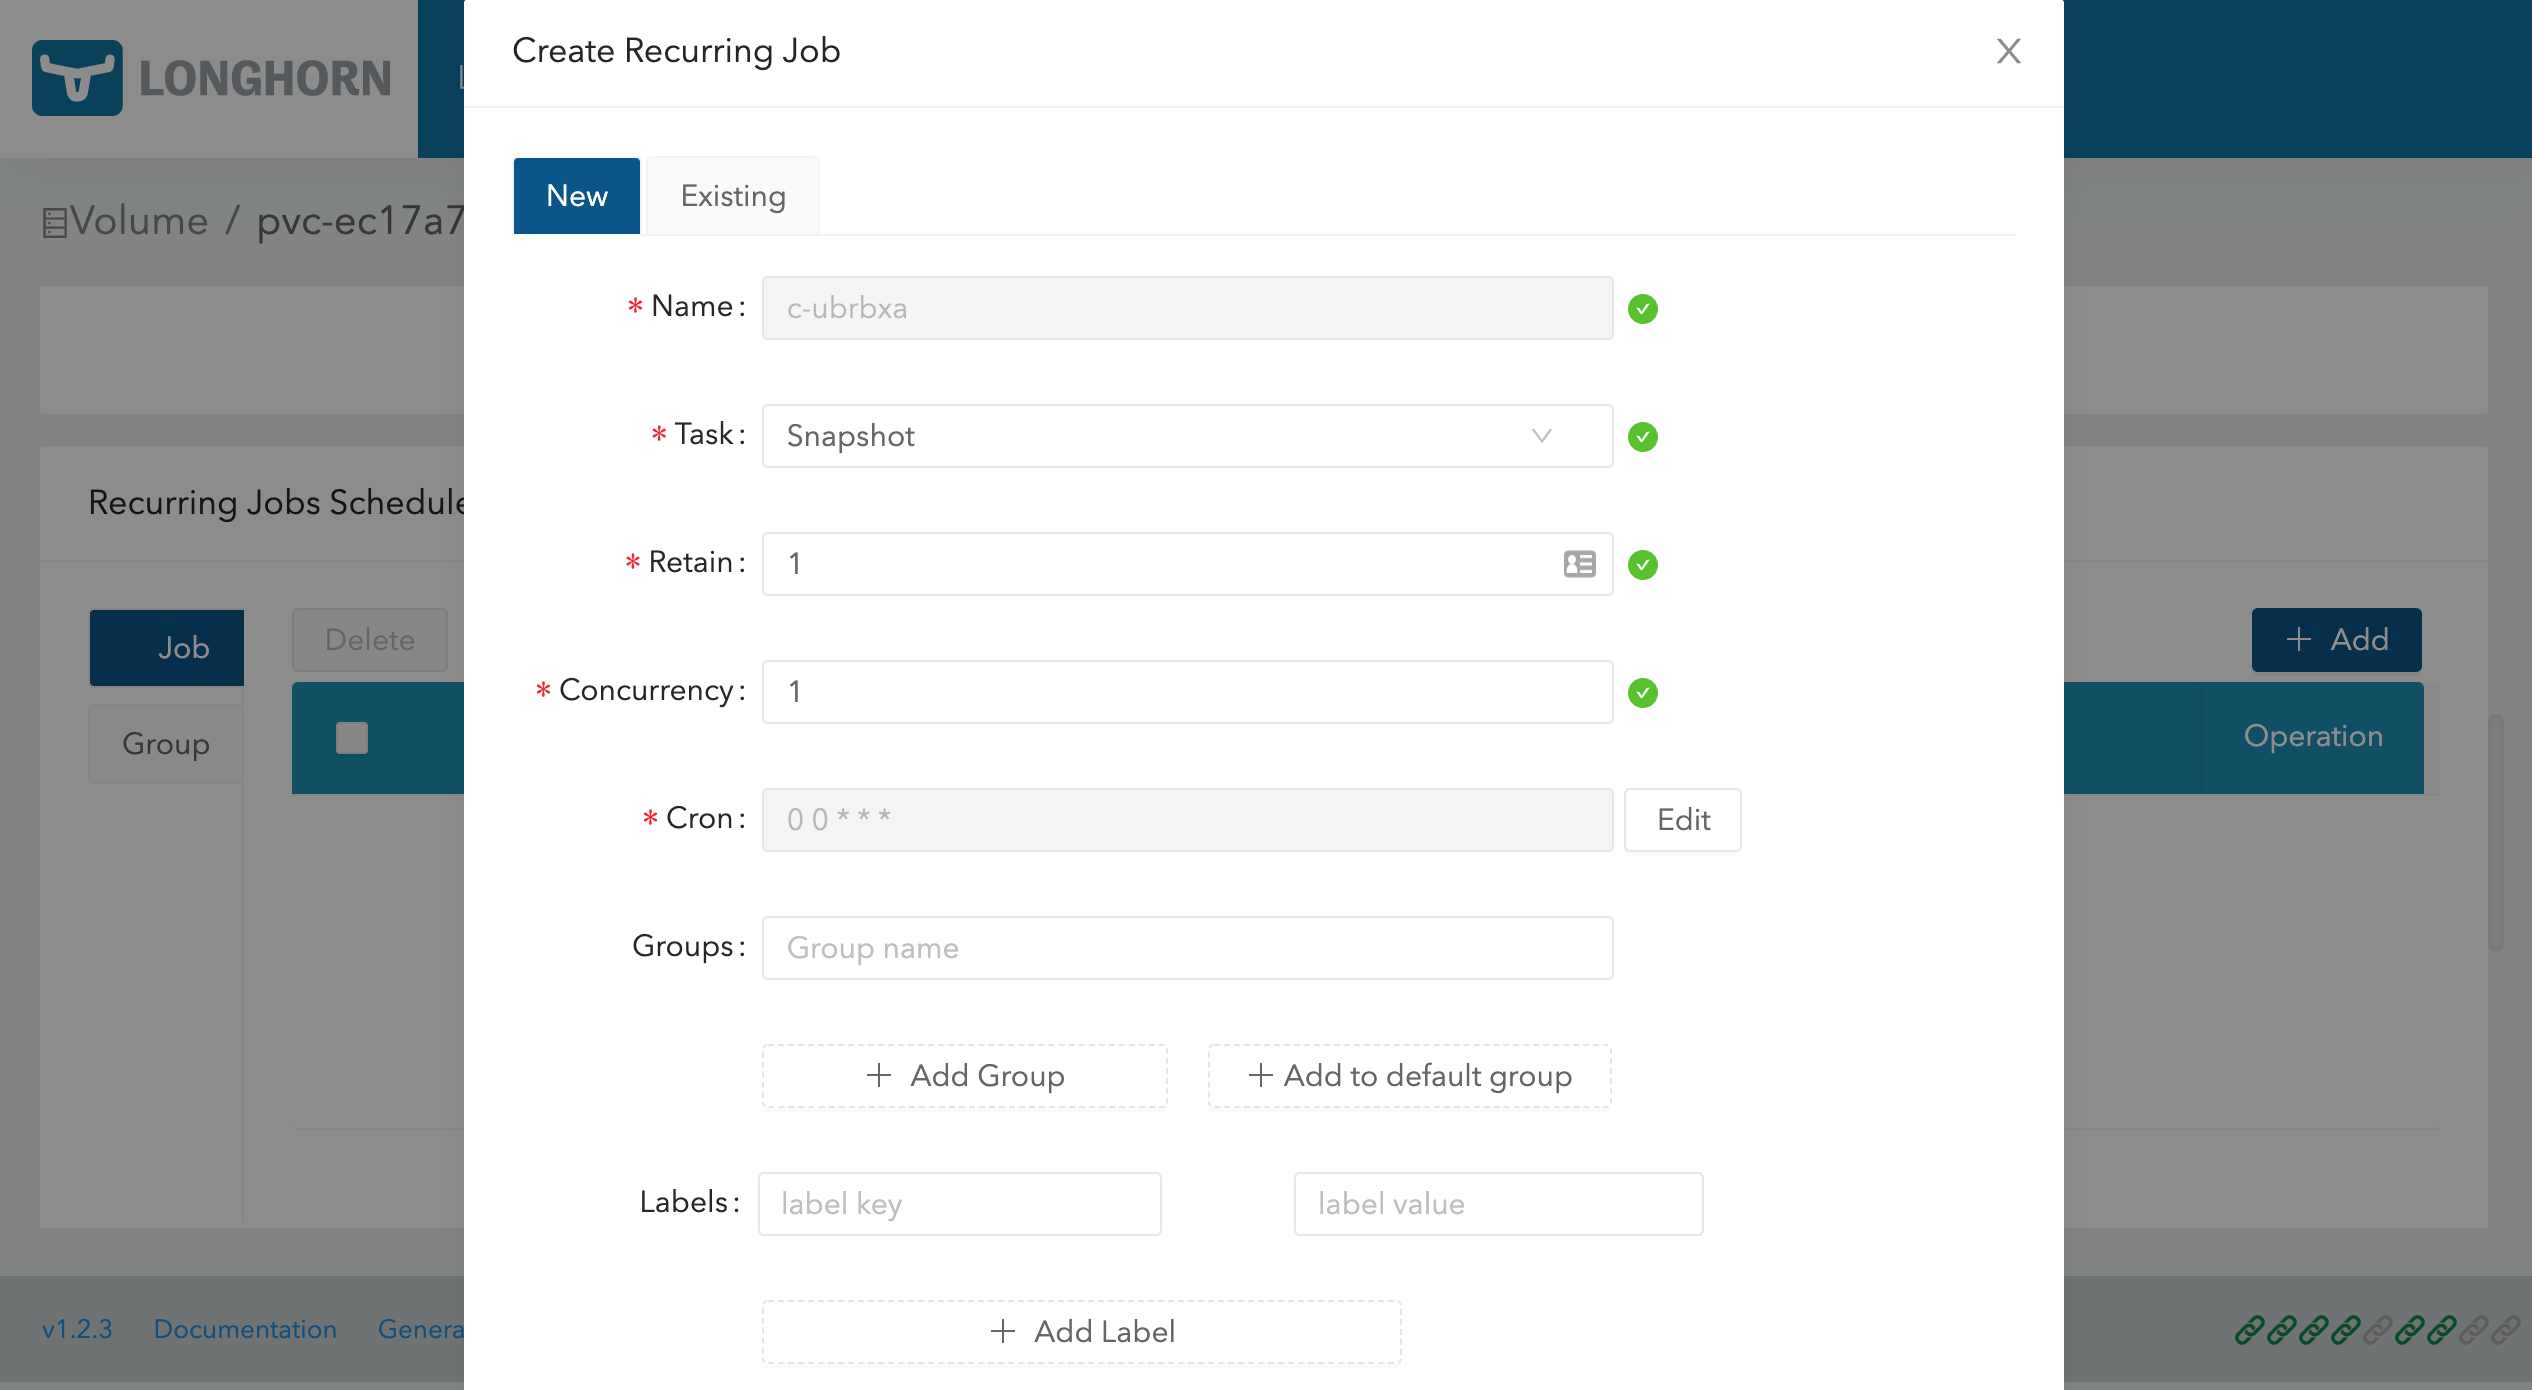
创建任务的时候可以选择任务类型是备份(backup)或快照(snapshot),任务�的时间以 CRON 表达式的形式进行配置,还可以配置要保留的备份或快照数量以及标签。
为了避免当卷长时间没有新数据时,recurring jobs 可能会用相同的备份和空快照覆盖旧的备份/快照的问题,Longhorn 执行以下操作:
Recurring backup job仅在自上次备份以来卷有新数据时才进行新备份Recurring snapshot job仅在卷头(volume head)中有新数据时才拍摄新快照
3️⃣ 使用 Kubernetes 的 StorageClass 来配置定时快照
此外我们还可以通过使用 Kubernetes 的 StorageClass 来配置定时快照,可以通过 StorageClass 的 recurringJobs 参数配置定时备份和快照,recurringJobs 字段应遵循以下 JSON 格式:
apiVersion: storage.k8s.io/v1
kind: StorageClass
metadata:
  name: longhorn
provisioner: driver.longhorn.io
parameters:
  numberOfReplicas: "3"
  staleReplicaTimeout: "30"
  fromBackup: ""
  recurringJobs: '[
    {
      "name":"snap",
      "task":"snapshot",
      "cron":"*/1 * * * *",
      "retain":1
    },
    {
      "name":"backup",
      "task":"backup",
      "cron":"*/2 * * * *",
      "retain":1
    }
  ]'
应为每个 recurring job 指定以下参数:
- name:认为的名称,不要在一个
recurringJobs中使用重复的名称,并且 name 的长度不能超过 8 个字符 - task:任务的类型,它仅支持 snapshot 或 backup
- cron:Cron 表达式,指定任务的执行时间
- retain:Longhorn 将为一项任务保留多少快照/备份,不少于 1
使用这个 StorageClass 创建的任何卷都将自动配置上这些 recurring jobs。
4️⃣ 使用备份卷
🍀 要备份卷就需要在 Longhorn 中配置一个备份目标,可以是一个 NFS 服务或者 S3 兼容的对象存储服务,用于存储 Longhorn 卷的备份数据,备份目标可以在 Settings/General/BackupTarget 中配置,我们这里使用 Helm Chart 安装的,最好的方式是去定制 values 文件中的 defaultSettings.backupTarget,当然也可以直接去通过 Longhorn UI 进行配置,比如这里我们先配置备份目标为 nfs 服务,Backup Target 值设置为 nfs://172.29.9.51:/var/lib/k8s/data(要确保目录存在),Backup Target Credential Secret 留空即可,然后拉到最下面点击 Save:
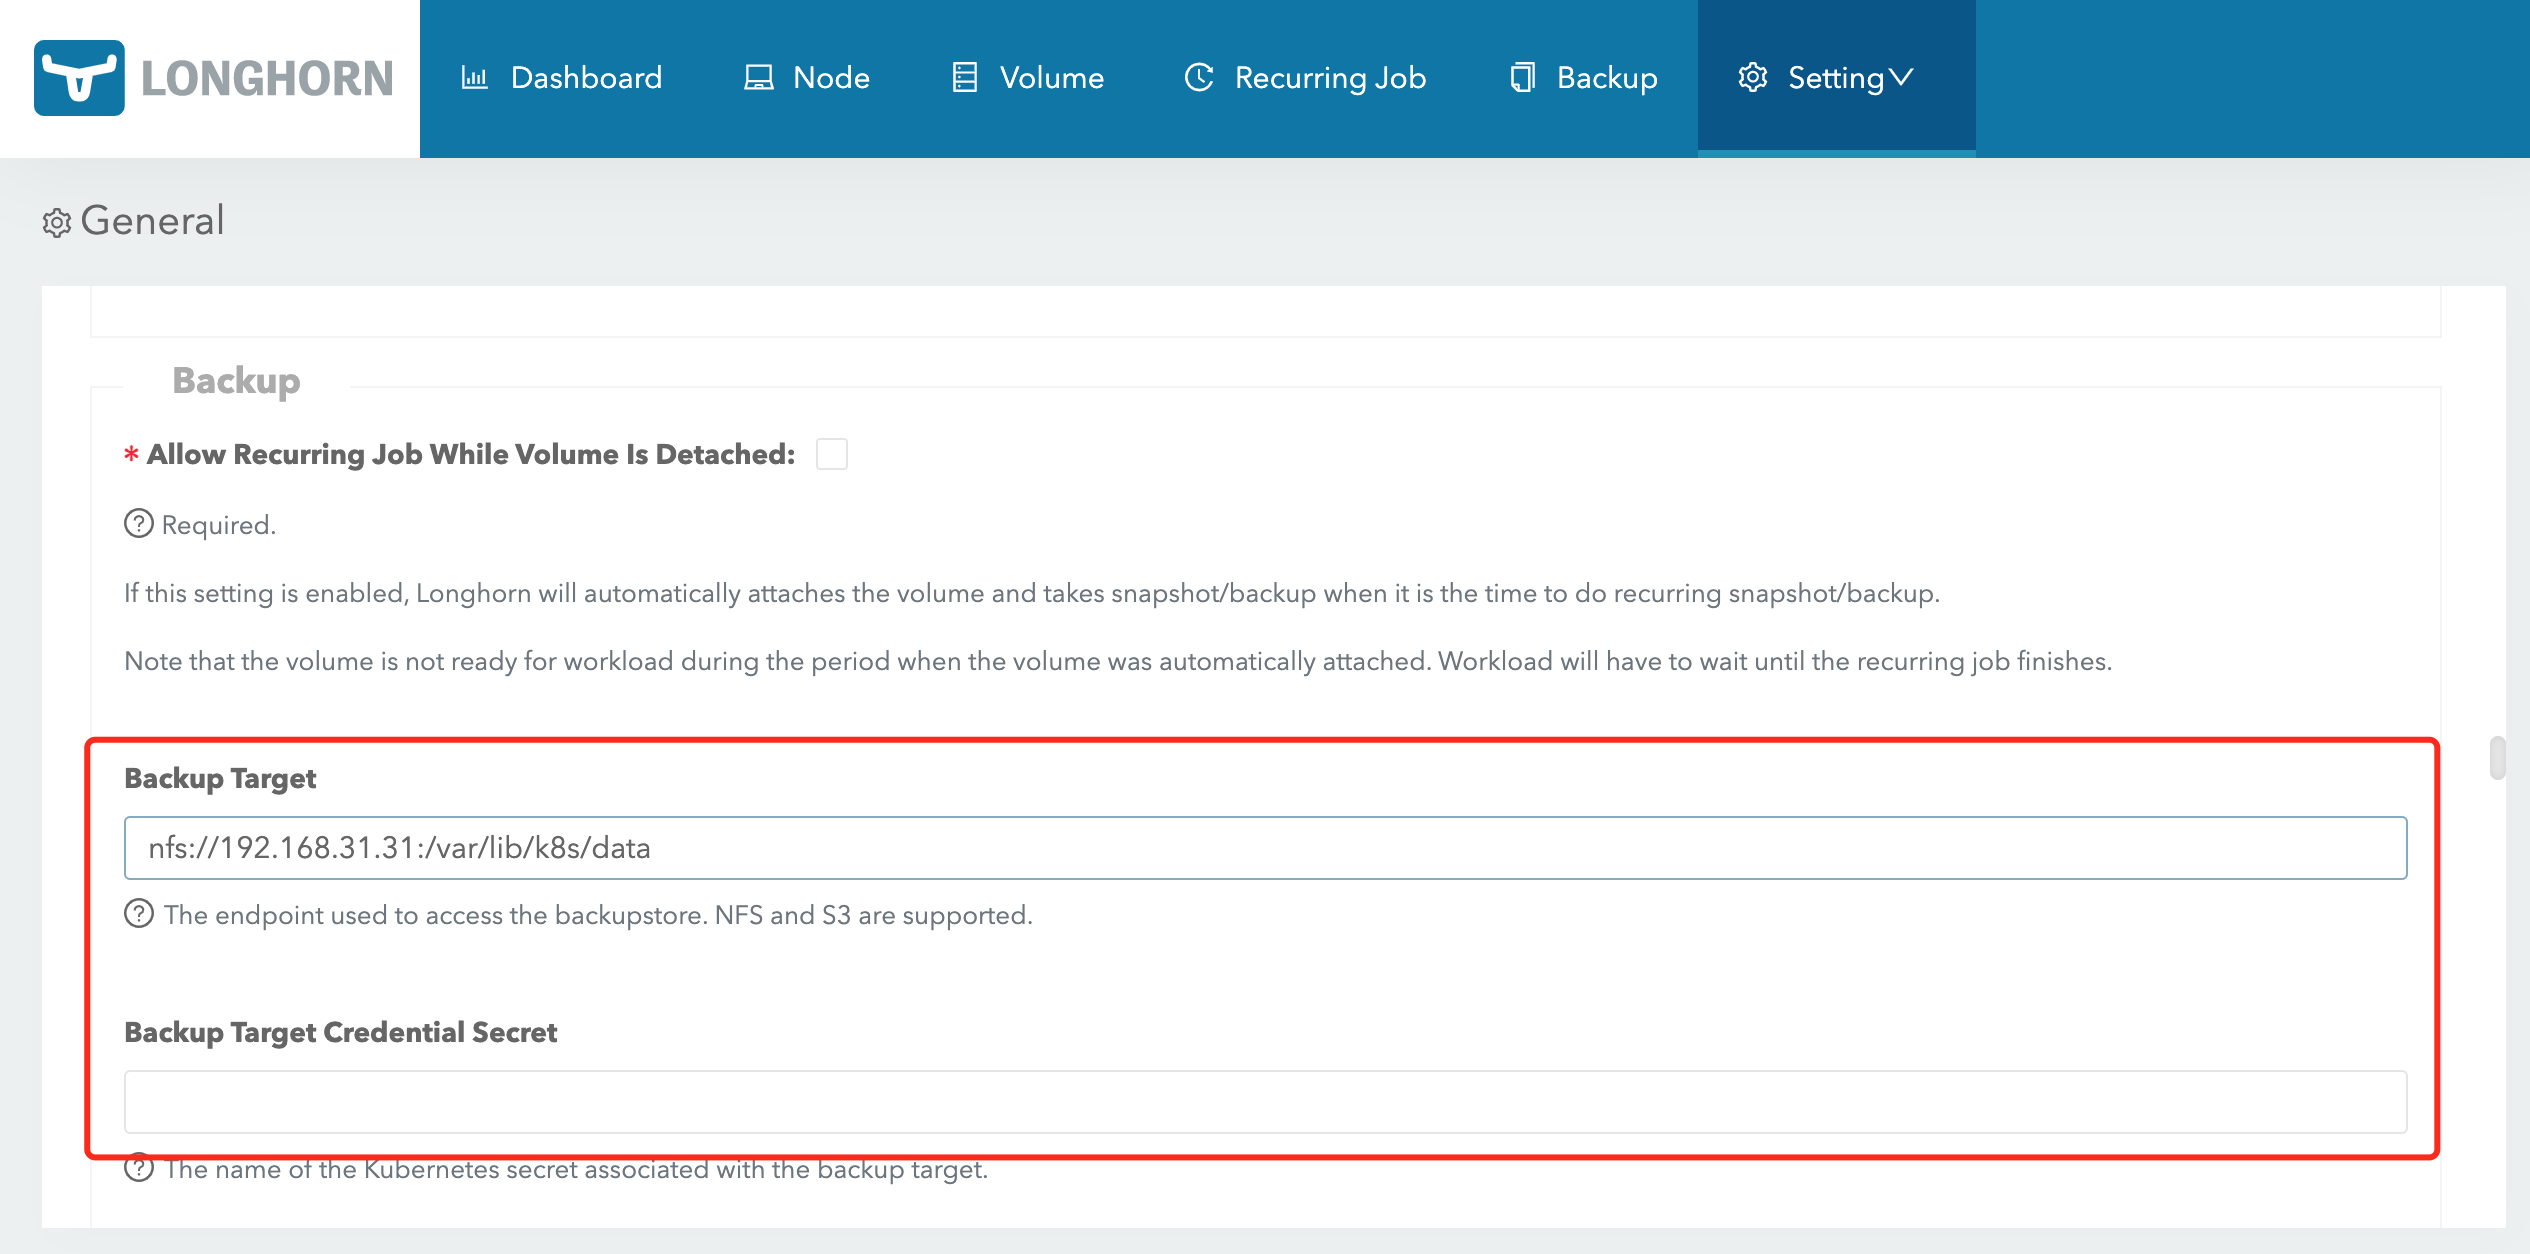
备份目标配置后,就可以开始备份了。
这里和修改下面是等价的:

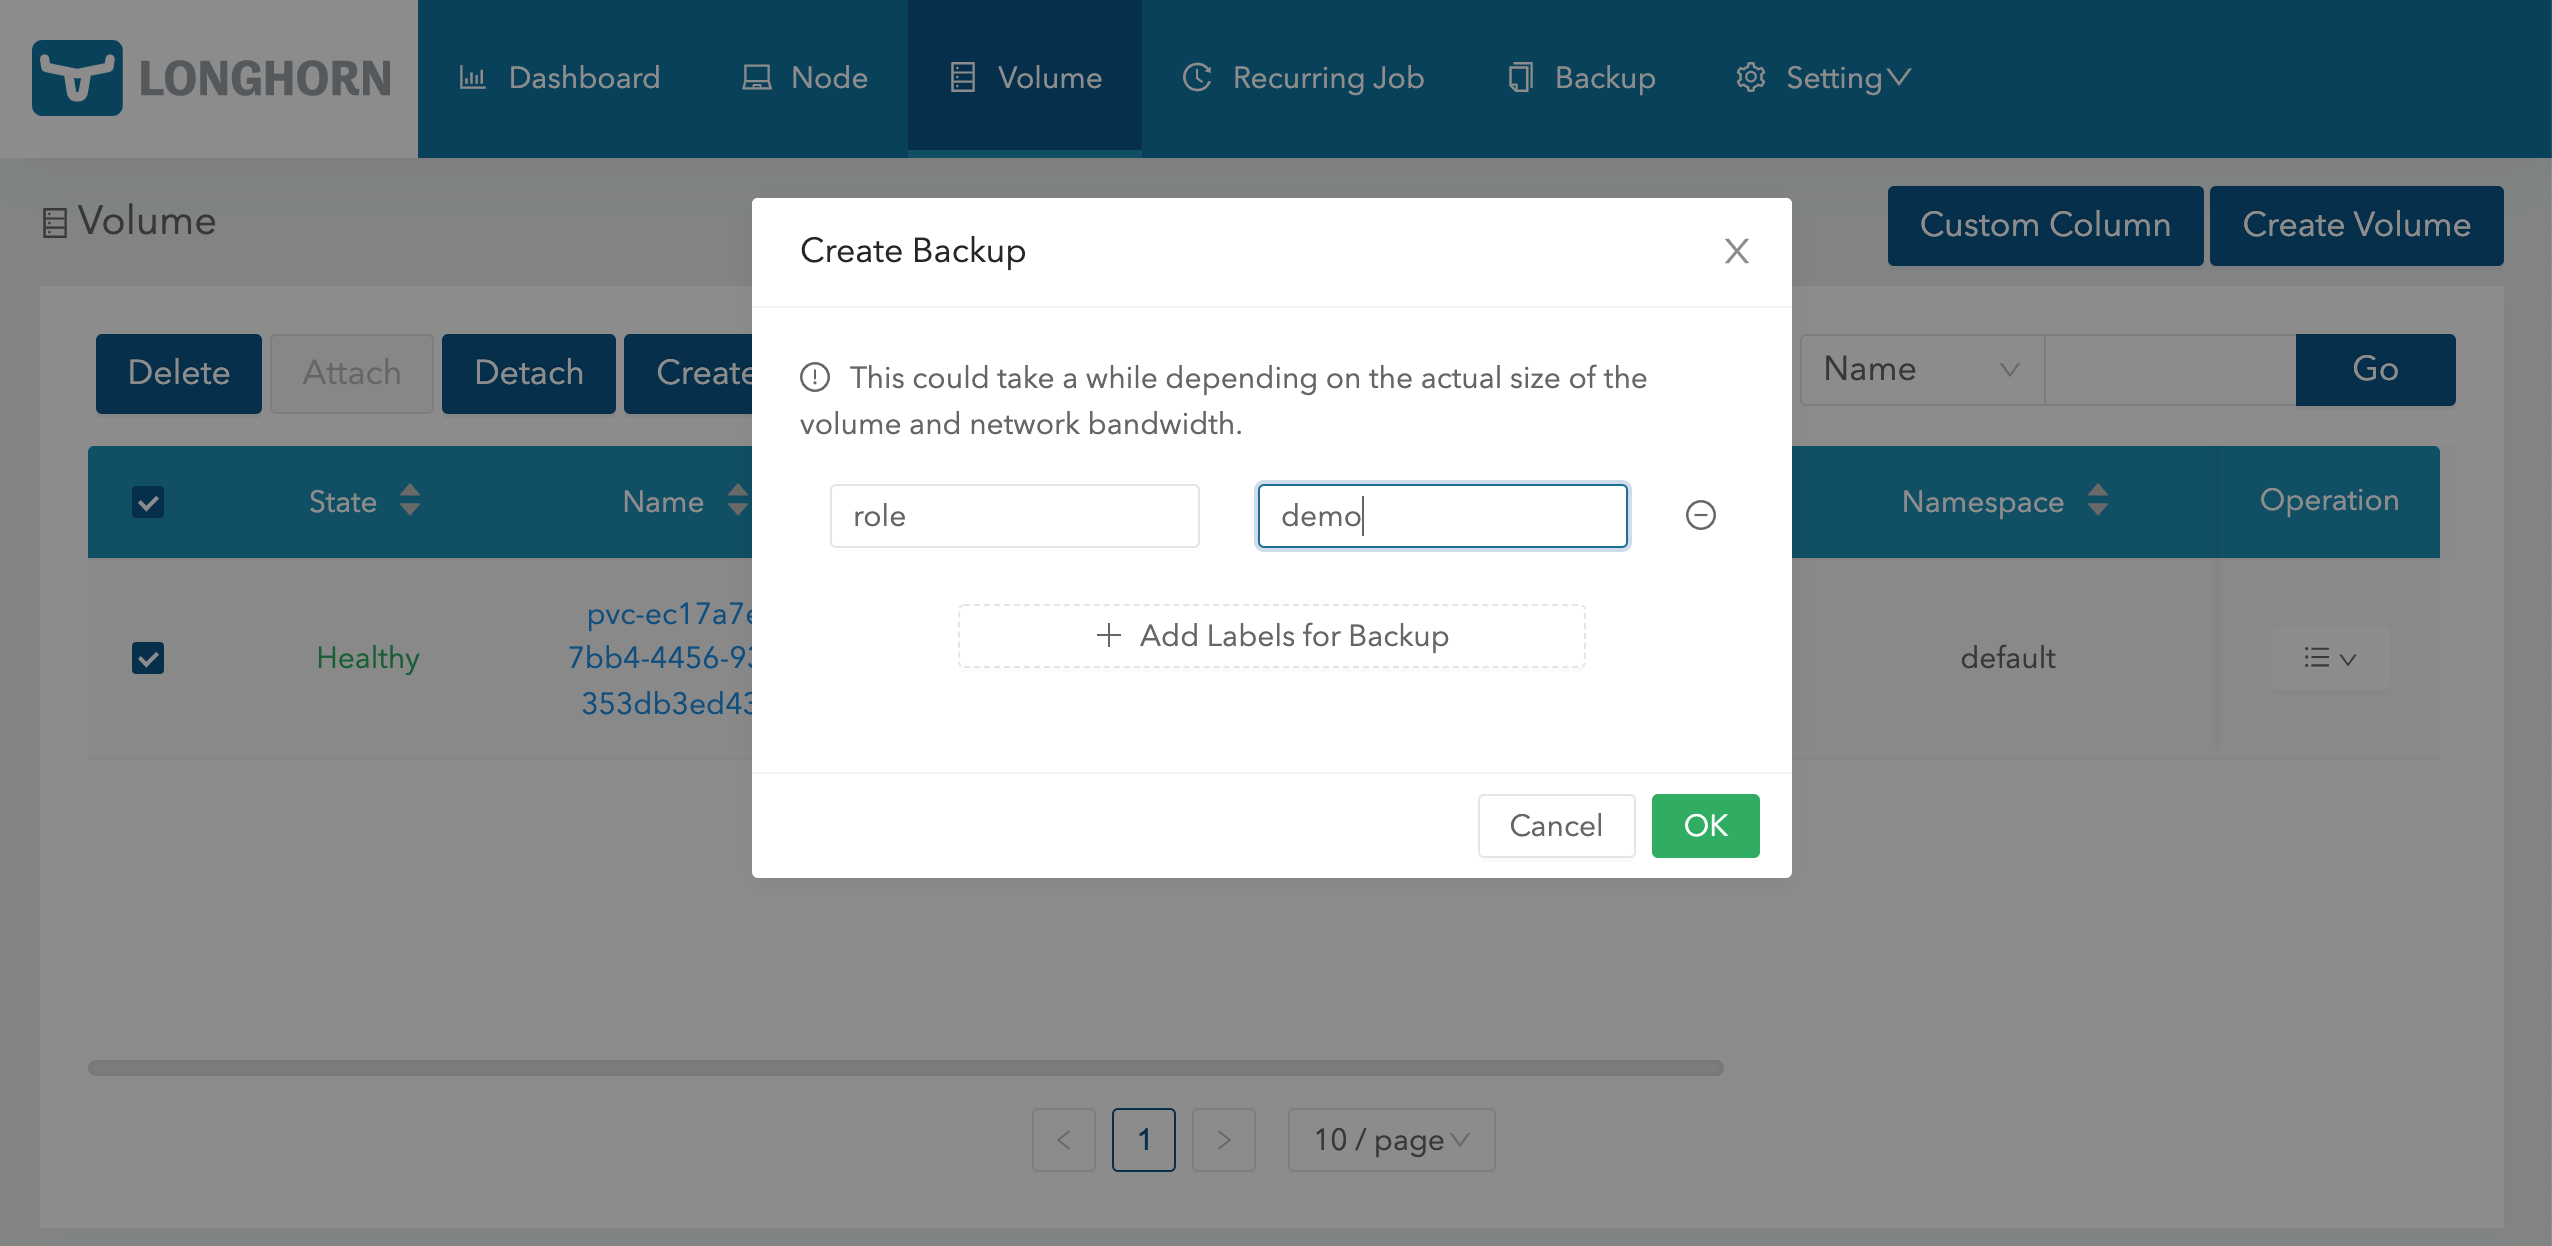
同样导航到 Longhorn UI 的 Volume 页面,选择要备份的卷,点击 Create Backup,然后添加合适的标签点击 OK 即可。
🍀 备份完成后导航到 Backup 页面就可以看到对应的备份数据了:

🍀 这些备份的数据也会对应一个 backupvolumes crd 对象:
➜ kubectl get backupvolumes -n longhorn-system
NAME                                       CREATEDAT              LASTBACKUPNAME            LASTBACKUPAT           LASTSYNCEDAT
pvc-ec17a7e4-7bb4-4456-9380-353db3ed4307   2022-02-22T09:23:24Z   backup-8ae4af9c49534859   2022-02-22T09:23:24Z   2022-02-22T09:41:09Z
然后我们去到 NFS 服务器上查看会在挂载目录下面创建一个 backupstore 目录,下面会保留我们备份的数据:
➜ tree /var/lib/k8s/data/backupstore
/var/lib/k8s/data/backupstore
└── volumes
    └── 5e
        └── b6
            └── pvc-ec17a7e4-7bb4-4456-9380-353db3ed4307
                ├── backups
                │   └── backup_backup-8ae4af9c49534859.cfg
                ├── blocks
                │   ├── 02
                │   │   └── 2e
                │   │       └── 022eefc6526cd3d8fc3a9f9a4ba253a910c61a1c430a807403f60a2f233fa210.blk
                ......
                │   └── f7
                │       └── e3
                │           └── f7e3ae1f83e10da4ece5142abac1fafc0d0917370f7418874c151a66a18bfa15.blk
                └── volume.cfg

51 directories, 25 files
🍀 同样这个时候我们也可以去快照列表选择要备份的快照:

🍀 有了备份数据后要想要恢复数据,只需要选择对应的备份数据,点击 Restore Latest Backup 恢复数据即可:

🍀 查看存在的crd
[root@master1 ~]#kubectl get crd |grep longhorn
backingimagedatasources.longhorn.io      2022-02-23T14:01:40Z
backingimagemanagers.longhorn.io         2022-02-23T14:01:40Z
backingimages.longhorn.io                2022-02-23T14:01:40Z
backups.longhorn.io                      2022-02-23T14:01:40Z
backuptargets.longhorn.io                2022-02-23T14:01:40Z
backupvolumes.longhorn.io                2022-02-23T14:01:40Z
engineimages.longhorn.io                 2022-02-23T14:01:40Z
engines.longhorn.io                      2022-02-23T14:01:40Z
instancemanagers.longhorn.io             2022-02-23T14:01:40Z
nodes.longhorn.io                        2022-02-23T14:01:40Z
recurringjobs.longhorn.io                2022-02-23T14:01:40Z
replicas.longhorn.io                     2022-02-23T14:01:40Z
settings.longhorn.io                     2022-02-23T14:01:40Z
sharemanagers.longhorn.io                2022-02-23T14:01:40Z
volumes.longhorn.io                      2022-02-23T14:01:40Z
[root@master1 ~]#kubectl get backuptargets -nlonghorn-system
NAME      URL                                   CREDENTIAL   INTERVAL   AVAILABLE   LASTSYNCEDAT
default   nfs://172.29.9.51:/var/lib/k8s/data                5m0s       true        2022-02-24T14:16:09Z
5、ReadWriteMany
Longhorn 可以通过 NFSv4 服务器暴露 Longhorn 卷,原生支持 RWX 工作负载,使用的 RWX 卷 会在 longhorn-system 命名空间下面创建一个 share-manager-<volume-name> 的 Pod,该 Pod 负责通过在 Pod 内运行的 NFSv4 服务器暴露 Longhorn 卷。
当然一般块存储是不支持rwx的,但文件系统例如nfs是支持的;

📍 案例演示:LongHorn的RWX功能测试(测试成功)
🍀 要能够使用 RWX 卷,每个客户端节点都需要安装 NFSv4 客户端,对于 Ubuntu,可以通过以下方式安装 NFSv4 客户端:
➜ apt install nfs-common
对于基于 RPM 的发行版,可以通过以下方式安装 NFSv4 客户端:
➜ yum install nfs-utils
这个软包我们前面已经安装过了。
🍀 现在我们来创建一个如下所示的 PVC 对象,访问模式配置为 ReadWriteMany:
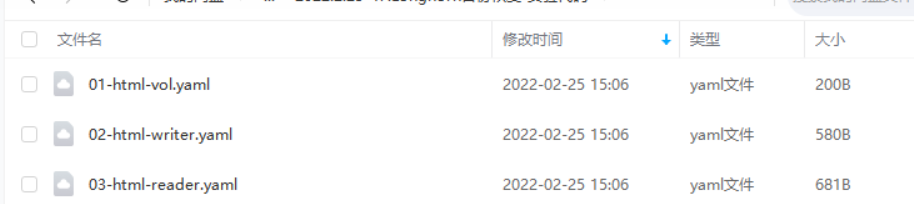
# 01-html-vol.yaml
kind: PersistentVolumeClaim
apiVersion: v1
metadata:
  name: html
spec:
  accessModes:
    - ReadWriteMany
  storageClassName: longhorn
  resources:
    requests:
      storage: 1Gi
直接创建上面的资源对象就会动态创建一个 PV 与之绑定:
$ kubectl apply -f 01-html-vol.yaml
persistentvolumeclaim/html created


[root@master1 ~]#kubectl get pvc html
NAME   STATUS   VOLUME                                     CAPACITY   ACCESS MODES   STORAGECLASS   AGE
html   Bound    pvc-6d15f7e3-8d2f-471d-b1b4-4bc045e84d7f   1Gi        RWX            longhorn       38s
[root@master1 ~]#kubectl get pv pvc-6d15f7e3-8d2f-471d-b1b4-4bc045e84d7f
NAME                                       CAPACITY   ACCESS MODES   RECLAIM POLICY   STATUS   CLAIM          STORAGECLASS   REASON   AGE
pvc-6d15f7e3-8d2f-471d-b1b4-4bc045e84d7f   1Gi        RWX            Delete           Bound    default/html   longhorn                61s
🍀 然后创建一个如下所示的名为 writer 的 Deployment 资源对象,使用上面创建的 PVC 来持久化数据:
# 02-html-writer.yaml
apiVersion: apps/v1
kind: Deployment
metadata:
  name: writer
spec:
  selector:
    matchLabels:
      app: writer
  template:
    metadata:
      labels:
        app: writer
    spec:
      containers:
      - name: content
        image: alpine:latest
        volumeMounts:
        - name: html
          mountPath: /html
        command: ["/bin/sh", "-c"]
        args:
        - while true; do
          date >> /html/index.html;
          sleep 5;
          done
      volumes:
      - name: html
        persistentVolumeClaim:
          claimName: html
🍀 部署后上面创建的 Longhorn 的卷就变成 Attached 状态了:
$ kubectl apply -f 02-html-writer.yaml
deployment.apps/writer created

并且这个时候会自动启动一个 share-manager 的 Pod,通过该 Pod 内运行的 NFSv4 服务器来暴露 Longhorn 卷:
[root@master1 ~]#kubectl get pods -n longhorn-system -l longhorn.io/component=share-manager
NAME                                                     READY   STATUS    RESTARTS   AGE
share-manager-pvc-6d15f7e3-8d2f-471d-b1b4-4bc045e84d7f   1/1     Running   0          6m1s

[root@master1 ~]#kubectl logs -f share-manager-pvc-6d15f7e3-8d2f-471d-b1b4-4bc045e84d7f -nlonghorn-system
time="2022-02-25T06:07:26Z" level=info msg="starting RLIMIT_NOFILE rlimit.Cur 65536, rlimit.Max 65536"
time="2022-02-25T06:07:26Z" level=info msg="ending RLIMIT_NOFILE rlimit.Cur 1048576, rlimit.Max 1048576"
time="2022-02-25T06:07:28Z" level=debug msg="volume pvc-6d15f7e3-8d2f-471d-b1b4-4bc045e84d7f device /dev/longhorn/pvc-6d15f7e3-8d2f-471d-b1b4-4bc045e84d7f contains filesystem of format " encrypted=false volume=pvc-6d15f7e3-8d2f-471d-b1b4-4bc045e84d7f
I0225 06:07:34.943294       1 mount_linux.go:425] Disk "/dev/longhorn/pvc-6d15f7e3-8d2f-471d-b1b4-4bc045e84d7f" appears to be unformatted, attempting to format as type: "ext4" with options: [-F -m0 /dev/longhorn/pvc-6d15f7e3-8d2f-471d-b1b4-4bc045e84d7f]
I0225 06:08:01.740766       1 mount_linux.go:435] Disk successfully formatted (mkfs): ext4 - /dev/longhorn/pvc-6d15f7e3-8d2f-471d-b1b4-4bc045e84d7f /export/pvc-6d15f7e3-8d2f-471d-b1b4-4bc045e84d7f
time="2022-02-25T06:08:03Z" level=info msg="starting nfs server, volume is ready for export" encrypted=false volume=pvc-6d15f7e3-8d2f-471d-b1b4-4bc045e84d7f
time="2022-02-25T06:08:03Z" level=info msg="starting health check for volume" encrypted=false volume=pvc-6d15f7e3-8d2f-471d-b1b4-4bc045e84d7ftime="2022-02-25T06:08:03Z" level=info msg="Running NFS server!"
🍀 然后我们再创建一个如下所示的 Deployment:
# 03-html-reader.yaml
apiVersion: apps/v1
kind: Deployment
metadata:
  name: reader
spec:
  replicas: 3
  selector:
    matchLabels:
      app: reader
  template:
    metadata:
      labels:
        app: reader
    spec:
      containers:
      - name: nginx
        image: nginx:stable-alpine
        ports:
        - containerPort: 80
        volumeMounts:
        - name: html
          mountPath: /usr/share/nginx/html
      volumes:
      - name: html
        persistentVolumeClaim:
          claimName: html
---
apiVersion: v1
kind: Service
metadata:
  name: reader
spec:
  selector:
    app: reader
  type: NodePort
  ports:
  - protocol: TCP
    port: 80
    targetPort: 80
上面的 reader Pods 可以引用 writer Pod 相同的 PVC,是因为上面我们创建的 PV 和 PVC 是 ReadWriteMany 访问模式。
🍀 直接创建上面的资源对象,我们可以通过 NodePort 来访问应用:
$ kubectl apply -f 03-html-reader.yaml
deployment.apps/reader created
service/reader created

[root@master1 ~]#kubectl get pods -l app=reader
NAME                     READY   STATUS    RESTARTS   AGE
reader-7b44f6f6c-bkb4b   1/1     Running   0          71s
reader-7b44f6f6c-llrnq   1/1     Running   0          71s
reader-7b44f6f6c-sgnds   1/1     Running   0          71s
[root@master1 ~]#kubectl get svc reader
NAME     TYPE       CLUSTER-IP      EXTERNAL-IP   PORT(S)        AGE
reader   NodePort   10.100.245.39   <none>        80:30234/TCP   106s


[root@master1 ~]#curl 172.29.9.51:30234
......
Fri Feb 25 06:16:15 UTC 2022
Fri Feb 25 06:16:20 UTC 2022
Fri Feb 25 06:16:35 UTC 2022
Fri Feb 25 06:16:40 UTC 2022
Fri Feb 25 06:16:46 UTC 2022
......
🍀 现在我们尝试从一个 reader Pod 中去产生一些数据,然后再去访问应用验证数据是否正确:
[root@master1 ~]#kubectl exec reader-7b44f6f6c-sgnds  -- /bin/sh -c "echo longhorn rwx access mode >> /usr/share/nginx/html/index.html"

[root@master1 ~]#curl 172.29.9.51:30234
......
Fri Feb 25 06:18:56 UTC 2022
Fri Feb 25 06:19:04 UTC 2022
Fri Feb 25 06:19:24 UTC 2022
longhorn rwx access mode
Fri Feb 25 06:19:30 UTC 2022
Fri Feb 25 06:19:35 UTC 2022
......
这里我们就验证了在 Longhorn 中使用 ReadWriteMany 访问模式的 Volume 卷。
6、Longhorn排错
FAQ
总之这个longhorn整体使用起来比ceph要简单很多,ceph还是复杂很多的;
并且longhorn整体性能比我们之前说的nfs要高好几倍的,但是它的性能比我们直接使用本地磁盘还是要差一些的,这是必然的;
并且longhorn也是rancher开源的,所以这个ui界面和rancher也是比较类似的;
01 可以指定其中的一些节点作为存储使用:例如你总共有6个node节点,当然你是可以指定其中的4个节点来做存储使用的;
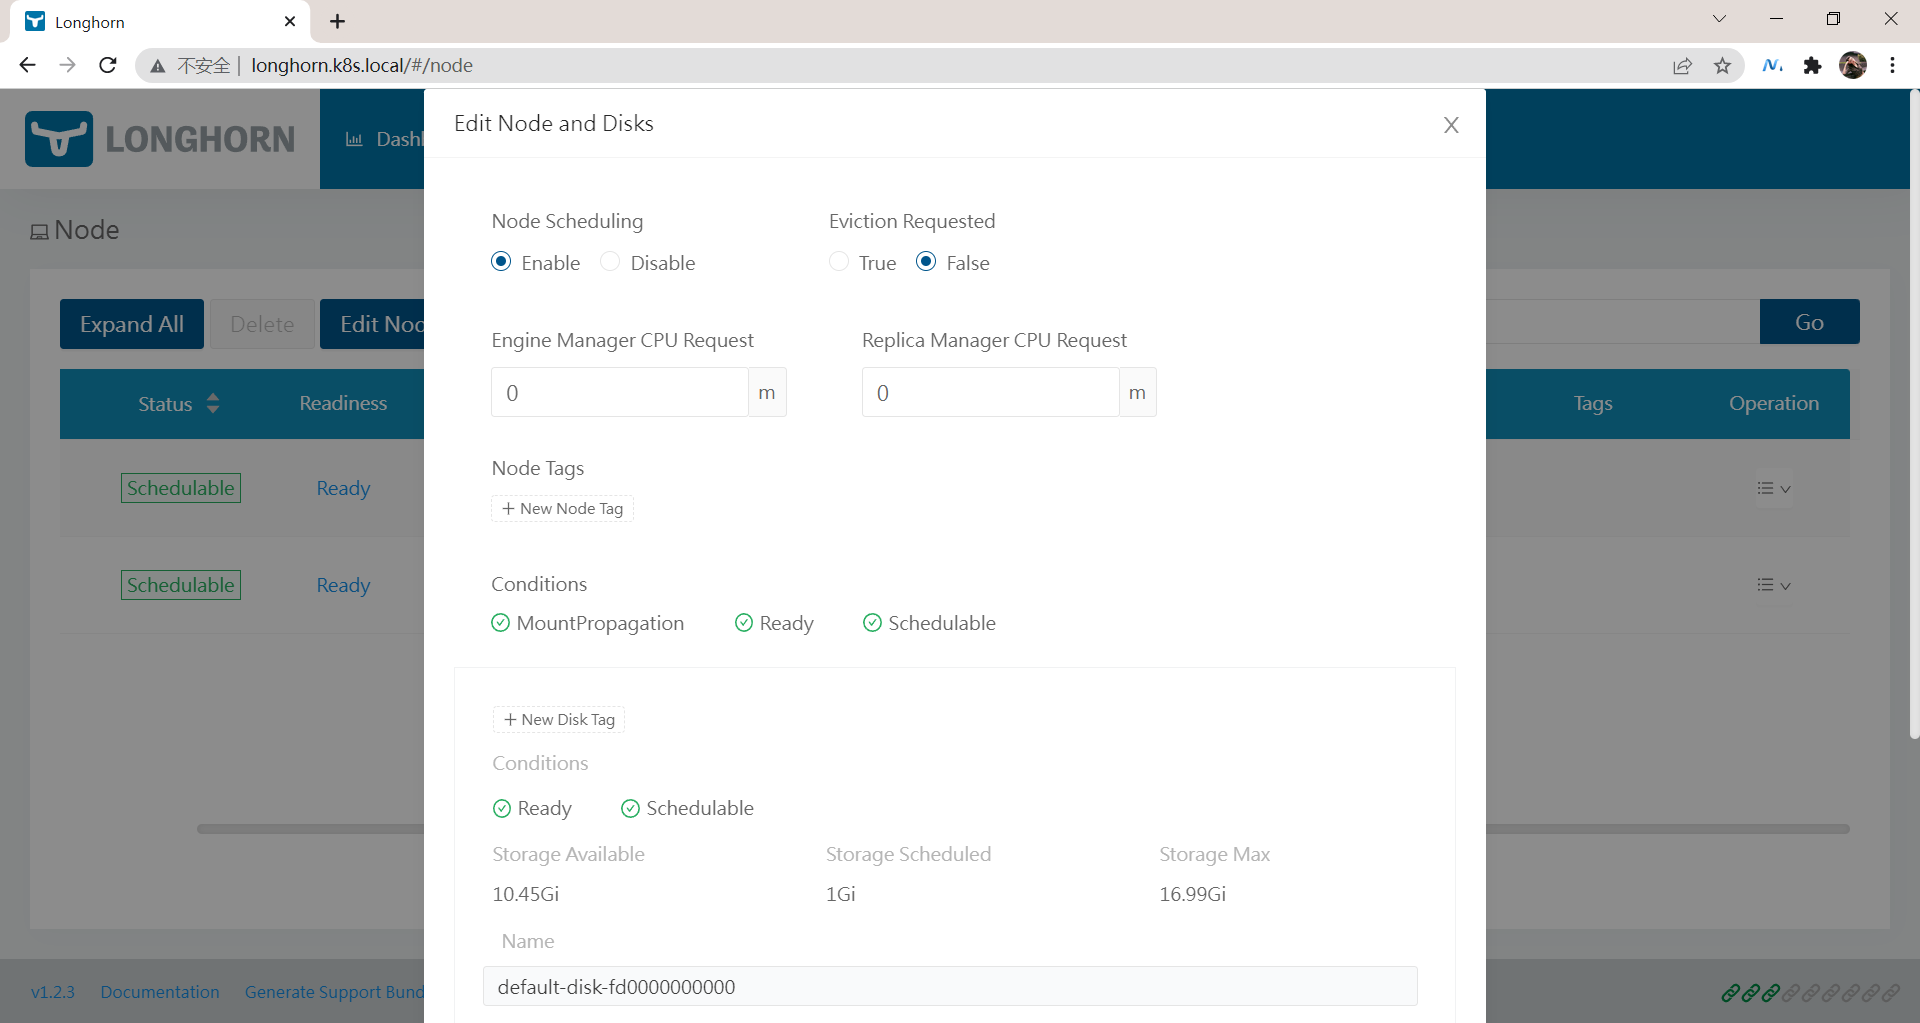
02 也可以扩容节点的存储:例如某个节点新添加了一块盘,那么你也是可以通过web界面将其添加进来的;(在node选项那里)
📍 注意:LongHorn Engine


这个volume engine不是单独作为一个pod运行的,而是作为pod里的某一个进程存在的;
📍 LongHorn的RWX使用场景:wordpress

关于我
我的博客主旨:我希望每一个人拿着我的博客都可以做出实验现象,先把实验做出来,然后再结合理论知识更深层次去理解技术点,这样学习起来才有乐趣和动力。并且,我的博客内容步骤是很完整的,也分享源码和实验用到的软件,希望能和大家一起共同进步!
各位小伙伴在实际操作过程中如有什么疑问,可随时联系本人免费帮您解决问题:
- 个人微信二维码:x2675263825 (舍得), qq:2675263825。

- 个人博客地址:www.onlyonexl.cn

- 个人微信公众号:云原生架构师实战

- 个人csdn
https://blog.csdn.net/weixin_39246554?spm=1010.2135.3001.5421

- 个人已开源干货😘
| 名称 | 链接 |
|---|---|
| 01 实战:打造一款王者云笔记:typora+坚果云+阿里云oss | https://www.jianguoyun.com/p/DXS6qiIQvPWVCRiS0qoE |
| 02 实战:定制宇宙中最美的typora主题皮肤 | https://www.jianguoyun.com/p/DeUK9u0QvPWVCRib0qoE |
| 03 玩转vscode | https://www.jianguoyun.com/p/DZe8gmsQvPWVCRid0qoE |
| 04 陈果的幸福哲学课 | https://www.jianguoyun.com/p/Db0kM7gQvPWVCRj2q6YE |
最后
好了,关于longhorn存储实验就到这里了,感谢大家阅读,最后贴上我女神的photo,祝大家生活快乐,每天都过的有意义哦,我们下期见!

1